The Dragon is the second to last boss for The Island and the final boss before players reach the end-game dungeon. This spot is well-earned – survivors will need to push through four difficult dungeons to gain all artifacts necessary to summon the boss, and then the real battle begins.
Dungeon 1: The Caverns of Lost Hope – Artifact of the Cunning
- Location: (45.9, 88.9)
- Equipment: SCUBA suit, stimulants
- Tames: Basilosaurus
The Caverns of Lost Hope are as aptly named as its sister dungeon on the opposite side of the island, the Caverns of Lost Faith. In another underwater cavern, the temperature is freezing, and there is a hefty spawn of enemies that will bottleneck chokepoints and threaten death. Survivors are urged to slowly and carefully fight through the cavern, taking time to replenish health and armor as necessary.
If you have friends, make good use of them as we did in the Cavern of Lost Faith; on megalodons, allowing the basilosaurus to take point as the tank with megalodons moving up to deal raw damage as necessary.
Dungeon 2: Swamp Cave – Artifact of the Immune
- Location: (32.7, 37.3)
- Equipment: Gas masks, ghillie suit (minus head), pike, assault rifle, stimulants, flamethrower (optional)
- Tames: Megatherium
The swamp cave can become an infernal slog if not treated with patience. A litany of bugs can trap players in small passageways while enemies hit your gas mask until it breaks. Equip the gas mask once you load into the dungeon, before walking down the counter-clockwise ramp. Having a second (or third) gas mask may prove to save your life when deep into the Swamp Cave.
The insect spawns can be nearly insurmountable here, and death can make it very difficult to find your backpack among the litany of corpses. There will be times, specifically near the artifact, where you’ll need to progress without the megatherium. Having a flamethrower is an ideal companion at that point, as you can clear hordes of bugs otherwise difficult to hit.
Dungeon 3: North West Cave – Artifact of the Skylord
- Location: (19.3, 19)
- Equipment: grappling hooks (many), fur suit, pikes, antidotes, medical brew, metal pick
- Tames: None
On the best of days, the North West Cave is a death trap and can be intensely frustrating if survivors are moving too eagerly. Multiple pits are slightly hidden, bringing an instant death if anyone falls, meaning everything equipped is permanently lost.
Add to this claustrophobic dungeon a slew of onyc’s that bring Mega Rabies, and caution is once again the failsafe of players. Move slowly, look down often, and bring grappling hooks for any jump necessary. Don’t risk a jump, specifically after gathering the artifact: use the grapple, and ensure safety at every step.
Dungeon 4: Snow Cave – Artifact of the Strong
- Location: (29.4, 31.9)
- Equipment: Fur suit (or riot), pikes, fria curry (5), medical brew, grappling hooks, assault rifle, grenades, campfire, wood
- Tames: Direwolf (pack)
The Snow Cave has broken up entire tribes: it’s so cold that a standard engram-crafted fur suit isn’t enough to survive (you’ll need looted suits well-above default), and default spawns in the Snow Cave range from 120 to 340. Add on that the cave is massive, with multiple chokepoints that will force you onto the ground (players can’t grapple through the dungeon entirely), and it gets stressful.
A high-level direwolf pack with 100% imprint should allow cautious movement through the dungeon, and use the grenades to aggro purlovias that wait in ambush to dismount riders. If you have friends playing with you, this is the time to call upon them. If not, moving slowly and deliberately should be enough.
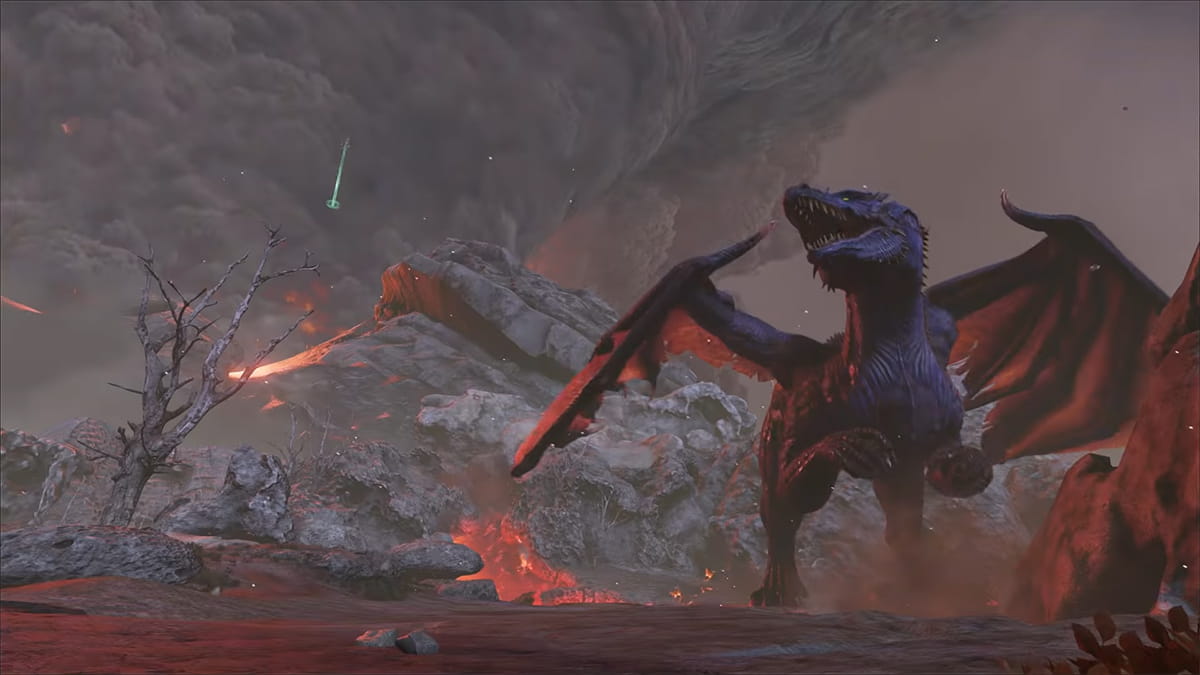
Boss: The Dragon
- Location: Any obelisk (red obelisk in single player)
- Equipment: The highest armor-level apparel and highest ranged weapons, multiple medical brews, calien soup
- Tames: Therizinosaurus (19), Yutyrannus (1)
Easily the hardest of the initial three bosses within The Island, the Dragon is an imposing enemy for even the best prepared. Every dinosaur brought with the players should be bred at the highest-level possible with a 100% imprint and best possible saddle. We’re relying on the Therizinosaurus due to its fireball resistance, but the Dragon is a formidable foe.
Whereas tame-packing the bosses worked for Lysrix and Megapithecus, the Dragon’s area-of-effect attack can level entire tribes in a few strikes. Ensure all tames have the best saddles possible, and skip the Daeodon for this fight: the healing isn’t fast enough to counter the Dragon’s damage. Players should ride the Yuty in the backline and keep the damage-buff up as high as possible.
Once the Dragon roars its last, grab that banner and give your surviving tames a nice pat on the back for managing to live through that mess.


Published: Dec 10, 2021 12:30 am