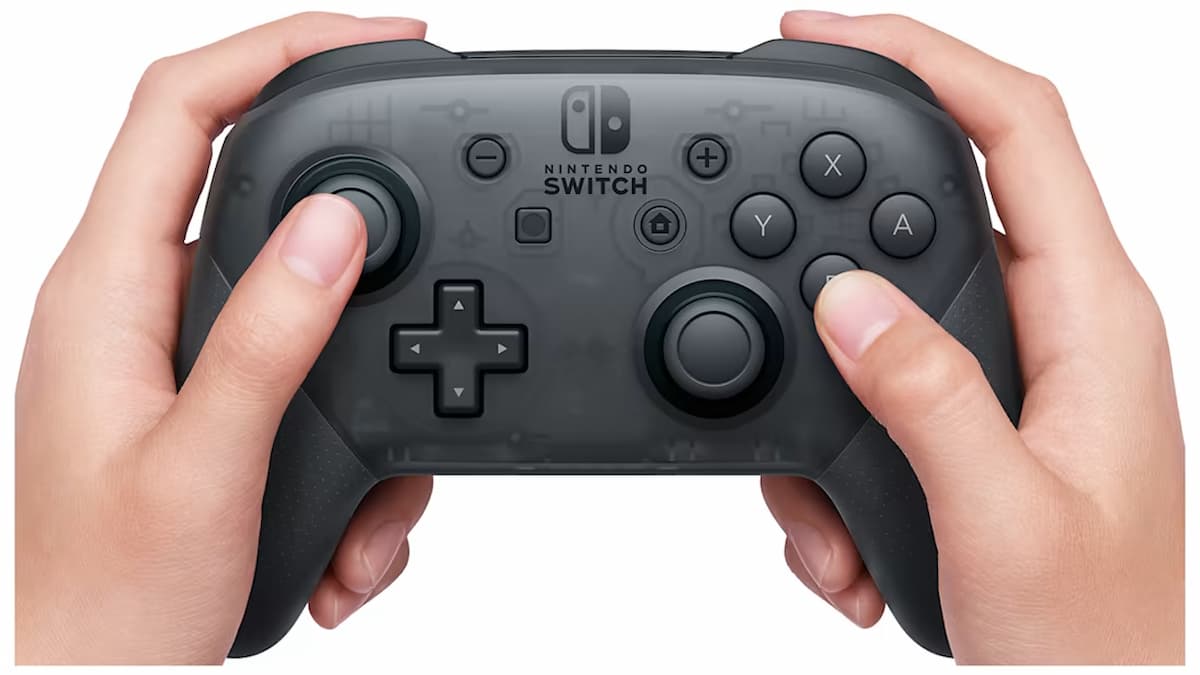
Drift is one of the worst problems to encounter with a controller, especially with a Nintendo Switch Pro controller. The gradual unassisted movement may not seem like much at first, but it can slowly derail gameplay with unnecessary movements. The problem can also get worse over time, with the drift gradually increasing in intensity to the point it can’t be ignored.
Trying to fix the joystick drift yourself sounds challenging, especially if you don’t know the first thing about controller repair. Fortunately, you’re not out of options when it comes to repairing your Pro controller. By working through your options, you can successfully fix your drift problem and have your joysticks working properly.
Nintendo Switch Pro controller drift issue — Fixes and Solutions
1) Calibrate your control sticks in the Settings menu
Before you think about taking apart your Pro controller, there may be a more straightforward option. Go to the Settings menu with your Switch and go down to the Controller and Sensors section. From there, go down the list of options until you find the Calibrate Control Sticks selection.
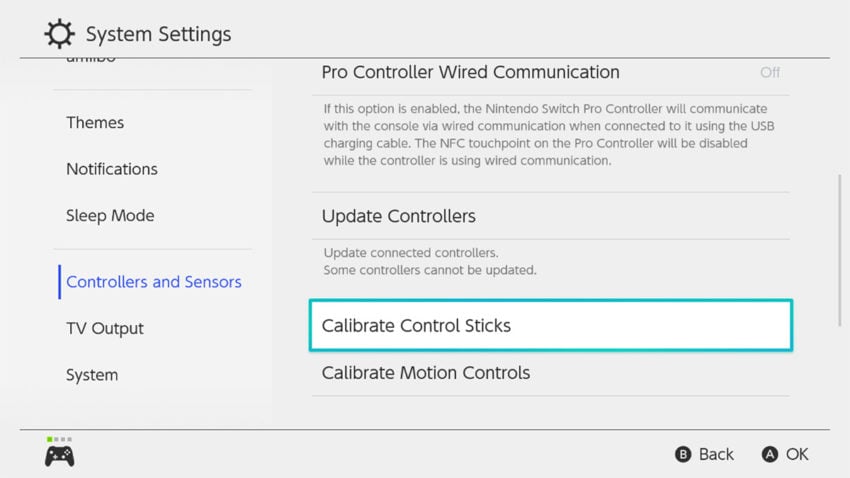
This will take you through the process of re-calibrating your control sticks and getting them back to your desired input sensitivity. After the calibration is complete, you can test your joysticks to see if drift continues to occur.
2) Update your controllers
Just above the Calibrate Control Sticks option, you can select Update Controllers. Some newer updates have addressed the drift issue and are able to resolve it. It might not seem like it works, especially if you believe the problem is hardware related, but it’s worth a try. If the updates and calibrations don’t fix the problem, you have to go for more drastic repair measures.
3) Take apart the controller and repair it yourself
If you have the tools and are confident with your repair skills, you can fix the Switch yourself. This will involve opening the Switch up and shouldn’t be done recklessly. To repair it yourself, you will need the following:
- A Phillips #0 Screwdriver
- Compressed air
- Contact cleaner (optional)
You may be able to get away by using another small head screwdriver, but you run the risk of stripping the screws. This can make future repairs harder.
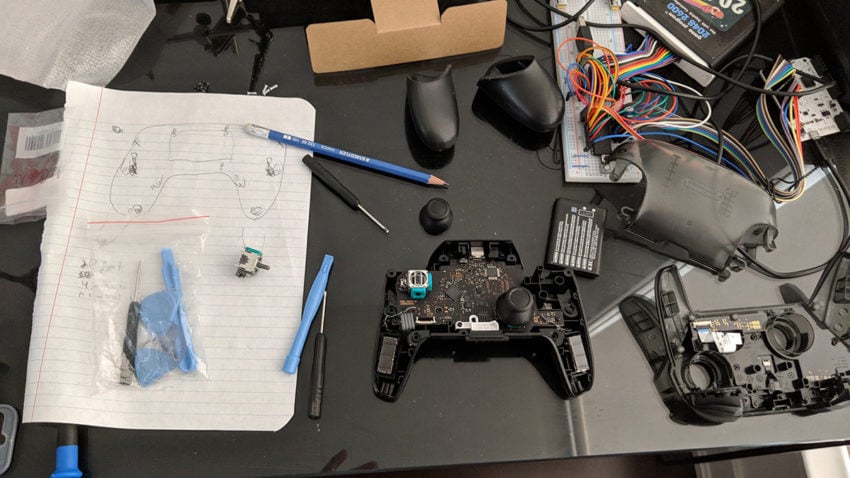
Here is the process in a step-by-step format. Before proceeding, make sure your controller isn’t active before working on it for safety reasons. Also, ensure that all the components are within reach for reassembly.
- Unscrew the two screws at the bottom of the controller. Pull the hand grips off.
- Turn the controller around and unscrew the four screws revealed after pulling off the hand grips. Remove the backplate from the controller. This may require some force, but this is normal.
- With the backplate gone, use your finger and place it on the gap to the left of the battery. Remove the battery from the controller. If you haven’t turned the power off for your controller, this is your last chance.
- Remove the five back screws behind the controller. There are two at the top, one on the left and right sides, and one at the bottom. This allows you to split the controller in half, but be careful during removal.
- Take the half with the joysticks, then remove the rubber cap from the joysticks.
- Use compressed air to blow away any debris that may be stuck within the joysticks themselves. If there is some debris that you can’t reach, use contact cleaner or alternatives like a cotton swab to remove them.
- When everything looks good, reassemble the Pro controller.
For veterans of DIY repair, this process isn’t difficult. It can be cheaper than hiring a professional to do it for you, and you already have some of these tools on hand. You may be able to borrow some items from friends if it has been a while.
4) Get an expert to repair it
There’s no shame in being afraid to repair a Pro controller yourself, especially if you don’t know what you’re doing. If your self-repair skills haven’t solved the issue, there may be something else that’s going wrong that you can’t diagnose.
You can always send your Pro controller back to your local/regional Nintendo supplier, who can do the repairs for you. It will cost money, but you can cut the costs down if you are still within warranty/still have the receipt. Alternatively, there are other repair facilities where you can take your Pro controller that can also do the repairs. They may void your warranty, but they can be cheaper.
Fixing your Pro Controller’s drift problem may seem complicated, but you are never out of options. Work your way down the list, and send your controller to the professionals if you can’t find any other solution. The experts will get it fixed, saving you time and effort.


Published: Nov 10, 2022 06:37 pm