The Greed Enumeration is the first Escalation in the Hitman 3: Seven Deadly Sins expansion. The Escalation is themed around Greed and kicks things off to start the Season of Greed in Hitman 3. In this guide, we’ll provide a route for you to follow to complete this Escalation with a rank of Silent Assassin. We’ll also show you how to pick up all 60 coins throughout the Escalation.
The greed mechanic
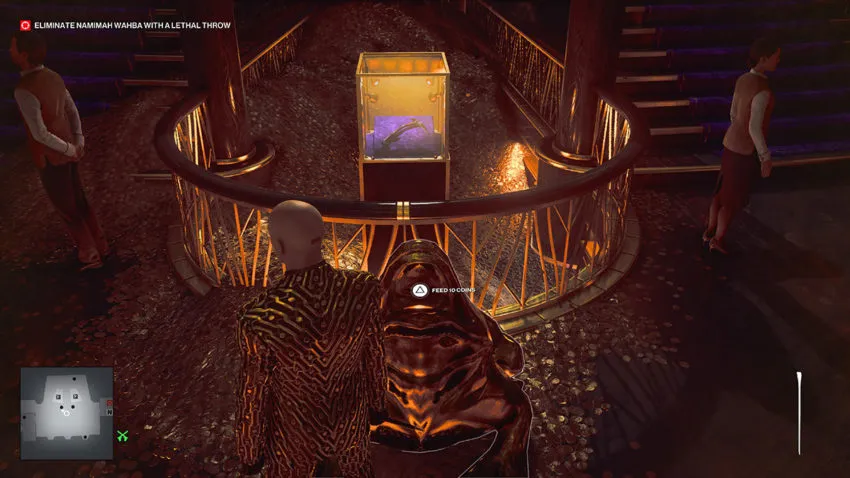
In this Escalation, you can’t choose your starting position or loadout. The only thing you’re told is that you get to keep the greed coins you collect from one level when you complete it and move to the next one. You gain these coins by killing targets. Each one awards slightly more than the last. You can then spend these coins at the Frog in exchange for weapons. These weapons will help you with your next target.
Level 1
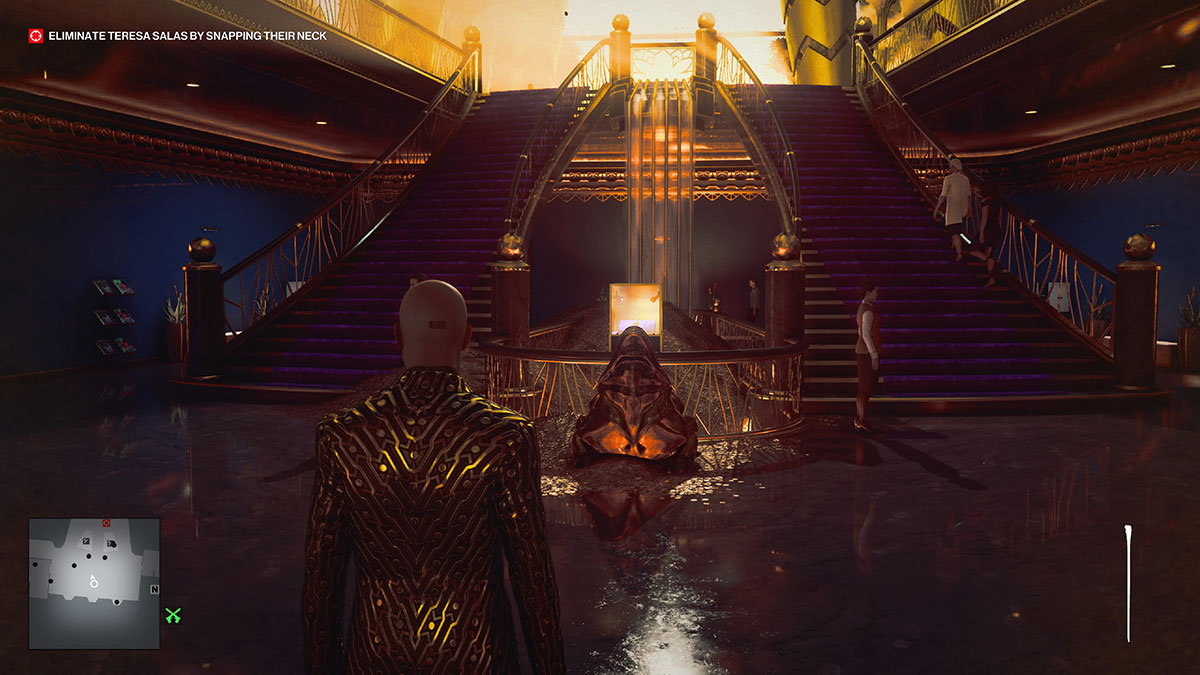
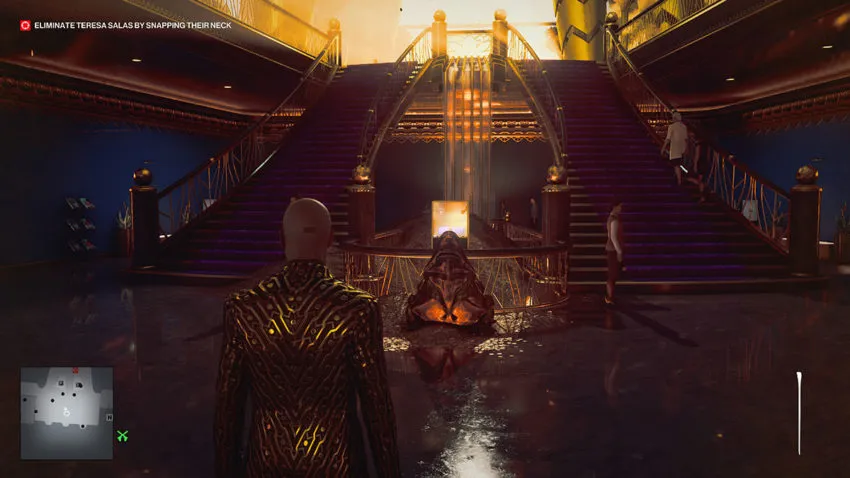
The first level of this Escalation drops you in the atrium starting area of Dubai. There’s a golden hue over the entire area, and everyone’s voices sound distorted. Your first target is behind the stairs you’ll be facing. She’s admiring the artwork there.

Don’t take the target out too quickly. Wait for the NPCs in the atrium to head upstairs. One will hang around outside an elevator, but she’s no threat, and the two staff on the stairs will also remain. Once the rest of the NPCs have departed, snap your target’s neck. You can leave her body hidden by the pile of gold back here.
Pick up the two Greedy Little Coins that this target has dropped. You’ll now have the option to finish the level or continue with it and kill a second target. The more coins you have in the next level, the easier it will be, but there’s no pressure to keep on killing if you’re happy to finish with a rank of Silent Assassin now.
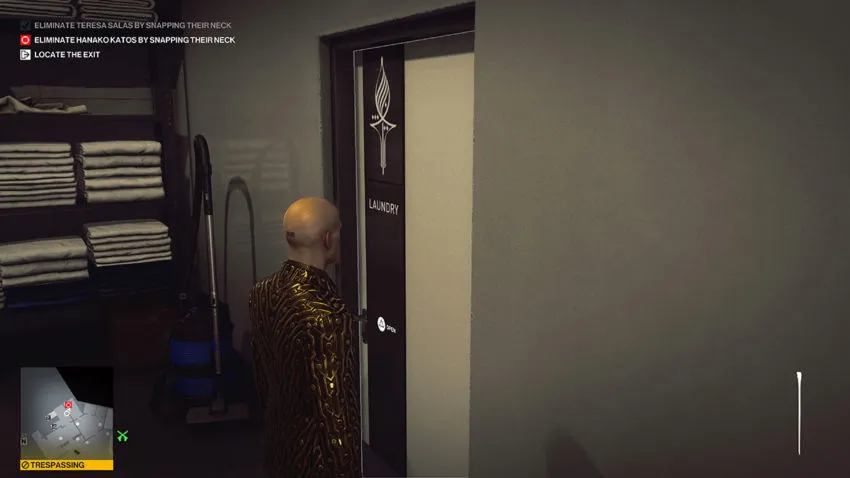
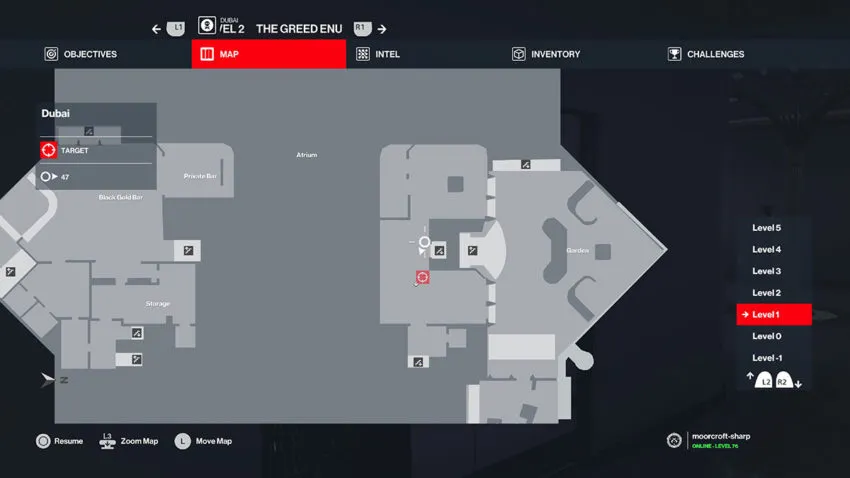
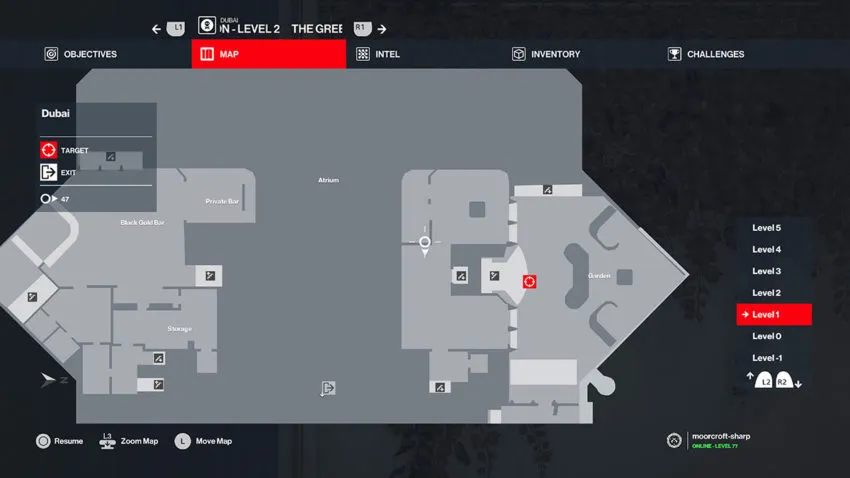
The second target is located in the laundry room. To get there, you need to head to the Black Gold Bar. Once there, head up the stairs to the bar’s left.
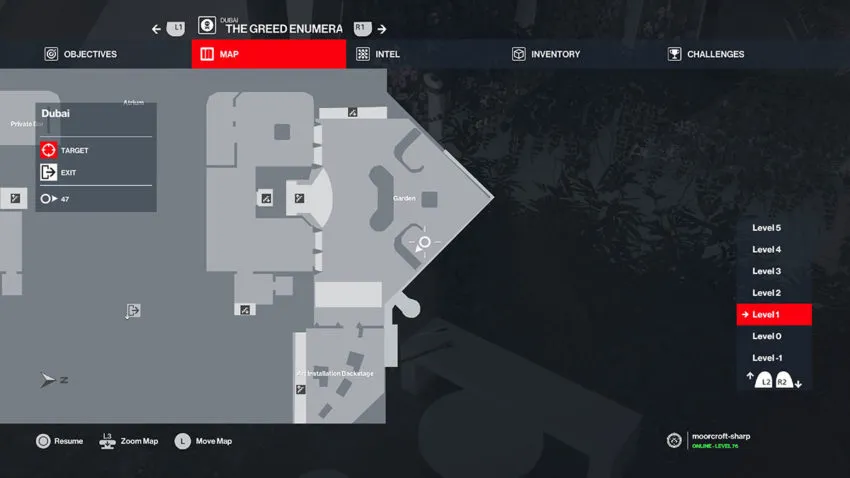
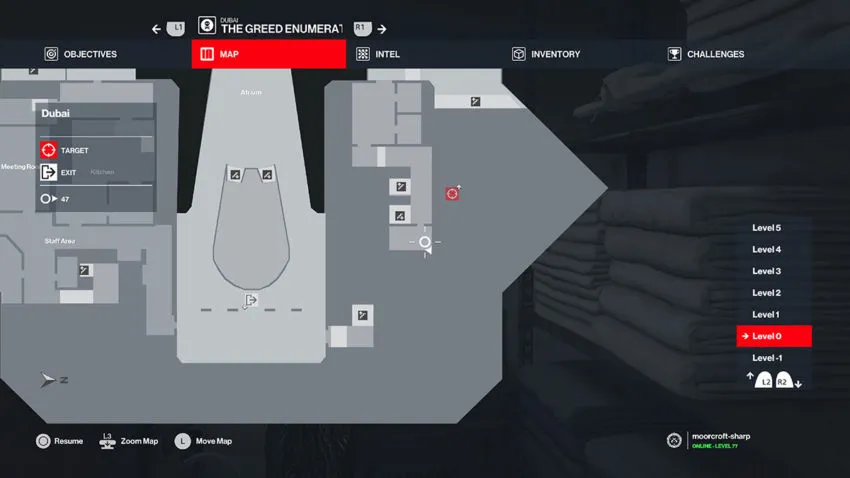
Below is a map reference for these stairs.
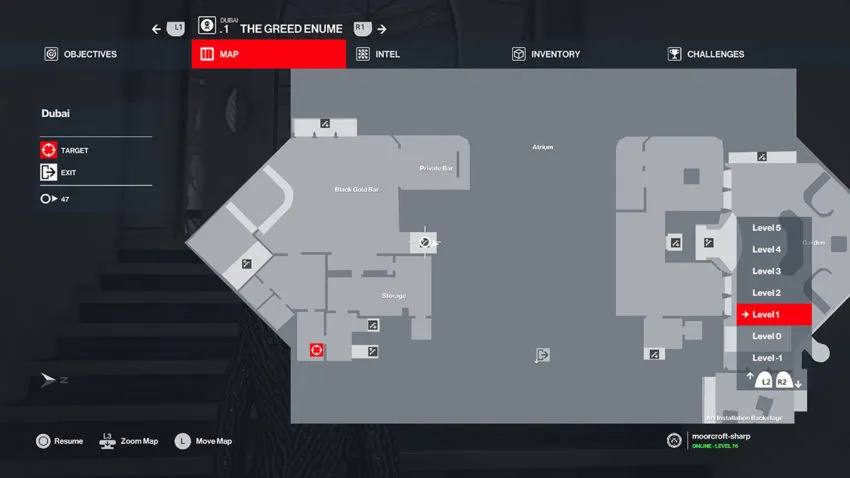
Blue curtains shroud them. At the top of these stairs, turn right and open the door at the end, but don’t go through just yet.
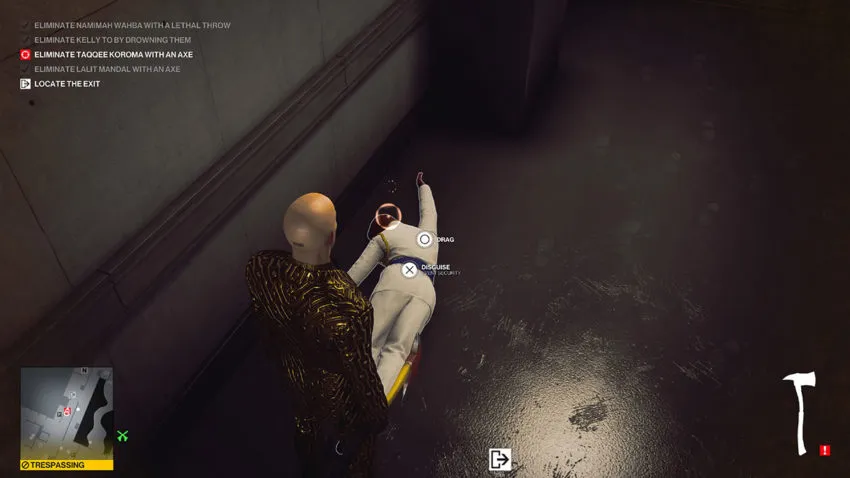
There’s a guard who will patrol this area. Wait until he leans against the wall to the left of your view. As he begins to walk away, rush in, close the door, and take him out. You can hide his body in a locker further down the hall to the left.
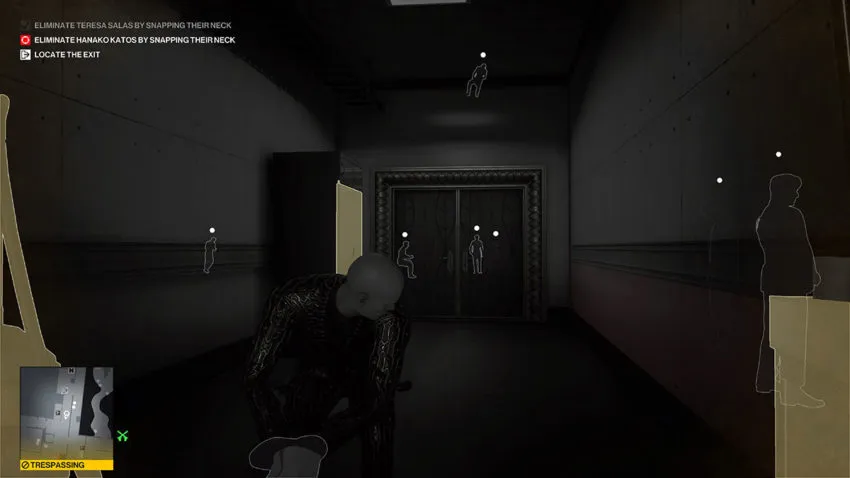
Now you need to go down the stairs to the right of the doors you used to enter this area. A technician is working on a vending machine around the corner. Crouch and run to get down those stairs. The technician will notice you, but not enough to blow your rank.
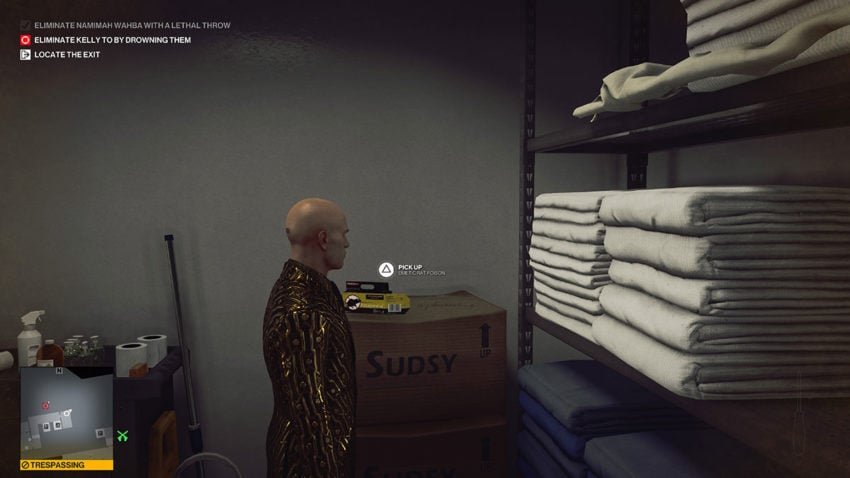
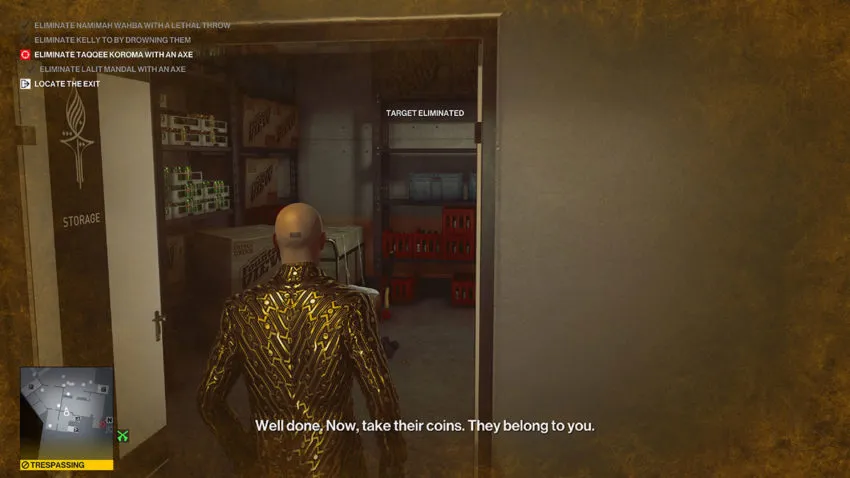
Head down three floors and wait for the technician to come and investigate. Once she’s given up, head to the laundry door. Once you’re ready, burst in and kill the target by snapping his neck. You can hide his body in the container.
Once you’ve picked up the Greedy Little Coins from this target, you’ll have enough to feed the Frog. The weapon you’ll get is a knife that you can throw, which is handy because the next target needs to be killed with a lethal throw.
Spend the coins with the Frog and pick up a weapon there if you’d like to. However, our route takes you past a lethal throwing weapon anyway, so you don’t need to spend anything.
From the laundry room, take the second door leading into the Black Gold Bar bathroom. Run through the doorway fast because the staff will treat you suspiciously if not. From here, head to the garden. It’s the only lush area in the building, to the right of the top of the stairs from the atrium.
Once you’re there, check the bench in the corner and pick up the screwdriver that’s been left there.
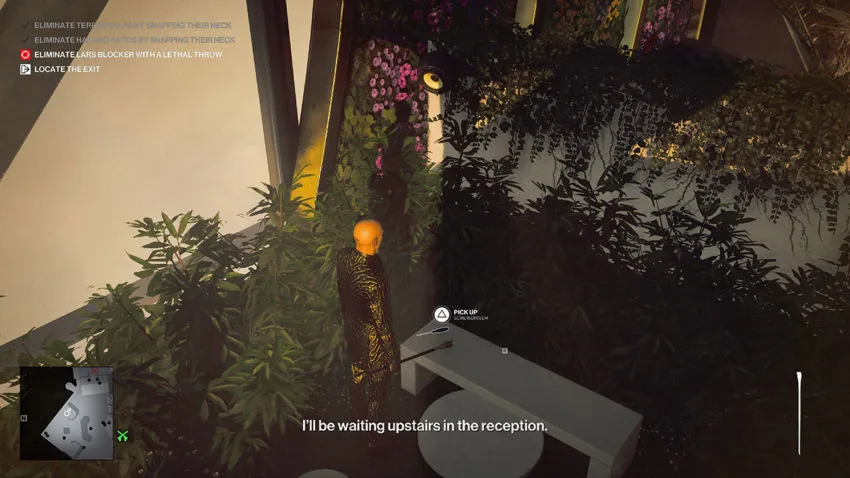
Below is a map reference for this location.
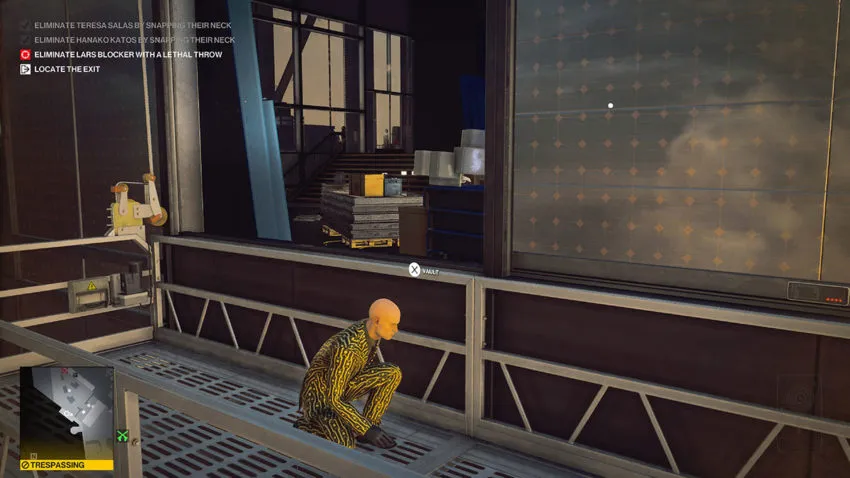
Now head to the edge of the balcony, exactly where the shovel is. Vault over this ledge and shimmy all the way along to the left. This will take you to a platform with two locked windows.
Unlock the windows and wait until both NPCs are at the top of the room before you proceed through and out of the area via the door to the left. This takes you to an outdoor space where your target is inspecting boxes all alone.
Unfortunately, your target is in the line of sight of a camera. Take cover behind the objects to the left and wait until he comes a little closer. Flip one of the Greedy Little Coins as a distraction to draw him in. When you have your opportunity, throw the screwdriver at his head.
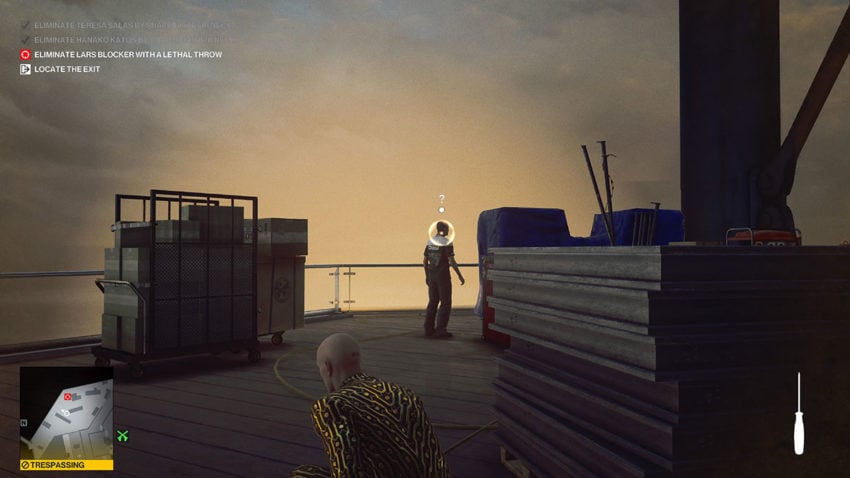
Dump the body over the balcony and pick up the coins. You should have ten now. There are no more targets to take care of, but you have to head back to the atrium because it’s the only available exit.
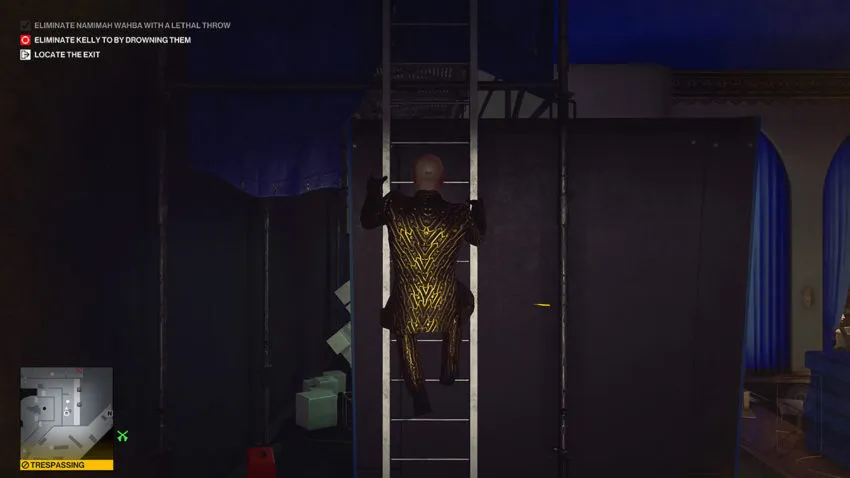
Don’t head back the way you came. Instead, return to the room you came through and climb the ladder. Follow the walkway here along to the left and shimmy over the first ledge. You’ll now be on a platform with a ladder leading down.

Wait until the guard below has walked away and the technician is working on the floor. Then, slide down and immediately make for the door to your right. It leads to the corridor you took a guard out in earlier. From here, head back through the door you initially came through when heading for your second target, and you won’t be trespassing any longer. Now you can take a stroll to the exit.
After completing this level you will unlock The Devil’s Cane, Greedy Little Coin, and the Rapacious Suit to use in all other locations and missions.
Level 2
This second level introduces an additional complication. You now can’t change your disguise, or you’ll fail the mission.
Once you get into the mission, you can buy from the Frog immediately. Ten coins will get you an icepick, which is handy since your first target must be killed with a lethal throw. Once again, our route will save you this unnecessary expenditure.
If you’ve unlocked the shortcut in the atrium, you can head up and kill your target straight away. For those who haven’t, our guide accommodates a longer route.
Head for the garden and pick up the same screwdriver you used in level 1. Then look at the blur curtains opposite this area, to the left of the stairs. You can walk through there without trespassing and find the door that you need to go through to reach your target. Unfortunately, it’s locked.
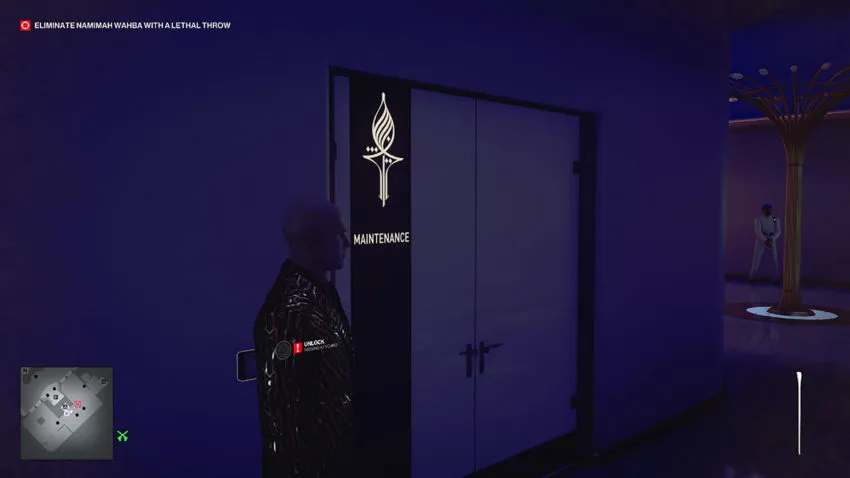
Below is a map reference for this door.
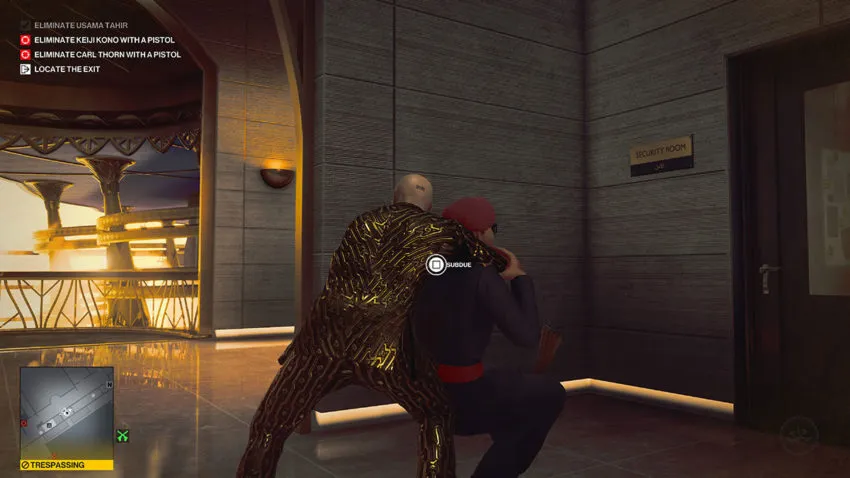
Now head back to the Black Gold Bar. Go back up the stairs to the bar’s left, turn right, and go through the doors. Instead of taking out this guard now, you need to kill him later. Wait for Marcus Stuyvesant and his guard to walk through this area. After that, you can subdue this guard and hide him further down the corridor to the left, outside the locker. Then, pick up his weapon and the five coins he drops, and head out the door next to the locker.
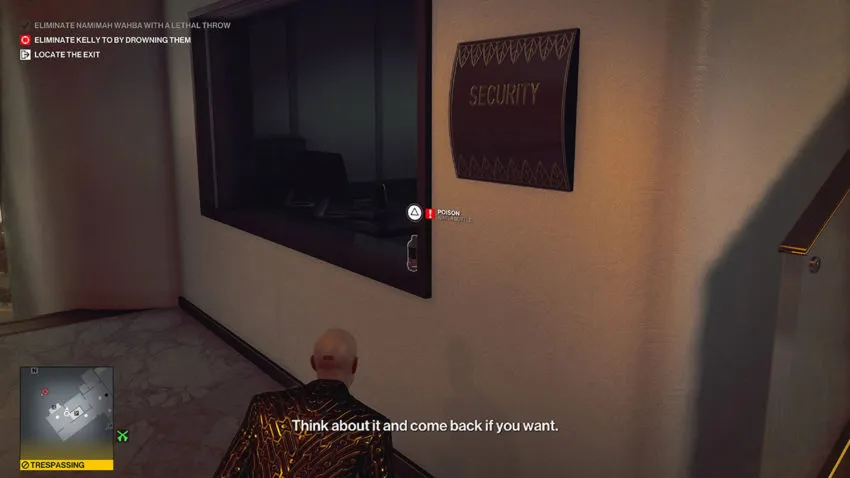
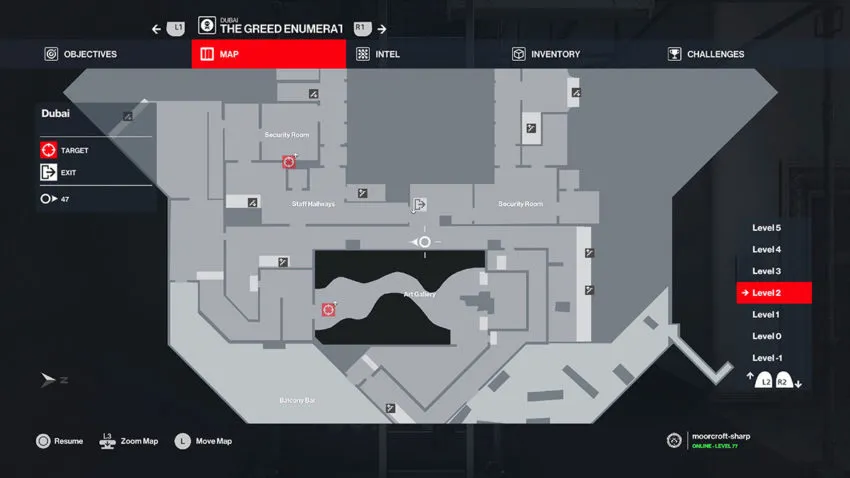
Go through the door, and you’ll see the doors to the security room ahead of you. Lean against the wall and open the doors. You can see a janitor, one guard sat down inside the room to your left, and one patrolling guard.
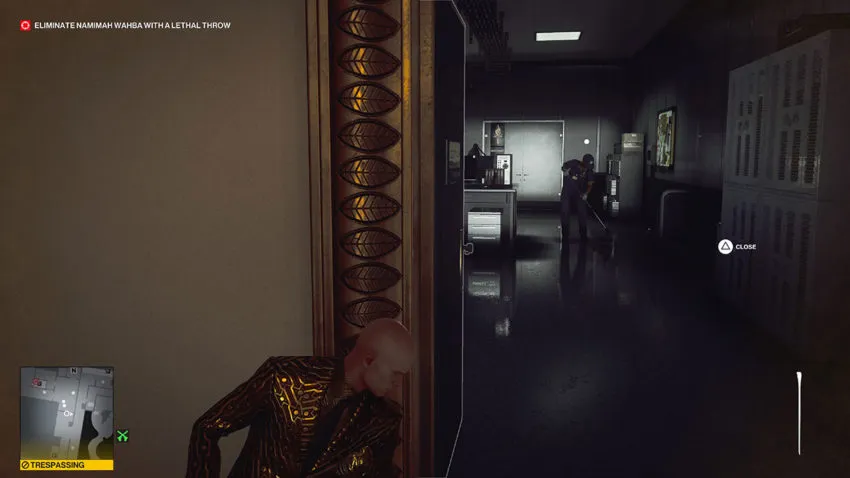
Below is a map reference for this doorway.
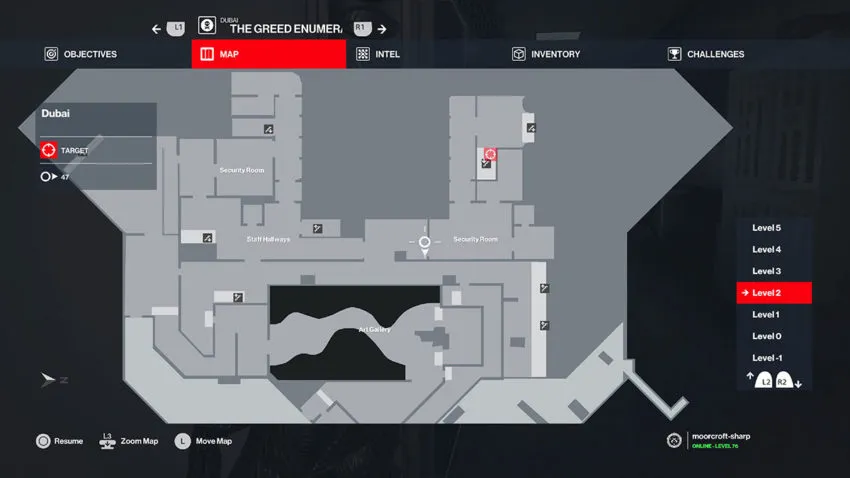
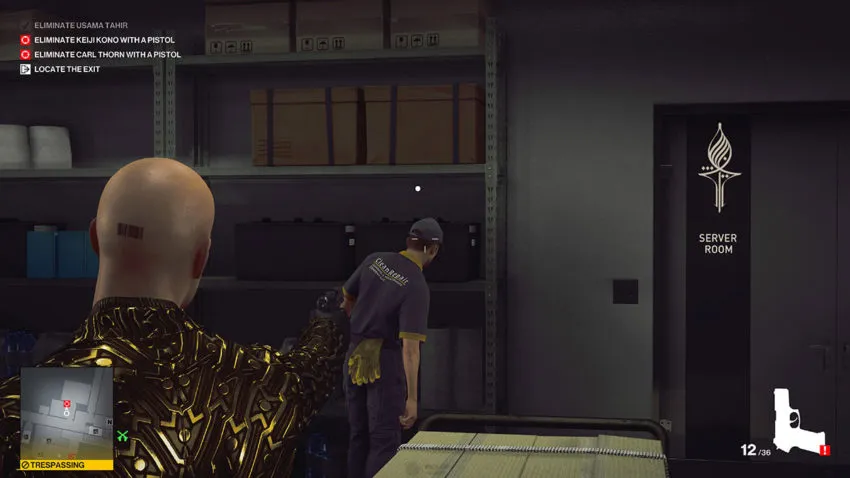
When the patrolling guard moves away from the guard closest to you, move into the room slightly and drop the weapon you picked up earlier. Then lean against the doorway again. When the patrolling guard makes his next move, he’ll pick up the weapon and go to deposit it in a different area.
As soon as the patrolling guard moves away, head into the room and pick up the Staff Keycard from the set of desks furthest away from you. There is a security camera watching the area, so try not to be seen by it. You need to do this very quickly because the janitor and second guard may spot you on your way out. The patrolling guard will also return after a few seconds, so there’s not much time to get this right.
Once you have the card, get out of the room and head back to the maintenance door we pointed out earlier. You can’t unlock this door without alerting the nearby guards. One will walk out of the area soon enough. Once he has, you can unlock the door without anyone else noticing.
Move through the door and be careful to avoid the camera at the bottom of the stairs. You should be able to squeeze by to the right. Then, throw your screwdriver to kill the target. Don’t forget to pick up those coins.
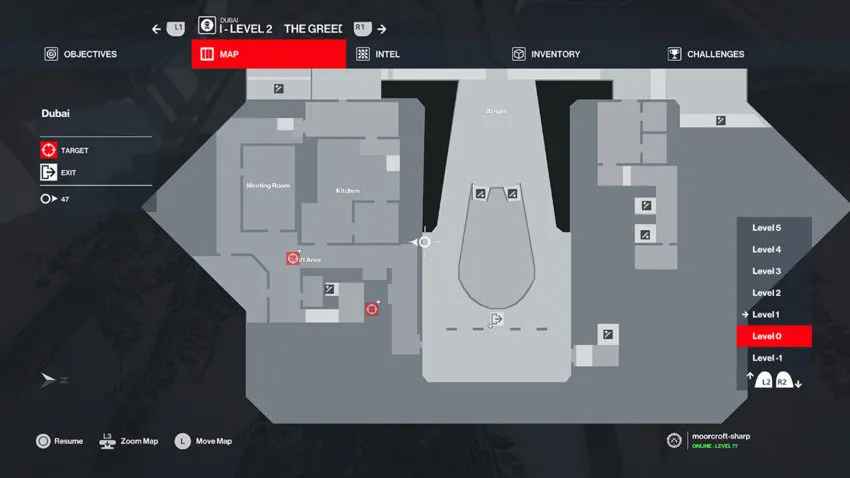
As before, you can exit or choose to take on the second target. Either way, head down the stairs and unlock the shortcut to return to the atrium. Your next target must be killed by drowning. To do this, we need some poison first.
Below is a map reference for the rat poison.
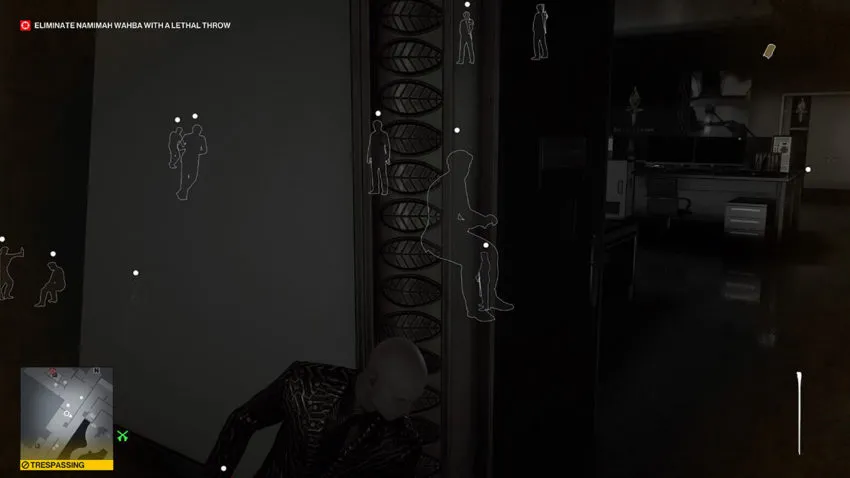
Head up the stairs and into the maintenance room on your right. The rat poison can be found in there. Then sneak past that camera and get out into the blue corridor once more. Head out to the large staircase opposite the garden. This is where you might see your target.
Go through the doorway to the right of this staircase and out to the balcony. Turn left and you’ll see some red vines, climb up them.
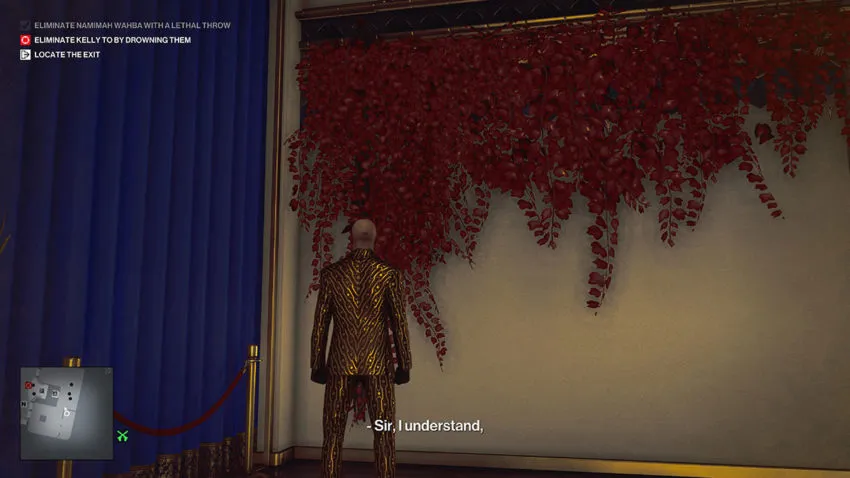
Below is a map reference for these red vines.
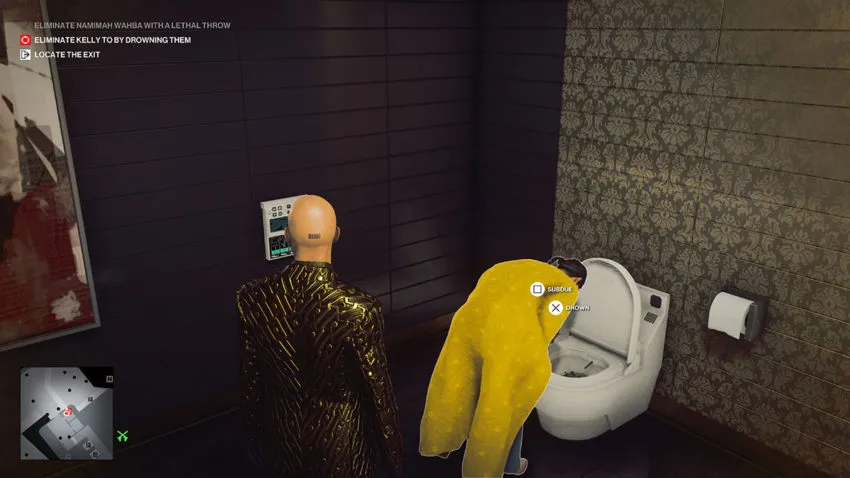
At the top of the stairs, you’ll see a bottle of water in the room to your left. That’s the one you need to poison to get this target to the bathroom. Move through, avoiding the sight of the guard here, poison the water, and then return the way you came.
The target will eventually drink this water and go to the bathroom on the net floor down, left as you walk out of the area next to the stairs you entered earlier. Wait patiently for your target to come down and then drown her. The kill counts as an accident, so there’s no need to hide the body.
Pick up all the coins and head outside for the final two targets. These require an axe. You can buy the axe from the Frog, but we’re going to use a fire axe instead.
Turn left and make your way to the walkway on the left-hand side of the stairs you climbed up from the atrium starting point. As if you were turning left and back on yourself from that starting position. There are more red vines here that you need to climb up. Below is a map reference for these red vines.
This takes you to the area to the left of the Black Gold Bar. It’s where you subdued a guard earlier. Next, crouch and run down the stairs around the corner from where this guard was patrolling. Watch out for the technician who can almost spot you as you go down. Keep going down the stairs until you find a fire axe.

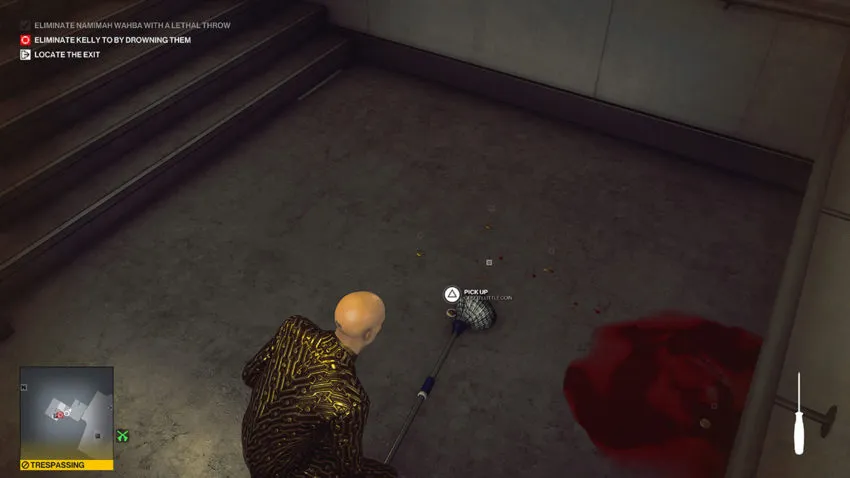
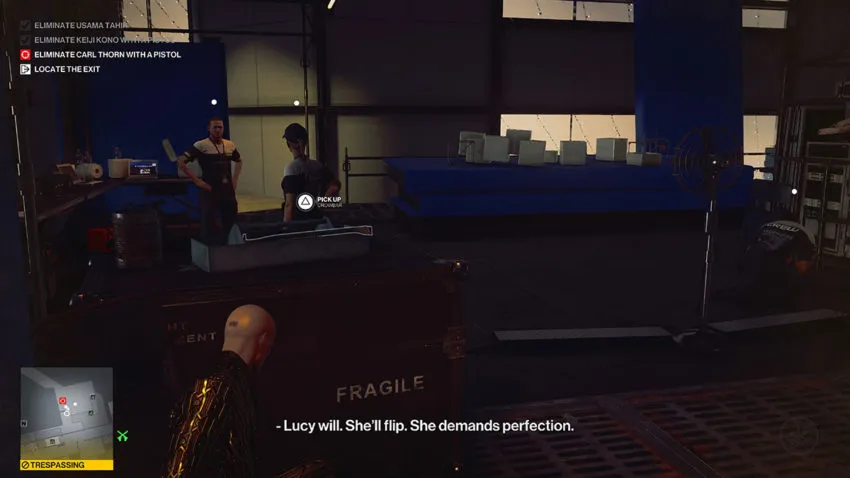
Opposite this fire axe is a room, and your next target is in there. Throw the fire axe at his head. Pick up all the coins and retrieve your fire axe. Then, make your way back up the stairs.
The technician who almost spotted you as you came down needs to be subdued. Take her out, but be sure you don’t kill her with the fire axe equipped. It’s safer to drop it before you approach her. Now use the fire axe to kill your last target where you left him sprawled out on the floor.
After that, make your way to the exit as quickly as possible. You should finish the mission with 30 coins.
Level 3
Level 3 adds yet another complication. If you’re caught trespassing or doing anything illegal, you’ll fail the mission. That’s not going to be a problem, though.
Your first target is a guard. You need to head to the Black Gold Bar again, up the stairs to the left, and in through those doors down the corridor to the right. Subdue the guard and hid his body in the locker. Don’t pick up his pistol. It’ll slow down Marcus Stuyvesant on his way through. Alternatively, wait for that particular NPC to pass through ahead of you, then follow.
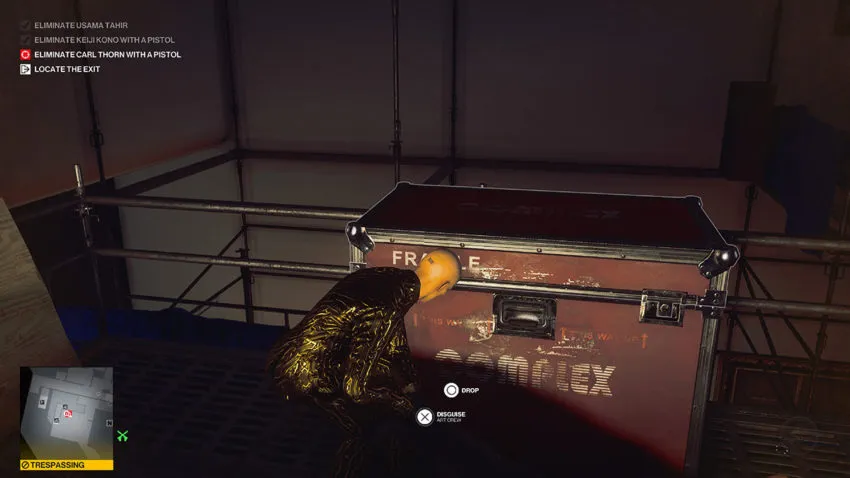
Your first target is patrolling the corridor outside of the doors next to this locker, to the left. You need to peek out and have him almost spot you before hiding again. This will draw him in. Then, hide behind the pallets in this small area outside the doors.
The target should make his way to you so that you can subdue him easily. Snap his neck once you’ve fully subdued him and dump his body in the crate. Pick up his pistol and climb the ladder up to the walkways above.
Below is a map reference for this ladder.
At the top of the walkway, you’ll see a guard on the balcony begin a conversation on his phone. When he’s turned slightly, vault up and subdue him. You can leave his body where it is.
Next, turn your attention to the guard down the corridor to the left. Wait until he’s staring at the wall, and then subdue him. Your next target is in the maintenance room just around the corner.
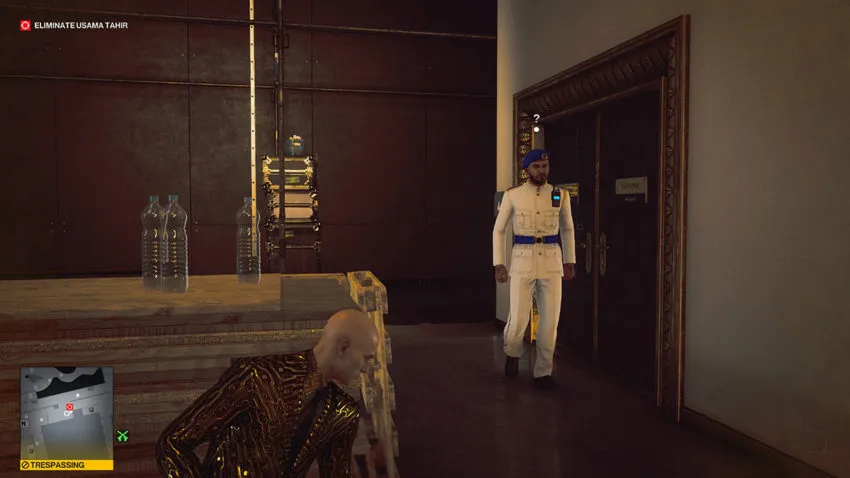
With both of the guards who would notice this kill taken down, you can shoot this target in the head and leave his body where it is.
The next target is over the balcony outside of this room. Vault over and sneak up to the edge of where the two NPCs are working. Grab the crowbar and wait for them to finish their conversation. When the pair part, vault in and subdue them both. Pick up the coins now before you kill him.
Now you need to drag both bodies to the nearby crate. Dump the body of the non-target first. Then, you can shoot the target in the head and quickly dump his body. As soon as you have, vault back out of this area and up to the corridor you came from.
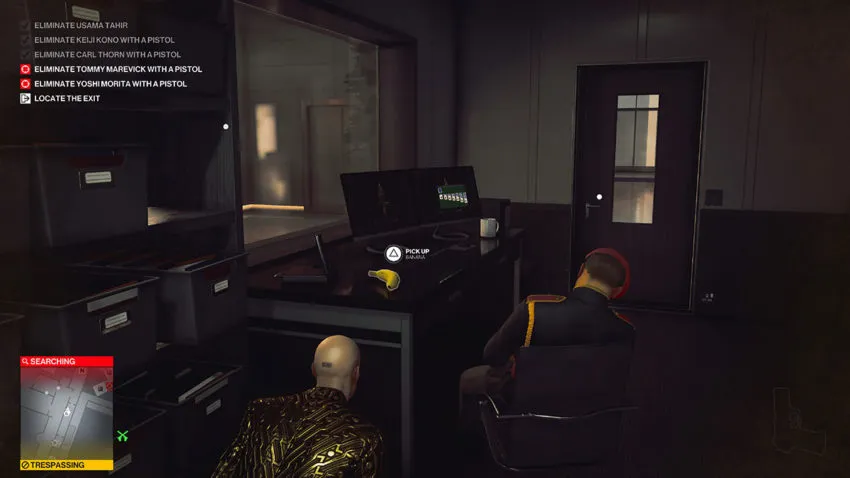
The final two targets are up here. Make your way along the corridor and back to where you took out the first guard. He was on his phone. Go into the security office, pick up the banana, and then get out the door and keep running down the corridor.
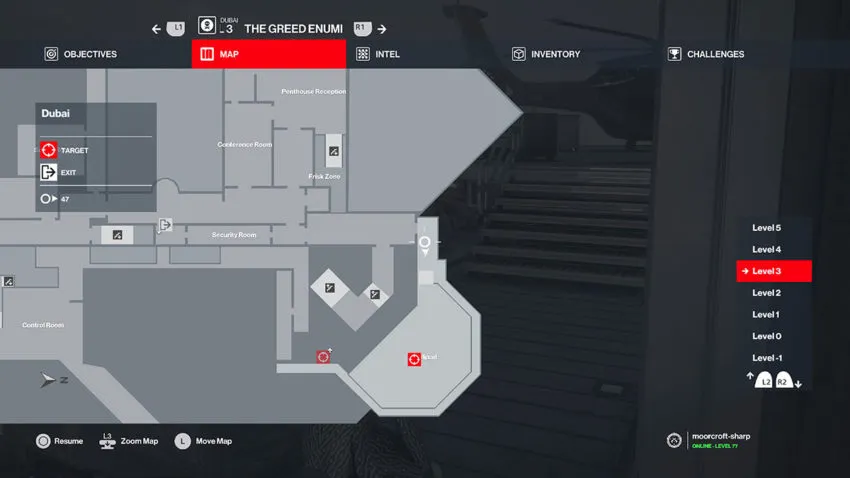
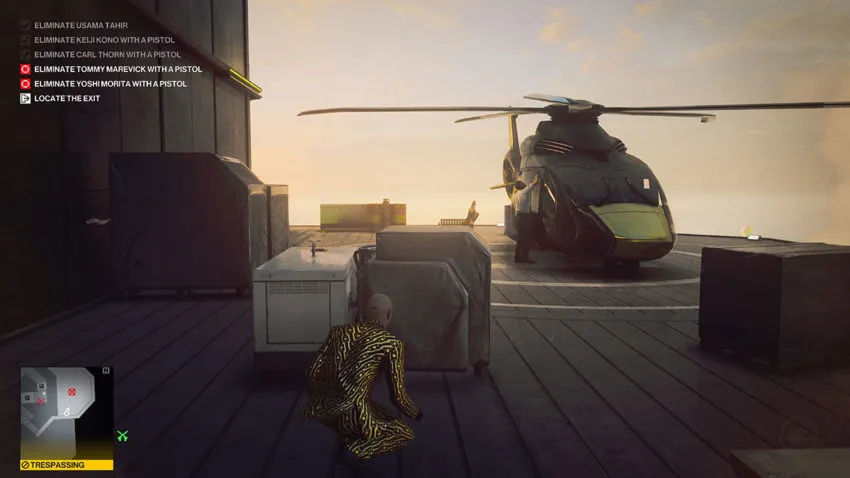
Go past the security camera by sneaking under its vision, and don’t dawdle outside the entrance on your right. A guard can spot you here if you’re too slow. You need to go out through the door to outside, where the helicopter is.
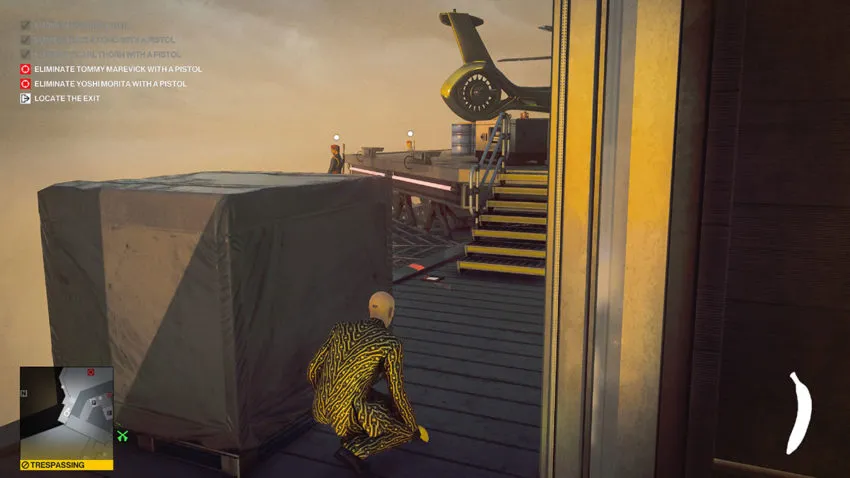
Below is a map reference for this location.
Now you need to wait for the guard on the left to come over and patrol near your location. Use the same technique as earlier to lure the guard to you. Allow him to almost spot you, then hide behind the crate. Once he’s close enough, subdue him.
Now you need to do the same with the second guard on that tiny walkway. Get closer to him until he can actually see you. Then use the same technique to draw him to you. You can press Agent 47 against the low wall and subdue the guard from around the corner.
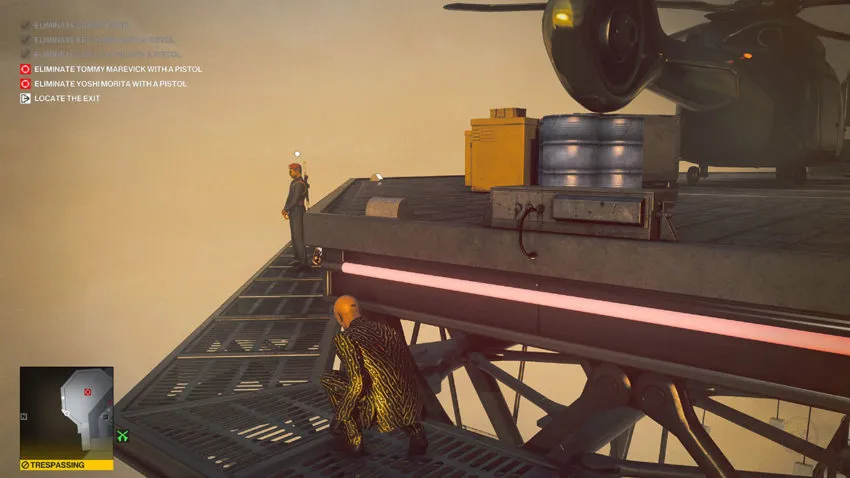
Now you’re free to get around the right-hand side of the helicopter pilot and shoot him in the head. Collect the coins, as you should have been doing with every target, and then make your way along the walkway to your right to a ladder that leads up the building. This ladder is actually a shortcut that you’ll need to have unlocked.
If you haven’t got the shortcut, you can unlock it by making your way up into the penthouse and working your way to the area that the target is patrolling. It’s fairly straightforward. Just head to the first floor of the penthouse, vault over the balcony, and slide down. Then get to the outdoor area and move around to where the target is.
Once you’re up, the target will be cleaning windows. Sneak into the room and subdue the target. Now drag him further back into this area and leave him on the floor for a moment. Run over to the door and place the banana on the floor.
This will knock out any guards that come to investigate when you shoot the target in the head. With that done, kill the target, and then return the way you came. The safest route home is to follow your footsteps all the way back to the start of the mission.
Follow this guide, and you’ll finish with a rank of Silent Assassin and all 60 coins. This will complete an additional challenge for the Season of Greed.


Published: Mar 31, 2021 09:57 am