If you have taken a sweet gameplay screenshot or video on the Nintendo Switch recently, chances are that you might want to transfer it over to a PC. Nintendo Switch users have multiple options to do this, and an update to the console on November 30 made moving files a bit easier. So what are these methods? Let’s take a look at the options that you have.
microSD Card
One option that Nintendo Switch users have to transfer files over is through a microSD card, which can be slotted into the console (not the dock). To do this, go to your System Settings, and make sure that you manage the files properly. If the files are on the card, you have nothing to worry about.
If you don’t have the files on the microSD card, select Data Management, and then Manage Screenshots and Videos. From there, pick the System Memory option, and pick the tab that reads Copy All Screenshots and Videos to microSD card. This will move all your files over to the card. To move an individual file over, pick a screenshot or video, and select Copy.
Once you have made sure that the files are on the card, shut off the Nintendo Switch console and take the memory out of the platform. Then, either place the microSD card into your computer directly or place it into an SD card adapter and then slot it into the PC, should your device not have a slot for the microSD chip.
Related: How to transfer Nintendo Switch screenshots and videos to a smartphone
USB Cable
A second option that you have is through a USB cable. A new update to the Nintendo Switch on November 30 made it possible for users to connect the console to the PC and then transfer the files over.
To do this, grab a USB cable, connect it to the PC, and then put the other side of it in the console itself, not the dock. Once you have done this, here’s what you have to do:
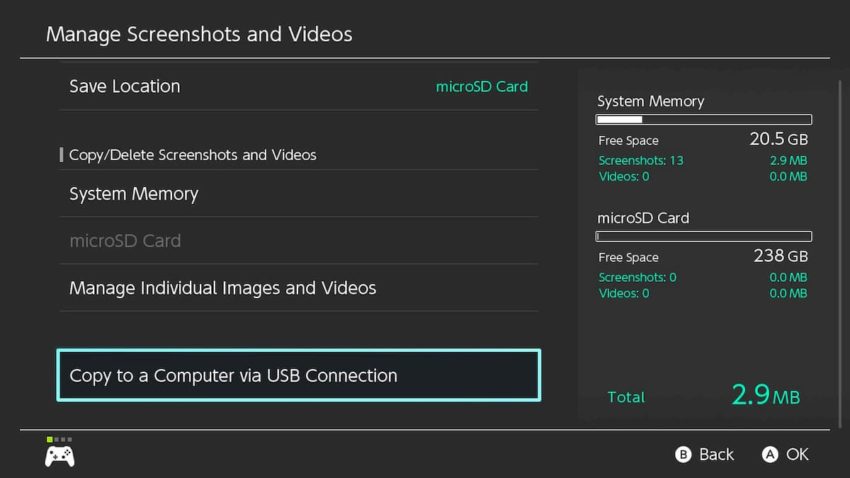
- From Home menu, select System Settings, and then Data Management
- Select Manage Screenshots and Videos, and then Copy to a Computer via USB Connection
- Select the screenshots and/or videos to transfer over to PC.
This method has no restrictions in terms of the number of screenshots and videos that can be transferred over at one time. However, keep in mind two things when using the USB cable.
For one, if you use the USB cable method, a USB charging cable (model HAC-010) or a USB-IF certified cable designed for data transfer is required to perform a move of files. Second, the Copy to a Computer via USB Connection function can only be used with an operating service with Media Transfer Protocol (MTP) service, such as Windows OS. If you plan on using software, such as iOS, that does not have MTP capabilities, you will most likely need to install a program that enables transfers of this nature.


Published: Nov 30, 2020 11:01 pm