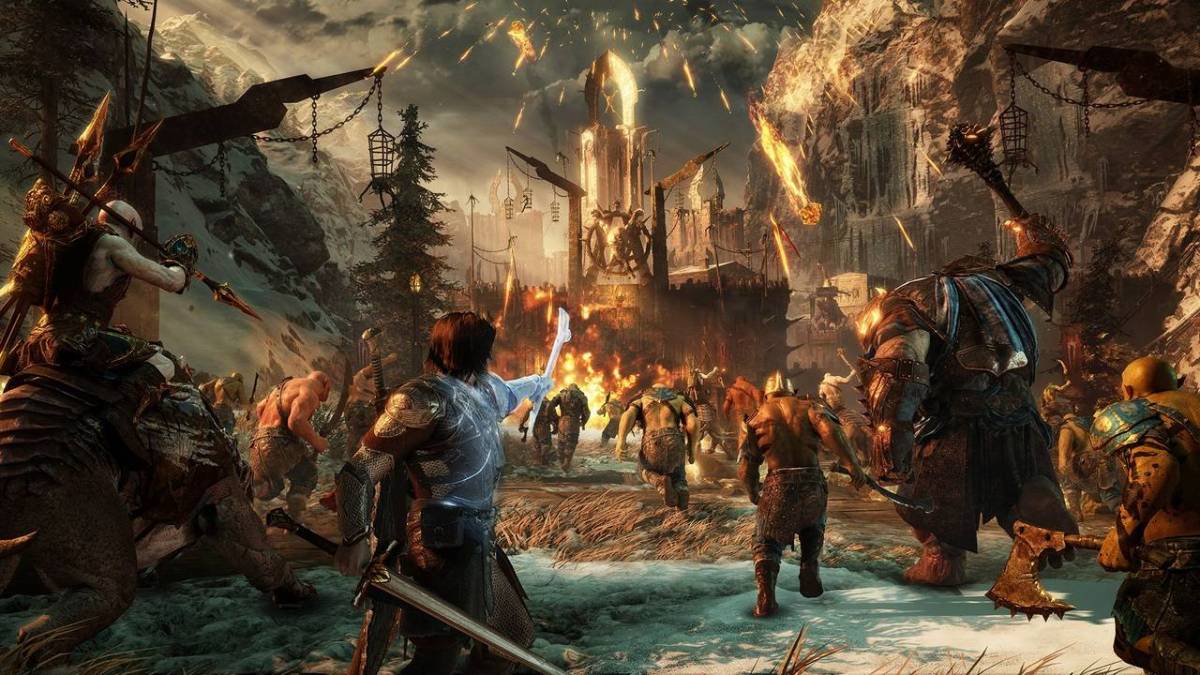
Act 2 Walkthrough of Shadow Of War has many objectives, but the main aim is to build up an army, capture fortresses, etc.
In Act I The Siege Of Minas Ithil, the city falls and Palantir goes in the hand of Sauron. Talion at the end gets his ring back and now he is on a mission to build his army against the Dark Lord. You will see a new region unlocked that will lead you to Act 2: Rise To Power. As the new Act begins after the cut scene you will unlock a new skill Domination. This skill will help you to build an army by Dominating Orcs.
Act 2 is a massive chapter, you will be doing a lot of things. You will also find new allies in the game and fight one of the toughest bosses. In between, you have to capture fortresses to gather high skill points and increase your army strength. Increasing levels will let you continue the main story, but do capturing the new fortress and keep recruiting new captains. You can see regions around which you will have to conquer to build a huge army. Some missions will help you in this.
Act II – Rise To Power Walkthrough
Dominate Archers without being Detected:

After getting the skill the first objective you will get is to dominate at least 10 Archers in stealth mode. So go slowly and look around for yellow markers. One a stone bridge you will find three of them, you have to quietly move behind them one by one. once you are done with that, you have to learn to Command Followers.
Defeat or Dominate the Orcs in Training:
Next objective is to Defeat of Dominate at least 25 Orcs in the area. The fastest way is to jump in a group of orc and dominate any one, and they will start attacking others around. In this way, you can easily achieve a target of Defeating 25 Orcs in Training.
Violent Nature
Forest Of Carnan:

In this objective, you have to visit Nurnen and follow the Trials into the forest of Carnan. Switch to the Wraith world, and run towards the yellow roots. You will find an Uruk there, interrogate him. For the next Trail switch to the Wraith world and walk on your left side, look for the white fog, it will lead you to the next stuck Uruk. The third trail is on the right ahead. You can spot that easily. Again interrogate the Uruk. A Great Tree will appear on your left, investigate it. This will initiate a cut scene.
Defeat the Spirit of Carnan: To defeat Carnan you have to fight with 3 Beasts.


Talion chooses to fight Carnan, even after Celebrimbor tells him not to. The first beast that will appear is easy to kill. Once you are done with that a giant beast will appear, the Elemental Graugs. To stun this creature you have to shoot in the head with a charged attack. Watch out for the attack by the beast, you have to run really fast to dodge it. He will also pit fire along with throwing up a burning ball of fire on you.


Next is a Drake you have to use a Charge shot to bring it down. But the problem is with the fire attack. Keep shooting the Drake and it will fall down. In the next cut scene you will see the real Carnan. The spirit of Forest. Carnan will tell Talion about Tar Goroth. Talion Level will increase to Level 18 after this.
Ring Of Power
You can pick this mission at the start, where you will be using the ring for dominating and building your own army. Once you take the mission you will see two Orcs are fighting in an arena. This will also unlock a new Skill Dominate Captain. This means you can now recruit a Captain as a Follower. To control it you have to attack the captain until he breaks, and then you can Dominate him.
Break Bruz:

In the beginning, you have to dodge three attacks of the Captain by sliding between his legs. Once you do this you have to keep on attacking him until he Breaks. Then Dominate the captain. The captain will tell you about a Two-Headed Troll. Talion plans to attack the troll with his new army. Talion also gains a skill point that will put him now on Level 18. Bruz, the captain you dominated unlocks a Region Control section, where after defeating the Overlord you get the fortress in Nurnen.
The Witch-king’s Vision:
This one is a small mission where you have to inspect a body on the ground. Then you have to follow the trails of Eltariel. You will locate her ahead, and then the next objective is to simply interrogate 5 worms according to the way points marked on the map. This will help you get some Intel. So you have to slowly find every worm and interrogate them one by one. once you are done interrogating all the 5 worms you have to get back to Eltariel and the mission is over.
The Three Towers

Eltariel has spotted a Nazgul. You have to now investigate the place to learn what they are up to. Once the Nazgul disappears, you have a time limit to reach the First Haedir Tower.
Haedir Tower 1: You have to reach the first tower before 54 seconds and kill 7 Orcs while mounted. You will be stopped by a Level 11 chosen. So keep killing the Orcs and finally kill the chosen one.
Haedir Tower 2: You will have to reach the next tower in less than 79 seconds. The fastest way is to summon a Caragors and ride it towards the point instead of running or jumping. Once you reach the spot you have to now kill 10 Orcs. You might face a Level 14 chosen here. You can try dominating a few Orcs to fight for you.
Haedir Tower 3: Reach the next tower in less than 94 seconds. In the third tower, you have to take down 15 Orcs, and a Level 17 chosen one. Also, there will be a Nazgul to give you the tough time.
After getting through all three towers the mission The Three Towers is over.
The Etten
Sharkhburz:

In the army menu, we found the fortress of Sharkburz that is controlled by an Overloard. To start the conquest of Mordor, Talion has to assault and capture this. To weaken the fortress defense, you have to kill or dominate a Warchief. If you have one you disable the Siege Upgrades that gives you an easy access to control the Fortress. You can draw out a Warchief by taking Confrontation Mission. You can strengthen your defense in similar way via Siege Upgrades, from the menu you can increase the Assault Force Level. Just pick your captain, and upgrade the assault force.

Before you with other missions ahead you can recruit more captains through the map. This is the Region Control part of the game. You can see tiny Skull icons on the map that will let you to track down stronger captains in the area. Once you have new captains you can make them as your body guard. Keep looking in the Haedir.

Like we found a Marauder Tracker in the above map locations and recruited it as a body guard. The better army you have the stronger you will be when you are about to attack any fortress. Once you recruit a body guard you will see Upgrade Unlock: Summon Bodyguard. This means you can summon them in a battle to fight on your side. So you can play around a while to get some Captains in your army. This will help you in coming battles ahead.

Once you done recruiting a few commanders in your team, you will unlock Commanding and Leveling Captains. You can through the Army menu command your follower to target and kill an enemy Captain. Once the follower completes the follower mission his level will increase and you have a stronger follower in your team. The follower can be equal to your level but not higher than that. Through the Army menu, you can pick a follower and command him to attack an Enemy Captain. Also keep a watch on enemy weakness, and match with the attack style of your follower. This will make your work easier. This is Camp Raid in the game. So before continuing with the main story, it is better you spend enough amounts here for learning this entire system.
By recruiting more like a Mystic Assassin you will further unlock Infiltrating Spies. In this mission you have to command a follower to become a body guard for an enemy Warchief first by fighting in the pits, next he will betray the master when you encounter with him. So from the Army menu pick a follower and choose an unknown Warchief to spy on. Issue a command to a follower to become a spy. He will prove his worth by fighting in the pits. This will reveal new Warchiefs. That new Warchiefs becomes your next target.

If you had triggered an Infiltration battle, then head to the Mission Start Point. You will see your follower in the Pit, you might control him to prove its worth for becoming a bodyguard. Depending on the follower Level, you can easily beat the opponent. Next is the Overlord. With your army now you can march towards the Fortress. You have to first capture the Victory Points, by killing all the enemies in the area. Once you are done with that, you have to Confront the Overlord.

You will find an old friend in the fortress, the Ratbag. He is the one head of the mighty two head troll. After the cut scene the objective The Etten is completed. You can now promote a follower to become an Overloard. So pick the best one according to your choice.
Conquest:
This unlocks the Online Conquest. You can attack other Fortress and launch attack against other player’s fortress in the game. This will help you to improve your rank and get rewards. Another part of this mission is Siege. It will help you to increase your defense. With the help of powerful Warchiefs and Siege Upgrade, you can setup a strong Fortress. A good defending fortress will also help you to increase your Rank. If you want you can start an Online Conquest or you can continue with the main story.
Allies:
In this objective you will be meeting Baranor, Talion will is going to assist him in freeing the captured Gondorian soldiers. As the mission begins you have to first rescue three Gondarian soldiers. Keep following the yellow marker on the screen, you will find all three of them. After rescuing them go the Cave, where you will have to rescue around 5 soldiers. After that, you have to kill the Captain who is guarding the last soldier. Once done you have to head towards the Final Gondorian. He will point the direction towards Idril. This finishes the mission Allies.
The Chosen:

In this mission, you will be meeting Eltariel, who has found a messenger that knows about the Chosen. Find her, first, then you have to follow her towards the Worm for interrogation. In your path you while following her you will have to cross an Orc camp. You have to kill around 9 Orcs in this camp. Once done get back to position and defeat Uruks as They pass. Using a bow and arrow will be easier options at this point.

Once you are done killing more Orcs, you have to interrogate the messenger. He will be ahead in another area near the mountain. After interrogating you will find the Captains are going to reach the Fort soon. You have to find the Captains next. Follow the marker and twill lead to the entrance of a fort. This will be a tough fight due to the different attack type by each captain. One of them might have a shield, another one a huge axe and third one burning arrows. You have to deal with all three of them. You will get some assistant from Eltariel. The best way to kill them is by stunning them first. Kill them and collect the rewards. One of them will try to run away. Follow and kill him. This ends the mission The Chosen.
Blood Sport:

In this mission, you have to investigate the fight pits to find Idril. Find Baranor in the Cave. You will see Gondorians are fighting a beast in the pit, defeat the Caragor. Then comes the Ologs. There will be two of them. Idril will join you in the fight. After she appears, you have to defeat all the Pit Fighters. They will appear from all sides. At the end you have to kill the Captain, stay at the Pit, he will join you there. There is one thing you can try, you can instead of killing the Captain recruit him in your army. You might get a Level 26 commander in your team. At then watch the cut scene and the mission is over.
The Uninvited:

In this mission the Orcs are having a party and you have to poison the grog barrels. You will also face a captain in this part, whom you can recruit or kill. Once you start the mission you have to poison 5 Grog Barrels. If you do this in stealth mode you can earn a green gem. The camp is filled with Orcs, and the barrels are around the corners. You quietly sneak behind the huts to poison the barrels. Once you are done poisoning them you have to hide to wait for the captain. He will be probably a Level 19 captain, you have to next defeat him. Try to recruit him in the end.
The Wages of War:
You will have to meet Baranor once again and assist him saving the trapped Gondorian soldiers. The mission begins with saving 4 Gondorians. After rescuing three of them you might face a Level 19 Warmonder Commander and a Warmonger Destroyer. You have to defeat these two captains along with other Orcs in your path. So this will be a bit tough fight. In order to restore your health, you can hide in the bushes around for a while and then enter back into the fight. Stealth kill is one of the fastest ways to kill unless they are not immune to it. Once you kill these captains this mission is over.
The Ritual:
Disrupt the Ritual:
In this part, you will be on a mission to simply stop Nagul from creating more Chosen. Eltariel has find the location of where this ritual is performed by Nagul. In this objective you have to dominate three Archers, so you have to go quietly. Once will be on your front, you can walk through the rope and dominate him. Other two are ahead, but there are chances of you getting spotted. It is the best wait for a while. Or go to the extreme left area, and try dominating the archers there from the back.

Once you are done, you have to Defeat the Nazgul and the Orcs at the ritual. You will be facing Level 21 and Level 23 Captains here. There will be around three to four of them. First, take down the Orcs and then go for the Nazgul. Gather your rewards. This is the end of mission Ritual.
Reversal of Fortune:

You will be playing something similar like Disrupt the Ritual, with Eltariel you have to disrupt the ritual to stop the Captains from turning into Chosen. Find Eltariel and go with her to Nazgul’s location to disrupt the ritual. You will also have a side objective to free a follower. There will be Two Level 29 Captains and Two Nazguls you have to deal with. The place is quiet messy where you will fight, you have to get some gap here. Use bow and arrow from a distance to reduce the captain’s health a bit. It is very important to dodge attacks if multiple enemies attack you at once. You can take benefit from the boxes and bonfire around, climb on a height and shoot with an arrow. The Nazgul will not follow you. When you have chance kills them one by one. Rescue your followers and the mission is complete. You might unlock an important skill here Shadow Dominate that will help you to control a grunt or Broken Captain through Shadow Strike.
To Gorgoroth:
In this objective, you will be working with Idril to find Baranor. The first thing you have to do is find and rescue Baranor. In this camp, you might face a Level 36 EPIC commander with Level 33 captain. Now you have to fight with these two Captains. As the level is high, you have to ensure that you approach these captains with a strategy. You will also have to rescue around 9 Gondorians and revive Idril whenever she is injured. Once both the captains are dead the mission is over.
Carnan’s Bane: Tar Goroth Boss Fight
In this mission Talion will have to face Tar Goroth, is a huge monster and commander of Saurons army. He is awaken by his master hen Talion and Celebrimbor forged the Ring of Power. Once the mission starts, you have two objectives. One to defeat at least 10 Acolytes in the area which is bit easy. And second defeating the Acolyte Captain. You can kill the Acolytes by arrows from a distance. And then you can head towards the Captain. He can be a Level 20 Cursed Mystic Trickster. Defeat him.


The captain will run away, after defeating both you have to jump into the pit where you will see the rise of Tar Goroth. Spirit of Carnan will be there to help you a bit to fight with the massive creature. You will be fighting with her for a while. Your objective is to shoot arrows on his back. But as you shoot he will turn mad, try to get on the back of this creature and shoot. You have to fight the white area on his back where you will shoot, watch out the red circles on the ground. This is where the debris will fall and you have to save yourself. Try to find a place on this back so that you can shoot, the creature will be busy fighting the spirit of Carnan. The beast will try to run away, mount Carnan, and follow him. Watch for the red circles on the ground, keep climbing up.

While mounting you can now fight with the beast controlling Carnan. You will have to shoot on the Chest as Carnan will tear it up. Keep shooting on the Chest. Tar Goroth will again run away. Mount Carnan once again and follow him. In the next cut scene, you will see Tar Goroth will destroy Carnan’s beast and escape the place.
Frozen Flame: Tar Goroth Boss Fight Final

As the barlog escapes in the previous mission, you have to find and destroy it before he destroys Mordor. You will have to mount Carnan and follow Tar Goroth’s Trail. Run through the mountains. Cross the burning camps. The fire is the trail. Tor Goroth will appear on you r back and follow you, Carnan will take through the caves and you have to shoot the Ice on the top that will fall on the beast. Keep doing that as it comes near you.


Keep shooting the ice on the roof of the cave, on the beast. This will slow him down for a while. Out of the cave, Carnan will drag him on a frozen lake. Now you will be in a direct fight with the beast. His attacks can eat a very huge chunk of your health. You have to maintain a good distance from him. Carnan will once again drop in to assist you. This time you will be shoot from the air. You have to hit the beast with Ice Blast multiple times. Controlling the flying beast, you have to fire with Ice blast from a distance, if you go near he will attack with fire balls. Once he slow down you will have to attack him dropping it in the frozen lake. Repeat the attack. You will have to keep on attacking the beast with Ice Blast unless his health is completely depleted. A final attack and the beast will be thrown back to the depths by Carnan. This completes Frozen Flames.
A Stench on the Wind

In this mission you have to get back to the forest of Carnan for investing about Zog. At the start of this mission, you will have to find the Source of the Stench. Run towards the yellow marker and you will find Revenant. Kill him and then kill 3 more ahead. Next you have to find the source of these Revenants. After finding the source you have to Purify the Necromancer Totem. Kill the Revenants around and Zog who ran away from the pit after racing the Tor Goroth. Zog will escape, after killing the Revenants drain the Totem’s power. This will complete the mission A Stench on the Wind.
The Best Defense

In this mission, you have to defend your Fortress from the attack of Sauron’s forces. You can play this when you hold the region of Nurnen. The Dark Lord has sent three Warchiefs to attack the fortress. You can either kill them or dominate them to fight for you. If you are able to dominate any of them it will make your job a bit easier. There are three victory points which you have to protect. It is best to recruit so that they can fight for you and attack other soldiers in their own army. After you had done with three Warchiefs, three more will appear. Now all these will be at one place trying to target the gate. Reach the point and fight. you can apply the same strategy of dominating the warchiefs to fight on your side. Once you are done killing all the Warchief run towards the Keep. This completes the mission. Look for the cut scene, Talion is betrayed by Bruz, who takes the fortress.
Damaged

After getting betrayed by Bruz, Talion heads towards him for revenge. At the start of this mission, you have to defeat the Guards and rescue three followers. In order to avoid much disturbance going in stealth mode is best. These followers are your overlords, you might need them ahead. To enter the fortress Talion follows the Orc towards a tunnel and reaches Bruz. After entering the fortress you have to defeat 30 Burz soldiers of his army and then finally defeat Bruz. He will eventually run away and you have to fight with a group of captains in the main hall. At the end, Talion regains the Fortress.
Missing
As the mission starts you have to reach the meeting point ahead. As Talion reaches the point with Ratbag, Bruz will appear. You have to first fight with the Ambushers in the arena. These ambushers are riding a Caragor, you can also mount it and attack others, or you can kill them all one by one. once you had done killing the Ambushers, the mission is over.
The Archers of Morgoth

In this mission you will be flying with the spirit of Carnan, to defeat Archers of Morgoth. Mouth Carnan, and then you have to two objectives. First is to purify 3 Necromancer Totems and defeat 40 Archers of Morgoth. Just fly towards the yellow marker and use the beast ice breath to destroy the archers. So fly from a distance and destroy the archers this will be an easier part. Next, you can head towards the Totems. Once you are done with the two objectives the mission is completed.
The Poisoned Road
In this objective, you have to rescue your followers who are captured and poisoned by Bruz. Follow Ratbag, and then you have to rescue around 3 Followers. Follow the markers to locate the followers one by one. To get some additional reward in the end you can try killing 5 enemies with Shadow strike. Once you are done rescuing all of them you have to defeat Bruz’s follower. You can also recruit him. Once you are done defeating the followers the mission is over.
Of Ghuls and Graugs

In this mission Zog’s cult continues to raise the dead, you have to join Carnan here to put an end to these risings. Mount Carnan, and you have to Purify 3 Necromancer Totems. There are Ghul Mounds in your path, you have to destroy around 15 of them in your path. So this mission will take some time. once you reach the totem kill the enemies around and dismount Carnan. Then go towards the second and third, one by one. Once you are done destroying the Ghul Mounds and purifying the Totems the mission is over.
The Tower of Sorcery

In this mission you will be meeting Eltariel, you have to go back to the fallen city to investigate about the Palantir. Follow here and as a bonus objective if you dominate 15 Orcs you will earn xxx. Eltariel will take you towards Suladan, which is the boss in this mission. Following her you will also find a group of Orcs in your path, you can either ignore them or simply kill them and follow Eltariel. Once you see Suladan, a Nazgul you have to fight him. Eltariel will use the Light of Galadriel to create a shield that will help you in the fight. you have to run inside the light to protect yourself from the magical attacks of this Nazgul. If you failed to reach the shield you will lose a huge chunk of your health. Try to dodge the Nazgul’s attack and also understand that it can counter your attacks. When you are to broke him dominate the Nazgul and watch the cut scene that will give you a vision about the how Nazgul story.
The Sighting
You have to meet Ratbag once again, to locate the ranger who is captured by Bruz. So follow him and he will take you to a cave. You have to explore it first, and at the entrance, you will find Bruz. Within 29 second you have to reach the Ranger to save him. This is actually a trap, the next objective is to escape the cave and catch bruz. There will be the constant blast in your path. Once you are out of the cave you will have to fight with the group of Orcs outside. At the end Ratbag goes behind Bruz to locate him, this is the end of the mission The Sighting.
The Scourge

Once again your fortress is under attack, this time Nazgul’s are coming. This Nazgul is Helm Hammerhand. You have to defeat him to defend your fortress. Go down, and attack him. As you jump down you will see a huge wave of enemies, the Ghuls. There are explosive barrels around shoot them to set an explosion. This will clear out some of the enemies in your path. Then you can start fighting the Nazgul. He is pretty powerful, he can counter attack you easily. He will disappear for a while and a Drake will destroy the Fortress gate. Follow the marker to find him again. Keep shooting the barrels from a distance once you spot him, this will help you to cause explosion damaging enemies around you. This will also help you to keep the area clear from a wave of enemies. You can mount the huge troll that will help you to create a chaos. The Nazgul will disappear once again, you have to find him on the other building and repeat the attack process. Once you are done breaking the Nazgul he will banish. With the end of cut scene the mission is over.
Fire and Fury: Defeat Helm Hammerhand Boss

After the Nazgul Helm Hammerhand runs away, Eltariel is able to track him down at the peaks of Seregost. You have to join her to defeat him. The fight will begin with a Drake. You have to use your bow and arrow to damage the Nazgul’s drake and bring him down on the ground. Follow Eltariel first and then attack the Drake. Follow her back to another location where you will face Two Drakes and a bunch of Ghuls. Take benefits by shooting nearby explosive, dodge Drake’s attack to avoid heavy damage. they will shoot a stream of fire from their mouth that can eat a good amount of your health.
Once again you have to follow her to a new location where the Nazgul will appear once again. You have to doge this attacks, Eltariel will be there to assist you. But it won’t help you much. If Eltariel is injured revive her. Ghuls will be another annoying part of this fight along with Drakes. So you have to watch all the corners. You have to run around and find opportunity to attack Helm, going much near to him will not help you. He can also teleport and spawn behind you. Dodge and keep on attacking and then watch the cut scene.
Worse Than Death:

In this mission you will be finally dealing with Bruz, Ratbag has found his camp. You have to rescue ranger and fight him. You will have to first meet Ratbag, and he will take you to the camp. You have to infiltrate it in stealth mode. Go quietly and kill all the enemies one by one without raising an alarm. Once you are done killing you can go deeper in the camp, where you will reach a large area. This is place guarded by enemies on patrol. It is better to avoid messing with these enemies as it will trigger alarm and then there will be chaos. Best is to walk through far left so that you can cross the patrol quietly and reach higher grounds. You can slowly sneak enemies from behind and kill them one by one. As you reach the camp you will see a cut scene with Ranger. Next, follow the ranger and you will see Bruz guarded by his allies. Try to shoot nearby explosives to damage more than one enemies. You can also ride Bruz and draw him into explosives. Dominate Bruz and Shame him. This will be the end of this mission. This unlocks Works Then Death Skill, you can Shame a captain.
Gravewalkers: Boss Fight Islidar – Fights the Wight’s.

You will find Elatriel in this mission, follow here and she will take you to an open area. In the cut scene you will see a Nazgul Isildur. He will summon Wight, these are spirits of soldiers. The nazgul will banish. You have to defeat this Wight’s first. You can damage them by freezing them in a place. One you are done go to the next way point and you will see more of them. You have to kill them one by one without raising any alarm, just sneak from behind and banish them. Once all are the dead follow Eltariel and she will take you to an open area. This is the place where you will be fighting with Nazgul Islidar. There will be Wight’s also in the same place. Here focus on Islidar, you can dodge this attacks easily and then perform multiple attacks on him. To protect yourself from his magical attack run in the barrier of light created by Eltariel. After a cut scene you will be facing more Wights’ and one of them will be a Castamir father of Idril. A stronger one, you have to fight him. You have to clear the area to finish the mission.
The Burning Forest:

In this objective you will be meeting Carnan, you have to protect her forest from Zog’s Acolytes. For this you have to find the totems which are placed in the forest and purify them. Just follow the way points on the map to locate them. Purify them, and also deal with the nemesis around. You have to clear the area before leaving to another way point. There are around four totems in the forest, once you are done with all of them get back to Carnan. There will be enemies who are trying to burn it down, kill them all. Target the wave of Torchbearers, they also have guards, so you have to at all cost kill them as fast as possible before they burn the tree. All you have to be focus only on those enemies who are trying to burn the tree leave all others for the end. Then meet Carnan. She will talk about the Balrog.
Fire from Ice: Zog Boss Fight

Zog is at Seregost he is trying to raise the Balrog once again and you have to stop him. Follow your path towards the waypoint and you will get your first objective where you have to purify four totems in your path. Zog has started the ritual of raising the beast. the area is cursed and you will lose your health fast, so you have to first purify the totems. The enemies are slow in this area, stand at one place and let them reach you, then fast move towards the totems. You will also have to fight with Zog at the same time with his arm around. You can summon allies in this fight. You can also summon beast, so try to get some help when needed. Having allies and beast will help you to make your way through a huge wave of enemies. While purifying the totems you will have to face Zog. He will attack you. Avoid him and try to focus on the totems first. After purifying them all you have to fight with Zog. An easy way to kill him is by hiding behind a totem and shooting arrows continuously on him. In this way you can void his curse attack.

There will be two phase of fight with Zog, once his health is depleted he will tell you that Necromancers never truly die and he will rise once again with full health bar. You have to fight him once again. This time your attacks will give him more damage.
Army of the Dead

In this objective, Zog’s Acolytes will try to raise Zog back again with an army of Undead from the casualties of the Siege of Minas Ithil. You have to stop them. In the cut scene you will see Zog is raised. In the arena where you will see Zog, there are 6 Necromancer Totems. There are also a lot of dead Uruks. Before Zog raise them you have to purify all 6 totems one by one. So start quietly from those which are on the extreme end. If you want you can ignore the Acolytes around, and instead purify the totem and run ahead. This one is the fastest way. If you engage into fight, it will take a long time. once you are done purifying the totems you have to once again kill Zog and his allies around.
For triggering Act 3, you have to head to the main mission way point, but before you must check that you had done with all the previous missions of Act 2, once you lead your army to Sauron’s castle you cannot return and play previous levels. Once you are done playing all the levels, conquering fortresses and defending them you can begin Act 3 which is the end of Act 2 Rise to Power. You can also read our walkthrough on Act 3 Shadow and Flame or you can go through our Shadow of War wiki guides for more tips and updates on the game.


Published: Oct 12, 2017 02:38 pm