Want to get started on the Xbox Game Pass for PC? Here’s how!
Microsoft’s Xbox E3 Press conference last night dedicated some time to their game subscription service, the Xbox Game Pass. Not only did they announce some of the games that are coming to the game pass, but they also confirmed their commitment to PC gaming as they launched the Xbox Game Pass for PC.
The service includes over 100 games that are available to play and starts with a new Xbox app for PC that will help to manage your new library. But what they didn’t explain is how to get involved with it, and make a start on getting the service up and running.
Fear not, as our handy guide will help you get setup for Xbox Game Pass on PC. Bear in mind that in order for the Xbox PC app to work, you must have Windows 10 installed. The app will not work on Windows 7 or Windows 8. It may take up to an hour to complete the installation, so make sure you reserve enough time to complete the update in full.
Here’s how to get the Xbox PC app, step-by-step:
Getting the App Installer
There are two ways to get a hold of the files to get the process started. Firstly, you can open up the Windows Store on your computer, and in most instances, you will see a tab that shows the Xbox PC app available to download. Clicking this will bring up a web browser that will take you to the Xbox PC app page.
Alternatively, you can go straight to the Xbox PC app page by clicking on the following link: Xbox Game Pass for PC (Beta)
Once there, you will see the store page for the new application, along with information about the service, as well as a Download the App button. If you don’t immediately see this (you may see the Join button instead), scrolling down until you see the following page should allow you to download then the application, known as ‘XboxInstaller.exe.’
Installing the Windows Update (if required)
Immediately following the download, click on the installation file, and it should then prompt you to install a Windows Update in order for the app to work. This will also tweak a few visual elements of Windows, including the default look of the Cortana search feature. If you already have this Windows update, you can skip this step and head to the next one.
Follow the prompts to start downloading the update. While the speed at which it works will vary depending on the speed of your internet connection, it typically takes no more than 15 minutes to complete the download.
From here, you will be prompted to apply the update. Once you do, it will start a countdown to an automatic installation, causing your computer to restart in 30 minutes time. It’s at this point that you will need to save any work you have done or finished anything you may be doing. When ready, hit the prompt and your computer should begin shutting itself down to prepare for the update.
After this, you should be taken to a screen where it confirms that a Windows Update is being applied to your computer. This process can take some time depending on the speed of your PC and the storage type of your computer. For us, we are using an SSD for the operating system in a mid-to-high range PC, and this part of the process took about 20 minutes, restarting several times in the process. It should look similar to the below screen.
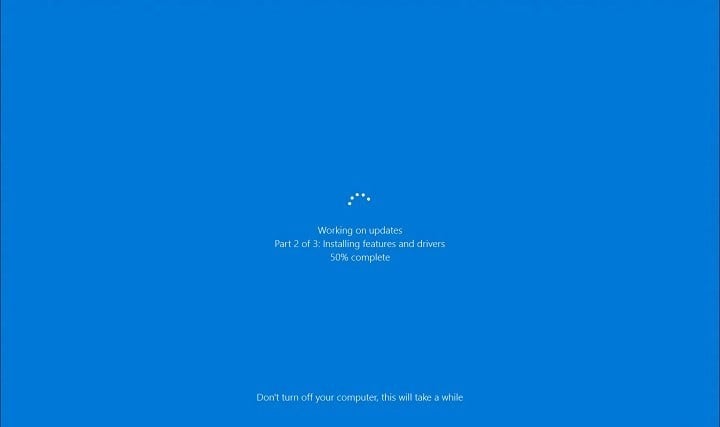
Fear not if it does restart, it will take some time. Feel free to leave the computer to do its thing at this point. Once it is done, it will fire up as normal and take you to the login screen. After you have logged in (or if you don’t require a login), it will confirm that it is getting your PC ready. This should only take about a minute, and once done you’ll be back on your home screen.
Installing the app
After the Windows Update install is complete and you are back on your home screen, you should automatically see a screen pops up to confirm that you would like to install the Xbox Game app. It should look like the below.
Read and accept the Microsoft Software Licence term once you have confirmed you are OK with them, and then it should begin an installation, stating that it’s ‘Making Things Awesome.’ In our installation, this didn’t move the first time it tried this so if the same happens to you, simply close the installer, and use your Window search bar to look for ‘XboxInstaller.exe’ and start the process again. It will relaunch the above prompt, and this should fix it.
Once installed, it will prompt you to launch the Xbox PC game, and from there, you are ready to go and explore! It includes being able to see and chat with friends from your Xbox Live friends list, even on different platforms and includes an option for the store if you want to purchase your games.
We hope that you found this guide helpful and that you enjoy the brand new Xbox Game Pass for PC!





Published: Jun 10, 2019 03:09 pm