
Scattered across the world of Tunic, you’ll find six Hero’s Graves. Who this hero was and why they have so many graves is not made clear, but it’s worth keeping track of them. Their locations and the secrets they hide when you pray in front of them will be of paramount importance late in the game, after picking up the laurels. Read on to find out where they are.
Old Burying Ground
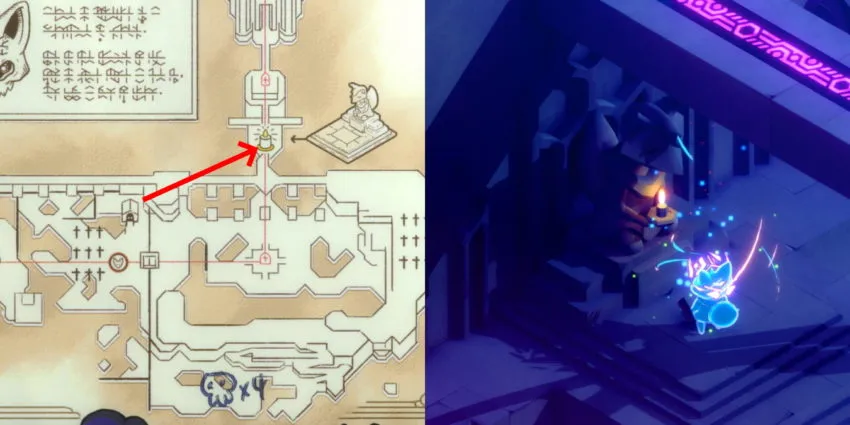
This will likely be the first Hero’s Grave you visit after picking up the laurels because it’s right outside. Just dash across the stepping stones leading out of the arena in which you won the laurels and follow the path around to find this grave, which holds the Stamina power-up.
The Quarry
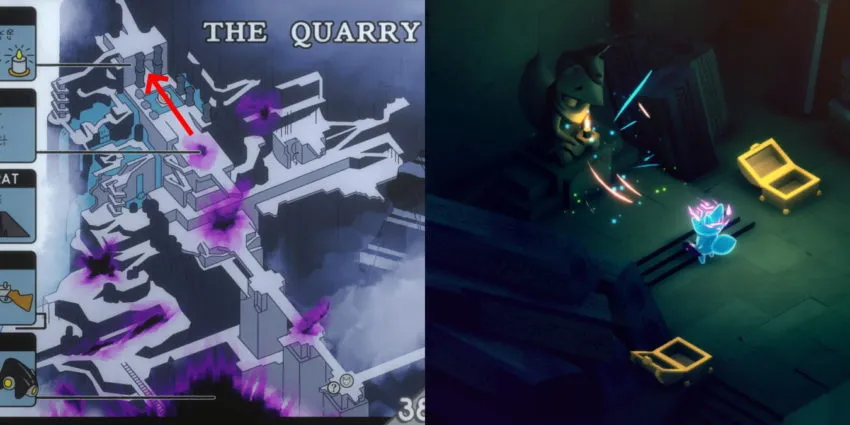
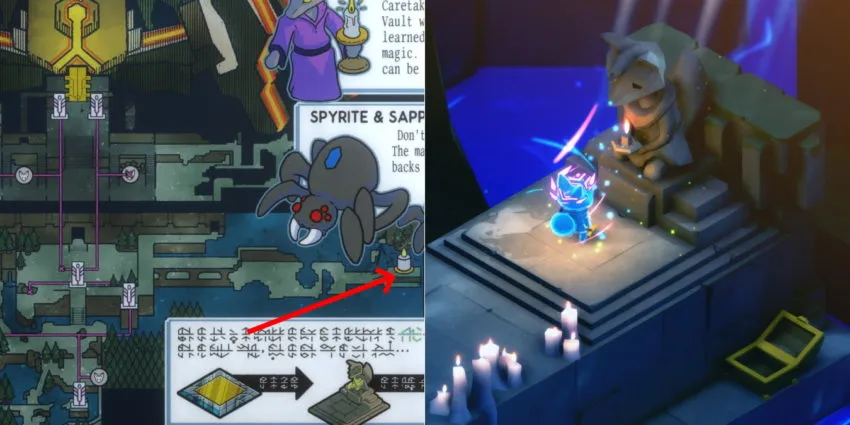
You’ll pass by this Hero’s Grave on your first foray into the Quarry — it’s where the chest containing the Scavenger’s Mask is located. Late in the game, though, it’s far more difficult to access. With the main entrance to the Quarry completely blocked off, how are you supposed to get back to the grave?
The answer lies at the summit of the mountain to the north of the Overworld, where that mysterious stone door resides. Behind the rocks to the right of the door, you’ll find a secret path that’ll lead you to the top of the Quarry. Follow the path down, flash-stepping to cross the gaps, and enter the Monastery. Head towards the back until you reach the corruption covering the grave. Turning back towards the entrance will reveal a new enemy. Defeat it to clear the corruption and gain access to the grave, granting you Potion power-up. Mind yourself, though — its attacks will drain your max health, just like the corruption itself.
West Garden
The Hero’s Grave in the West Garden is easy to find early in the game, as you’ll pass right by it shortly after entering the garden. To find it later on, though, you’ll have to find a way back in since many of the previously used methods of entry will be blocked off or more difficult to access.
The easiest way is to make your way down to the western beach in the Overworld. With a combination of the Magic Orb and the laurels, you can hop your way across the islands connecting the Overworld and the West Garden, spitting you out just below the Hero’s Grave. Simply make your way up the steps, and you’ll recover the Defense power-up.
The Library
The Library, where you fight the Librarian, is initially accessed via the Ruined Atoll. But later in the game, that route becomes less viable, and you’ll need another way in. Thankfully, on your way up the tower, you likely activated the shrine and teleport pad just below the boss arena. That makes it a cinch to get back there once you can access the teleport hub again.
Once you arrive back in the Library, make your way down to the bottom of the tower, taking care to avoid the corruption along the way. At the bottom, you’ll find the Hero’s Grave covered in corruption, much like in the Quarry. To clear it up, you need to defeat the two statues flanking the stairways. Try to aggro one at a time because these guys hit hard. They’re slow, though, and telegraph their attacks pretty clearly, so utilize the laurels’ flashstep to zip behind them and get a few hits in whenever they wind up to strike. Take them both down, and the Hero’s Grave will reveal itself, clearing the way to the MP power-up.
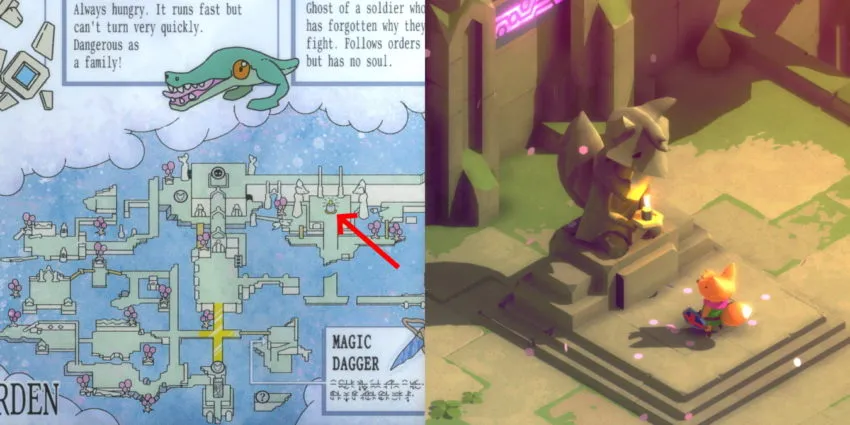
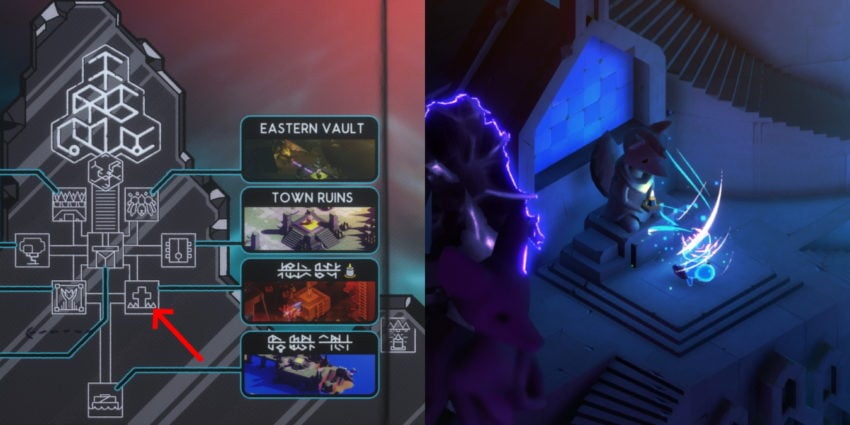
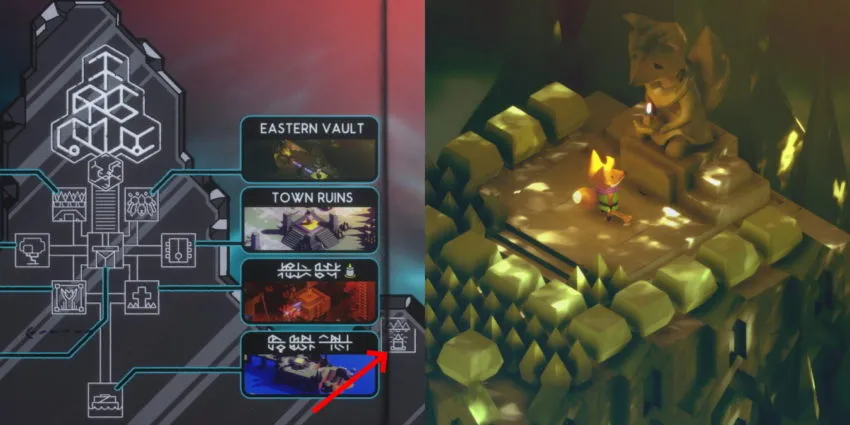
Fortress of the Eastern Vault
As with the Library, the regular way to the Eastern Vault is left pretty much impassable later in the game. Thankfully, you’ll have another easy shortcut available from the teleport hub. Take the top-right teleporter, and it’ll send you to the inner chamber of the Vault, where you fought the Siege Engine. From there, head south and outside of the Vault and then off to the east.
Be careful as you navigate the path of the Hero’s Grave, as the way is laced with corruption and features several powerful enemies that will deplete your maximum HP if their attacks connect. It may be a better bet to just sprint and flashstep past them to pray at the grave and pick up the HP power-up.
East Forest
This final Hero’s Grave is the first one you encountered in the game, out in the East Forest, where you first picked up the sword. It’s completely blocked off later in the game, though, and there’s no obvious way in, even from the teleport hub.
If you have pages 41 and 42 of the manual, which show you a map of the hub, you’ll see that there’s more to the area than immediately meets the eye. Off the edge of the bottom-right corner, you’ll be able to use the laurels to dash across a broken path, taking you to another teleporter. This one will beam you right into the heart of the East Forest. From there, simply follow the familiar path to the Hero’s Grave and the Attack power-up. Watch out for enemies, though — Scavengers from the Quarry have invaded the area, and they’ll do their best to stop you from getting past.


Published: Mar 16, 2022 12:50 pm