Potion Craft is a quirky game in which you aim to become the best alchemist in town by crafting potions with various effects to help the customers. The orders you’ll receive during the game vary from simple acid and fire potions to full-on levitation and necromancy potions, all of which come in several different tiers of quality. Each tier is more difficult to brew than the previous one and will require more time, ingredients, and better mixing techniques. In this guide, we will tell you about all of the potion effects in Potion Craft and how to make their potions in each tier.
All potion effects in Potion Craft
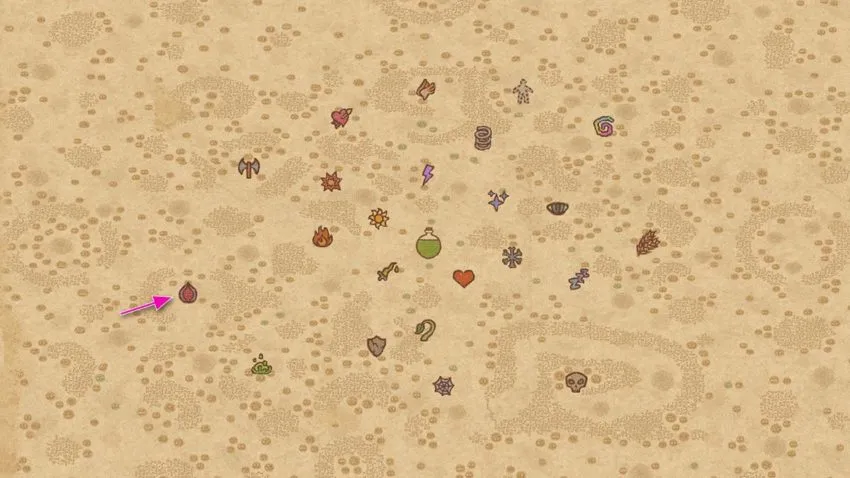
Acid

The Acid effect can be found to the left of the Poison effect on the Alchemy Map. It will melt and decay anything in contact. There are three tiers of Acid effect, with the following recipes:
- Weak Potion of Acid (Tier I): 5 Firebell + 5 Terraria
- Step 1: 2 Firebell + Mortar + Cauldron
- Step 2: 1 Terraria + Mortar + Cauldron
- Step 3: 1 Firebell + Mortar + Cauldron
- Step 4: 3 Terraria + Mortar + Cauldron
- Step 5: 1 Firebell + Mortar + Cauldron
- Step 6: 1 Firebell + Cauldron
- Step 7: 1 Terraria + Cauldron
- Potion of Acid (Tier II): 2 Red Mushroom + 2 Firebell + 5 Terraria
- Step 1: 1 Red Mushroom + Mortar + Cauldron
- Step 2: 1 Firebell + Mortar + Cauldron
- Step 3: 2 Terraria + Mortar + Cauldron
- Step 4: 1 Firebell + Cauldron
- Step 5: 2 Terraria + Mortar + Cauldron
- Step 6: 1 Red Mushroom + Mortar + Cauldron
- Step 7: 1 Terraria + Cauldron
- Strong Potion of Acid (Tier III): 3 Firebell + 6 Terraria
- Step 1: 2 Firebell + Mortar + Cauldron
- Step 2: 2 Terraria + Mortar (finish at bottom-left bend) + Cauldron
- Step 3: 3 Terraria + Mortar (finish at bottom-left bend) + Cauldron
- Step 4: 1 Firebell + Mortar + Cauldron
- Step 5: 1 Terraria + Mortar + Cauldron + Ladle
- Strong Potion of Acid (Tier III): 2 Red Mushroom + 2 Firebell + 5 Terraria
- Step 1: 1 Red Mushroom + Mortar + Cauldron
- Step 2: 1 Firebell + Mortar + Cauldron
- Step 3: 2 Terraria + Mortar + Cauldron
- Step 4: 1 Firebell + Cauldron
- Step 5: 2 Terraria + Mortar + Cauldron
- Step 6: 1 Red Mushroom + Mortar + Cauldron
- Step 7: 1 Terraria + Cauldron + Ladle (used after completing the Tier II mix)
- Strong Potion of Acid (Tier III): 3 Firebell + 3 Terraria + 1 Thronstick + 1 Brown Mushroom
- Step 1: 2 Firebell + Mortar + Cauldron
- Step 2: 1 Terraria + Mortar + Cauldron
- Step 3: 1 Thronstick + Mortar (past left bend) + Cauldron
- Step 4: 1 Terraria + Mortar + Cauldron
- Step 5: 1 Terraria + Mortar (past left path, towards bottom bend) + Cauldron
- Step 6: 1 Firebell + Mortar + Cauldron
- Step 7: 1 Brown Mushroom + Cauldron + Ladle
Berserker
The Berserker effect can be found to the left from Explosion on the Alchemy Map. It is an effect that increases the strength and rage of the imbiber. This effect can be made in Tier III form, with a couple of recipes:
- Strong Potion of Berserker (Tier III): 5 Firebell + 3 Windbloom
- Step 1: 2 Firebell + Mortar + Cauldron
- Step 2: 1 Firebell + Mortar (on the upturn) + Cauldron
- Step 3: 1 Firebell + Mortar + Cauldron
- Step 4: 1 Windbloom + Mortar + Cauldron
- Step 5: 1 Firebell + Mortar + Cauldron
- Step 6: 2 Windbloom + Mortar + Cauldron + Ladle
- Strong Potion of Berserker (Tier III): 2 Red Mushroom + 2 Sulphur Shelf + 1 Lava Root + 1 Thunder Thistle + 1 Windbloom
- Step 1: 1 Red Mushroom + Mortar + Cauldron
- Step 2: 1 Red Mushroom + Cauldron
- Step 3: 1 Sulphur Shelf + Mortar + Cauldron
- Step 4: 1 Lava Root + Mortar + Cauldron
- Step 5: 1 Windbloom + Mortar + Cauldron
- Step 6: 1 Sulfur Shelf + Mortar + Cauldron
- Step 7: 1 Thunder Thistle + Mortar + Cauldron + Ladle
Bounce
The Bounce effect can be found up from Mana on the Alchemy Map. It is an effect that lets the user jump high. This effect comes in three tiers, with several recipes:
- Weak Potion of Bounce (Tier I): 4 Windbloom + 2 Waterbloom
- Step 1: 1 Windbloom + Mortar + Cauldron
- Step 2: 1 Waterbloom + Mortar + Cauldron
- Step 3: 1 Windbloom + Mortar + Cauldron
- Step 4: 1 Waterbloom + Cauldron
- Step 5: 2 Windbloom + Mortar + Cauldron
- Potion of Bounce (Tier II): 4 Windbloom + 2 Waterbloom
- Step 1: 1 Windbloom + Mortar + Cauldron
- Step 2: 1 Waterbloom + Mortar + Cauldron
- Step 3: 1 Windbloom + Mortar + Cauldron
- Step 4: 1 Waterbloom + Cauldron
- Step 5: 2 Windbloom + Mortar (keep using until it hitsTier II) + Cauldron
- Potion of Bounce (Tier II): 4 Windbloom + 2 Waterbloom + 1 Firebell
- Step 1: 1 Windbloom + Mortar + Cauldron
- Step 2: 2 Waterbloom + Mortar + Cauldron
- Step 3: 3 Windbloom + Mortar + Cauldron
- Step 4: 1 Firebell + Cauldron
- Strong Potion of Bounce (Tier III): 4 Windbloom + 2 Waterbloom
- Step 1: 1 Windbloom + Mortar + Cauldron
- Step 2: 1 Waterbloom + Mortar (about 80% of the way) + Cauldron
- Step 3: 1 Windbloom + Mortar + Cauldron
- Step 4: 1 Waterbloom + Mortar (about 80% of the way) + Cauldron
- Step 5: 2 Windbloom + Mortar + Cauldron
- Strong Potion of Bounce (Tier III): 4 Windbloom + 2 Waterbloom + 1 Firebell
- Step 1: 1 Windbloom + Mortar + Cauldron
- Step 2: 1 Waterbloom + Mortar + Cauldron
- Step 3: 1 Windbloom + Mortar + Cauldron
- Step 4: 1 Waterbloom + Mortar + Cauldron
- Step 5: 2 Windbloom + Mortar + Cauldron
- Step 6: 1 Firebell + Cauldron + Ladle
- Strong Potion of Bounce (Tier III): 2 Windbloom + 2 Waterbloom + 1 Thunder Thistle
- Step 1: 1 Windbloom + Mortar + Cauldron
- Step 2: 1 Waterbloom + Mortar (stop at about the highest bend) + Cauldron
- Step 3: 1 Windbloom + Mortar + Cauldron
- Step 4: Use Whirlpool + Ladle
- Step 5: 1 Thunder Thistle + Mortar + Cauldron
- Step 6: 1 Waterbloom + Mortar + Cauldron
- Strong Potion of Bounce (Tier III): 1 Windbloom + 1 Lumpy Beet + 1 Thunder Thistle
- Step 1: 1 Thunder Thistle + Mortar + Cauldron
- Step 2: 1 Lumpy Beet + Mortar (about 80% of the way) + Cauldron
- Step 3: Use Whirlpool + Ladle
- Step 4: 1 Windbloom + Mortar + Cauldron
Charm
The Charm effect can be found up from Explosion on the Alchemy Map. It is an effect that makes the user more charming and agreeable. There are three tiers of this potion, with the following recipe:
- Potion of Charm (Weak/Strong, Tiers I-III): 5 Windbloom + 4 Firebell + 1 Waterbloom (All tiers use the same recipe, the difference being in the stirring and use of the ladle in the last step, letting you choose which tier to make)
- Step 1: 1 Windbloom + Mortar + Cauldron
- Step 2: 1 Firebell + Mortar + Cauldron
- Step 3: 1 Firebell + Mortar (finish at bottom-left bend) + Cauldron
- Step 4: 1 Windbloom + Mortar + Cauldron
- Step 5: 1 Firebell + Mortar + Cauldron
- Step 6: 1 Windbloom + Mortar + Cauldron
- Step 7: 1 Firebell + Cauldron
- Step 8: 1 Windbloom + Mortar + Cauldron
- Step 9: 1 Windbloom + Mortar (finish at bottom-left bend) + Cauldron
- Step 10: 1 Waterbloom + Mortar + Cauldron + Ladle
Explosion
The Explosion effect can be found to the left from Lighting on the Alchemy Map. This is the effect you need when you want things to go boom. There are three tiers of Explosion potions, with several recipes:
- Weak Potion of Explosion (Tier I): 2 Windbloom + 3 Firebell
- Step 1: 1 Windbloom + Mortar + Cauldron
- Step 2: 1 Firebell + Mortar + Cauldron
- Step 3: 1 Firebell + Mortar (finish at bottom-left bend) + Cauldron
- Step 4: 1 Windbloom + Mortar + Cauldron
- Step 5: 1 Firebell + Mortar (finish at bottom-left bend) + Cauldron
- Potion of Explosion (Tier II): 3 Windbloom + 3 Firebell
- Step 1: 1 Windbloom + Mortar + Cauldron
- Step 2: 1 Firebell + Mortar (finish at bottom-left bend) + Cauldron
- Step 3: 1 Firebell + Mortar (finish at bottom-left bend) + Cauldron
- Step 4: 1 Windbloom + Cauldron
- Step 5: 1 Firebell + Mortar + Cauldron
- Step 6: 1 Windbloom + Mortar (finish at about ¾ of the way) + Cauldron
- Strong Potion of Explosion (Tier III): 2 Windbloom + 4 Firebell
- Step 1: 1 Windbloom + Mortar + Cauldron
- Step 2: 2 Firebell + Mortar (finish at bottom-left bend) + Cauldron
- Step 3: 1 Windbloom + Mortar + Cauldron
- Step 4: 1 Firebell + Mortar + Cauldron
- Step 5: 1 Firebell + Cauldron
- Strong Potion of Explosion (Tier III): 3 Windbloom + 3 Firebell
- Step 1: 1 Windbloom + Mortar + Cauldron
- Step 2: 1 Firebell + Mortar (finish at bottom-left bend) + Cauldron
- Step 3: 1 Firebell + Mortar (finish at bottom-left bend) + Cauldron
- Step 4: 1 Windbloom + Cauldron
- Step 5: 1 Firebell + Mortar + Cauldron
- Step 6: 1 Windbloom + Mortar (finish at about ¾ of the way) + Cauldron + Ladle
- Strong Potion of Explosion (Tier III): 2 Windbloom + 2 Firebell + 1 Sulphur Shelf
- Step 1: 1 Sulphur Shelf + Mortar + Cauldron
- Step 2: 1 Windbloom + Mortar + Cauldron
- Step 3: 1 Firebell + Mortar + Cauldron
- Step 5: 1 Windbloom + Mortar + Cauldron
- Step 5: 1 Firebell + Mortar + Cauldron + Ladle
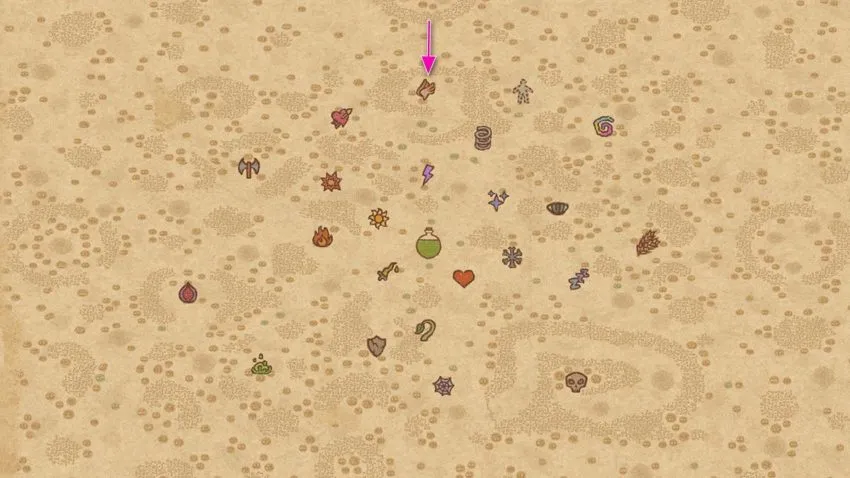
Fast Growth
The Fast Growth effect can be found just below the center of the Alchemy Map. It is an effect that lets plants and trees grow faster. There are three tiers of this potion, with a few different recipes:
- Weak Potion of Fast Growth (Tier I): 3 Terraria + 1 Waterbloom + 1 Firebell
- Step 1: 1 Terraria + Mortar + Cauldron
- Step 2: 1 Waterbloom + Cauldron
- Step 3: 2 Terraria + Mortar + Cauldron
- Step 4: 1 Firebell + Cauldron
- Potion of Fast Growth (Tier II): 4 Terraria + 1 Waterbloom + 1 Firebell
- Step 1: 1 Terraria + Mortar + Cauldron
- Step 2: 1 Waterbloom + Cauldron
- Step 3: 2 Terraria + Mortar + Cauldron
- Step 4: 1 Firebell + Cauldron
- Step 5: 1 Terraria + Cauldron
- Strong Potion of Fast Growth (Tier III): 4 Terraria + 1 Waterbloom + 1 Firebell
- Step 1: 1 Terraria + Mortar + Cauldron
- Step 2: 1 Waterbloom + Cauldron
- Step 3: 2 Terraria + Mortar + Cauldron
- Step 4: 1 Firebell + Cauldron
- Step 5: 1 Terraria + Cauldron (mix until it becomes Tier III)
- Strong Potion of Fast Growth (Tier III): 2 Terraria + 1 Waterbloom + 1 Firebell + 1 Brown Mushroom
- Step 1: 1 Terraria + Mortar + Cauldron
- Step 2: 1 Waterbloom + Cauldron
- Step 3: 1 Brown Mushroom + Mortar + Cauldron
- Step 4: 1 Terraria + Mortar + Cauldron
- Step 5: 1 Firebell + Cauldron
- Strong Potion of Fast Growth (Tier III): 1 Terraria + 1 Waterbloom + 1 Firebell + 2 Brown Mushroom
- Step 1: 1 Waterbloom + Mortar + Cauldron
- Step 2: 2 Brown Mushroom + Mortar + Cauldron
- Step 3: 1 Terraria + Mortar + Cauldron
- Step 4: 1 Firebell + Mortar + Cauldron + Ladle
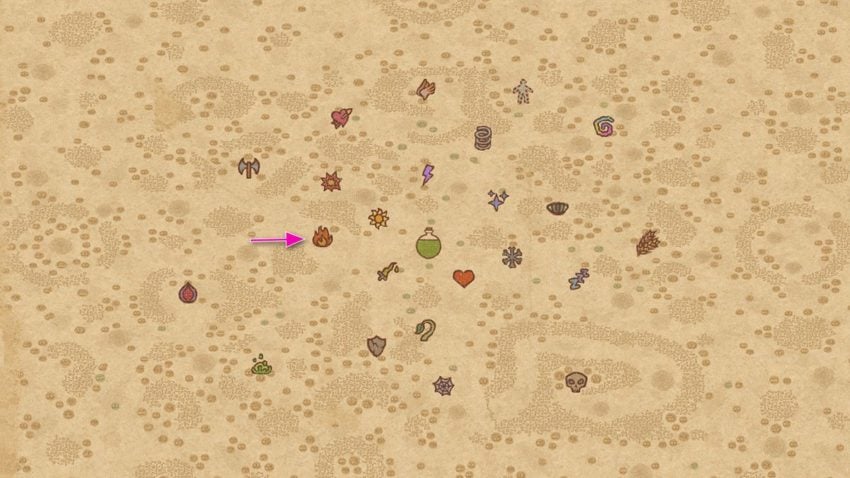
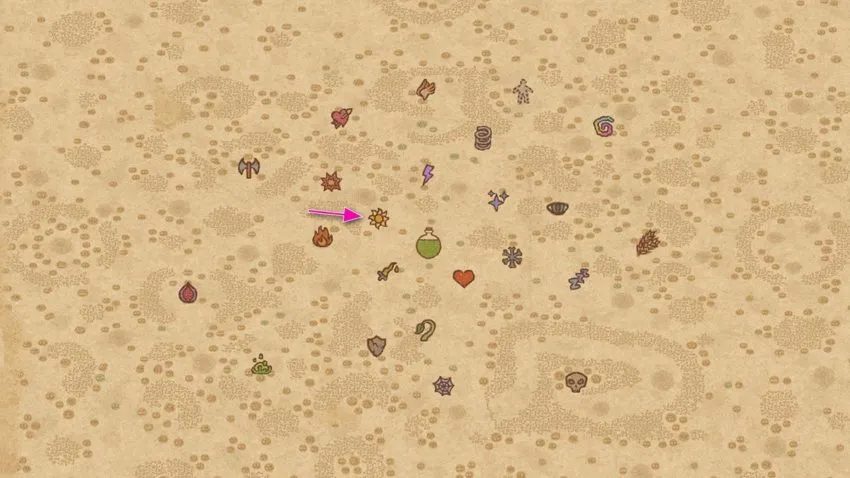
Fire
The Fire effect is located directly left of the center of the Alchemy Map. This hot and fiery effect has three tiers with several recipes:
- Weak Potion of Fire (Tier I): 3 Firebell
- Step 1: 3 Firebell + Mortar + Cauldron
- Potion of Fire (Tier II): 3 Firebell + 1 Windbloom
- Step 1: 3 Firebell + Mortar + Cauldron
- Step 2: 1 Windbloom + Cauldron
- Strong Potion of Fire (Tier III): 4 Firebell
- Step 1: 1 Firebell + Mortar + Cauldron
- Step 2: 1 Firebell + Mortar (finish at bottom-left bend) + Cauldron
- Step 3: 2 Firebell + Mortar + Cauldron + Ladle
- Strong Potion of Fire (Tier III): 3 Firebell + 1 Windbloom
- Step 1: 3 Firebell + Mortar + Cauldron
- Step 2: 1 Windbloom + Cauldron + Ladle
- Strong Potion of Fire (Tier III): 2 Lava Root
- Step 1: 2 Lava Root + Mortar (finish just before full grind) + Cauldron + Ladle (if needed)
- Strong Potion of Fire (Tier III): 2 Firebell + 1 Red Mushroom
- Step 1: 1 Firebell + Mortar (finish at bottom-left bend) + Cauldron
- Step 1: 1 Red Mushroom + Mortar + Cauldron
- Step 1: 1 Firebell + Mortar + Cauldron + Ladle
- Strong Potion of Fire (Tier III): 3 Firebell + 1 Terraria
- Step 1: 1 Terraria + Mortar (use only before the right bend) + Cauldron + Ladle
- Step 2: 1 Firebell + Mortar (finish at half-way point) + Cauldron
- Step 3: 2 Firebell + Mortar + Cauldron + Ladle
Frost
The Frost effect is located directly right of the center of the Alchemy Map. This frosty effect has three tiers with a number of recipes:
- Weak Potion of Frost (Tier I): 1 Terraria + 3 Waterbloom
- Step 1: 1 Terraria + Cauldron
- Step 2: 3 Waterbloom + Mortar + Cauldron
- Potion of Frost (Tier II): 1 Terraria + 3 Waterbloom
- Step 1: 1 Terraria + Cauldron
- Step 2: 3 Waterbloom + Mortar + Cauldron (stop stirring when Tier II symbol appears)
- Strong Potion of Frost (Tier III): 1 Terraria + 3 Waterbloom
- Step 1: 1 Terraria + Cauldron
- Step 2: 3 Waterbloom + Mortar + Cauldron + Ladle
- Strong Potion of Frost (Tier III): 1 Terraria + 1 Waterbloom + 1 Tangleweed
- Step 1: 1 Terraria + Cauldron
- Step 2: 1 Waterbloom + Mortar + Cauldron
- Step 3: 1 Tangleweed + Mortar + Cauldron + Ladle
- Strong Potion of Frost (Tier III): 1 Terraria + 1 Tangleweed + 1 Ice Fruit
- Step 1: 1 Terraria + Cauldron
- Step 2: 1 Tangleweed + Mortar + Cauldron
- Step 3: 1 Ice Fruit + Mortar (finish at about ¾ of the way) + Cauldron + Ladle
- Strong Potion of Frost (Tier III): 1 Terraria + 2 Tangleweed
- Step 1: 1 Terraria + Cauldron
- Step 2: 2 Tangleweed + Mortar + Cauldron + Ladle
- Strong Potion of Frost (Tier III): 1 Dryad’s Saddle + 2 Waterbloom
- Step 1: 1 Dryad’s Saddle + Cauldron
- Step 2: 2 Waterbloom + Mortar + Cauldron
- Strong Potion of Frost (Tier III): 1 Green Mushroom + 2 Waterbloom
- Step 1: 1 Green Mushroom + Mortar (finish at top-right bend) + Cauldron
- Step 2: 1 Waterbloom + Mortar (finish at bottom-left bend) + Cauldron
- Step 3: 1 Waterbloom + Mortar + Cauldron + Ladle
Hallucinations
The Hallucinations effect is located to the right of Mana on the Alchemy Map. It is an effect that muddles both the mind and the senses. There are three tiers of potions for this effect, with the following recipes:
- Weak Potion of Hallucinations (Tier I): 5 Windbloom + 5 Waterbloom
- Step 1: 1 Windbloom + Mortar + Cauldron
- Step 2: 1 Waterbloom + Mortar + Cauldron
- Step 3: 1 Windbloom + Mortar + Cauldron
- Step 4: 1 Waterbloom + Mortar + Cauldron
- Step 5: 2 Windbloom + Mortar + Cauldron
- Step 6: 3 Waterbloom + Mortar + Cauldron
- Step 7: 1 Windbloom + Cauldron
- Potion of Hallucinations (Tier II): 5 Windbloom + 5 Waterbloom
- Step 1: 1 Windbloom + Mortar + Cauldron
- Step 2: 1 Waterbloom + Mortar + Cauldron
- Step 3: 1 Windbloom + Mortar + Cauldron
- Step 4: 1 Waterbloom + Mortar + Cauldron
- Step 5: 2 Windbloom + Mortar + Cauldron
- Step 6: 3 Waterbloom + Mortar + Cauldron
- Step 7: 1 Windbloom + Mortar (stop at leftmost bend) + Cauldron + Ladle
- Strong Potion of Hallucinations (Tier III): 5 Windbloom + 5 Waterbloom
- Step 1: 1 Windbloom + Mortar + Cauldron
- Step 2: 1 Waterbloom + Mortar + Cauldron
- Step 3: 1 Windbloom + Mortar + Cauldron
- Step 4: 1 Waterbloom + Mortar + Cauldron
- Step 5: 2 Windbloom + Mortar + Cauldron
- Step 6: 3 Waterbloom + Mortar + Cauldron
- Step 7: 1 Windbloom + Mortar (stop just before the leftmost bend) + Cauldron + Ladle
- Strong Potion of Hallucinations (Tier III): 2 Windbloom + 5 Waterbloom + 1 Thunder Thistle
- Step 1: 1 Windbloom + Mortar + Cauldron
- Step 2: 1 Waterbloom + Mortar (about ¾ of the way) + Cauldron
- Step 3: 1 Windbloom + Mortar + Cauldron
- Step 4: 1 Thunder Thistle + Mortar + Cauldron
- Step 5: 2 Waterbloom + Mortar + Cauldron
- Step 6: 1 Waterbloom + Mortar (about ¾ of the way) + Cauldron
- Step 7: 1 Waterbloom + Mortar + Cauldron + Ladle
- Strong Potion of Hallucinations (Tier III): 2 Windbloom + 3Waterbloom + 1 Thunder Thistle + 2 Shadow Chanterelle
- Step 1: 1 Windbloom + Mortar + Cauldron
- Step 2: 1 Waterbloom + Mortar (about ¾ of the way) + Cauldron
- Step 3: 1 Windbloom + Mortar + Cauldron
- Step 4: 1 Thunder Thistle + Mortar + Cauldron
- Step 5: 1 Shadow Chanterelle + Mortar (about ¾ of the way) + Cauldron
- Step 6: 1 Waterbloom + Cauldron
- Step 7: 1 Shadow Chanterelle + Mortar + Cauldron + Ladle
Healing
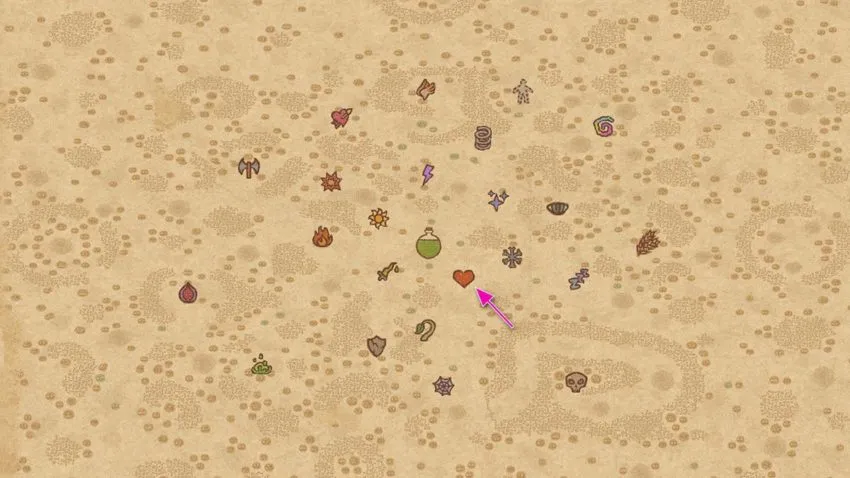
The Healing effect is located at the lower-right of the center of the Alchemy Map and is the first potion effect learned during the tutorial. It is one of the most-requested potions, used in the healing of wounds and diseases. There are three tiers of this potion, with many recipes, including:
- Weak Potion of Healing (Tier I): 1 Terraria + 1 Waterbloom
- Step 1: 1 Waterbloom + Mortar + Cauldron
- Step 2: 1 Terraria + Mortar + Cauldron
- Potion of Healing (Tier II): 1 Terraria + 1 Marshroom
- Step 1: 1 Terraria + Cauldron
- Step 2: 1 Marshroom + Mortar + Cauldron
- Potion of Healing (Tier II): 2 Terraria + 1 Waterbloom
- Step 1: 1 Terraria + Mortar + Cauldron
- Step 2: 1 Waterbloom + Mortar + Cauldron
- Step 3: 1 Terraria + Cauldron
- Potion of Healing (Tier II): 1 Terraria + 1 Waterbloom + 1 Goblin Shroom
- Step 1: 1 Waterbloom + Mortar + Cauldron
- Step 2: 1 Goblin Shroom + Mortar + Cauldron
- Step 3: 1 Terraria + Cauldron
- Potion of Healing (Tier II): 1 Waterbloom + 1 Weirdshroom
- Step 1: 1 Waterbloom + Mortar + Cauldron
- Step 2: 1 Weirdshroom + Mortar (only half-way) + Cauldron
- Strong Potion of Healing (Tier III): 2 Terraria + 1 Waterbloom
- Step 1: 1 Terraria + Mortar + Cauldron
- Step 2: 1 Waterbloom + Mortar + Cauldron
- Step 3: 1 Terraria + Cauldron + Ladle
- Strong Potion of Healing (Tier III): 1 Terraria + 1 Green Mushroom
- Step 1: 1 Green Mushroom + Mortar (stop just before full grind) + Cauldron
- Step 2: 1 Terraria + Cauldron
- Strong Potion of Healing (Tier III): 1 Terraria + 1 Waterbloom + 1 Goblin Shroom
- Step 1: 1 Waterbloom + Mortar + Cauldron
- Step 2: 1 Goblin Shroom + Mortar + Cauldron
- Step 3: 1 Terraria + Cauldron + Ladle
- Strong Potion of Healing (Tier III): 1 Waterbloom + 1 Weirdshroom
- Step 1: 1 Waterbloom + Mortar + Cauldron
- Step 2: 1 Weirdshroom + Mortar (only half-way) + Cauldron + Ladle
- Strong Potion of Healing (Tier III): 1 Waterbloom + 1 Brown Mushroom
- Step 1: 1 Waterbloom + Mortar + Cauldron
- Step 2: 1 Brown Mushroom + Mortar + Cauldron
- Strong Potion of Healing (Tier III): 1 Marshroom + 1 Brown Mushroom
- Step 1: 1 Marshroom + Mortar + Cauldron
- Step 2: 1 Brown Mushroom + Mortar + Cauldron + Ladle
- Strong Potion of Healing (Tier III): 2 Green Mushroom
- Step 1: 1 Green Mushroom + Mortar + Cauldron
- Step 2: 1 Green Mushroom + Cauldron + Ladle
Invisibility
The Invisibility effect is located above Mana on the Alchemy Map. It is an effect that can be taken to be invisible from everything except the Magical Vision effect. You can mix this potion with the following recipes:
- Potion of Invisibility (Tier II): 6 Windbloom + 4 Waterbloom
- Step 1: 1 Waterbloom + Mortar (about ⅓ of the way) + Cauldron
- Step 2: 2 Windbloom + Mortar + Cauldron
- Step 3: 1 Waterbloom + Mortar + Cauldron
- Step 4: 1 Windbloom + Mortar + Cauldron
- Step 5: 1 Waterbloom + Cauldron
- Step 6: 1 Windbloom + Mortar + Cauldron
- Step 7: 1 Waterbloom + Cauldron
- Step 8: 2 Windbloom + Mortar + Cauldron + Ladle
- Potion of Invisibility (Tier II): 5 Windbloom + 2 Waterbloom + 2 Witch Mushroom
- Step 1: 2 Witch Mushroom + Mortar + Cauldron
- Step 2: 2 Windbloom + Mortar + Cauldron
- Step 3: 1 Waterbloom + Cauldron
- Step 4: 1 Windbloom + Cauldron
- Step 5: 1 Windbloom + Mortar + Cauldron
- Step 6: 1 Windbloom + Cauldron
- Step 8: 1 Waterbloom + Cauldron + Ladle
Levitation
The Levitation effect is located above Lightning on the Alchemy Map. It is an effect that provides the user with flight. There are the following two recipes for this mix:
- Strong Potion of Levitation (Tier III): 5 Windbloom + 2 Firebell + 1 Witch Mushroom
- Step 1: 1 Firebell + Mortar (stop at the upper-right bend) + Cauldron
- Step 2: 4 Windbloom + Mortar + Cauldron
- Step 3: 1 Witch Mushroom + Mortar + Cauldron
- Step 4: 1 Windbloom + Mortar + Cauldron
- Step 5: 1 Firebell + Cauldron + Ladle
- Strong Potion of Levitation (Tier III): 6 Windbloom + 2 Firebell + 1 Waterbloom
- Step 1: 1 Firebell + Mortar (stop at the upper-right bend) + Cauldron
- Step 2: 4 Windbloom + Mortar + Cauldron
- Step 3: 1 Windbloom + Mortar (stop about half-way) + Cauldron
- Step 4: 1 Waterbloom + Mortar + Cauldron
- Step 5: 1 Windbloom + Mortar + Cauldron
- Step 6: 1 Firebell + Cauldron + Ladle
Libido
The Libido effect is located left of Poisoning on the Alchemy Map. It essentially functions as a love potion. There is only a single tier with a few recipes:
- Strong Potion of Libido (Tier III): 6 Firebell + 2 Terraria
- Step 1: 2 Firebell + Mortar + Cauldron
- Step 2: 2 Firebell + Mortar (about ¾ of the way) + Cauldron
- Step 3: 1 Firebell + Mortar + Cauldron
- Step 4: 1 Terraria + Mortar (about ¾ of the way) + Cauldron + Ladle
- Step 5: 1 Firebell + Mortar + Cauldron
- Step 6: 1 Terraria + Mortar + Cauldron + Ladle
- Strong Potion of Libido (Tier III): 3 Firebell + 1 Terraria + 2 Red Mushroom + 1 Thornstick
- Step 1: 1 Red Mushroom + Mortar + Cauldron
- Step 2: 1 Firebell + Mortar (about ¾ of the way) + Cauldron
- Step 3: 2 Firebell + Mortar + Cauldron
- Step 4: 1 Red Mushroom + Mortar + Cauldron + Ladle
- Step 5: 1 Terraria + Mortar + Cauldron
- Step 6: 1 Thornstick + Mortar + Cauldron
- Strong Potion of Libido (Tier III): 4 Firebell + 2 Terraria + 1 Red Mushroom
- Step 1: 1 Red Mushroom + Mortar + Cauldron
- Step 2: 1 Firebell + Mortar (about ¾ of the way) + Cauldron
- Step 3: 2 Firebell + Mortar + Cauldron
- Step 4: 1 Terraria + Mortar (stop about half-way) + Cauldron
- Step 5: 1 Firebell + Mortar + Cauldron
- Step 6: 1 Terraria + Mortar + Cauldron
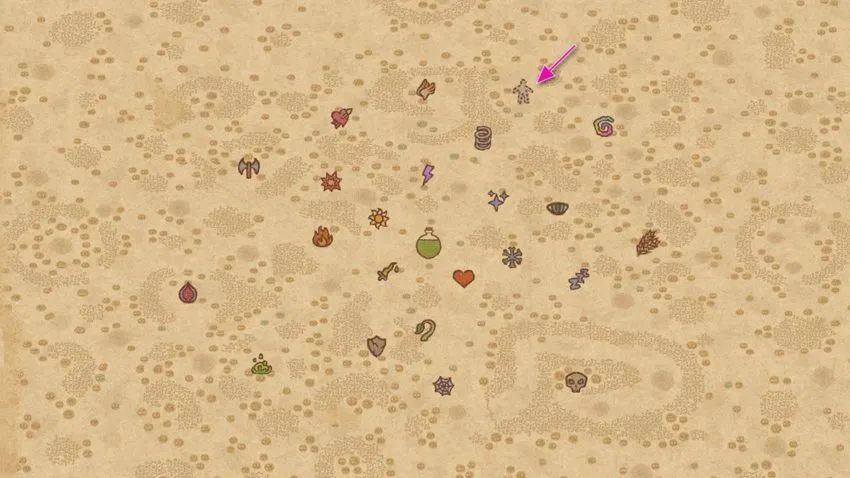
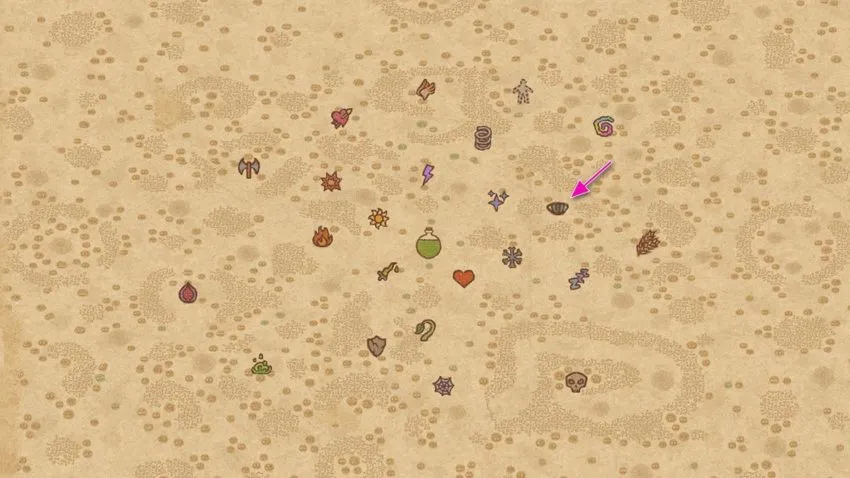
Light
The Light effect is located about up and right from the center of the Alchemy Map. It is an effect that provides light similar to a lightbulb. There is only a single tier with a few recipes:
- Strong Potion of Light (Tier III): 1 Windbloom + 2 Firebell
- Step 1: 1 Firebell + Mortar + Cauldron
- Step 2: 1 Windbloom + Mortar + Cauldron
- Step 3: 1 Firebell + Cauldron + Ladle
- Strong Potion of Light (Tier III): 1 Windbloom + 1 Red Mushroom
- Step 1: 1 Red Mushroom + Mortar + Cauldron + Ladle
- Step 2: 1 Windbloom + Mortar + Cauldron
- Strong Potion of Light (Tier III): 2 Sulphur Shelf
- Step 1: 1 Sulphur Shelf + Mortar + Cauldron
- Step 2: 1 Sulphur Shelf+ Mortar + Cauldron + Ladle
Lightning

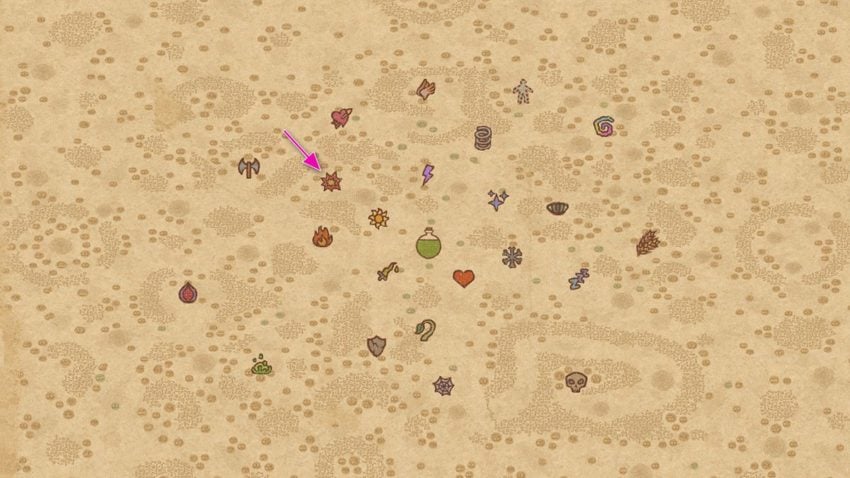
The Lightning effect is located above the center of the Alchemy Map. It is an effect that evokes lightning bolts and electrocution. There are potions of Tier I and Tier III representing this effect, with a few recipes:
- Weak Potion of Lightning (Tier I): 4 Windbloom + 1 Waterbloom + 1 Firebell
- Step 1: 1 Windbloom + Mortar + Cauldron
- Step 2: 1 Waterbloom + Mortar + Cauldron
- Step 3: 1 Windbloom + Mortar + Cauldron
- Step 4: 1 Windbloom + Mortar + Cauldron
- Step 5: 1 Firebell + Mortar + Cauldron + Ladle
- Step 6: 1 Windbloom + Mortar + Cauldron + Ladle
- Strong Potion of Lightning (Tier III): 3 Windbloom + 1 Waterbloom + 1 Firebell
- Step 1: 1 Windbloom + Mortar + Cauldron
- Step 2: 1 Waterbloom + Cauldron
- Step 3: 1 Windbloom + Mortar + Cauldron
- Step 4: 1 Firebell + Cauldron
- Step 5: 1 Windbloom + Mortar + Cauldron + Ladle
- Strong Potion of Lightning (Tier III): 1 Windbloom + 1 Shadow Chanterelle + 1 Firebell
- Step 1: 1 Shadow Chanterelle + Mortar (about ¾ of the way) + Cauldron
- Step 2: 1 Windbloom + Mortar + Cauldron
- Step 3: Use Whirlpool
- Step 4: 1 Firebell + Mortar + Cauldron + Ladle
- Strong Potion of Lightning (Tier III): 1 Sulfur Shelf + 1 Shadow Chanterelle + 1 Thunder Thistle
- Step 1: 1 Sulfur Shelf + Mortar + Cauldron
- Step 2: 1 Thunder Thistle + Mortar + Cauldron
- Step 3: 1 Shadow Chanterelle+ Mortar + Cauldron + Ladle
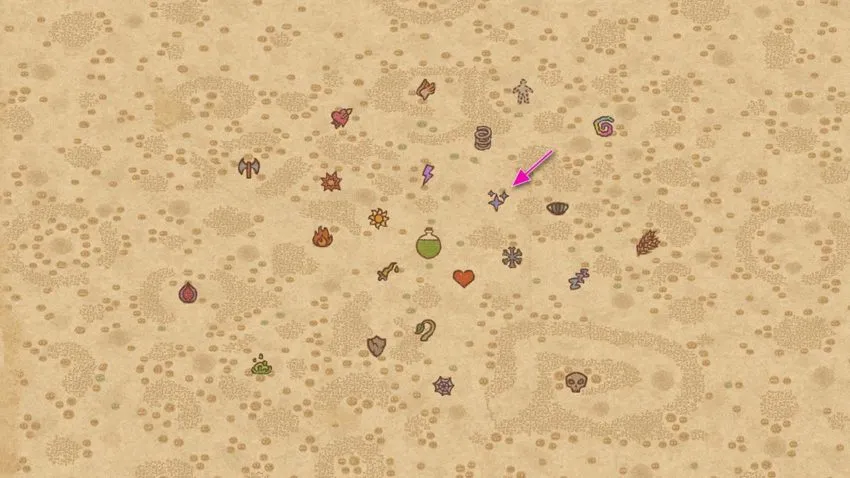
Magical Vision
The Magical Vision effect is located to the right of Mana on the Alchemy Map. This effect lets the imbiber see hidden and magical things. There are a couple of useful recipes to make Tier III of this potion:
- Strong Potion of Magical Vision (Tier III): 2 Windbloom + 4 Waterbloom
- Step 1: 1 Windbloom + Mortar + Cauldron
- Step 2: 3 Waterbloom + Mortar + Cauldron
- Step 3: 1 Waterbloom + Cauldron
- Step 4: 1 Windbloom + Cauldron + Ladle
- Strong Potion of Magical Vision (Tier III): 1 Windbloom + 3 Waterbloom + 1 Lumpy Beet
- Step 1: 1 Windbloom + Mortar + Cauldron
- Step 2: 3 Waterbloom + Mortar + Cauldron
- Step 3: 1 Lumpy Beet + Mortar (only about 20% of the way) + Cauldron + Ladle
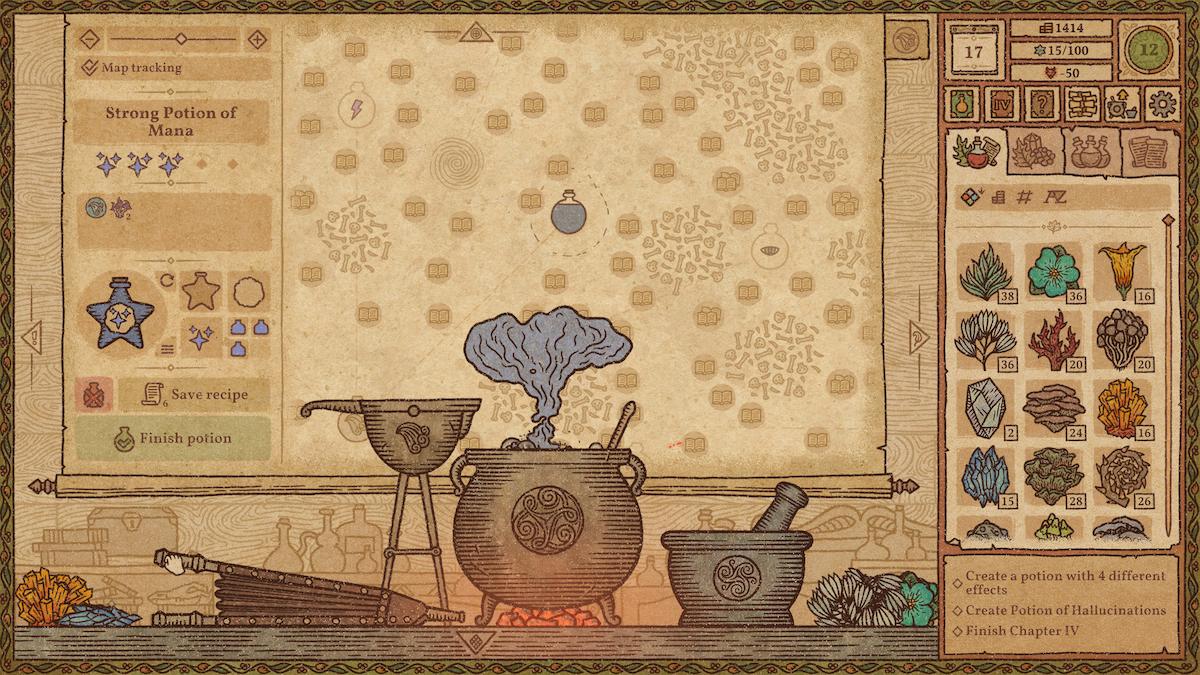
Mana
The Mana effect is located to the upper right from the center of the Alchemy Map. The user can recover their magical powers by drinking this potion. It is pretty easy to mix Tier III potions with these recipes:
- Strong Potion of Mana (Tier III): 2 Windbloom + 2 Waterbloom
- Step 1: 1 Windbloom + Mortar + Cauldron
- Step 2: 2 Waterbloom + Mortar + Cauldron
- Step 3: 1 Windbloom + Mortar + Cauldron + Ladle
- Strong Potion of Mana (Tier III): 1 Windbloom + 1 Waterbloom + 1 Shadow Chanterelle
- Step 1: 1 Windbloom + Mortar + Cauldron
- Step 2: 1 Waterbloom + Mortar + Cauldron
- Step 3: 1 Shadow Chanterelle + Mortar + Cauldron + Ladle
- Strong Potion of Mana (Tier III): 2 Witch Mushroom
- Step 1: 2 Witch Mushroom + Mortar + Cauldron + Ladle
- Strong Potion of Mana (Tier III): 1 Windbloom + 1 Waterbloom + 1 Witch Mushroom
- Step 1: 1 Witch Mushroom + Mortar + Cauldron
- Step 2: 1 Waterbloom + Mortar + Cauldron
- Step 3: 1 Windbloom + Mortar + Cauldron + Ladle
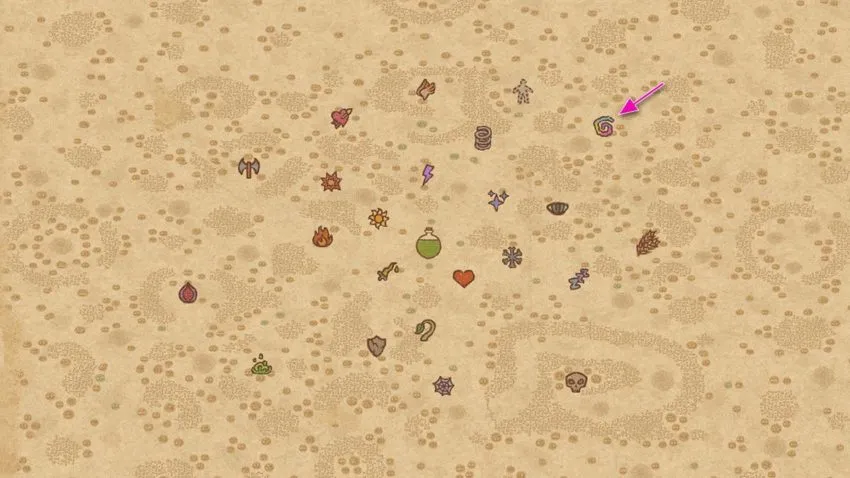
Necromancy
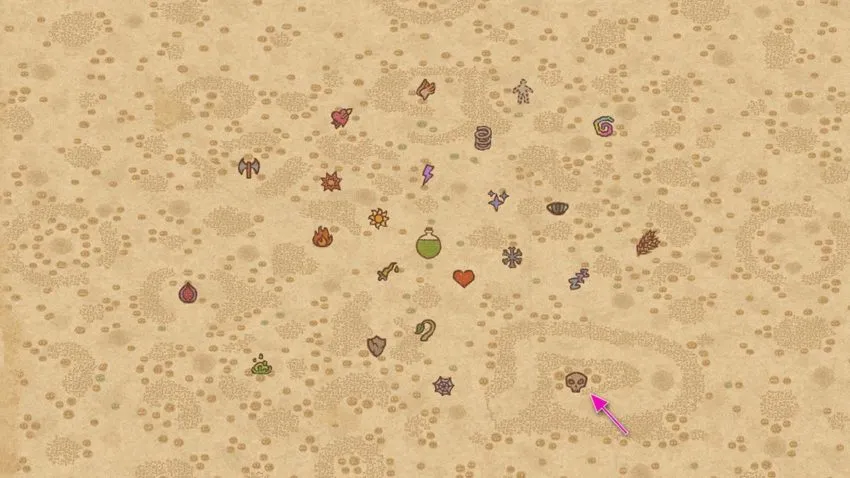
The Necromancy effect is located to the right from Slow Down on the Alchemy Map. These evil potions can bring your reputation down but are also some of the most lucrative. So to make gold with it, follow these recipes:
- Strong Potion of Necromancy (Tier III): 4 Marhsroom + 2 Earth Pyrite
- Step 1: 4 Marshroom + Mortar + Cauldron
- Step 2: 1 Earth Pyrite + Mortar (about 90% grind) + Cauldron
- Step 3: 1 Earth Pyrite + Mortar (until fully aligned) + Cauldron
- Strong Potion of Necromancy (Tier III): 6 Terraria + 4 Waterbloom + 1 Marshroom + 1 Green Mushroom
- Step 1: 1 Waterbloom + Mortar + Cauldron
- Step 2: 5 Terraria + Mortar + Cauldron
- Step 3: 1 Marshroom + Mortar + Cauldron
- Step 4: 2 Waterbloom + Mortar + Cauldron + Ladle (until you hit the upper-inside part of the spiral)
- Step 5: 1 Waterbloom + Mortar + Cauldron + Ladle
- Step 6: 1 Green Mushroom + Cauldron + Ladle
- Step 7: 1 Terraria + Mortar + Cauldron + Ladle (until it aligns for Tier III)
Poisoning
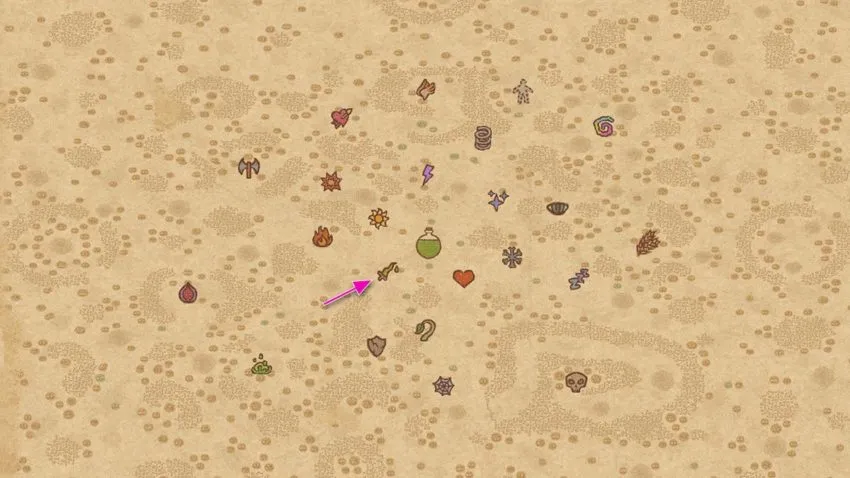
The Poisoning effect is located down and left from the center of the Alchemy Map. Like it says on the tin, its primary function is to poison those who ingest it. It’s pretty easy to make, and getting Tier III is simple with a few recipes:
- Strong Potion of Poisoning (Tier III): 1 Firebell + 1 Terraria + 1 Sulphur Shelf
- Step 1: 1 Firebell + Mortar + Cauldron
- Step 2: 1 Terraria + Mortar + Cauldron
- Step 3: 1 Sulphur Shelf + Mortar + Cauldron + Ladle
- Strong Potion of Poisoning (Tier III): 1 Firebell + 1 Thornstick
- Step 1: 1 Firebell + Cauldron
- Step 2: 1 Thornstick + Mortar + Cauldron + Ladle
- Strong Potion of Poisoning (Tier III): 1 Firebell + 2 Terraria
- Step 1: 1 Firebell + Mortar + Cauldron
- Step 2: 1 Terraria + Mortar (until it reaches the top of the bottle icon) + Cauldron
- Step 3: 1 Terraria + Cauldron
- Strong Potion of Poisoning (Tier III): 1 Terraria + 1 Red Mushroom
- Step 1: 1 Terraria + Mortar + Cauldron
- Step 2: 1 Red Mushroom + Mortar + Cauldron + Ladle
- Strong Potion of Poisoning (Tier III): 1 Firebell + 1 Goblin Shroom
- Step 1: 1 Goblin Shroom + Mortar + Cauldron + Ladle
- Step 2: 1 Firebell + Mortar + Cauldron + Ladle
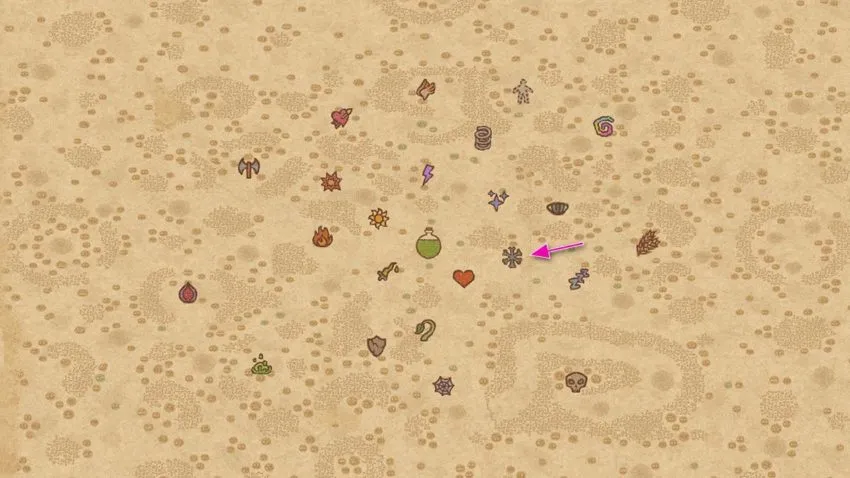
Rich Harvest
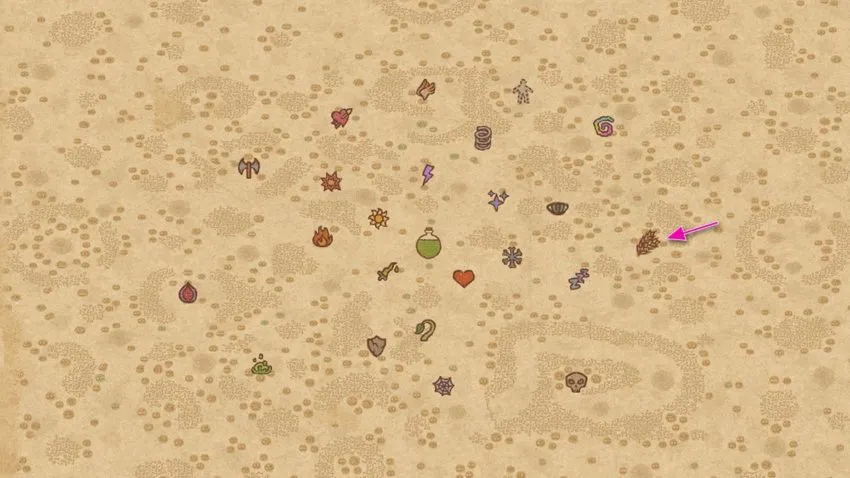
The Rich Harvest effect is located to the right of the center of the Alchemy Map. It helps the farmers with bountiful crops. There are a few recipes that can help you make this potion:
- Strong Potion of Rich Harvest (Tier III): 3 Tangleweed + 1 Marshroom + 1 Witch Mushroom
- Step 1: 1 Marshroom + Mortar + Cauldron
- Step 2: 2 Tangleweed + Mortar + Cauldron
- Step 3: 1 Witch Mushroom + Cauldron
- Step 4: 1 Tangleweed + Mortar + Cauldron + Ladle
- Strong Potion of Rich Harvest (Tier III): 1 Terraria + 7 Waterbloom
- Step 1: 1 Terraria + Cauldron
- Step 2: 6 Waterbloom + Mortar (about ¾ of the way) + Cauldron
- Step 3: 1 Waterbloom + Mortar (only half-way grind) + Cauldron + Ladle
- Strong Potion of Rich Harvest (Tier III): 1 Marshroom + 6 Waterbloom
- Step 1: 1 Marshroom + Mortar + Cauldron
- Step 2: 6 Waterbloom + Mortar (about ¾ of the way) + Cauldron
- Strong Potion of Rich Harvest (Tier III): 1 Terraria + 6 Waterbloom
- Step 1: 1 Terraria + Mortar (about ¾ of the way) + Cauldron + Ladle
- Step 2: 2 Waterbloom + Mortar + Cauldron
- Step 3: 3 Waterbloom + Mortar (about ¾ of the way) + Cauldron
- Step 4: 1 Waterbloom + Mortar + Cauldron + Ladle
Sleep
The Sleep effect is located far right from Healing on the Alchemy Map. Its effect will put the drinker to sleep, and there are several recipes to make this potion:
- Strong Potion of Sleep (Tier III): 1 Terraria + 5 Waterbloom
- Step 1: 1 Terraria + Mortar + Cauldron
- Step 2: 2 Waterbloom + Mortar + Cauldron
- Step 3: 1 Waterbloom + Mortar (only about a quarter of the way) + Cauldron
- Step 4: 2 Waterbloom + Mortar + Cauldron + Ladle (if needed)
- Strong Potion of Sleep (Tier III): 1 Weirdshroom + 4 Waterbloom
- Step 1: 1 Weirdshroom + Mortar (about ⅔ of the way) + Cauldron
- Step 2: 4 Waterbloom + Mortar + Cauldron + Ladle
- Strong Potion of Sleep (Tier III): 2 Terraria + 4 Waterbloom
- Step 1: 1 Terraria + Mortar (stop before the last bend) + Cauldron + Ladle
- Step 2: 1 Terraria + Mortar + Cauldron
- Step 3: 4 Waterbloom + Mortar + Cauldron
- Strong Potion of Sleep (Tier III): 1 Green Mushroom + 2 Tangleweed + 1 Goblin Shroom
- Step 1: 1 Green Mushroom + Mortar + Cauldron
- Step 2: 2 Tangleweed + Mortar + Cauldron
- Step 3: 1 Goblin Shroom + Cauldron + Ladle
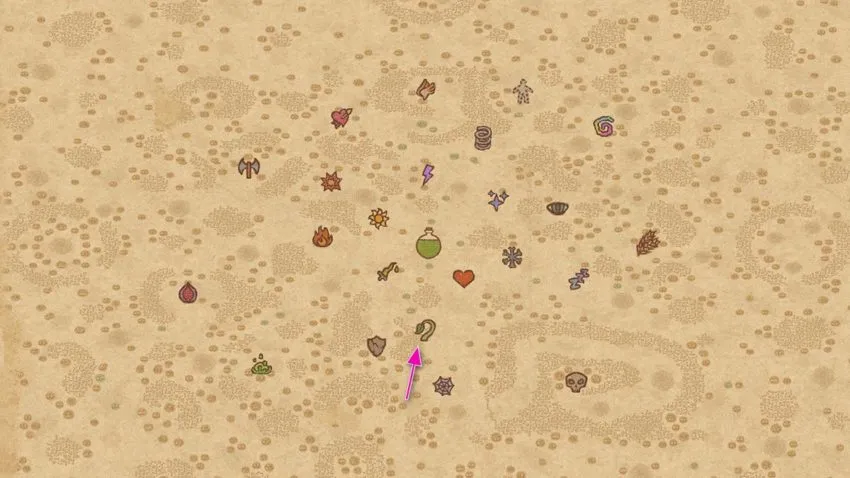
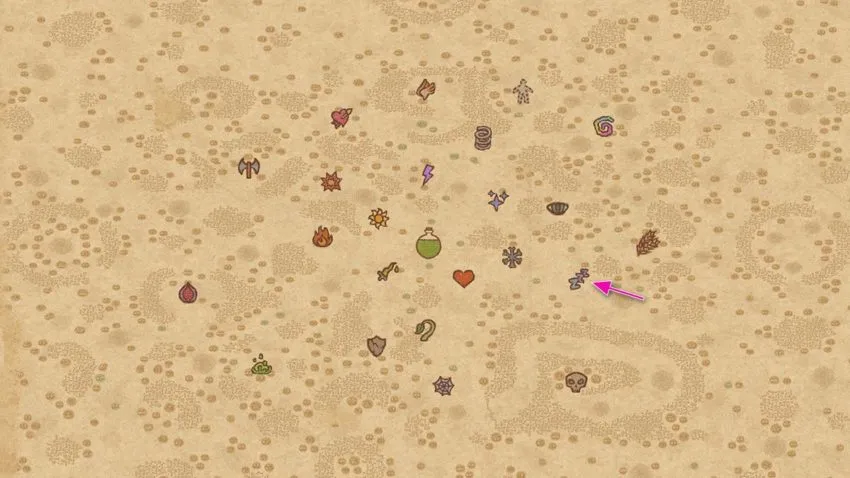
Slow Down
The Slow Down effect is located directly down from the center of the Alchemy Map. It has a slowing effect on whatever it’s administered to. There are a couple of useful recipes to mix this potion:
- Strong Potion of Slow Down (Tier III): 5 Terraria + 1 Goblin Shroom
- Step 1: 1 Goblin Shroom + Cauldron
- Step 2: 4 Terraria + Mortar + Cauldron
- Step 3: 1 Terraria + Cauldron + Ladle
- Strong Potion of Slow Down (Tier III): 1 Green Mushroom + 3 Brown Mushroom + 1 Dryad’s Saddle
- Step 1: 1 Green Mushroom + Mortar + Cauldron + Ladle
- Step 2: 3 Brown Mushroom + Mortar + Cauldron
- Step 3: 1 Dryad’s Saddle + Mortar (about ¾ of the way) + Cauldron
Stone Skin
The Stone Skin effect is located below Poisoning on the Alchemy Map. This effect grants the user tock-hard skin. There are a few recipes to make this potion in the strongest tier:
- Strong Potion of Stone Skin (Tier III): 5 Terraria + 1 Firebell
- Step 1: 1 Firebell + Mortar + Cauldron
- Step 2: 2 Terraria + Mortar + Cauldron
- Step 3: 2 Terraria + Mortar (about ¾ of the way) + Cauldron
- Step 4: 1 Terraria + Mortar + Cauldron + Ladle
- Strong Potion of Stone Skin (Tier III): 4 Terraria + 1 Thornstick
- Step 1: 1 Thornstick + Mortar (slightly over half grind)
- Step 2: 3 Terraria + Mortar (about ¾ of the way)
- Step 3: 1 Terraria + Mortar (about ¾ of the way) + Cauldron + Ladle
- Strong Potion of Stone Skin (Tier III): 4 Terraria + 2 Firebell
- Step 1: 1 Firebell + Mortar + Cauldron
- Step 2: 4 Terraria + Mortar + Cauldron
- Step 3: 1 Firebell + Cauldron + Ladle
- Strong Potion of Stone Skin (Tier III): 3 Terraria + 1 Firebell + Goblin Shroom
- Step 1: 1 Goblin Shroom + Mortar + Cauldron + Ladle
- Step 2: 1 Firebell + Mortar + Cauldron
- Step 3: 3 Terraria + Mortar + Cauldron
- Strong Potion of Stone Skin (Tier III): 1 Bloodthorn + 2 Weirdshroom + 1 Dryad’s Saddle
- Step 1: 1 Bloodthorn + Mortar (slightly under ¾ of the way) + Cauldron + Ladle
- Step 2: 2 Weirdshroom + Mortar (only a third of the way) + Cauldron
- Step 3: 1 Dryad’s Saddle + Mortar + Cauldron + Ladle


Published: Nov 22, 2022 07:15 am