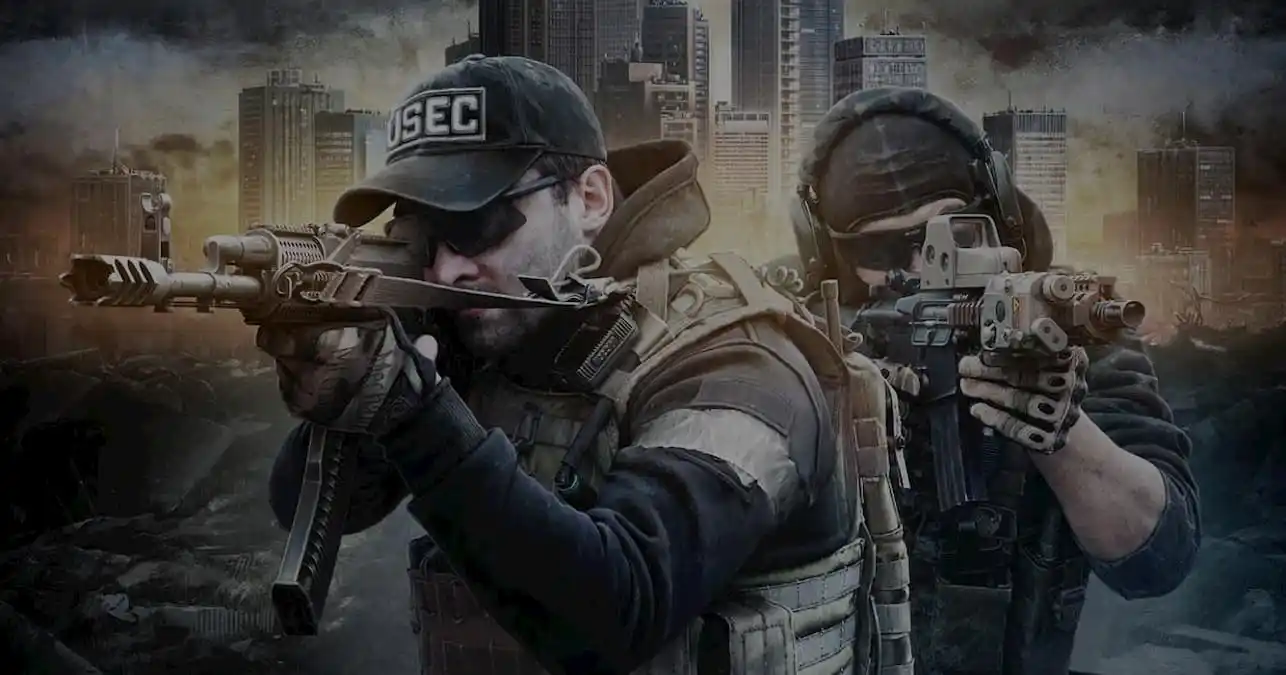
In the words of Robin Sparkles, “Let’s go to the mall, today.” Now, anyone that has ever binged How I Met Your Mother will be unable to dissociate this map with that song, you are welcome.
Interchange is a very fun map in Escape From Tarkov, but can be very frustrating to new players or to people who just aren’t experienced or well equipped for PVP. There is a massive amount of great loot on this map, which makes it very popular among players. While this map can seem intimidating at first, the relatively small size makes it pretty easy to learn for new players.
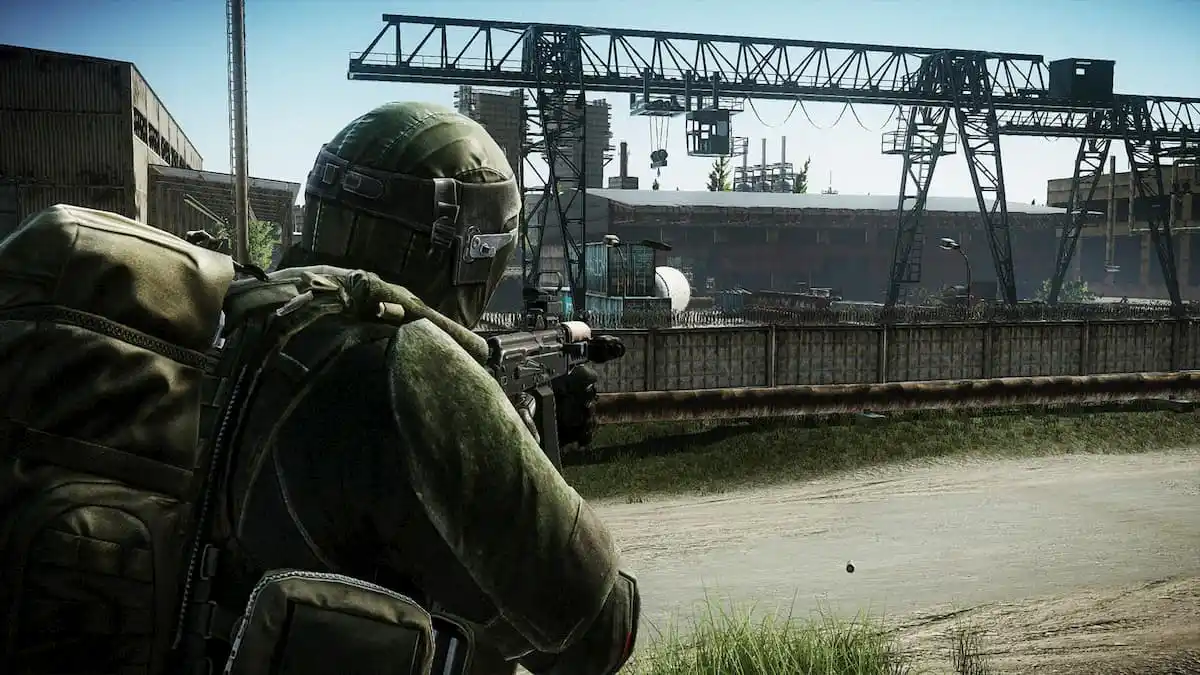
A big feature of this map is an abandoned shopping mall. The mall has a lot of storefronts and a ton of loose loot but can be pretty close quarters. The PVP and PVE aspects are part of what makes this map particularly fun as it is very easy to get into intense battles.
This map is best when you play with a team. A lot of players will raid this map as a squad making it particularly difficult for lone players. If you don’t have any friends that play Tarkov, you might want to consider getting it for them as an unbirthday present.
General layout
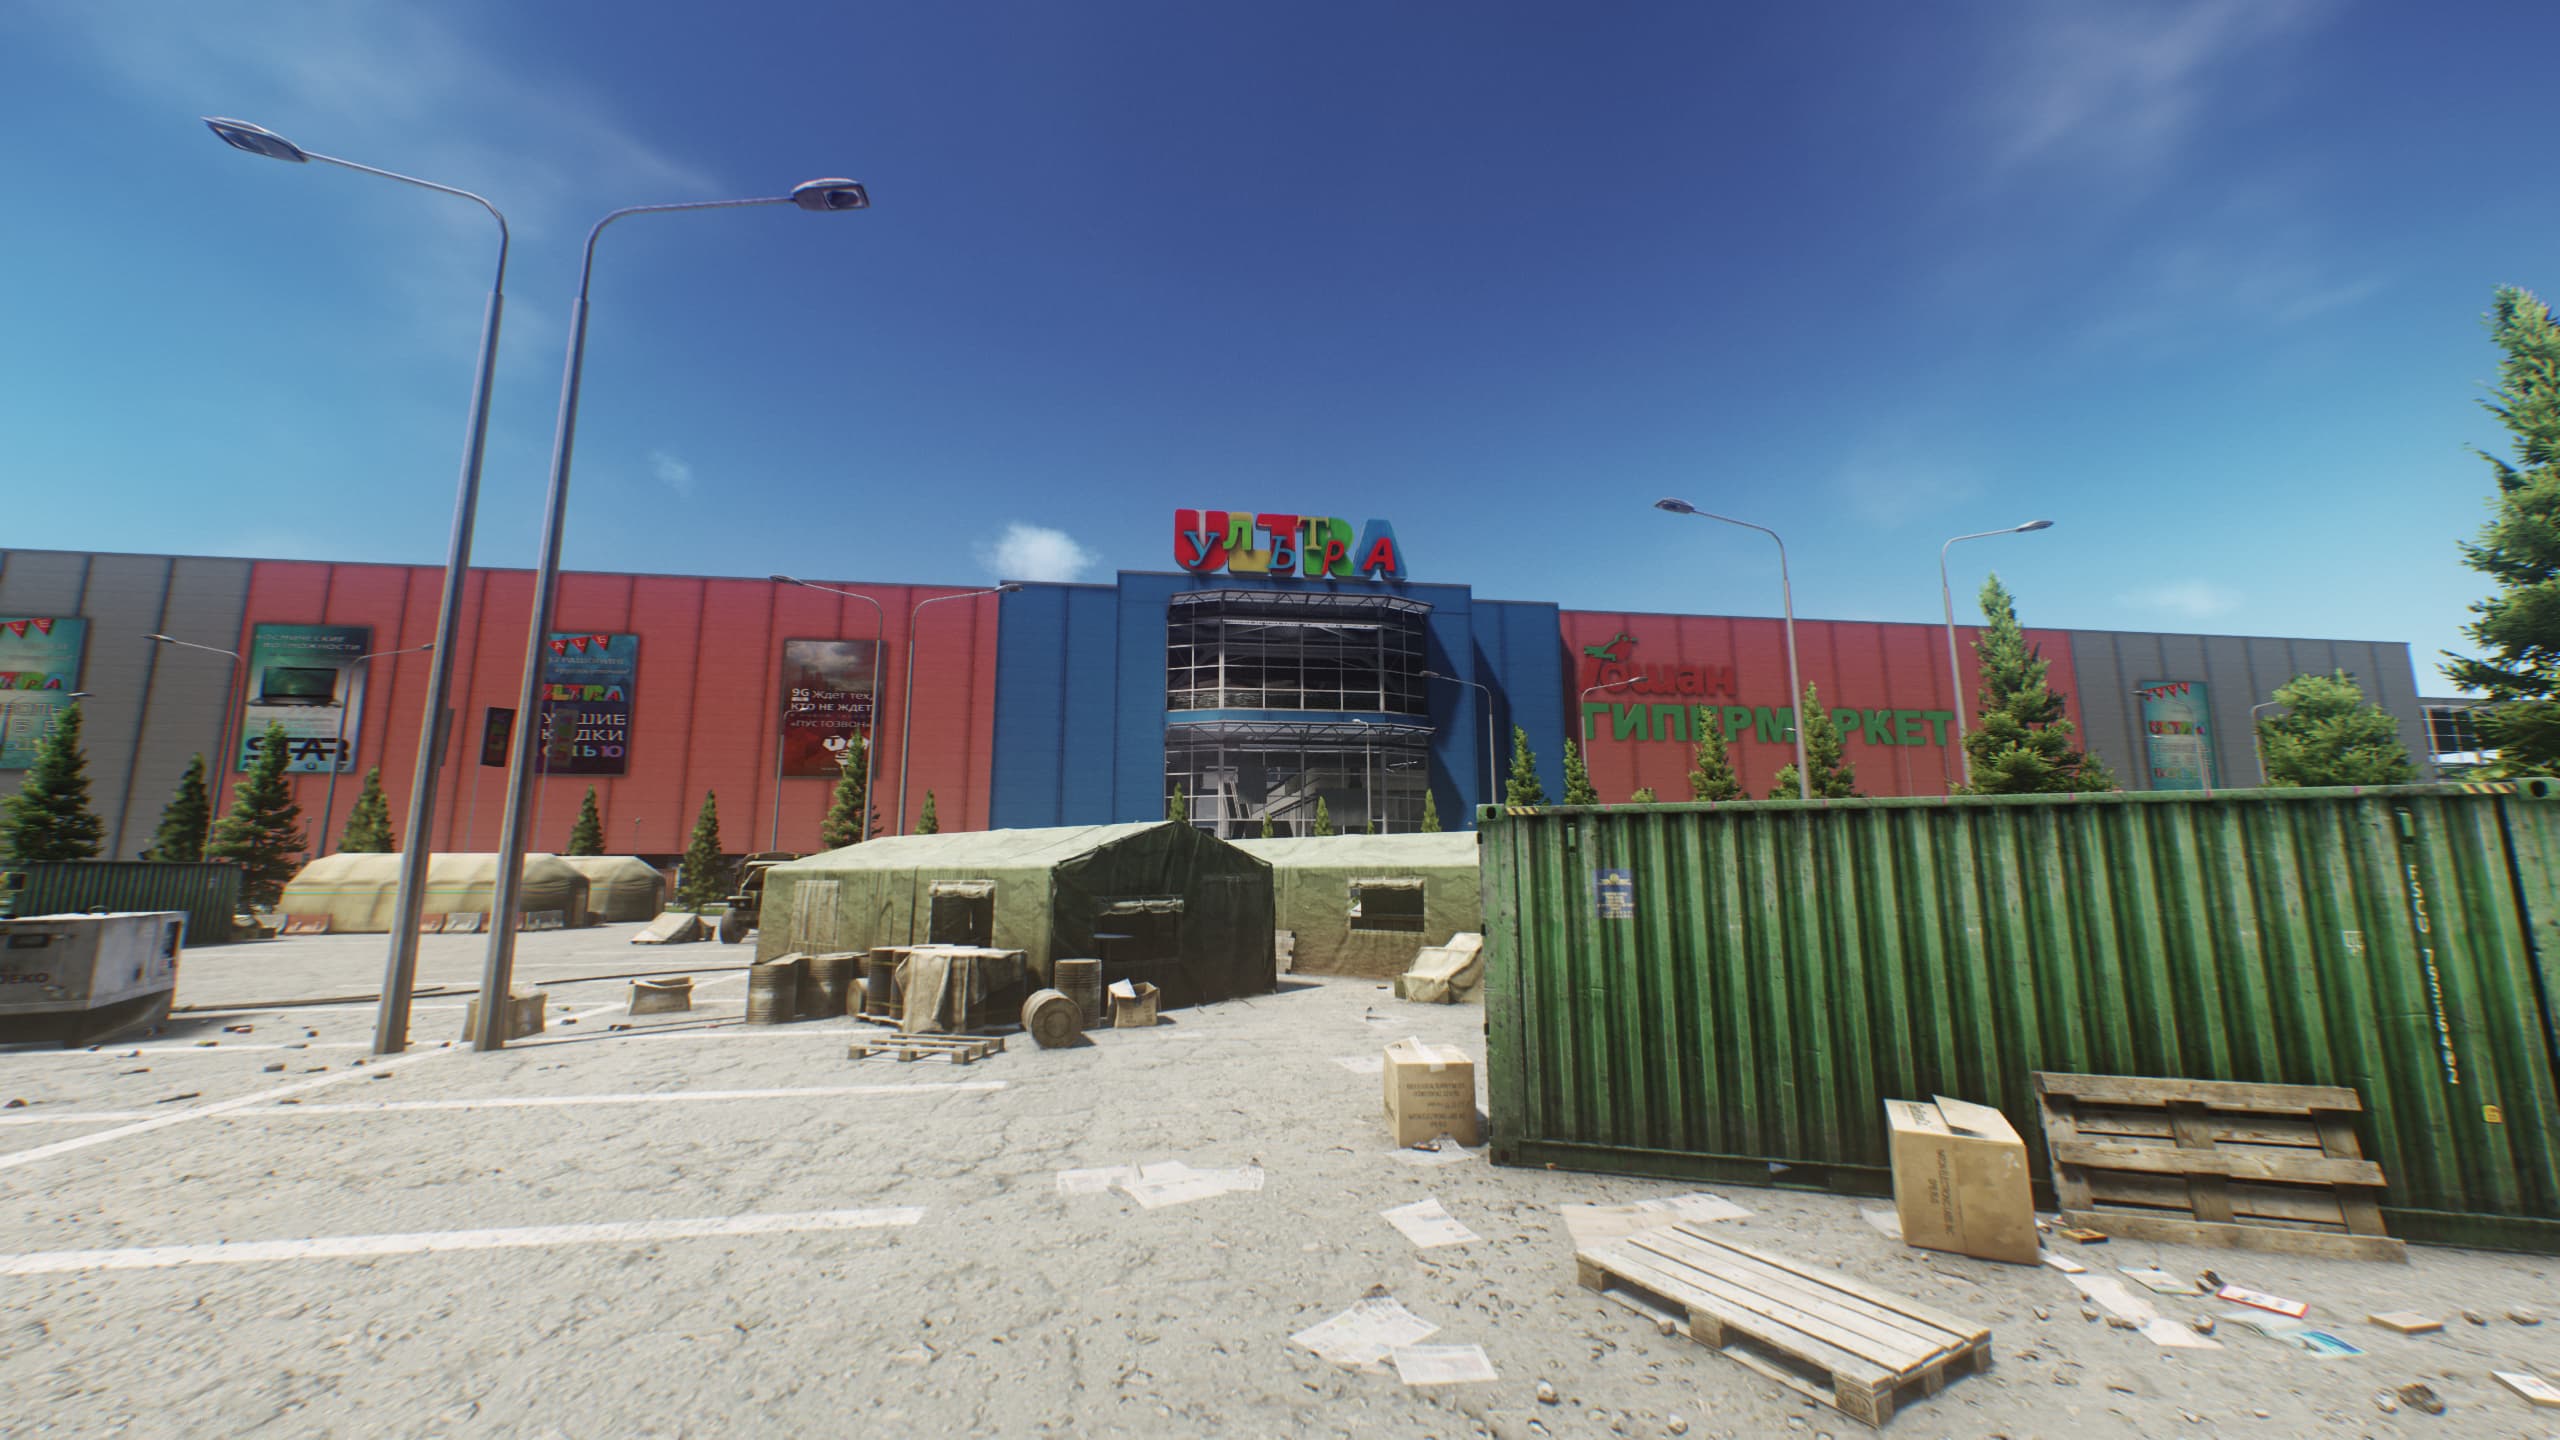
A good portion of the map is taken up by the “ULTRA Shopping Mall,” which was used during the evacuation of Tarkov. The mall certainly looks like a former evacuation site, with abandoned vehicles in the parking lot and garage and miscellaneous loot scattered all over the abandoned building. There is a large outdoor area of the map, but the loot there is not as plentiful as inside the mall.
Most of the early and late raid PVP takes place outside since most of the spawn points and extraction points are located outside. There are only a handful of extractions and spawn points, and it is fairly easy to memorize their locations making them prime targets for spawn camping.
There are a few notable locations in the outside area of the map. In the northwest region of the map is a railway. There are a handful of hidden stashes located in the area around the railway. This region acts as a spawn point for PMC players and is the location of the Railway Exfil extraction point. These are prime spots for spawn campers so it is a good idea to move out of the area quickly upon entering the game.
Outside the front of the ULTRA Mall are several parking lots. There is not a lot of loot in these lots, but there are some med bags and crates that can be looted. Separating the parking lots from the railway is a highway that runs the length of the map on the west side. Much like the parking lots, there isn’t a ton of great loot along the highway aside from some loose loot in abandoned cars, a few crates, and a couple of med bags on the northern and southern ends.
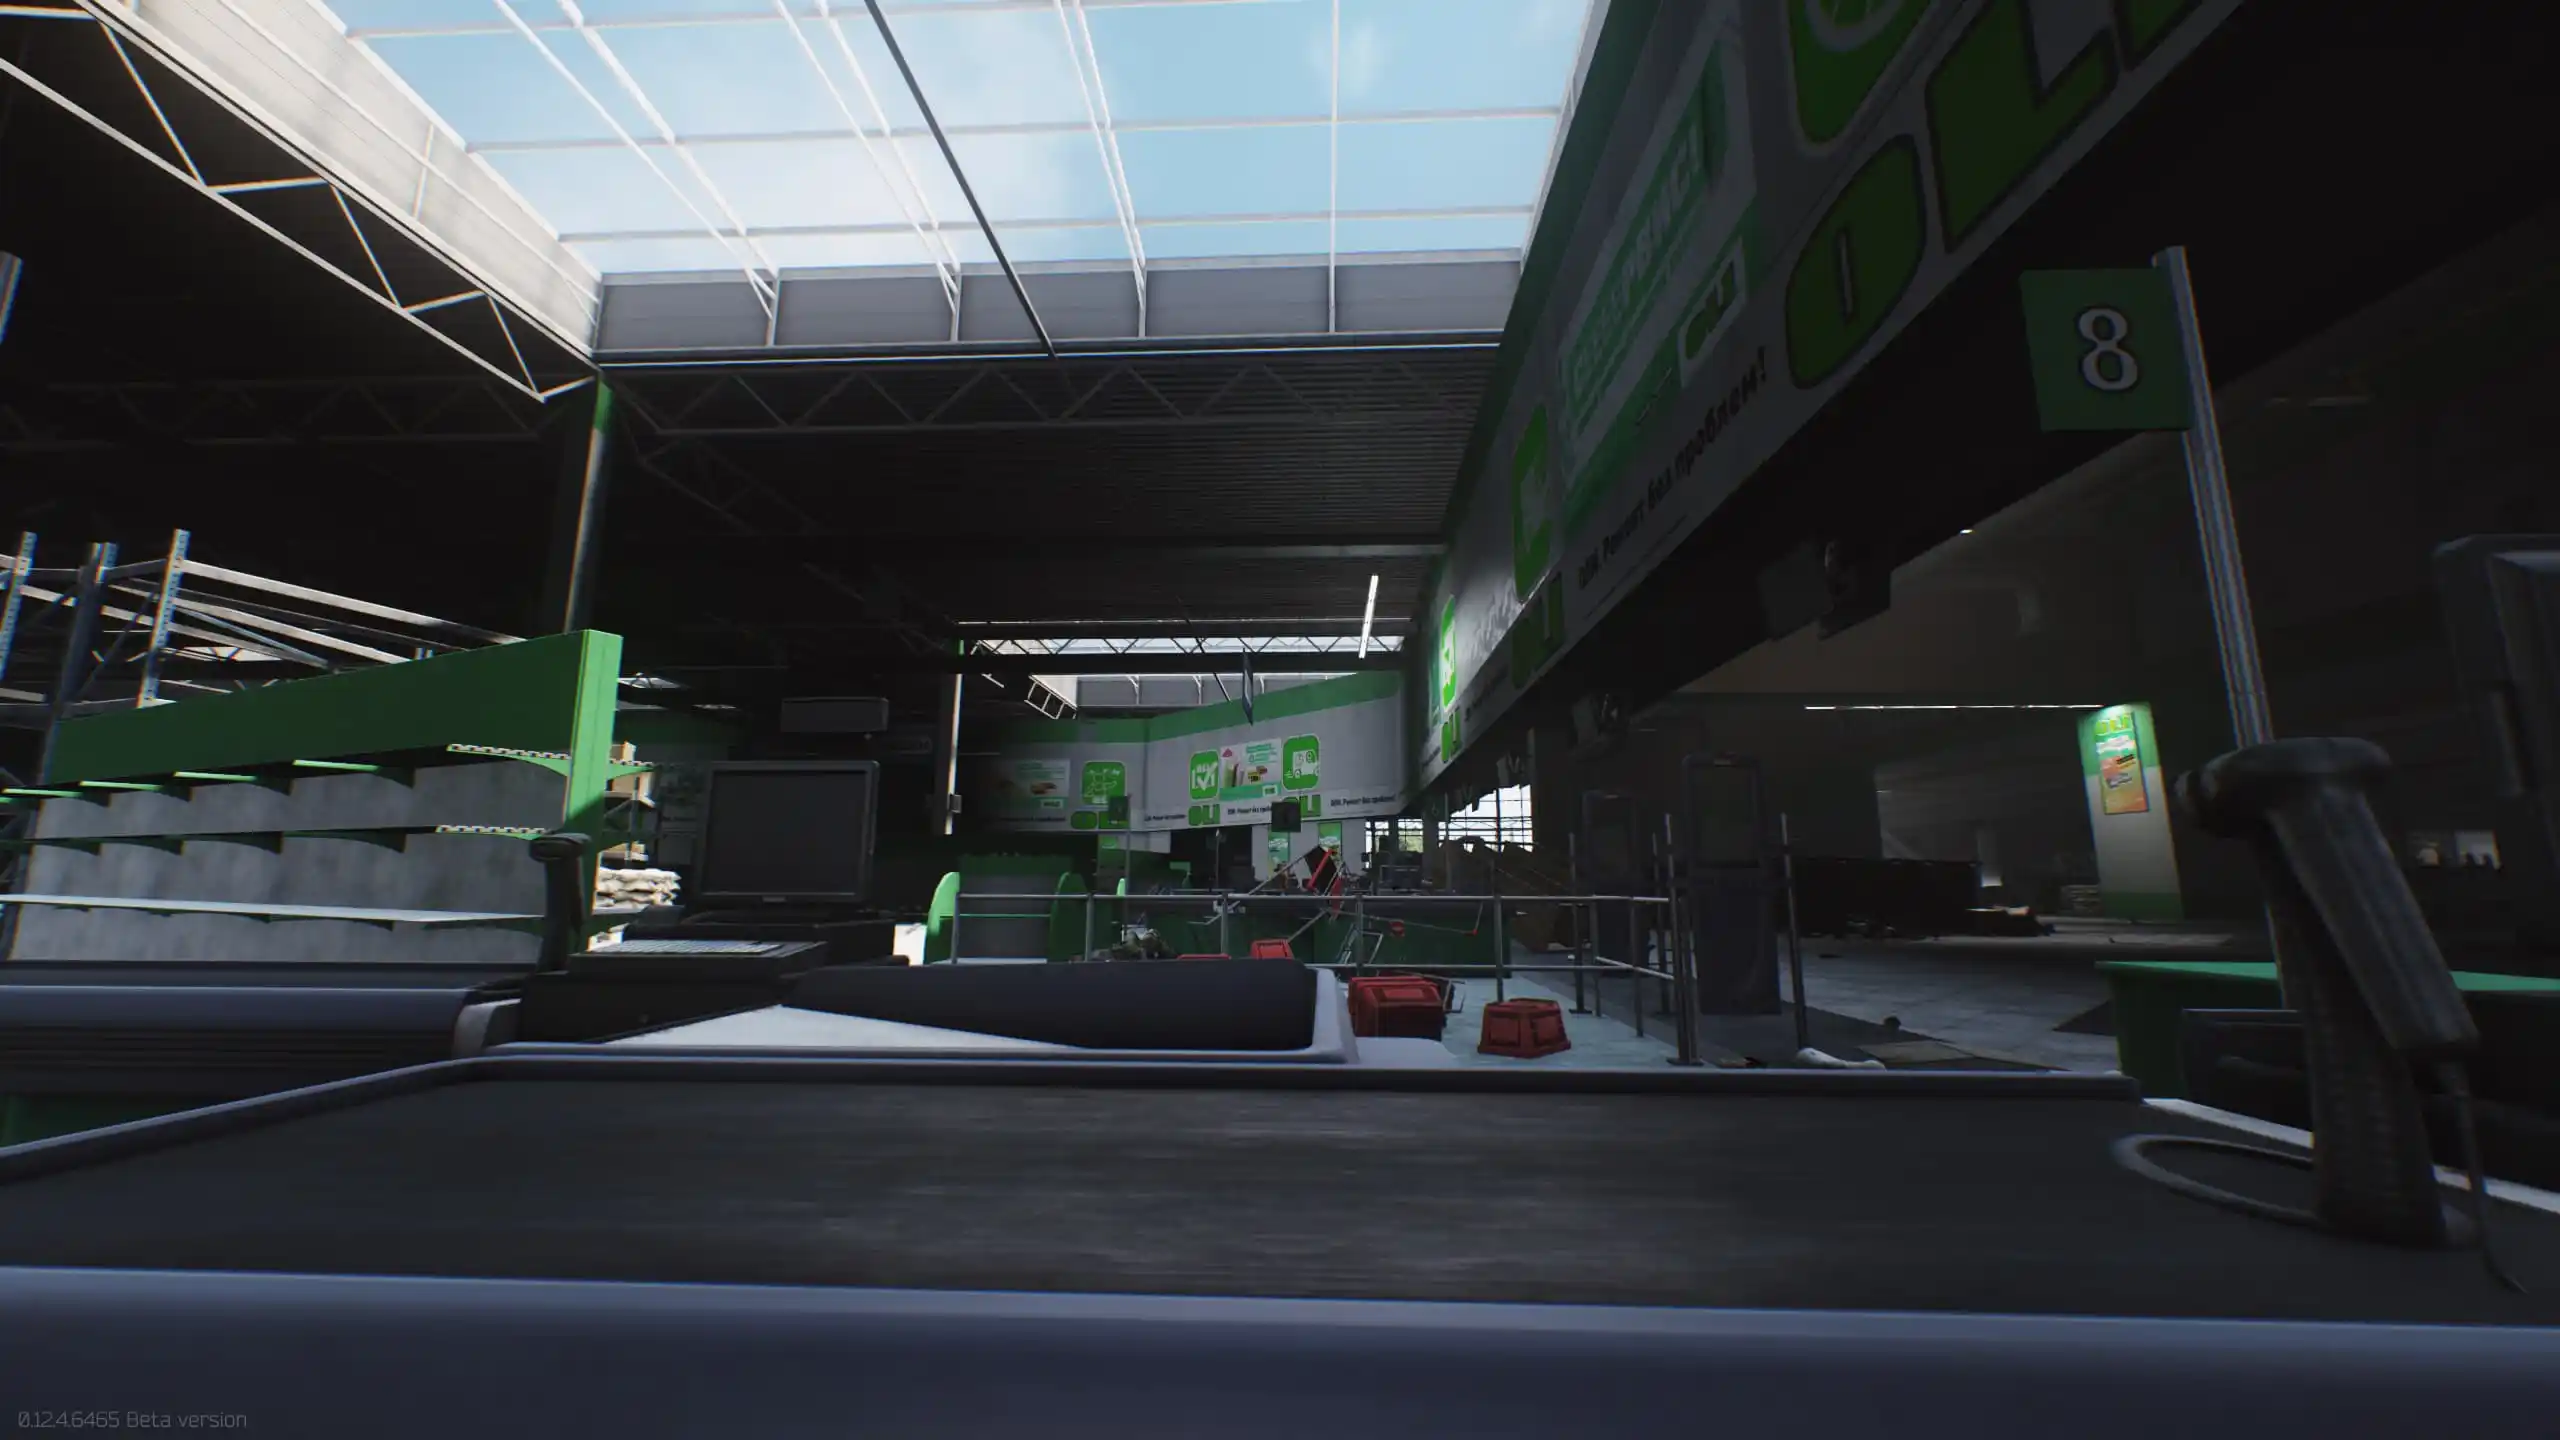
The southwest end is taken up primarily by the Emercom roadblock and the loading docks for Oli. This region is a spawn point for PMC players. The Oli loading ramps act as a good entrance for the mall proper through Oli. It is very easy to get into the parking garage by heading just north of the loading ramps. This area may be a good entrance, but it is also a busy one, so stay vigilant. The Emercom roadblock acts as an extraction point from the map but is a very popular area for spawn and extract campers.
Points of Interest
Garage
The parking garage is right underneath the ULTRA Mall and offers some of the best entrances and some great loot. If you aren’t interested in searching the garage a good rule of thumb is to just find some light a follow it till you hit an entrance. The garage is broken up into four lots starting with lot A on the north end and ending with lot D on the south end. It isn’t hard to tell which lot you are in as there are big letters painted on the walls.
The garage is filled with tents, shipping containers, and abandoned vehicles. Be sure to check in the back of any vehicles you see for weapon crates and loose loot. The tents also have weapons and loot crates that should be checked. If you don’t come with plenty of extra bag and pocket space you will fill up on loot very quickly just from the garage. The garage is also a good place to hunt scavs as there are a few groupings of scavs roaming the area.
Lot A is the northernmost area. Inside lot A in the northwestern corner is a pharmacy with some loose medical loot and hydrogen peroxide. To get in you will need the key to the pharmacy which is found either in the pockets and bags of Scavs or in room 315 on Shoreline in a frying pan. The staircase in lot A leads up to IDEA.
In the northernmost area of lot A is also where Killa’s stash becomes available after flipping the switch in the saferoom exfil. Killa’s stash is a hidden stash that can be found in a red shipping container on the northernmost side of lot A. This container is hidden behind a grouping of other containers near the northern entrance to lot A. Start from the orange truck just outside of lot A and head inside of the lot. There will be a grouping of several containers up against the wall on your right. Go around to the back of the containers to find a small hidden area. The container with the open door is the stash.
South of lot A is lot B. Lot B has some loose loot and weapon crates on the southern side of it. There are a few tents around the center of the lot that can have some weapon crates and loose loot inside.
Lot C is where the saferoom extraction is located. To loot the saferoom you will need to turn on the power at the power plant in the northeast corner of the map. There are a couple of weapon crates on the eastern side of lot C.
The southernmost lot in the parking garage is lot D. Like all of the other lots there is weapon crate and some loose loot in lot D. This lot has a staircase that leads up into Oli.
On the southern end of the garage is a hole in the ceiling that leads up to the first floor of the mall. This is a very busy entrance and should be approached with caution as it is popular among players. The hole in the floor will also dump you out near the area Killa likes to patrol so don’t go sprinting out of it without looking.
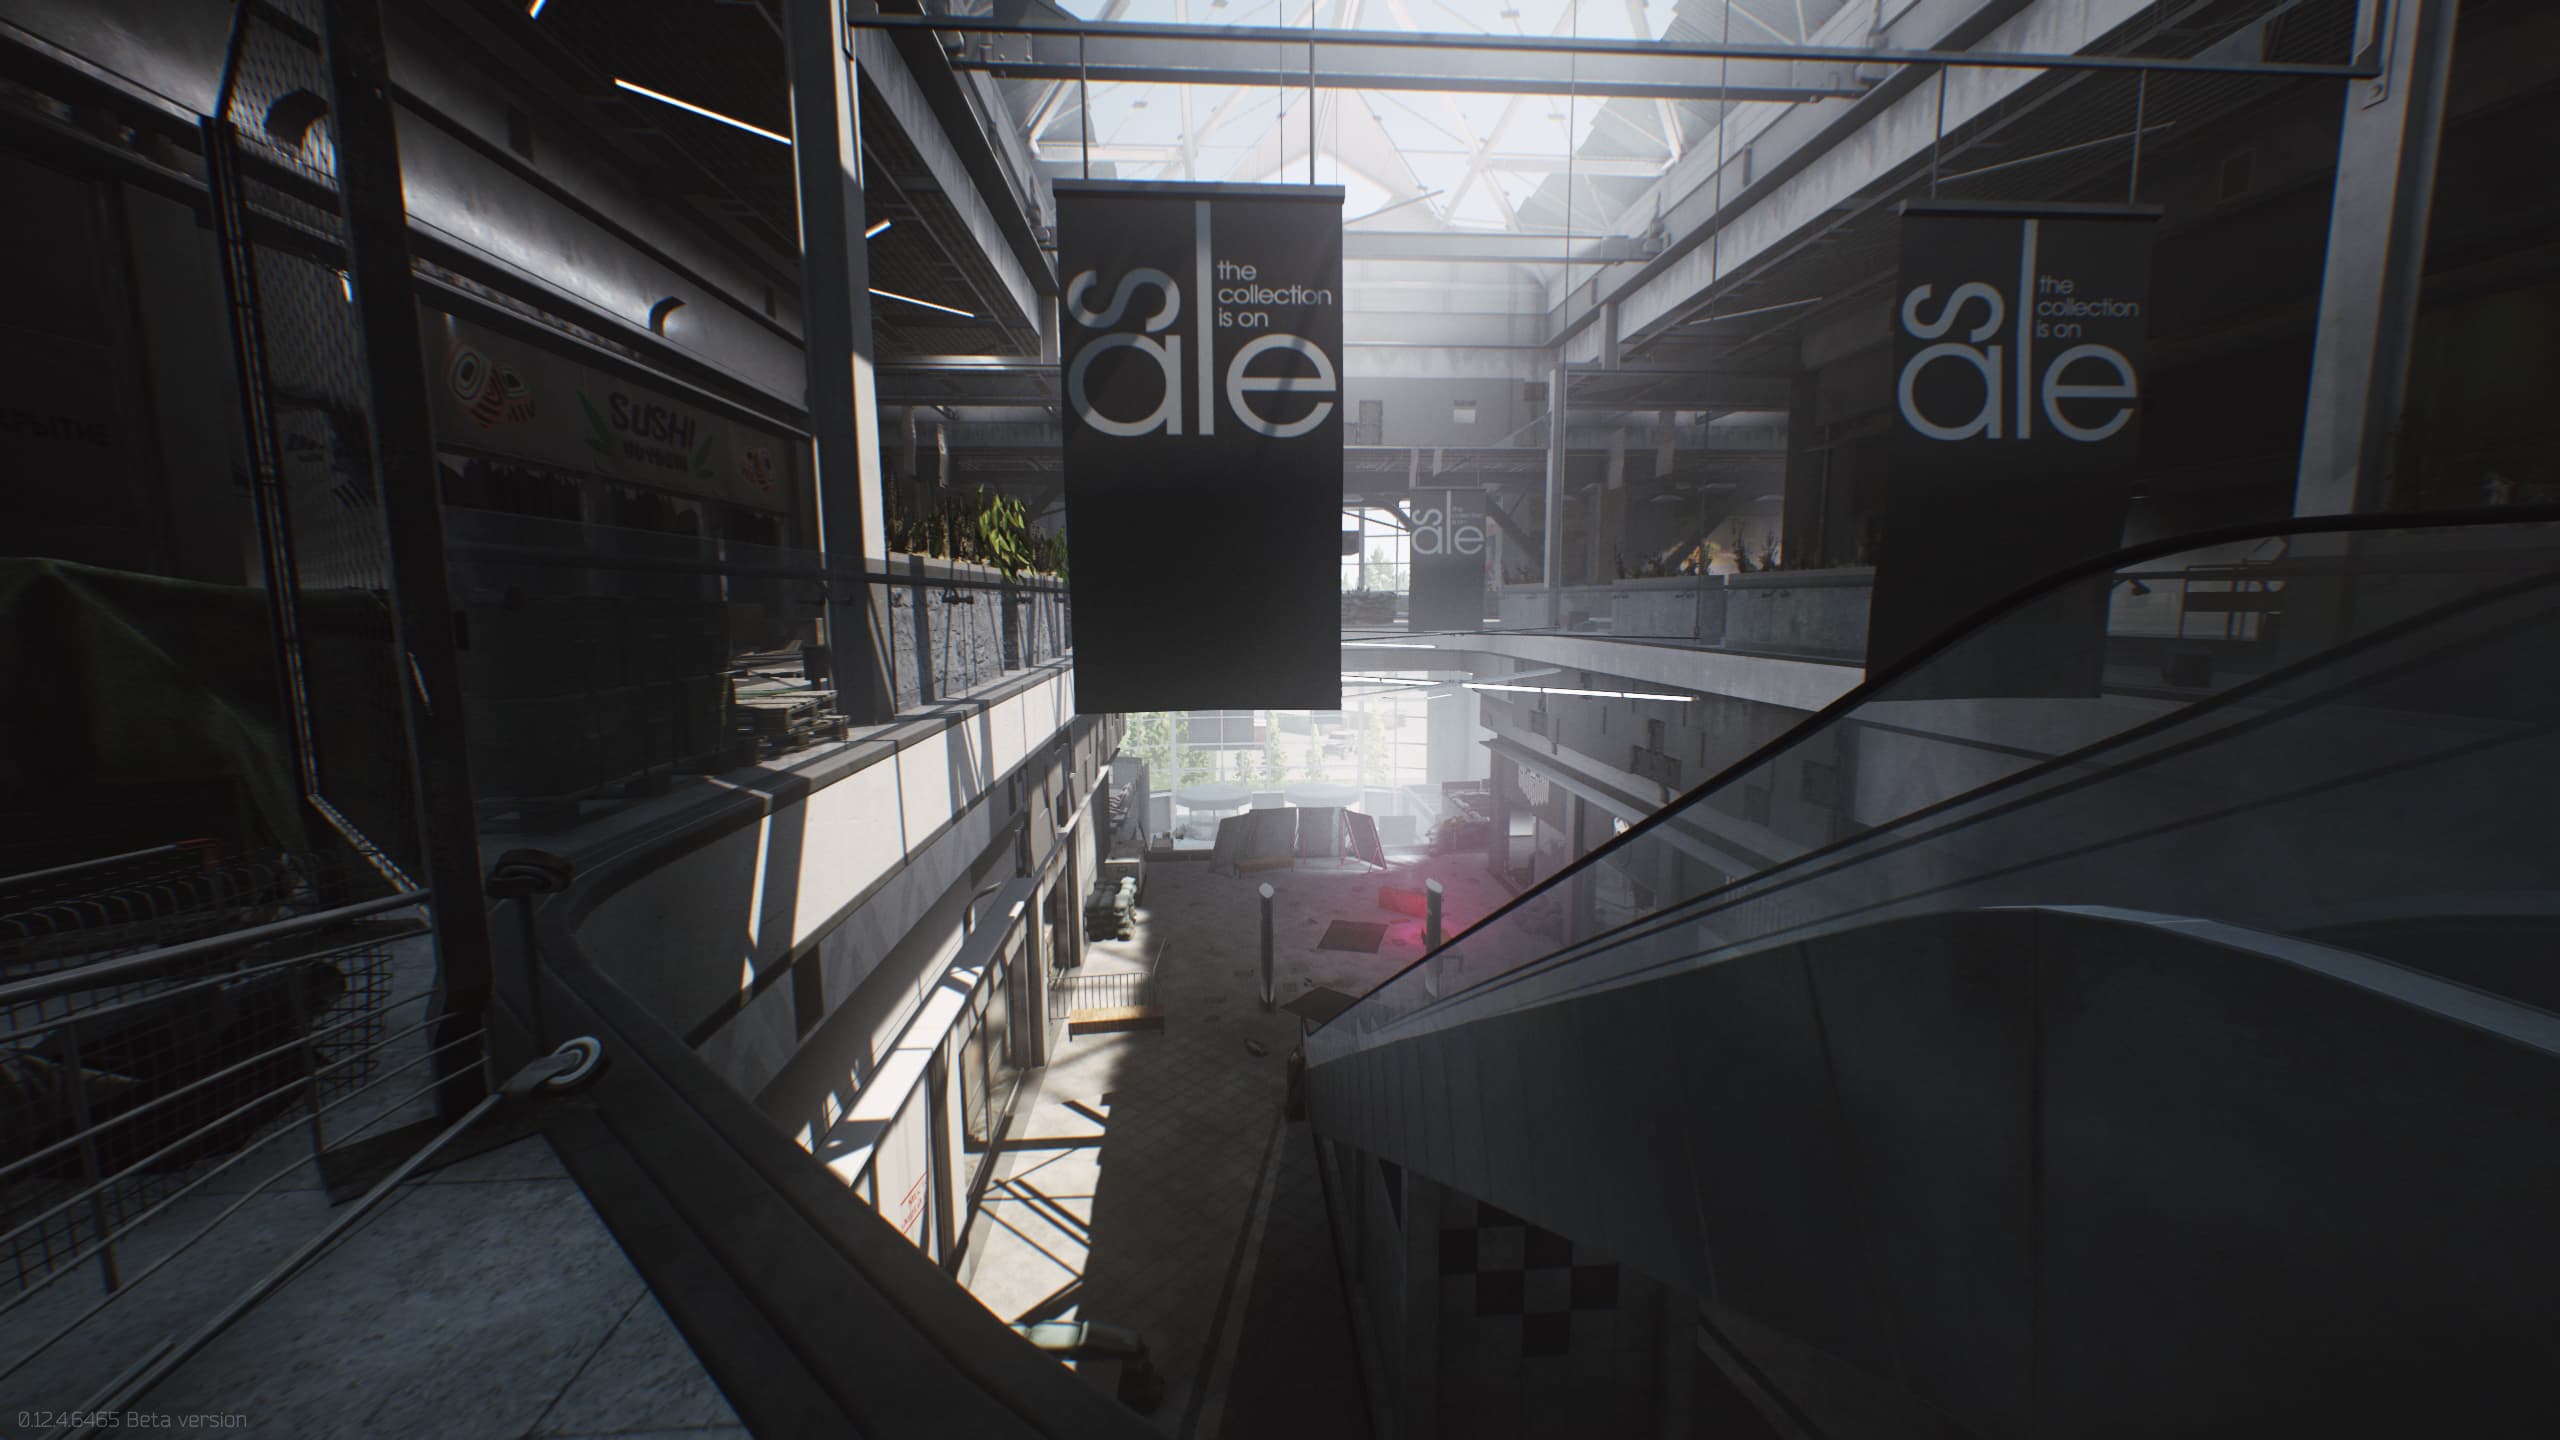
Common Area
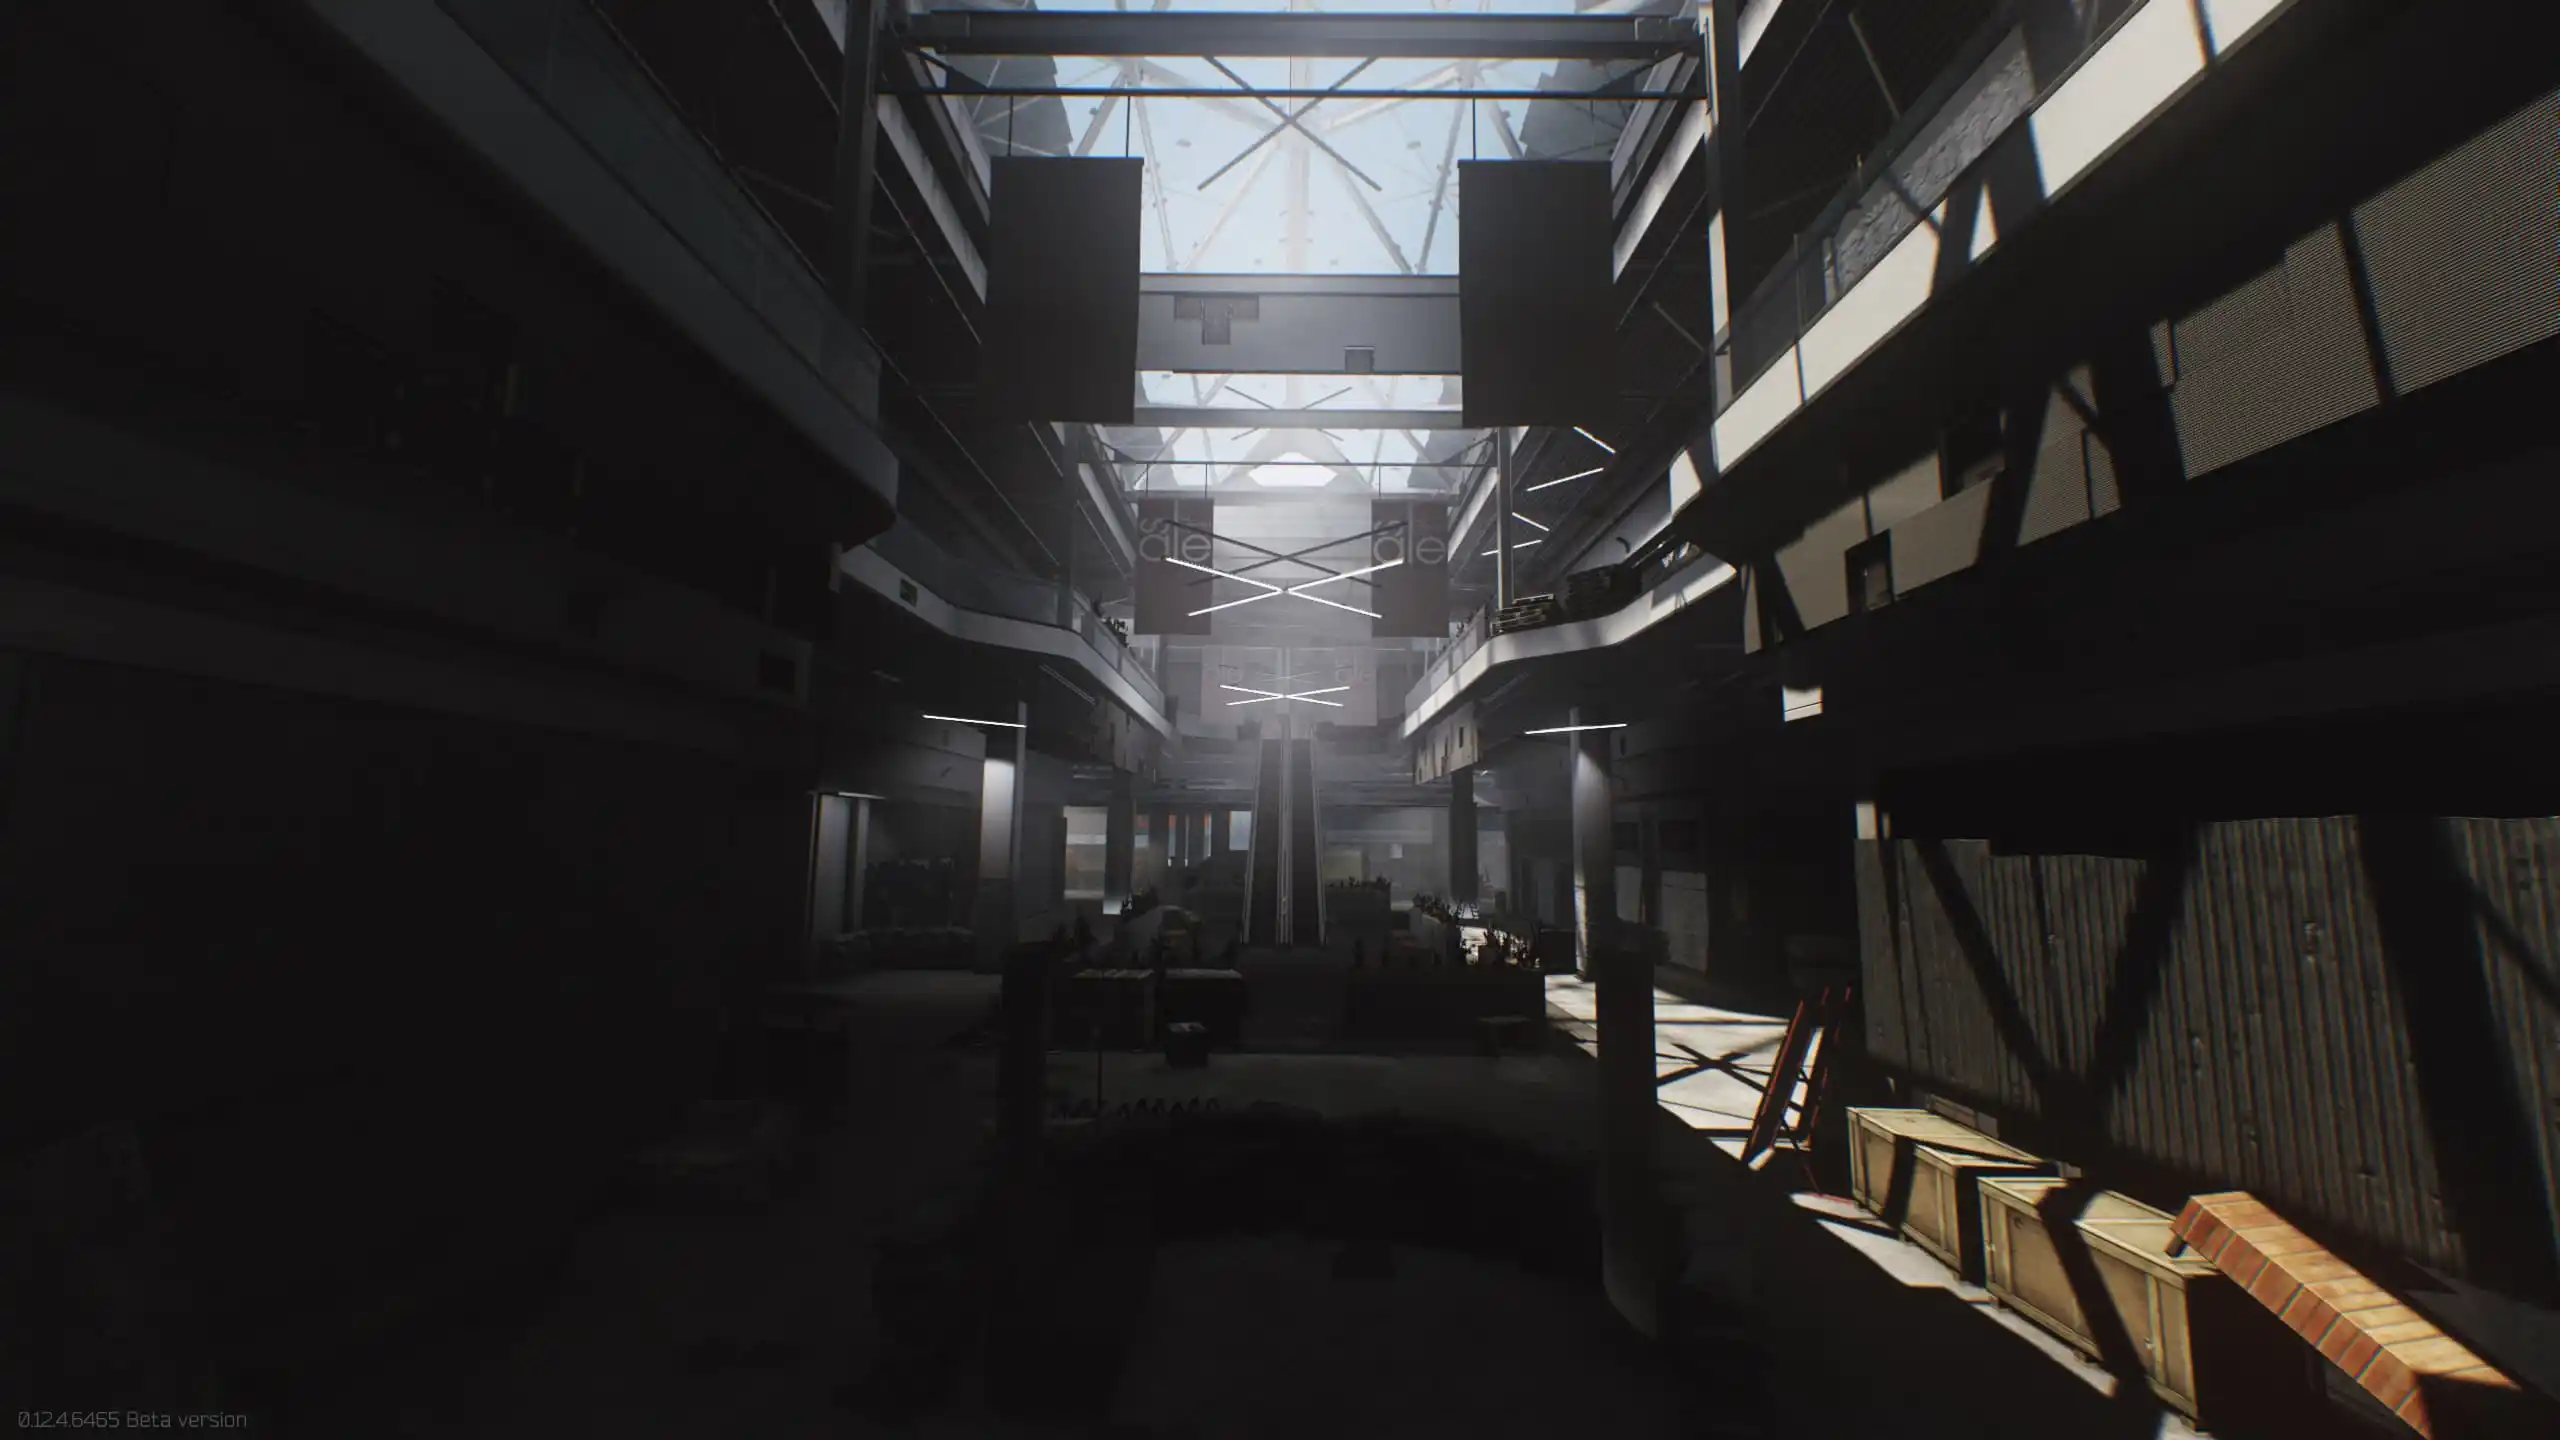
This area is the central region of the mall bordered on the north by IDEA, the east by Goshan, and the south by Oli. There are a bunch of smaller storefronts in the common area like Kiba and Emercom. There are four escalators that run through the middle of the common area leading to the next floor. The common area is pretty symmetrical on both the first and second floors aside from some debris and a giant hole in the floor on the southern end.
Three shops that should be noted on the first floor of the common area are Emercom, Mantis, and Kiba. There are several small shops in the common area each with tons of loose loot. Kiba, Mantis, and Emercom are special due to both the abundance of loot and that they are locked. Mantis and Emercom both have caches of medical supplies while Kiba has multiple weapon crates, registers, and armor or clothing.
From the front entrance of the mall, Mantis is on the left next to the second elevator. Mantis has several med boxes available to loot. The first is to the right of the door when you first enter from the main concourse. There are more meds on the shelves in the back corner along with a jacket. Gold chains and horse figurines can spawn on the shelves throughout the store.
Emercom is on the northern side of the grouping of stores with Mantis. Going out the main door of Mantis towards the escalator just turn left and stick to the wall all the way around to the other side of the grouping of stores and you should end up at Emercom on the northern side. The key needed to get into Emercom is found on customs. Like mantis, Emercom has a ton of med boxes along with a weapon box, jacket, and loose loot. Pain killers are also fairly common in this storefront if you need them.
Across the concourse from Mantis is a store called Brutal, Brutal has some loose loot and tools including clothes. Turn the corner going around Brutal and Kiba will be on your left across the concourse. Kiba requires two keys to enter, the grate key and the store key. The grate key is a reward for completing the Gunsmith – Part 11 quest for Mechanic. The store key can be found on scavs as well as in the power station and in Goshan. In Goshan there is a campsite, the key is on a book behind one of the tents. In the power plant, it is on top of a box on a shelf in the admin room. Kiba has tons of loot spawns. It is possible to find heavily modified weapons and grenades in Kiba along with money.
South of Kiba near the hole going down to the parking garage is a small corner store called Generic. Right outside are some weapon crates on a pallet that tend to spawn grenades. Generic can have a few weapon crates including the possibility of a sniper rifle in one of the lockers against the walls. There is also the possibility of gold chains and horses spawning inside the store.
Before you finish up on the first floor and head upstairs be sure to go by the kid’s train on the northern end near IDEA. If you go towards IDEA and turn left on the concourse towards the escalator you will see a small train reminiscent of Casey Jr. Inside of the train is a dead scav that can have some good loot that is worth grabbing as you head upstairs.
Second Floor
The second floor of the building isn’t as big as the lower floors but can be a lot busier. There is a fair amount of loot on the second floor and tons of cover. This is a close-quarters area with plenty of places to hide. You can reach it from the escalators in the center of the common area and near each of the anchor stores. Some new players will try to camp in the open areas near the central escalators as they offer a nice overlook of the first-floor concourse. Camping in these areas isn’t actually a great idea though because it is exactly where most experienced FPS players would expect a camper to be. Some of these overlooks are also well within the range of Killa making it easy to be picked off.
This floor is mainly a food court with a large number of restaurants. There are a few clothes and tech shops on the northern and southernmost ends but the majority of the stores are food-related. The majority of the loot on this floor is loose loot and cash registers along with a few weapon crates, jackets, and armor. On the northern end is a grouping of six stores surrounded by concourse. The center storefront on the western side is full of medical loot spawns.
If you head to the front of the mall from the central area of the second floor you will find a weapon crate. Turn left or right and there will be several small stores on either side with lootable cash registers. The southernmost area of the second floor is very popular. If you head to the southeastern corner of the second floor you will find a store called Techlight. Techlight has some tech loot like gphones, fuel conditioners, and gas analyzers as well as a weapon spawn. Across the concourse from Techlight is a store with some medicine in the back near the northern wall. Further down the concourse near the southeastern end is Urban Clothes. If you go past Urban Clothes and keep heading east you will find a couple of weapon boxes against the wall.
There are a lot of small back doors and hallways that can make for an easy escape from other players on this floor. Just be sure to close any doors behind you if you plan on hiding and waiting out other players. You can also vault over the counters in the food stores for some quick cover.
Goshan
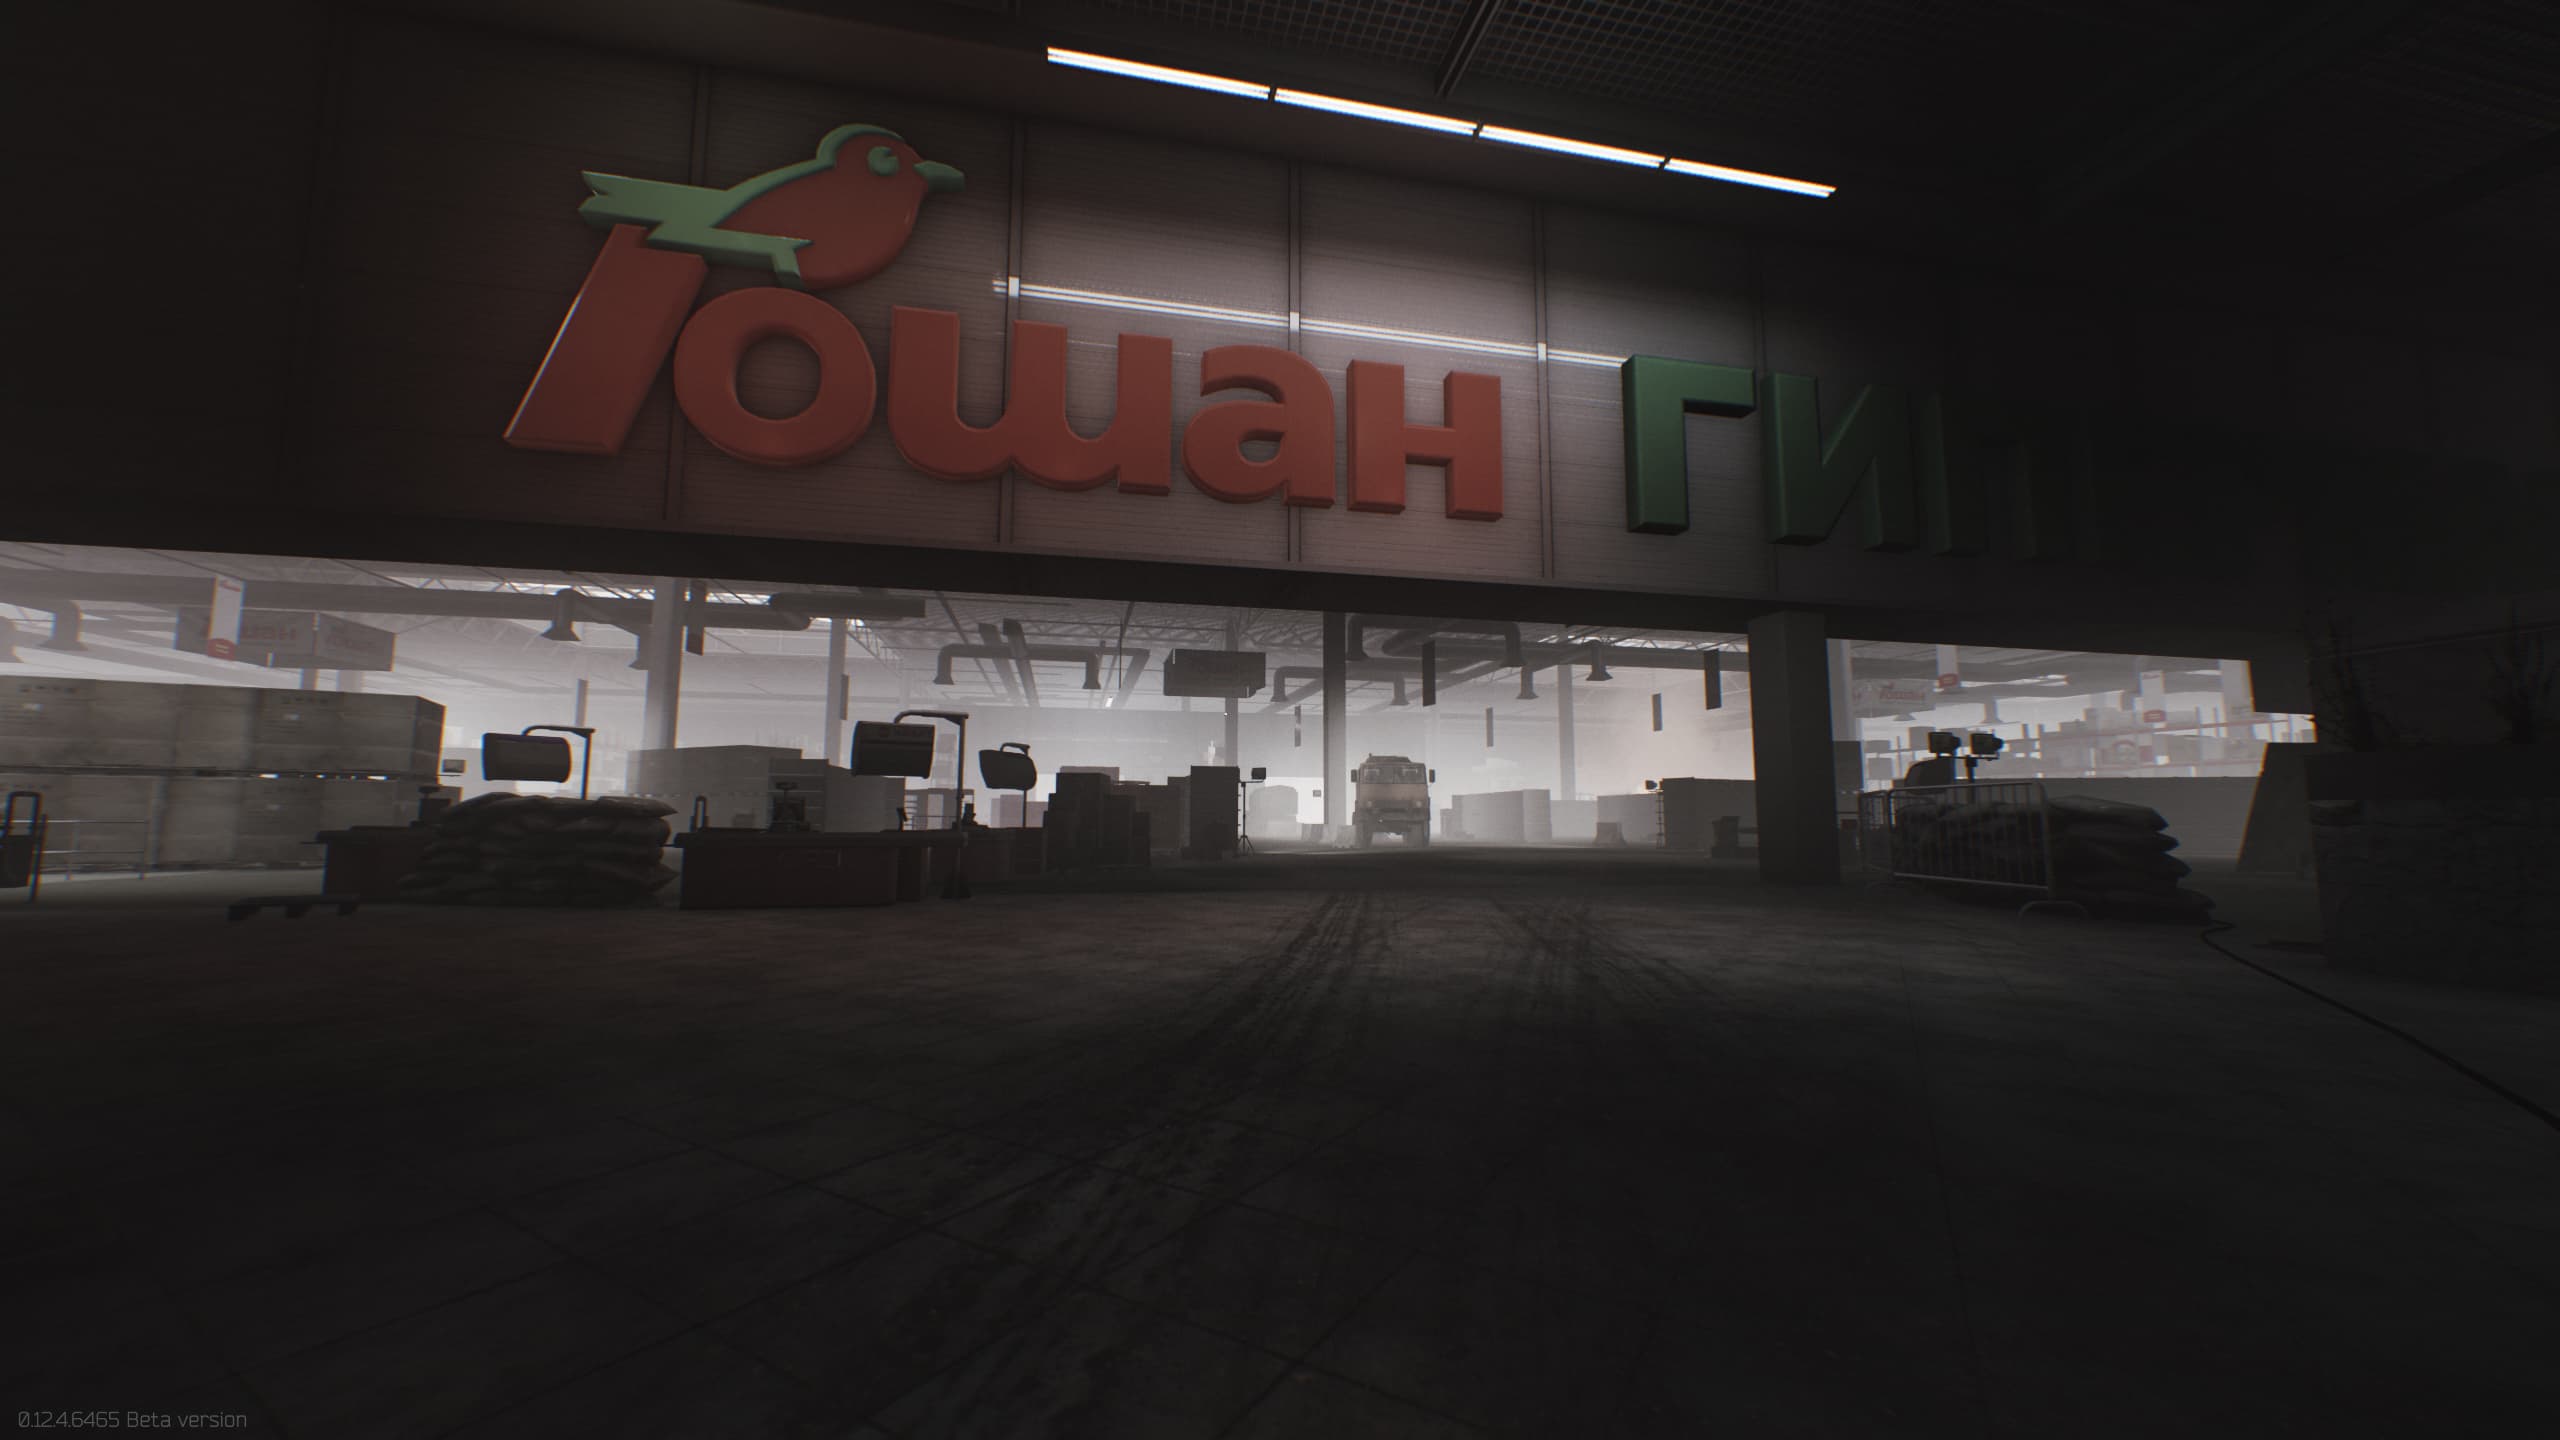
This grocery store is on the eastern end of the mall. The store has a red theme color shown by the red walls and signs. The store features long and open loading docks leading out the back of the store. There are lootable registers near the western wall of the store that leads out into the common area. Probably the most noticeable landmark in this store is the never eternal trash fire on the floor near the southern half of the store.
Goshan is the go-to location for food in Interchange. Most of the shelves can spawn food items including tushonka. There are also a handful of weapon crates scattered around the store. There are a just shy of 40 cash registers at the front of the store which require a key found on Customs. The registers are really good for leveling up your attention skill if you are still fairly new to the game.
In the southwestern corner of the store is a loading area with an abandoned forklift sitting in it. This area has crates and two weapon boxes. Check the corners of the loading area to find these. This area is also a good spot to find car batteries and spark plugs. If you stay in the back area and follow it along the back end of the store you will come by more loose loot, bags, and toolboxes. All of the shelves can spawn tools, gunpowder, tape, and the like.
Near the center of the store in the back area is a small alcove with ramps running down into the garage. This is great for sneaking into Goshan from the outside or trying to get away from a firefight. Heading up the west end of Goshan a little further north of the ramps to the parking garage and a little to the left is a campsite. The tents can have gold chains and some other loose loot. What is most important about the camp is that behind one of the tents, sitting on top of a book is a possible spawn point for the Kiba key. The key has a low spawn rate but it can spawn on top of the book on occasion.
There are multiple exits in the back of Goshan that lead out behind the mall. The back of the mall is a pretty narrow strip that on rare occasions can have campers in areas overlooking it. The back exits are good for a quick escape if it is needed.
Oli
This store is on the south end of the mall and it is really hard to miss. Oli has a green theme with green walls and signage. Most notably the name of the store is stamped all over the place, the owners just wanted to make sure their shoppers knew exactly where they were. Oli features some tall shelves that can make for decent cover in some places. The north wall of Oli is pretty wide open leading back out into the common area. There are a few registers on the north end leading out of the store that can be looted.
Oli is something of a hardware store for players as it is a good place to find loot like gas analyzers, propane, and car batteries. If you come up from the garage and turn right heading south you will come across several locked rooms to your right. Two of the rooms will require the Oli logistics key and the Oli administration key to enter. The second to last room in the hallway will have the key for the Oli registers on the desk. The offices can also have bleach and computers that can be looted.
On the northeast end of Oli are some cubicles that can have computers and some miscellaneous loot in them. The biggest draw to Oli is the registers and the shelves. There is a ton of loose loot scattered on the shelves throughout the shop. What loot you can’t use can be sold on the flea market. There are several registers at the front that can have several thousand roubles in them but will be locked. The Oli register key can unlock them to be looted. The back of Oli tends to have a lot of car batteries and spark plugs that are needed for a quest.
If you go through the doors in the southwest area of Oli you will end up in the back area. Head north to get to the loading dock. The loading area is a very busy area with scavs and players. It leads a very quick route to the Emercom extraction point making it a popular spot for campers, much like the extraction itself.
IDEA
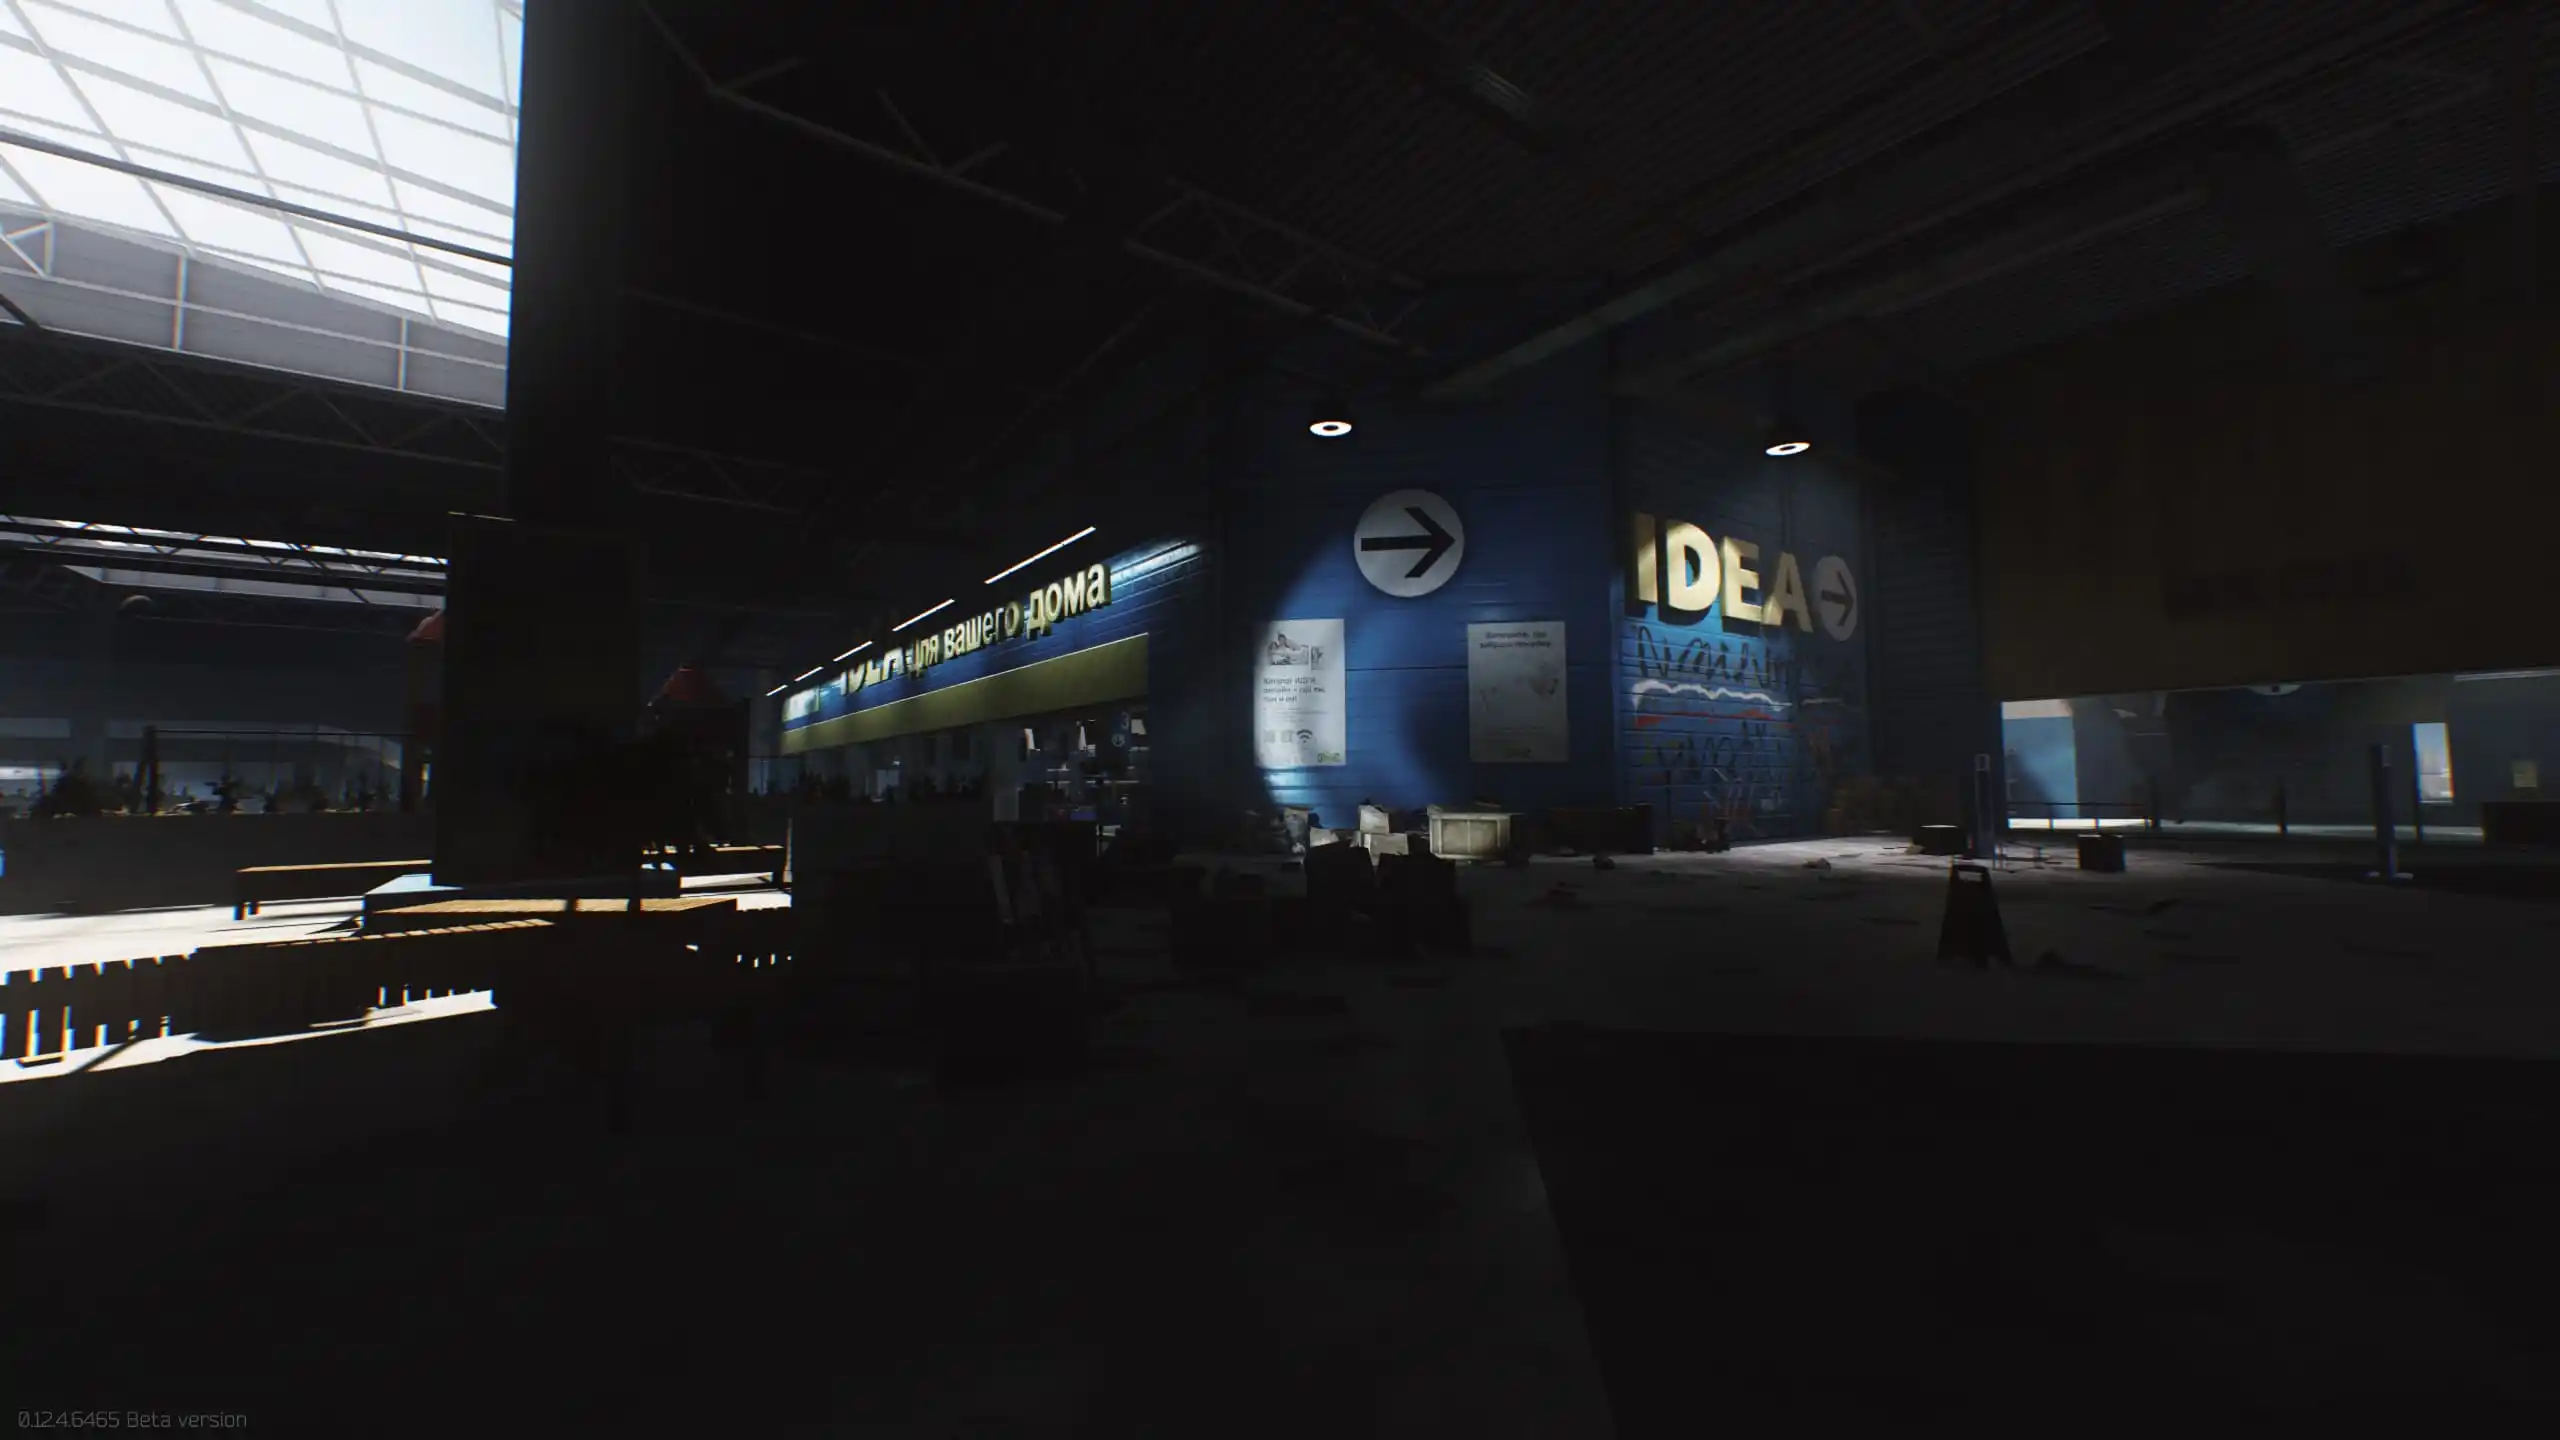
Just for clarification, this store is obviously Norwegian and in no way related to the Swedish furniture giant. The store is on the north end of the mall and is very easy to identify. It has a blue and yellow color scheme which was in no way inspired by a certain Swedish outlet. There is blue and yellow everywhere including blue walls. The inside of the store has a closed-off shelving pattern while the western side is pretty open.
From the common area entrance into IDEA, you can head straight back all the way to the northernmost wall of the building to find a weapon crate. The crate is near some stairs going to the second floor, just on the other side of a wall. IDEA has a lot of figurines like cat figurines scattered around the area along with loose loot and several crates. This is actually a great location to farm figurines particularly cats as they spawn pretty frequently inside IDEA.
On the northern end of the store in about the center of the back wall is an office with three computers that can be looted. There is also a duffel bag on the couch in the same office area. There are several bags scattered throughout IDEA, particularly among the shelves in the central area of the shop.
Like the other major stores in the mall, there are a large number of registers in IDEA that require a key to access them. The key is found on the seat of a white bus located outside of the mall. The bus is on the northern end of the map just outside of IDEA. If you exit IDEA from the northern door just follow the path until you get to a crossroads and turn right. The bus will be along the road heading towards the power plant. The bus also has a fair amount of loose loot in and around it.
Power Plant
This building is located in the northeastern corner of the map. You can get there from the back of IDEA by heading towards the wall across from the mall and heading north. You will see it as you approach the northern border of the map. The powerplant has some good loot but more importantly, it is used to restore power to the mall. There is a substation adjacent to the power plant that has small buildings inside the fence. These buildings can spawn toolboxes useful for making tool kits. Inside the main area of the power plant itself is a lot of loose loot, jackets, and toolboxes. Fuel conditioners can also spawn inside the main building.
Just off the main building is a smaller admin area with a few computers and filing cabinets. The computers occasionally have flash drives spawn in that can be grabbed. On a box on one of the shelves is a key needed to get into Kiba. The power plant can have a big effect on the map by allowing players to restore power to the mall. To restore power you need to flip a switch on a breaker box. The box is right outside the door leading into the main building from the admin offices. The box is immediately to the right and will have a red light on it if it has not been activated. Flip the switch and the light will turn green. This will cause some alarms to go off in the store and give you access to the saferoom extraction point. By extension, it will also let you access Killa’s stash.
Boss
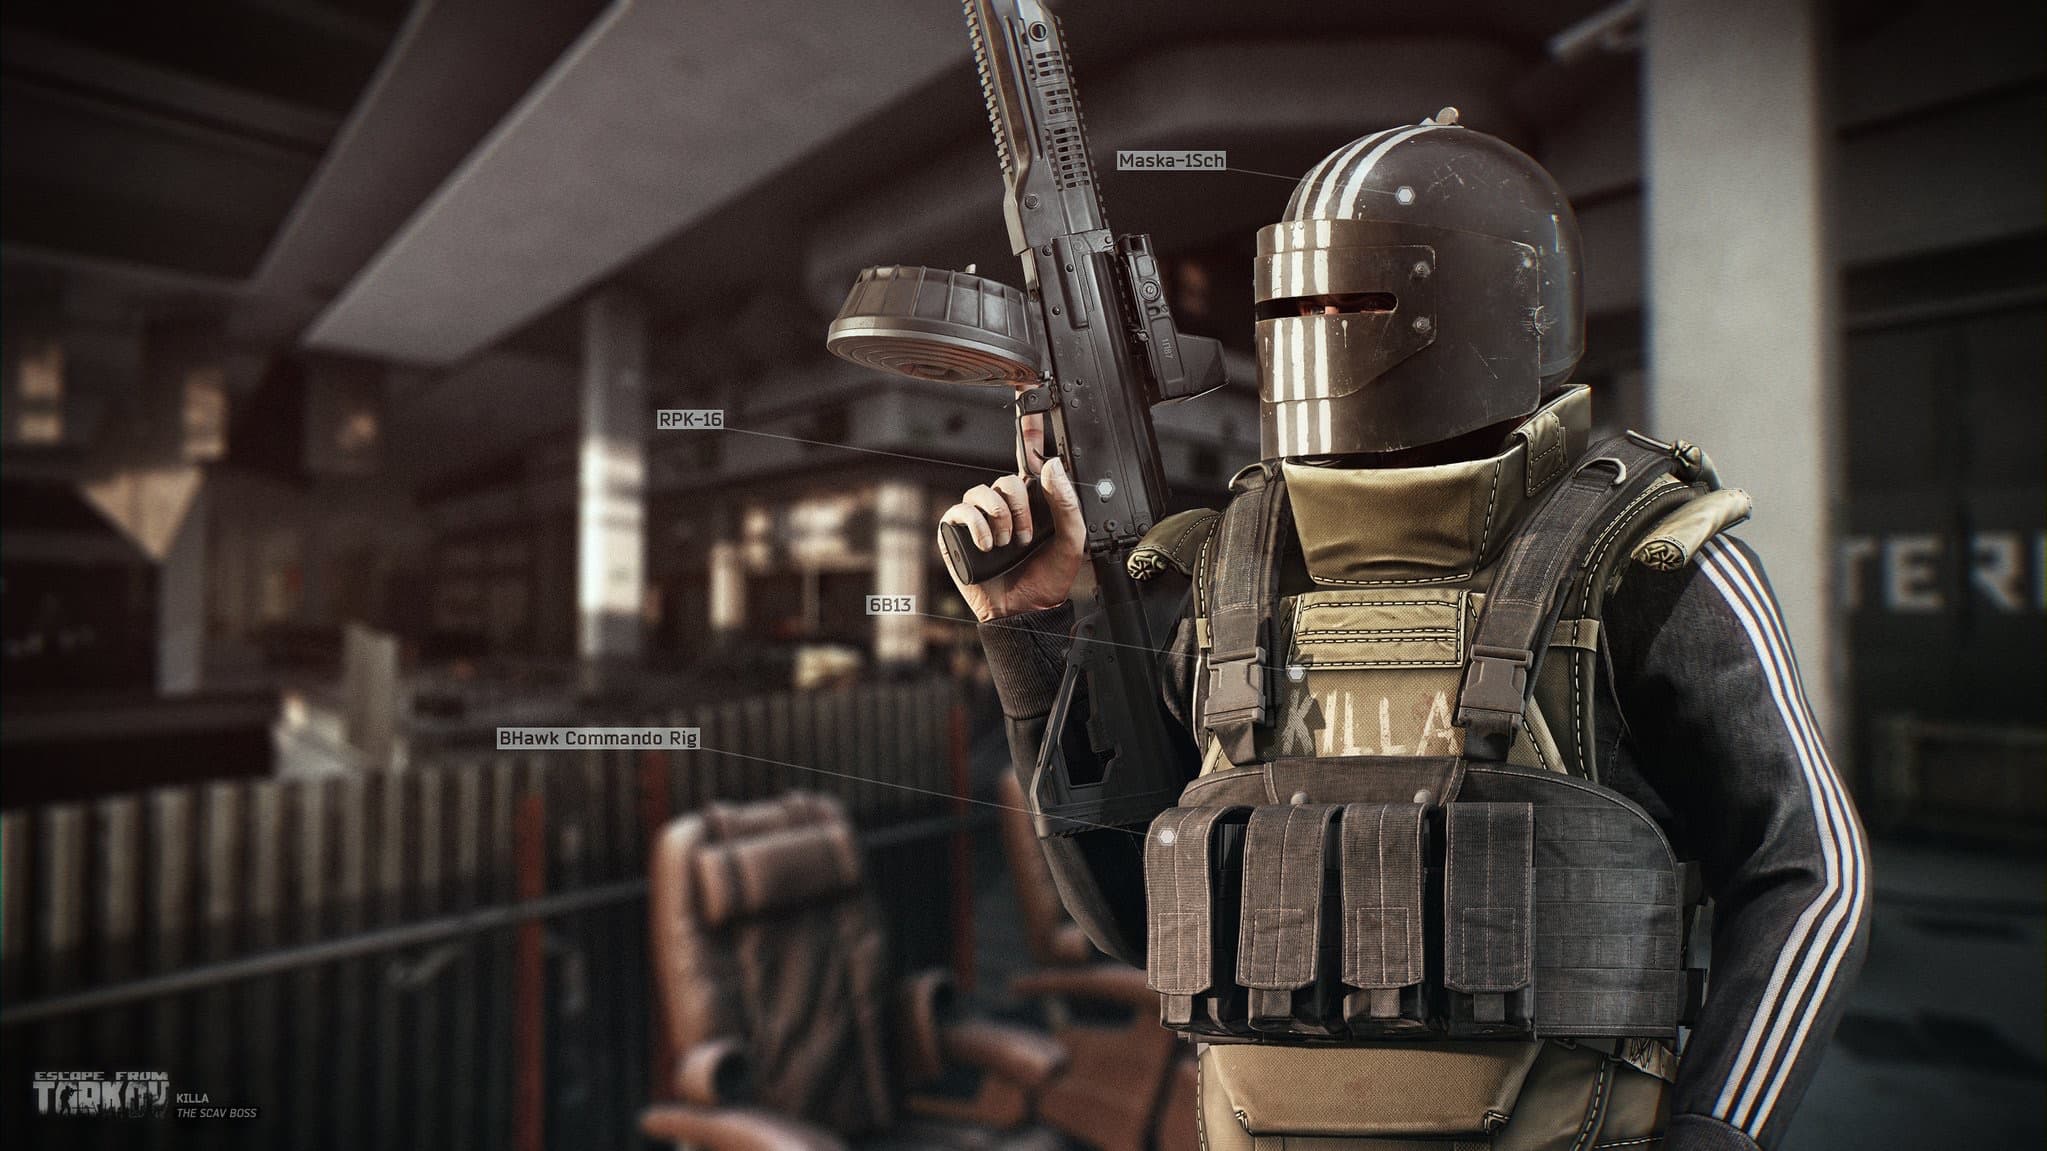
The boss for this map is a lovely heavily armed fellow named Killa. The bright side to this boss is that unlike the other Tarkov bosses, he works alone. The downside is that he is one of the most heavily armed NPCs in the game and absolutely hates everyone, including scav players.
The developers have actually admitted that this boss is loosely based on Tachanka from Tom Clancy’s Rainbow Six Siege. If you have ever played Siege or know anything about Tachanka then this boss is pretty much what you would expect. If you are new to the game, trying to take on Killa before you have some decent equipment is not a great idea, leave him for a bit later once you have some better gear. If you follow Ragman’s questline you will eventually get very good at beating him as one quest requires you to kill him 100 times.
Killa patrols the first floor of the mall in the area around the hole in the floor and the Viking storefront. His patrol covers some of the most popular entrances to the mall and some good loot spots so players should be careful when moving through these areas.
Killa’s primary weapon is an RPK light machine gun or a similar automatic weapon. He has a class 4 helmet with a class 6 face shield, class 5 body armor, and a variety of grenades. During combat, Killa will move in a zig-zag pattern from cover to cover. He will actively try to suppress his opponents with smoke and frag grenades and heavy fire. He will follow his target relentlessly well beyond his normal patrol route.
Being spotted by Killa is not recommended and should be avoided as best as possible. He is very accurate when he uses burst fire and loves to use suppressing fire. A common tactic of his is to track and suppress his targets relentlessly until he can close the distance, swing around, and ambush them. The best way to kill him is to use high-quality ammunition with high armor penetration. 5.45x39mm BS, and 5.56x45mm M995 or M855A1 rounds would be the best options for dealing with him. These rounds vary in price range but are a bit more common than some of the other ammo types. You can check our ammo guide for a brief overview of the different ammo types to find what would work best for you based on your available weapons and resources. If you do not have any kind of ammo available with decent armor penetration and damage, a workable strategy is to focus on his legs or try to shred his body armor but this is not recommended. Players should also consider using a weapon with a large magazine as he can be temporarily stunned with the opening attack. Unloading an entire large magazine into him can save some work later. This is not very effective though if Killa is using his RPK as it has a 95-round drum magazine and two 60-round magazines meaning he will almost certainly outgun you.
The best strategy is to combine good ammo with teamwork. Team up with another player while fighting Killa to make handling him easy. Killa will always focus on one player at a time allowing the free one to move around and target him. Grenades are next to useless with Killa as he is too mobile for them to be properly used. Players must use cover and must not stop moving when fighting Killa.
If you kill Killa he will drop a keycard that can let you access his stash and the saferoom extract. If you restore power to the mall from the power plant, head up to the Burger Spot on the second floor. In the bathroom behind the urinal is a keypad. Use the keypad to open the saferoom extraction lot C down in the parking garage. Inside the saferoom is another breaker box with a switch called the “Object 14 Switch.” If you flip the switch it will open a shipping container in the northernmost part of lot A. The entrance to the shipping container with the stash is hidden behind a group of other shipping containers up against the western wall of lot A. You have to swing around to the back of the containers to get to it.
Extraction Points
Interchange is unique in that players will get assigned an extraction at the start of the raid. Double-tap the “O” key to find out which extraction you can use. Be extremely vigilant when extracting. There aren’t very many extraction points and there are plenty of players that like to camp near them waiting for someone loaded down with loot to come by.
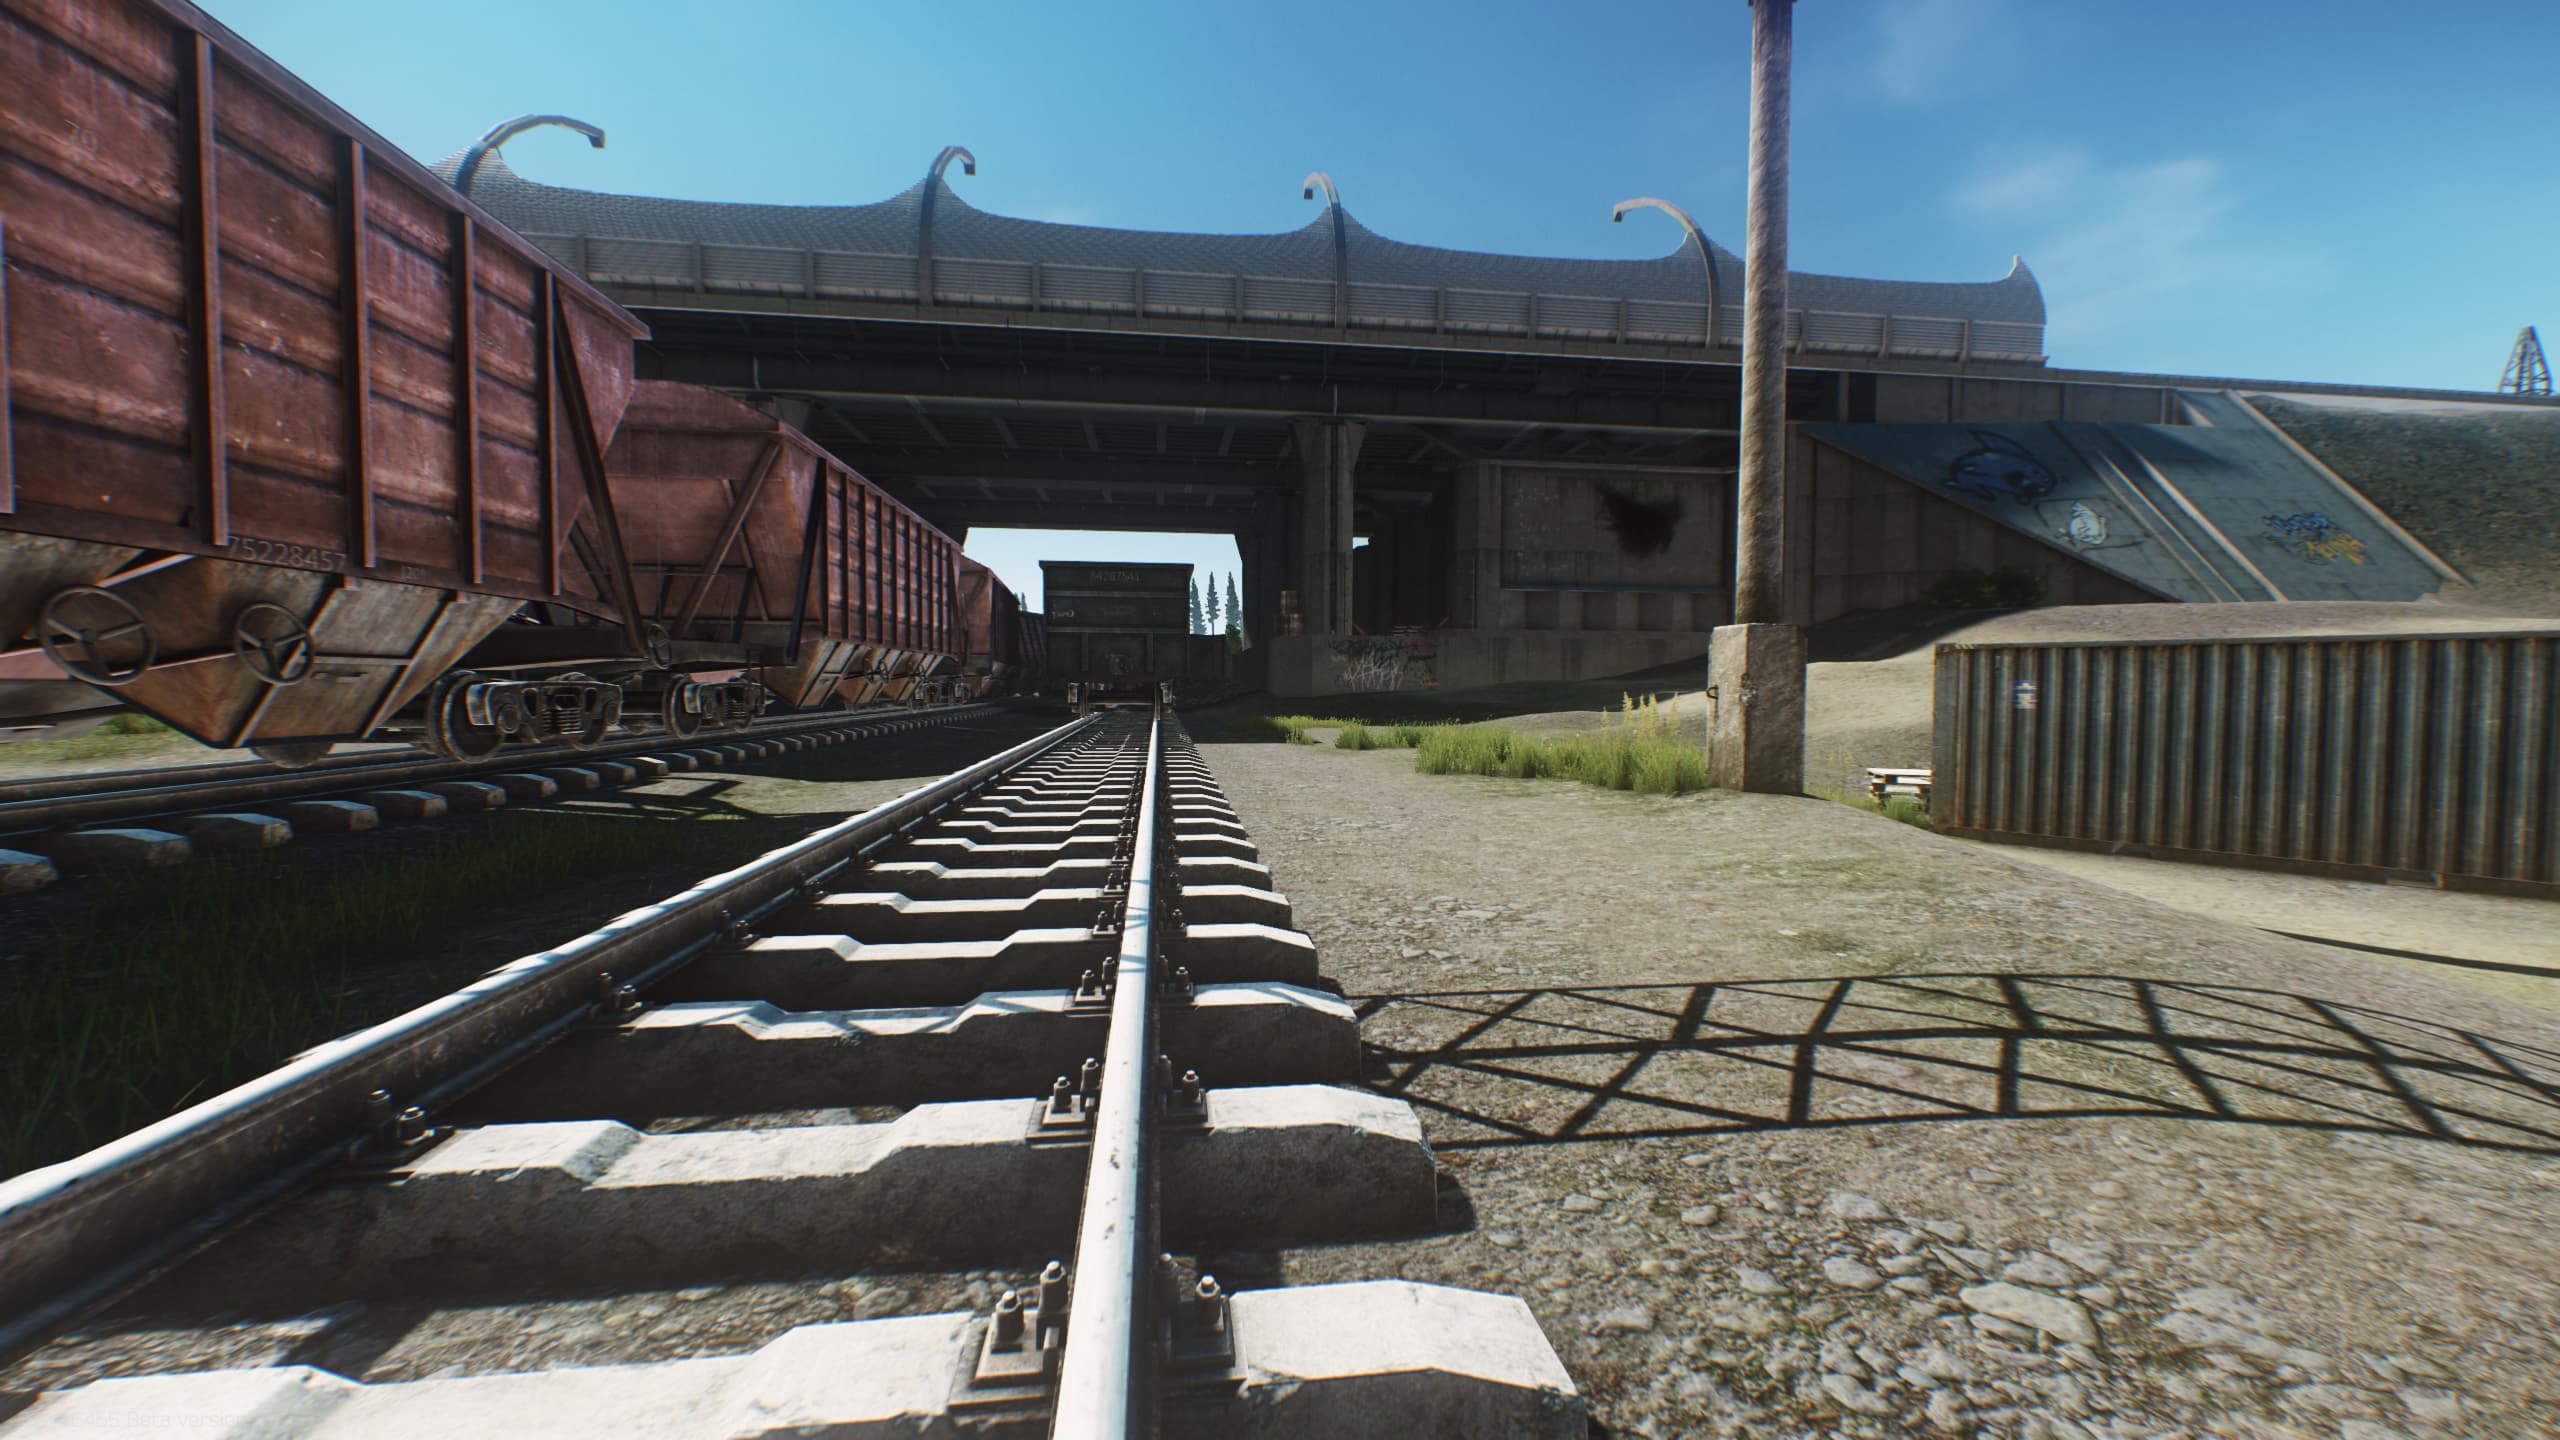
- Railway Exfil (ALL) – This extraction is in the northwest corner of the map. It isn’t too difficult to get to. If you are leaving the mall from Oli or IDEA just head straight to the western wall then follow it north, or hit the northern wall and follow it west. The extraction point is just outside of a railway tunnel with an abandoned train nearby.
- Emercom Checkpoint (ALL) – This extraction point is in the southeastern corner of the map. It is pretty easily reached from the loading dock near Oli. Head down the big ramp and head southeast. If you are leaving from the front of the mall just head left and skirt around the mall until you are towards the back and heading southeast. You will see a sort of military checkpoint set up near the gate in the border wall. Once you make it past the flatbed truck the extraction will trigger but be very careful as this, like most of the extraction points, will attract campers. There are some green tents and a bush on the side of the road to the left of the truck that campers like to hideout in waiting for someone to come by loaded down with loot. Your grenades and bullets can pass through the tent and bush so if you think there might be campers around, use that to your advantage.
- Hole in Fence (ALL) – You can’t wear a backpack to use this extraction point. This extract is easily overlooked but fairly easy to get to. This extraction point is along the eastern wall to the back of Goshan. Head north of the Oli loading ramp towards Goshan. Across from the parking area under Goshan is a small indent in the wall just before a rust-colored fuel truck. The indent will have a bunch of shipping containers scattered in it. There is a gap in the northeast corner of the indent that acts as the extraction, it is tucked right behind some barrels.
- Scav Camp (ALL) – This extraction point requires you to make friends with the locals. You need to make a friend with a scav player to use this extraction. This map tends to attract a lot more players at once, both PMC and Scav, than some of the others making this particular frenemy extract a bit easier to use than on other maps like Reserve. From the front of the mall just head towards the western wall past the stage with the red canopy. Go towards the crane with the red shipping container. There is an open shipping container that you can use to get through the fence and into the area with the crane. There is a gap in the big blue wall behind some more containers. The gap is the extraction point and it is possible to get some items in the mail from the fence if you use this method.
- Saferoom Exfil (ALL) – This extraction requires the 11SR keycard. The key is obtained from the map boss. You will also need to turn on the power for this extraction point to be activated. To turn on the power, go to the power plant in the northeast corner of the map near the vehicle extraction. Inside the power plant on a wall near the front and side entrances is a breaker box with a red light on. Flip the switch on the box and the light will turn green meaning that power has been restored. Head back into the wall and go up the escalators to the second floor. Go to the Burger Spot which totally doesn’t have a logo like a certain monarchical burger place, and head to the men’s restroom. Flush the urinal and a keypad will appear. Use the 11SR key and the saferoom will be open. Go back down the escalators and go to the giant hole in the ground and head down to the garage, you will probably hear alarms blaring from a few shops signaling the power is back on and that someone might be heading to the saferoom, any players around have probably heard them too so be careful. Stick to the left and head towards parking area “C”, you will know you are there by the giant “C” painted on a bunch of the walls. You will see a yellow van and next to it is an open door. Go through the door and use the keypad immediately to the left of the door to close it and activate the extraction. You will extract within a couple of seconds after activating the keypad but there is a lot of valuable loot that should be picked up if you have time. There is also a power box on the wall with a red lever. If you pull the lever it will unlock Killa’s stash for you to go loot. This is a one-time use exfil so once it has been used in a raid it can’t be used again.
- Power Station (PMC) – This is a vehicle exit similar to the one on other maps like Customs and Woods. It isn’t always available but if you happen to be going by that area go ahead and check to see if the van it’s available. If you see a black van idling at the gate, you can use the extract. The extract can be found in the northeastern corner of the map. The quickest way to get to it is to head out the back of IDEA and head north down the ramp. There will be a small power plant to your left as you head towards the extract. There is a black van parked inside of a gate. You will need to pay the driver 3000 Roubles and a maximum of four people can use it at a time. Once the driver has been paid the extraction will have a one-minute cool down before leaving. You can leave the immediate area and hide from any extract campers but if you are not standing by the van when the minute is up it will leave without you. Once the van is gone, it can’t be used again during that raid.


Published: Apr 3, 2020 02:47 am