Ghostrunner predominantly focuses on fast-paced combat and platforming. However, there are a lot of other things to do in the game as well. The game contains a plethora of collectibles in the form of audio logs, artifacts, and swords scattered throughout Dharma City for players to find. The artifacts and audio logs give some nice extra insight into the lore of the game, while the swords just make you look a lot cooler while slicing through enemies. Here is a complete list of all the collectibles available in the game.
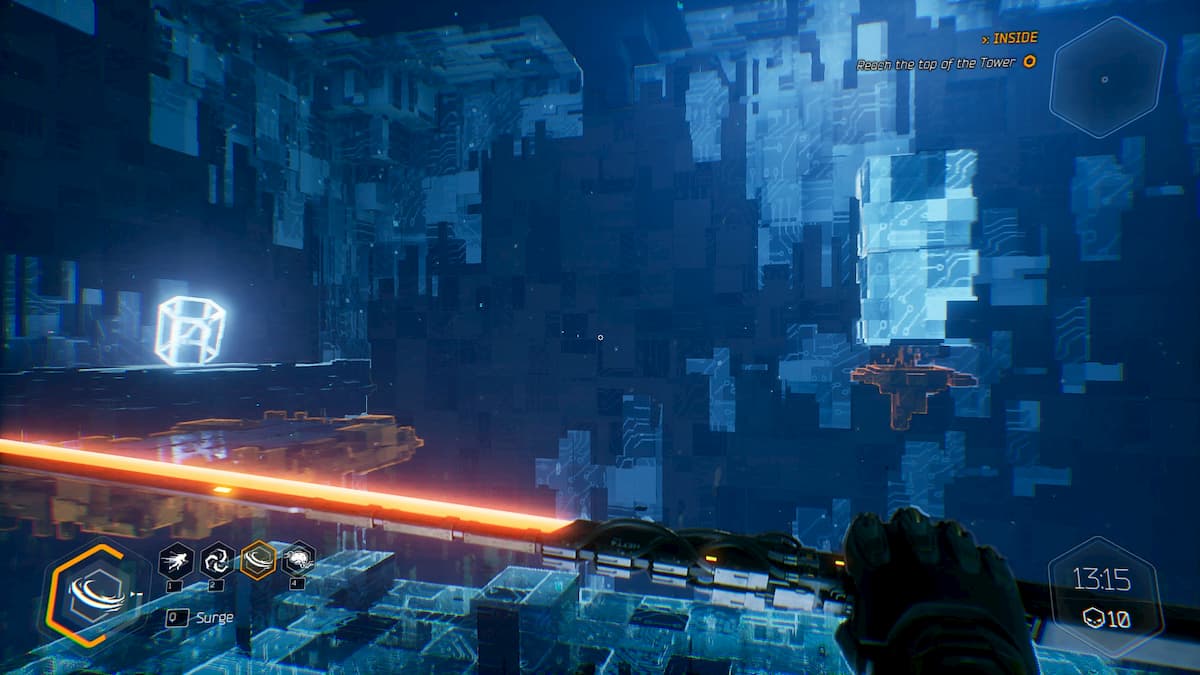
We recommend installing the yellow “Detector” module in the upgrades menu as soon as possible. This Ghostrunner module will mark collectibles in yellow on your radar in the upper right corner of the screen. While not completely necessary to find the collectibles, it does make the process a lot easier. Waiting until your second playthrough of the game would also be helpful as you will keep all of your upgrades.
Table of Contents
- An Awakening
- A Look Inside
- The Climb
- Jacked Up
- Breathe In
- Road to Amida
- Run Up
- The Gatekeeper
- Dharma City
- Echoes
- Faster
- In Her Own Image
- Forbidden Zone
- Reign in Hell
- Things You Wouldn’t Believe
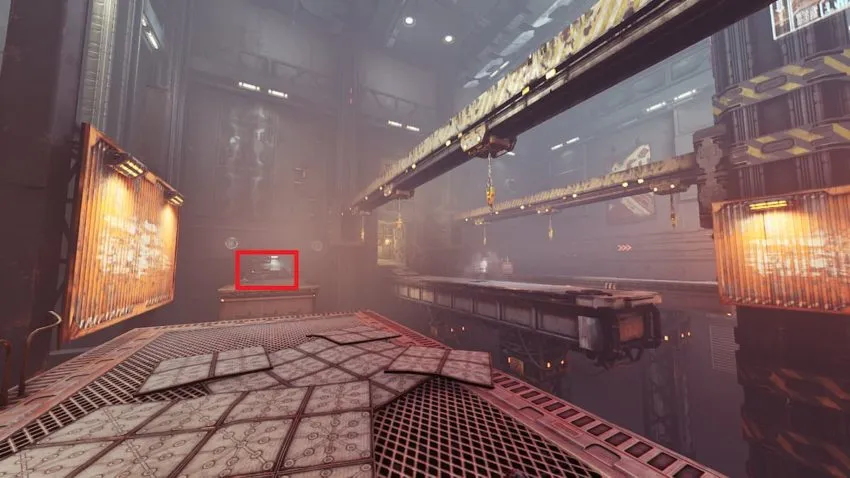
An Awakening
Artifact 1
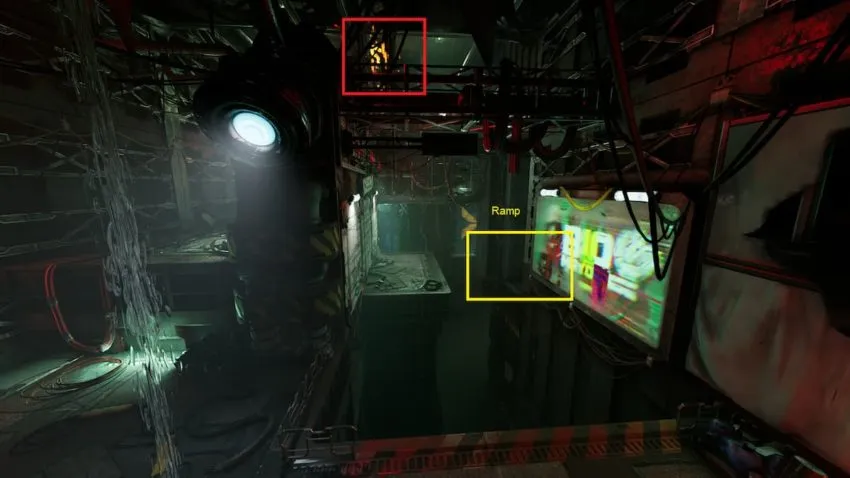
The first artifact of the game will show up near the end of the level right after you leave the air ducts. You will slide under some pipes to end up in a small room with two walls to run on and a ramp.
When you reach the ramp, turn around and run on the wall to your left. The artifact will be on the pipes on the other side. Just follow them around to the left to grab it.
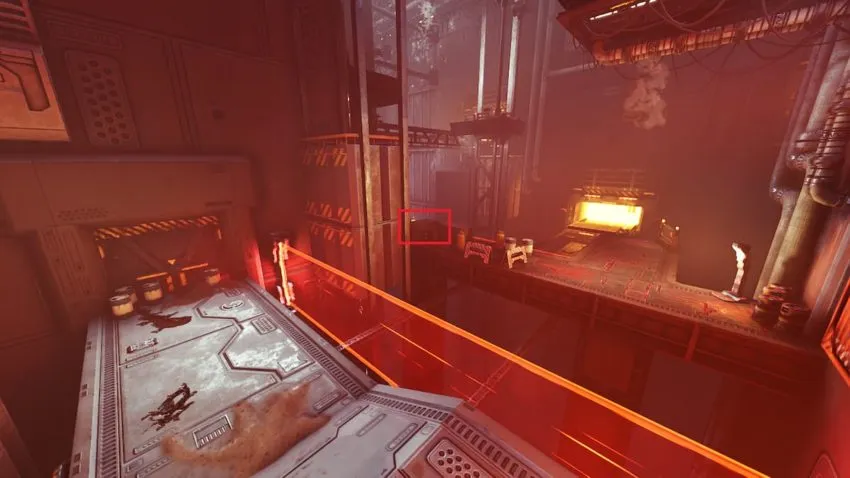
A Look Inside
Artifact 2
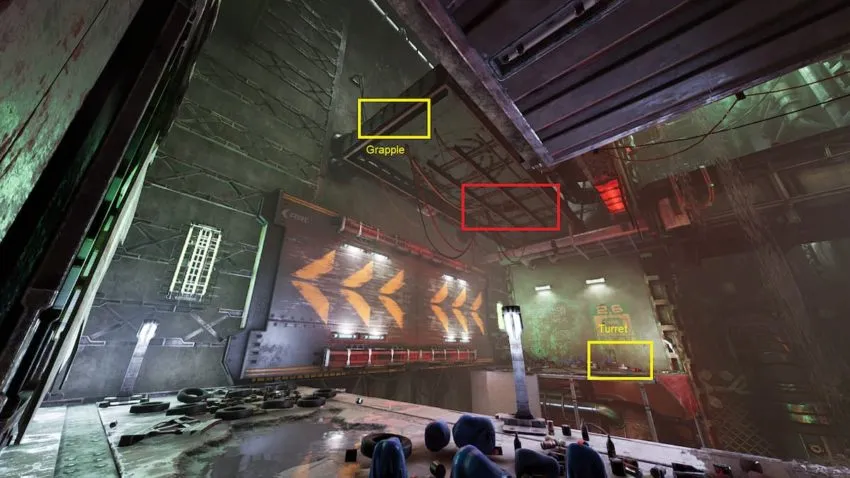
This artifact is immediately after you run into the first enemies on the level. You will slide down a ramp and end up in a large open area with four enemies. Go ahead and kill them or move past them on your way to the next section of the level.
When you get to the grappling hook leading to an airduct, turn around and head to the left. The artifact is around the corner up against the wall.
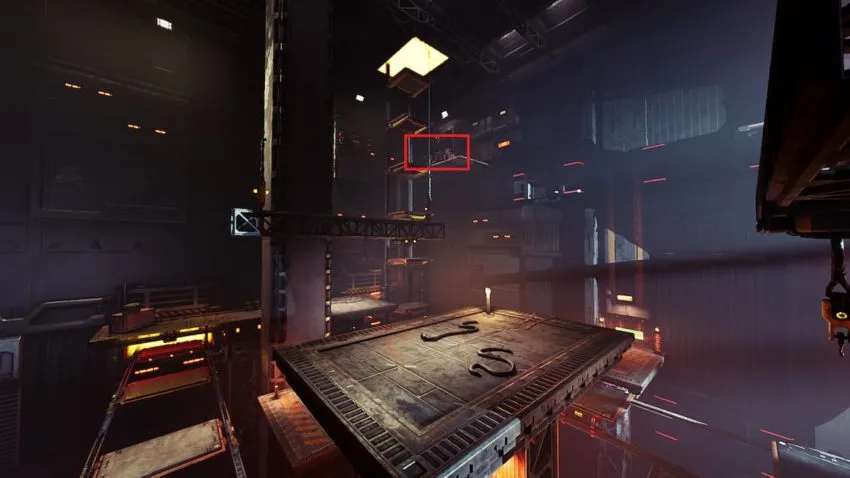
The Climb
Audiolog 1
After you get out of the prison and climb your way up to the next level, you will slide under some pipes into a room filled with pipelines. Jump onto the lower catwalk and start making your way through the room. In the middle of the room, you will need to walk up a pipeline to reach the next section.
Once you reach the top of the pipe, instead of jumping down onto the next catwalk turn around and jump across the gap to the walkway behind you. The audiolog will be on a pipe to the left at the end of the walkway.
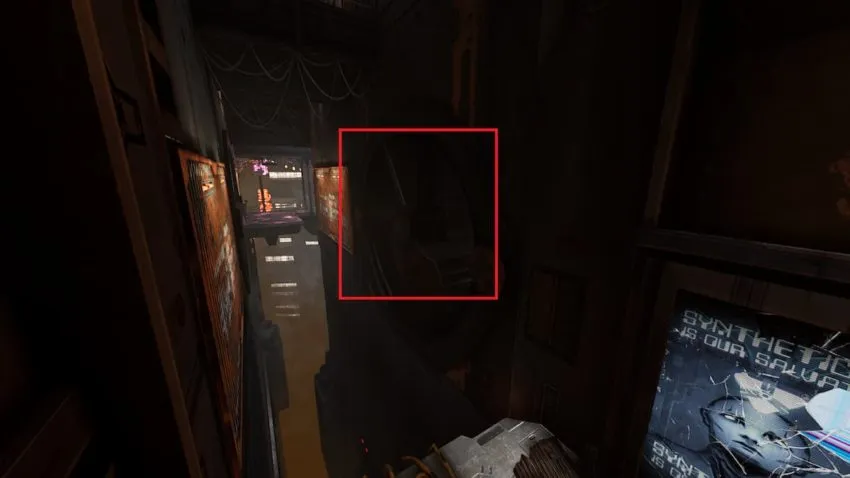
Artifact 3
Just before you reach the cybervoid mainframe you will have to climb up a tower littered with obstacles. Near the top of the level, there is a laser wall obstacle just before the next artifact. Go past the laser wall and land on the platform beyond it. Right ahead of you is a hole in the floor. Drop down the hole into the small room below to grab the next artifact.
Artifact 4
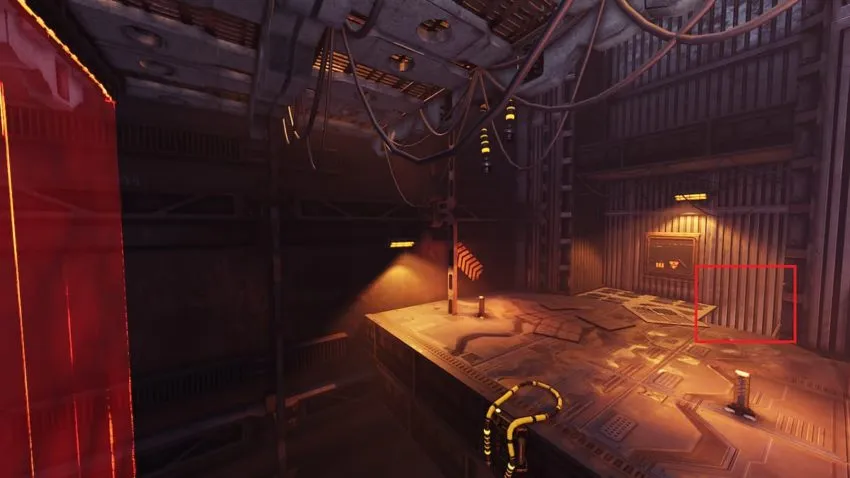
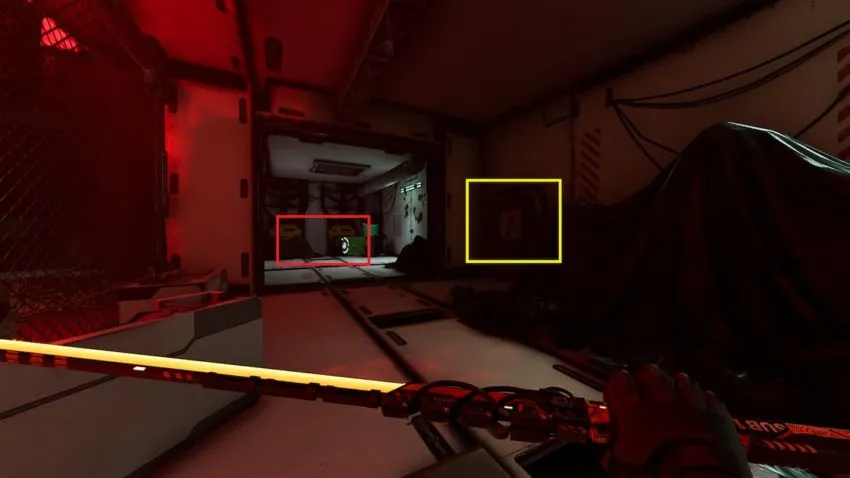
After you leave the cybervoid, you will get to try your new ability out on some real enemies. You will eventually come to a room with a large platform held up by six large pillars. The pillars will have walls wrapped around them and hanging adjacent to them. There are plenty of shielded enemies in this area and you will need to run around the walls to destroy the shield generators before you can fight them.
Once you have cleared the room, the artifact can be found on the far end of the platform behind a crate. There is a corpse wearing a chicken mask right next to it.
Sword 1
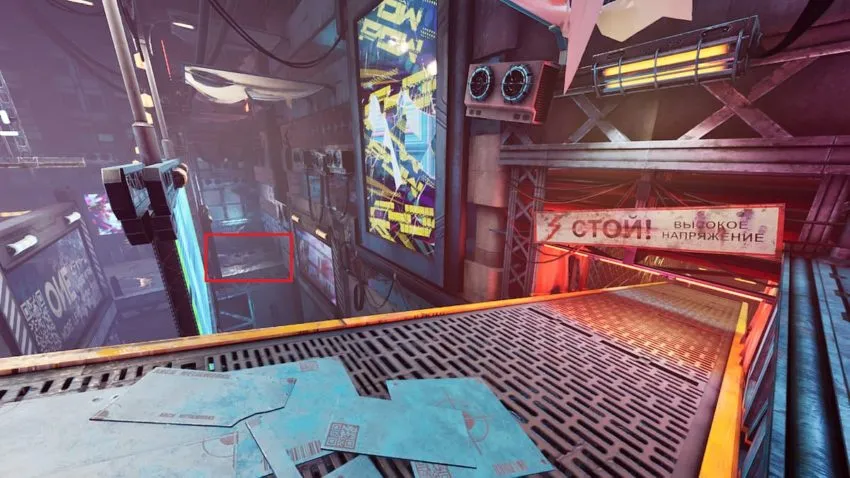
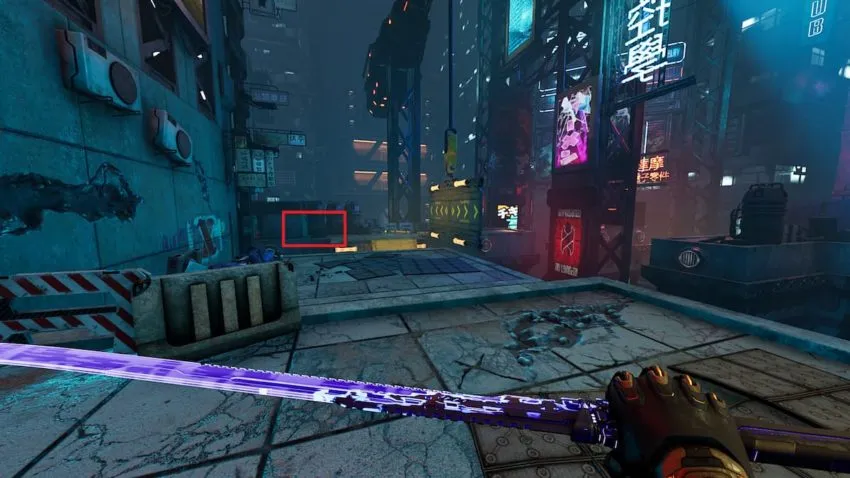
The first sword in the game, the TsuruGR-74, can be found at the very end of the level. After you have finished taking out all of the enemies on the level you will start heading towards the elevator. Once you are at the elevator, just do a 180 and look back down the catwalk leading up to it. The sword is right next to a stop sign at the far end.
Jacked Up
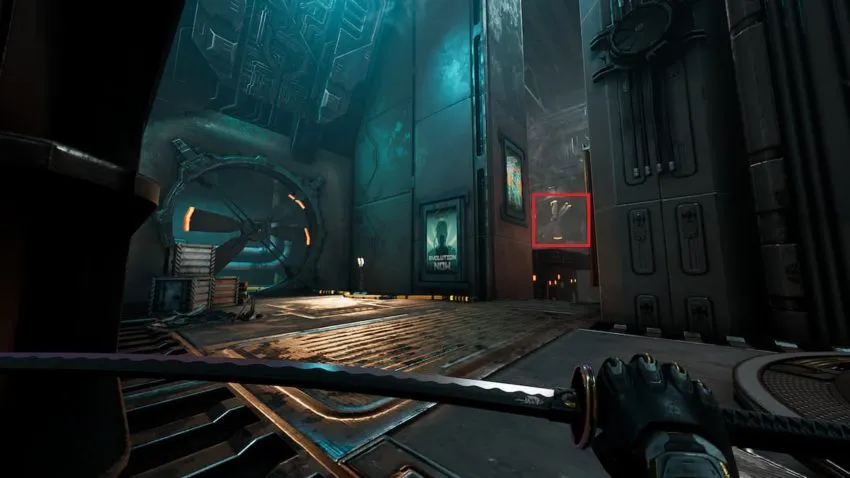
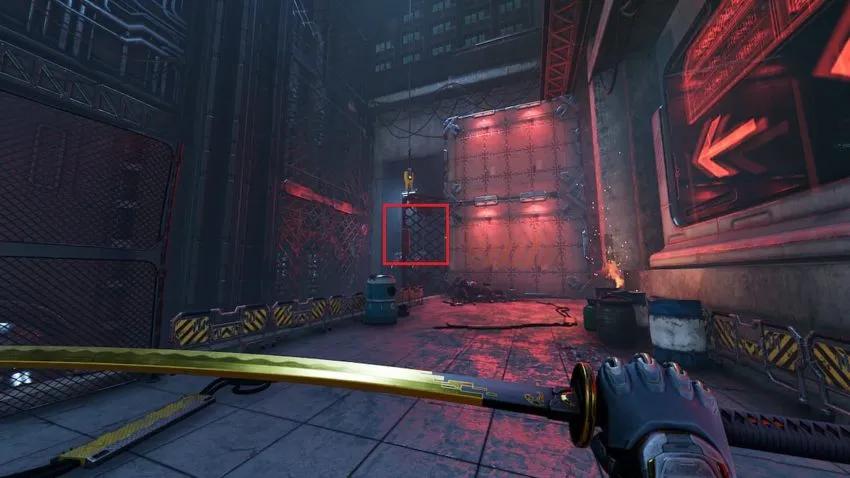
Sword 2
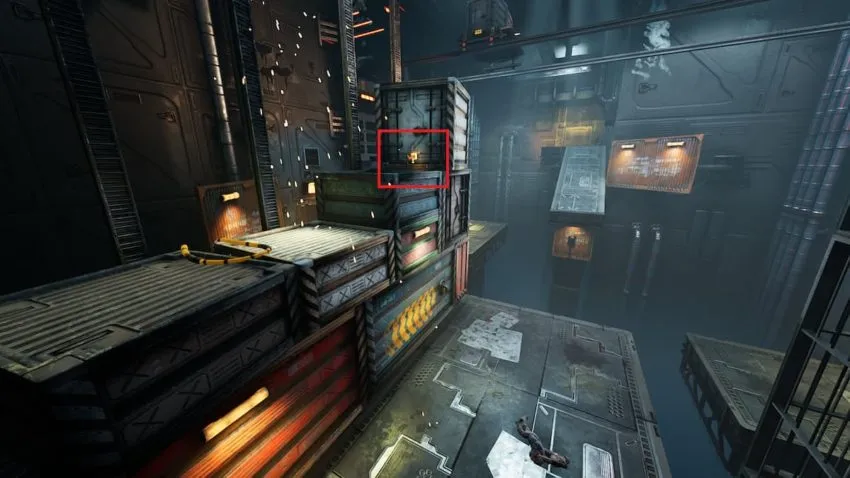
The next sword in the game, Sentinel, is found near the start of the level. After you get past the two enemies at the beginning of the level you will come to a room with moving grapple points. You will need to use the grappling points to land on a wall and land on a platform in the middle of the room.
Once you land on the platform, instead of moving on through the room just head towards the crates and scaffolding up against the wall on the other end. The sword will be behind a glowing sign pointing to the left.
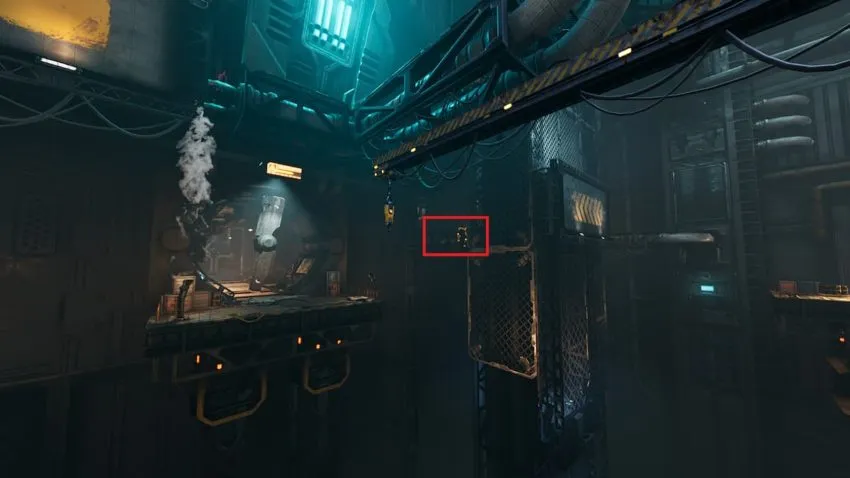
Artifact 5
A little ways after the first artifact, you will find a room with five enemies on long separate platforms. There will be grappling hooks moving through the room in opposite directions. The artifact will be behind a pile of junk on the platform immediately to your right when you enter the room.
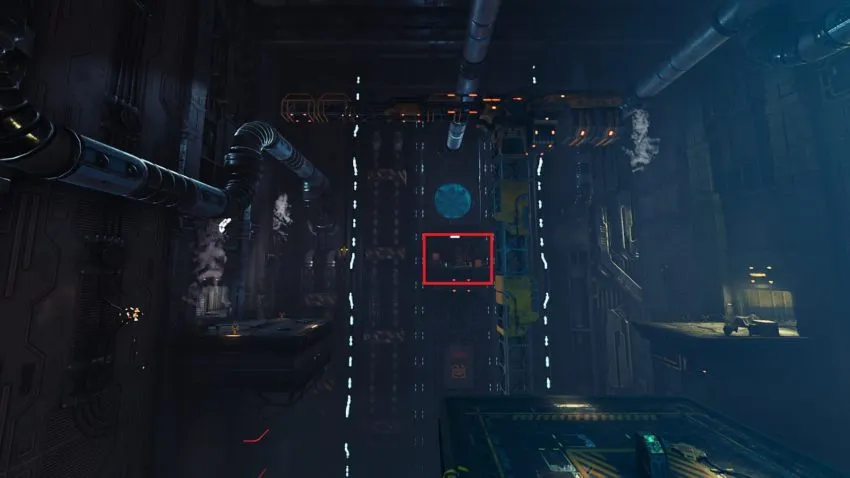
Artifact 6
The next artifact can be found near the end of a laser wall puzzle. You will have to use good timing to land on moving platforms and get past the laser walls. Near the end of the puzzle you will need to jump onto a walkway with a laser wall on the other side of it.
Use the orange wall on your right to get past the laser wall and onto the next walkway. The artifact will be behind some boxes to your left on the far end.
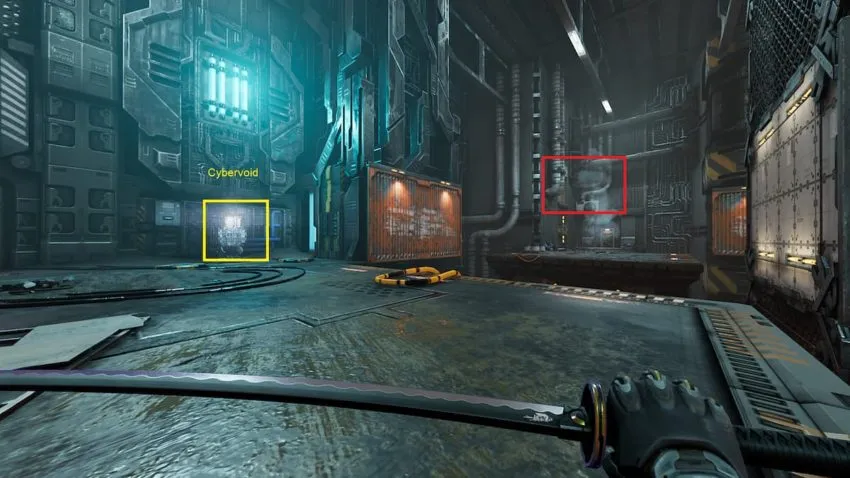
Artifact 7
This next artifact can be a bit tricky to spot. Near the end of the level you will enter a room with more roving platforms and a bunch of enemies including two shielded enemies. After you kill all of the enemies and the door unlocks, go to the left side of the room and jump onto the rising platforms.
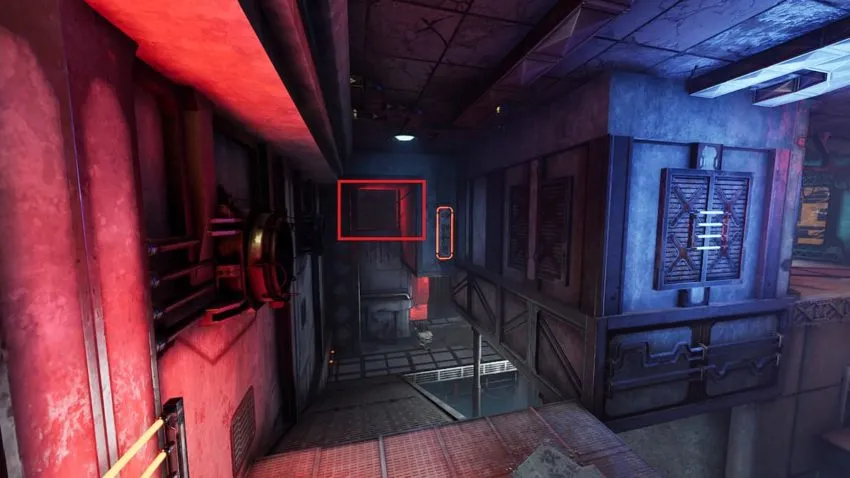
There is a walkway in the upper left corner of the room. The artifact is on it hidden behind some boxes.
If you reach the elevator, turn around and go back. The artifact is in the very last room with any enemies.
Breathe In
Artifact 8
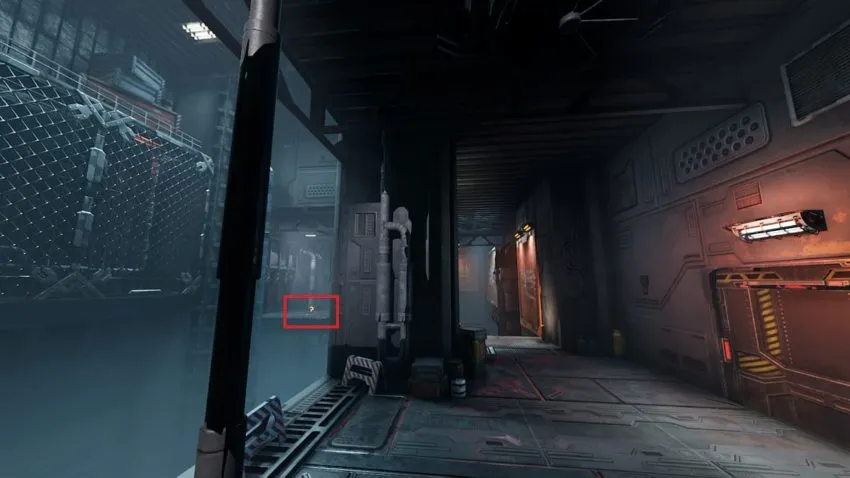
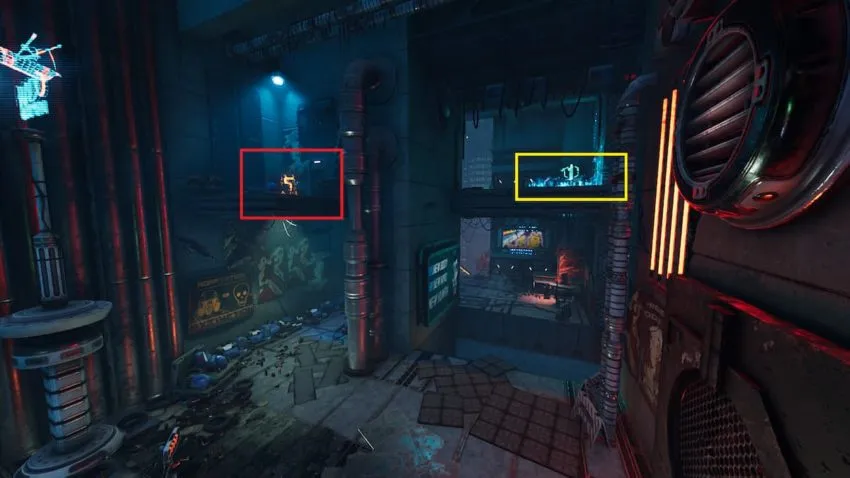
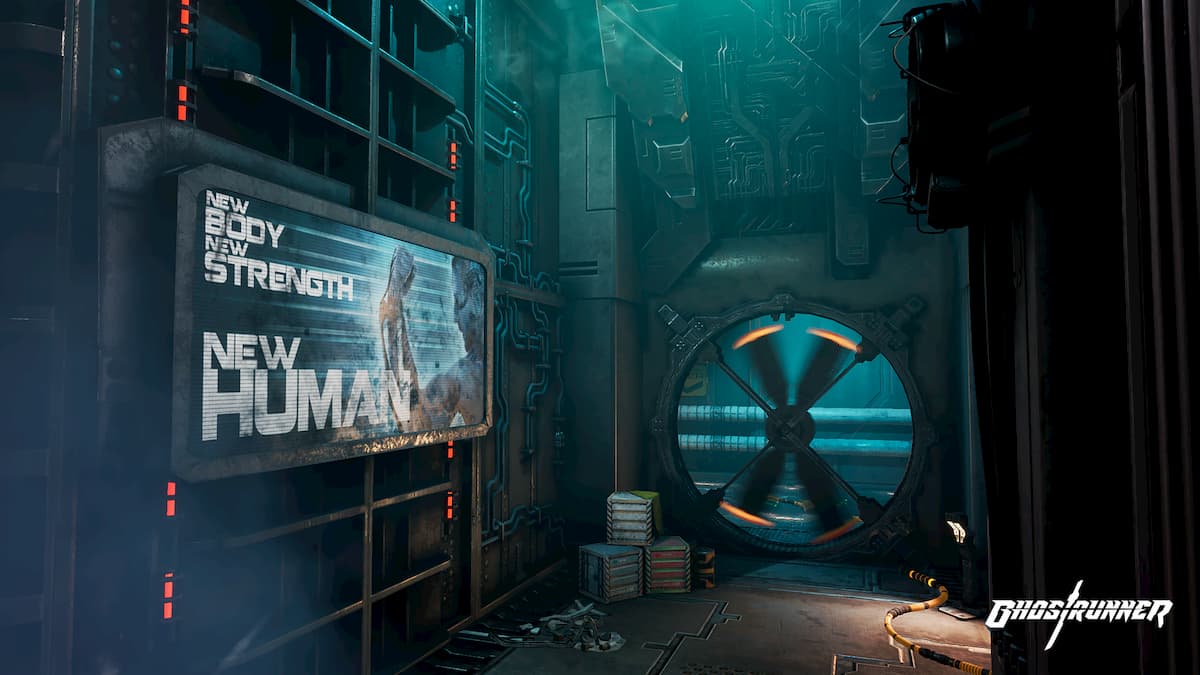
The first artifact will be behind a fan. You will probably see it on your left as you move in to kill the first enemy on the level. Getting it will literally require some speed. There is a sensory boost around the corner that you will need to grab to be able to get to it.
Once you have the sensory boost just do a 180, get back to the last platform as fast as you can, and then jump through the fan blades immediately to your right. You might die on the way back out but you will still have the artifact after you respawn
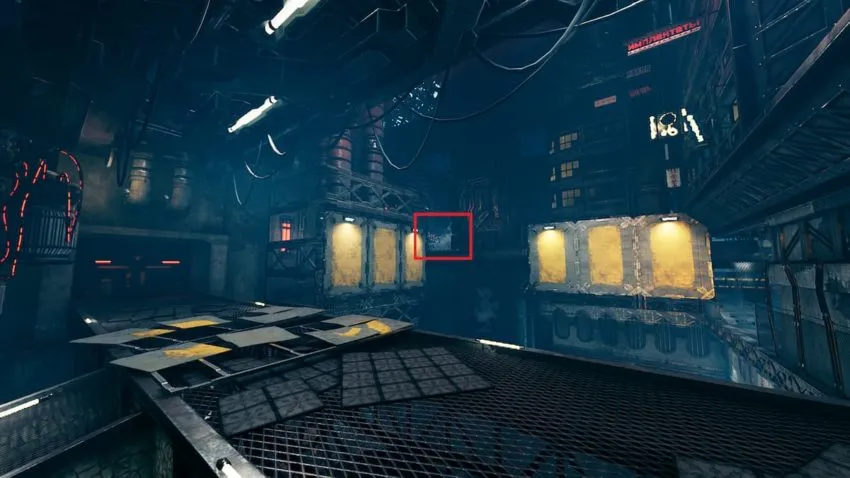
Artifact 9
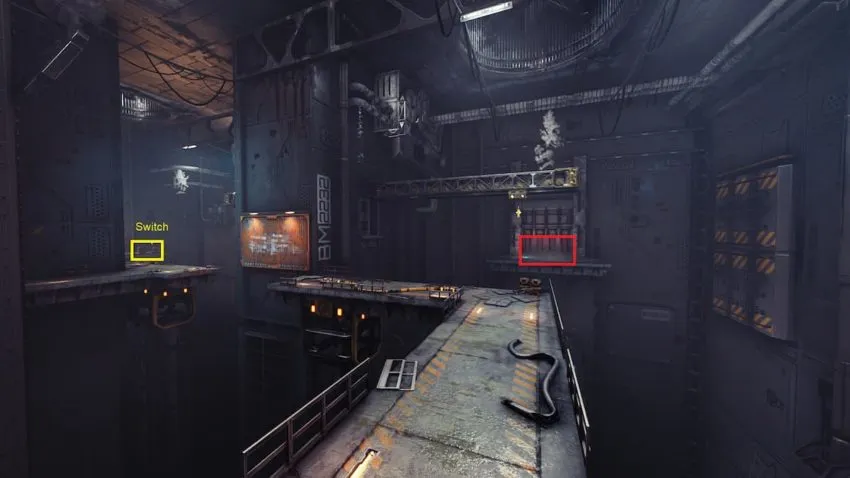
This artifact is in the next room, right after the last one. This one is much easier to get, you can see it as soon as you enter the room. Clear the area of enemies and then activate the switch the quest marker is pointing to. After that, go back towards the sensory boost, and you will notice that there is a grappling hook available to cross the gap.
Artifact 10
This artifact is in the room immediately after the last one. This will require a little backtracking. You will need to use a sensory boost to get through a large fan. After that, you will see a grappling hook hanging from a railing. Go ahead and use the hook to jump on the two walls ahead and move on to the next area.
After you are in the next area, turn around and jump back onto those walls you just used. This will let you hop up onto the railing above the grappling hook. Follow the railing onto the adjacent platform and you will find the next artifact.
Artifact 11
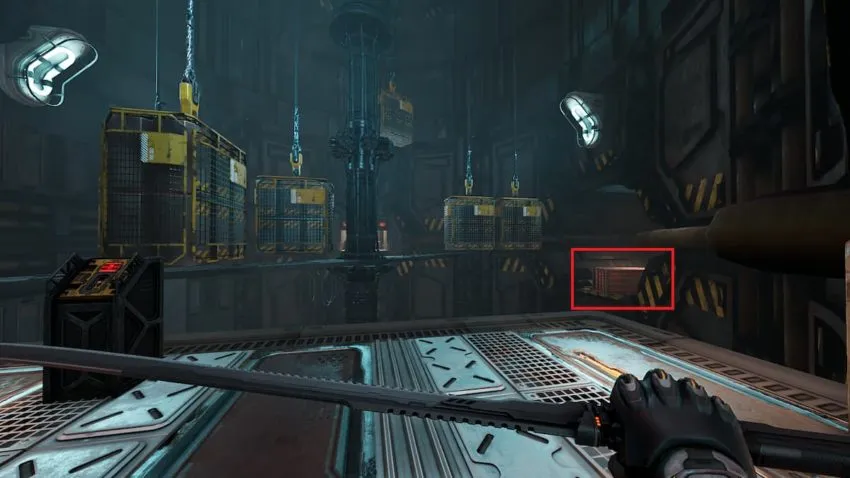
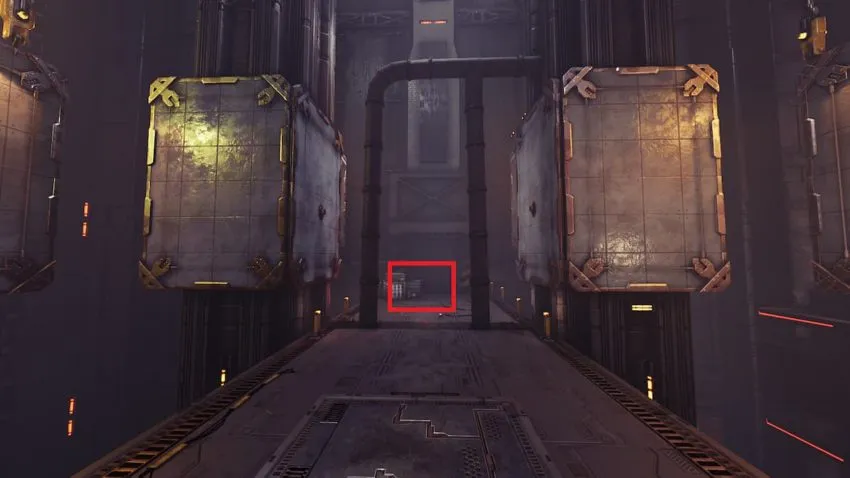
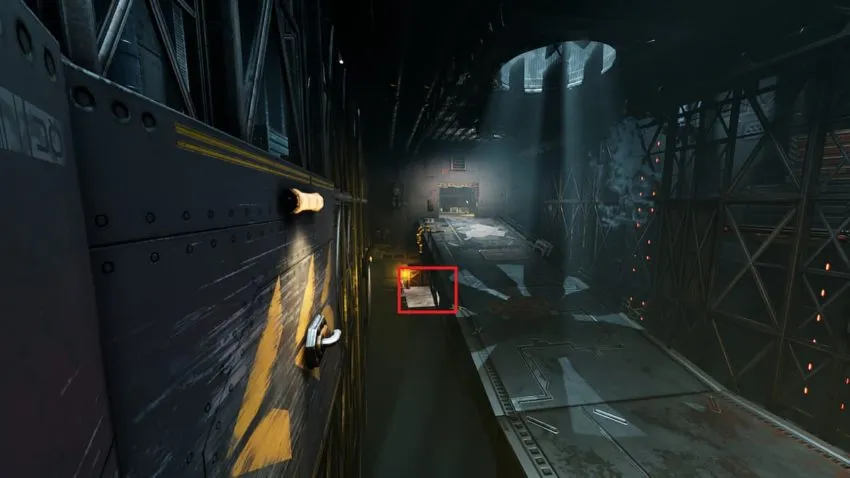
As you progress through the level you will eventually enter a room with a spinning bridge and large crates hanging from the ceiling. The artifact is in a tunnel on the right side of the room. Go ahead and activate the bridge and jump on, but skip your first stop. Jump off into the tunnel and you will find the artifact behind a shipping container.
Audiolog 2
You will eventually come to a room with some large fans to boost you up onto platforms. When you reach the first fan instead of going up to the platform ahead, flip around and jump onto the one above you. You will find the next audiolog just waiting for you.
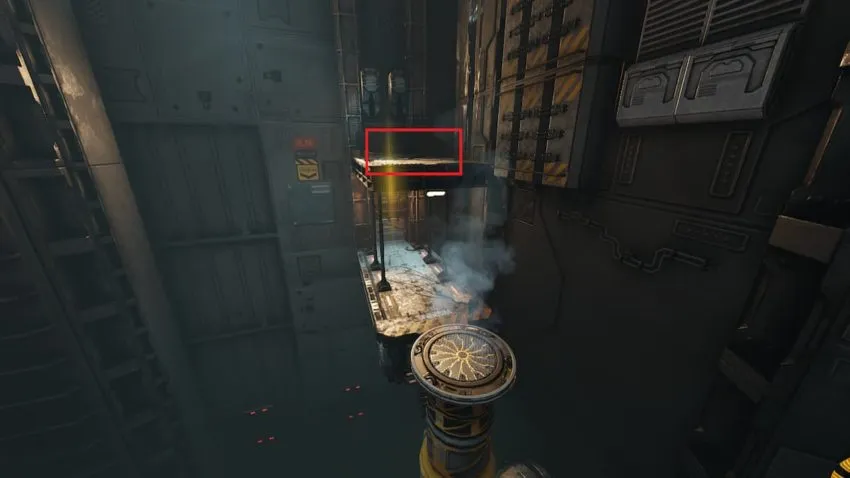
Artifact 12
You will eventually enter a room with a fan puzzle. You will need to activate two switches to turn a crane with grappling points on it before you can leave. You will also get some dialogue from Zoe and the Architect right after the filtration system is shut off.
Once you have complete the puzzle and are ready to head through to the next area, you will need to grab a sensory boost to dodge two fans along your path. Instead of going through the second fan and into the next area, turn to your right. There is a grappling point on some pipes. The artifact is right above it.
Sword 3
The next sword, the Twilight Seisokun, is just after your first encounter with the melee enemies. You will come to a room with a single grapple point attached to a crane. You will need to jump onto a platform and hit a switch to get the crane to start spinning. The artifact will be on the platform directly across from the one with the switch.
Artifact 13
This artifact is fairly easy to get. Once you turn the air system back on turn left after leaving the cybervoid terminal. You will see a fan you can use to get boosted up into a small alcove. The artifact is just inside.
Sword 4
This is possibly one of the most difficult collectibles to get in the game. You will need to be fast and have very good timing. After you turn the air system back on you will need to back track through the level. Eventually, you will reach an area with a spinning fan. On a platform above and behind you, there is a sensory boost you can use to get through it.
Grab the sensory boost, but instead of going through the fan in front of you, head to your right. There is another spinning fan against a back wall. Move as quickly as you can to get to the fan in time. You will find the sword, Yama, inside the airduct. You will probably die on the way back, but you will still get to keep the sword after you have collected it.
Road to Amida
Artifact 14
This artifact is right at the beginning of the level. Kill the first enforcer and move into the next room where you find the second one. After you have dispatched the second enforce, go back up to the top of the ramp and look over the side. You should see a small ledge sticking out. Drop down onto the ledge to get into a hidden space with the artifact.
Artifact 15
This artifact is pretty easy to grab. You will enter a room with a grunt and two shielded enforces. Once you kill the grunt you can pop up onto a container to destroy the shield generator protecting the enforces. The artifact is on a crate just above where the shield generator is located.
Artifact 16
The next artifact is in the room right after you stop the first motor. Once you go through the door into the next section you will see that the path goes to the right. But if you walk to the ledge of the platform and look to the right you will see the artifact. You will need to use the sensory boost to jump onto the wall and run over to the platform.
Sword 5
The next sword, the Kinteki Seisouken, is easy to miss. You will enter a room with four motors for you to hack. There will be a few guards and a couple of platforms with staircases. You will need to hop onto the second platform and jump onto a hacked motor to advance. From there you can have access to a grappling point.
Before you cross the motor over to the grapple point, search the second platform. The sword is behind some boxes.
Artifact 17
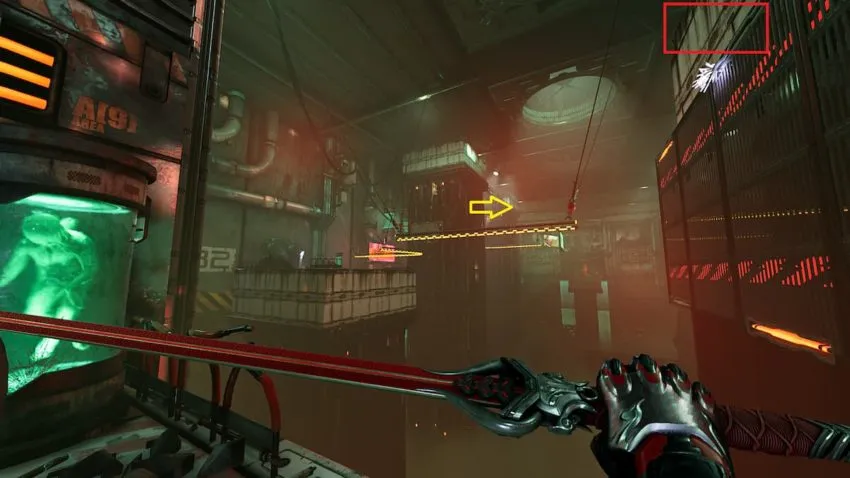
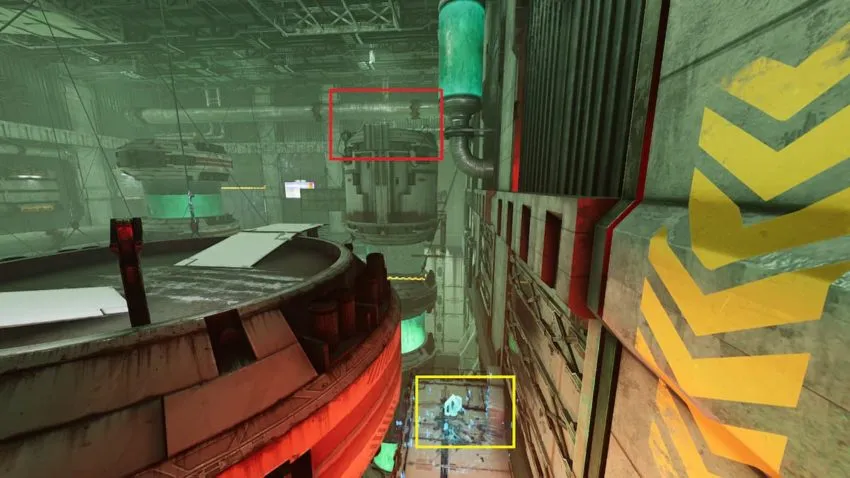
This artifact is easy to walk by. Near the end of the level you will need to use a shuriken to take out a bunch of guards at once, After that you will reach an area with a motor surrounded by laser walls. Before you hack the motor to climb over it, step back and look at the wall with the big yellow arrows on it. Right next to it is a grate with a small gap.
Run right at the grate and jump on it. You will start wall running into a new hallway with the artifact at the end of it.
Run Up
Artifact 18
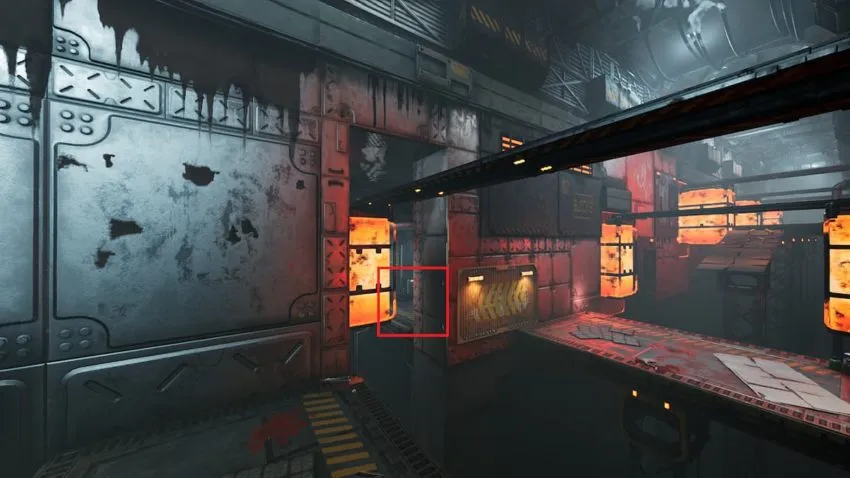
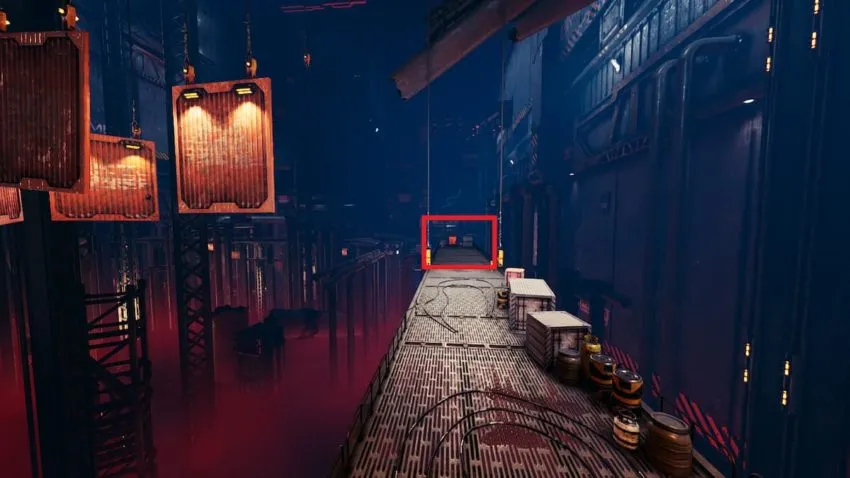
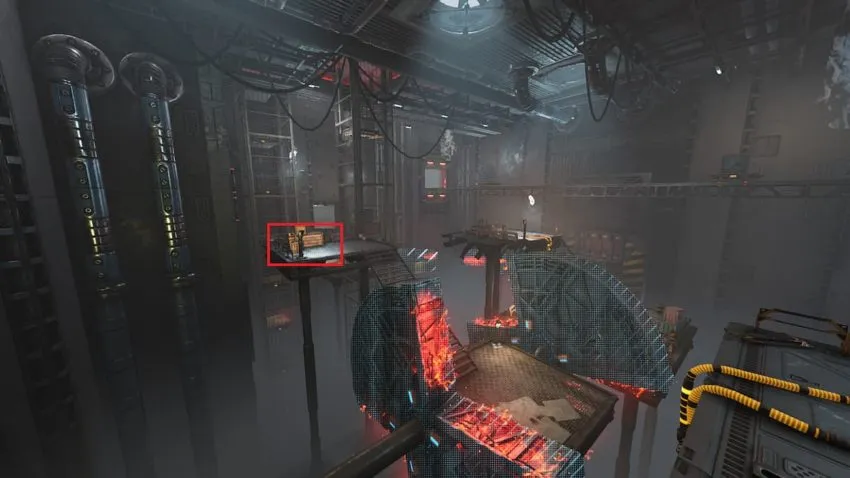
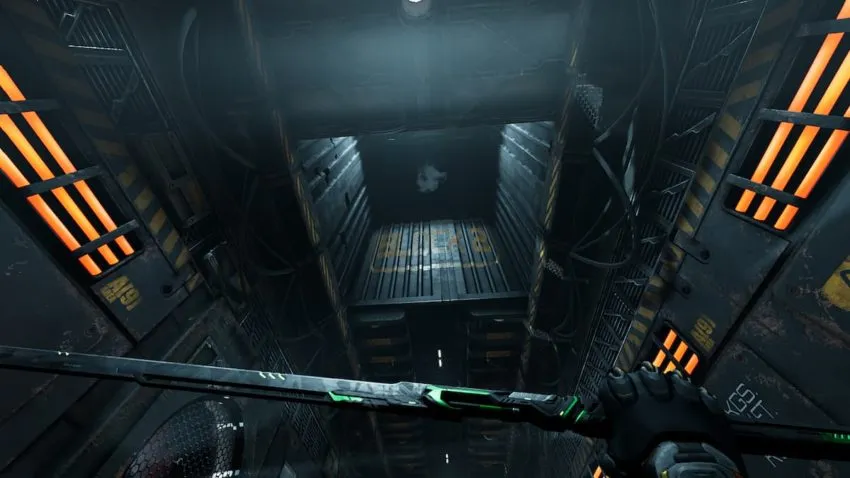
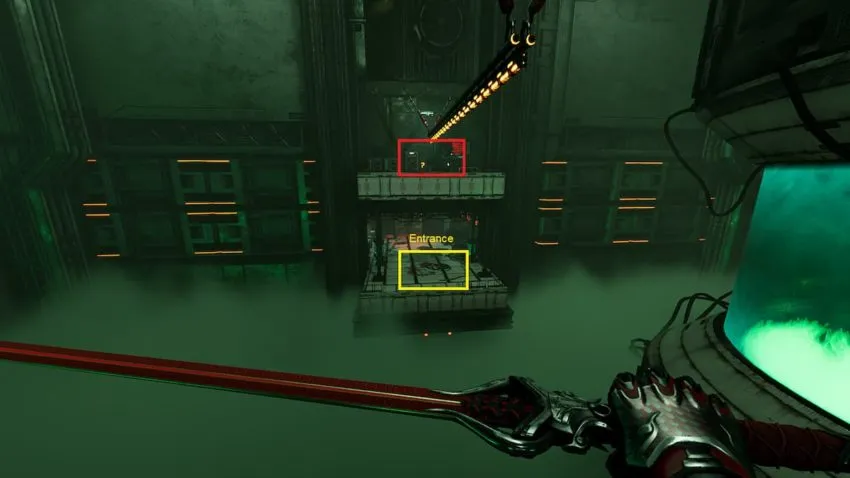
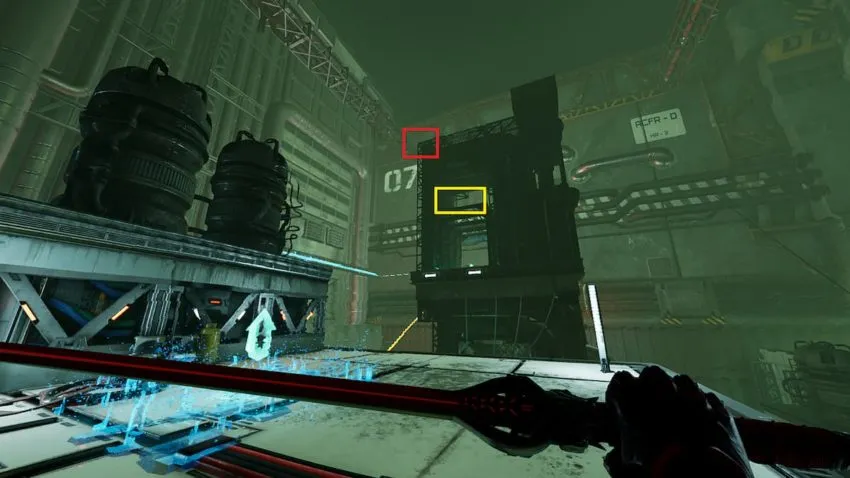
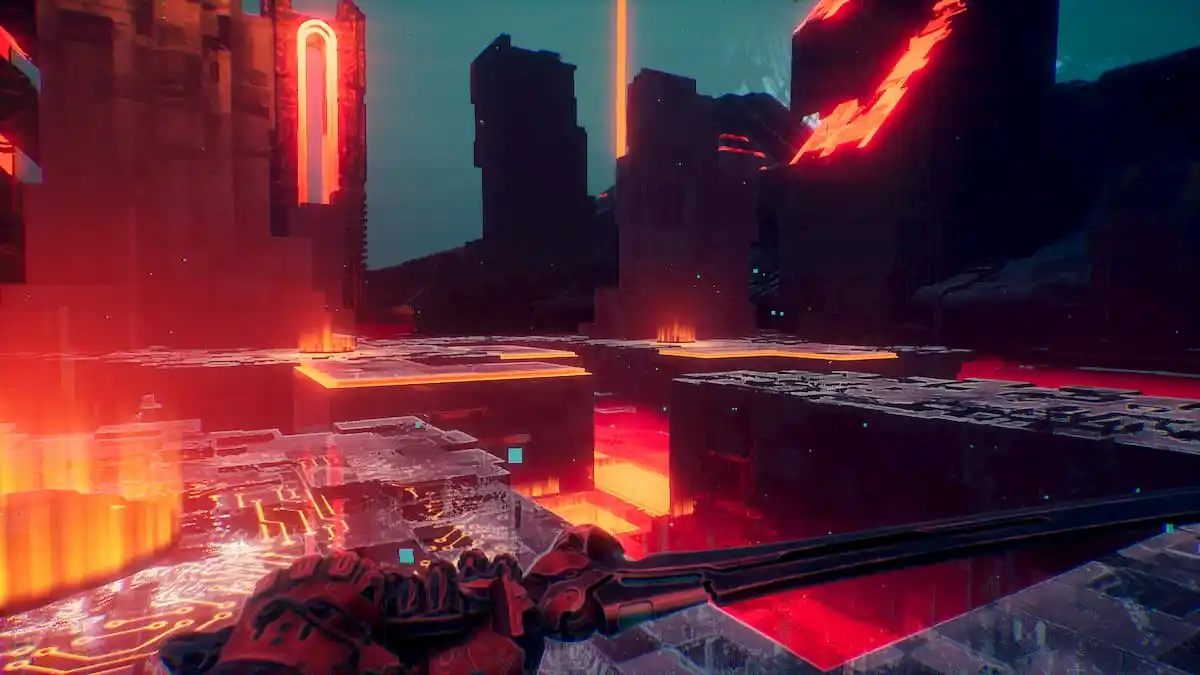
After you leave the Cybervoid, you will enter a room with molten cubes moving on zipline. Move through the corridor and take out the guards until you get to the last zipline. There is a hidden room the cubes are entering on the right side of the room. Follow them in to find the artifact waiting for you on a platform.
Audiolog 3
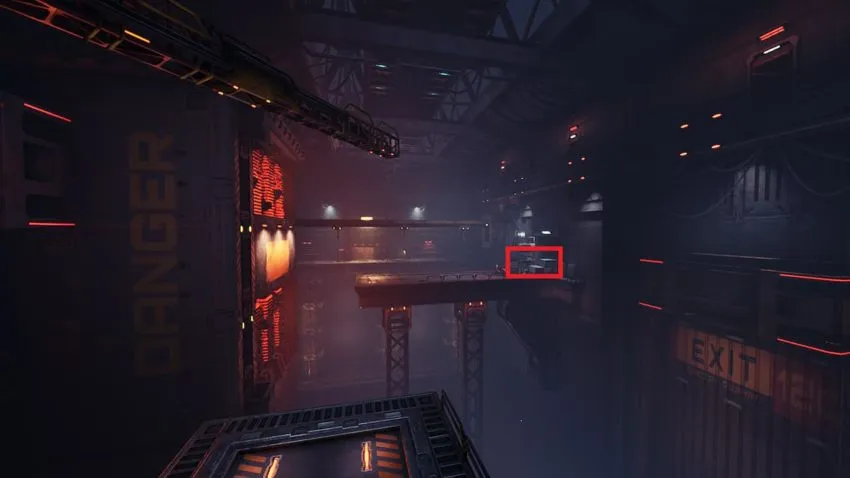
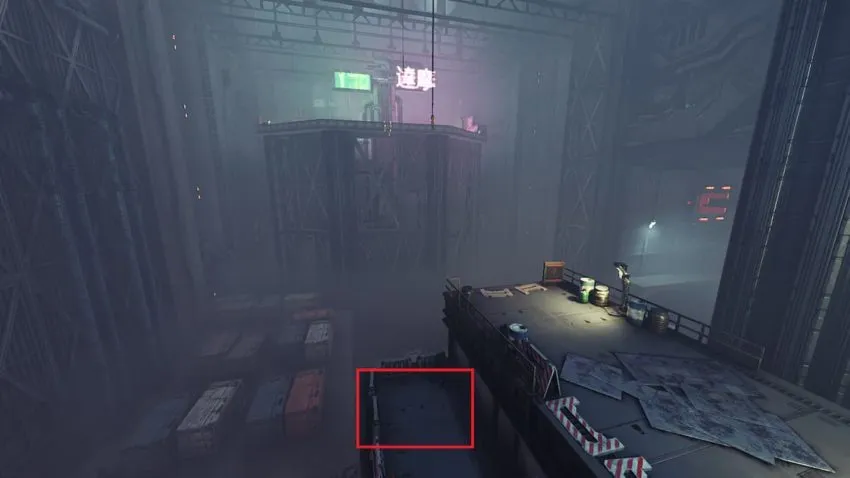
After you get past the first section of the grinding slide of doom, you will exit through a door and be greeted by a raptor mech firing horizontal waves at you. Before you go meet the mech, go back to the door you just came through and look up. There will be a platform with a grapple point on it in the ceiling. The artifact is just above it.
Sword 6
After you fight off a pair of mechs in a single room, you will have to wall run a little ways to get to the next section. You will land on a small platform with a grapple point that is supposed to take you to an even larger platform.
Before you leave, head over to the left of the platform and drop down onto the ledge below. You will find the next sword, Venom TsuruGR, waiting for you.
The Gatekeeper
This level doesn’t have any collectibles on it. Good luck meeting TOM!
Dharma City
Sword 7
After your first encounter with a drone, you’ll have to slide along a bunch of ziplines to get to the next platform. When you get off the last line and see the next drone, turn around. Jump back onto the zipline and it will take you down into an alcove with a new sword, Vintage Sentinel, ready to be used.
Artifact 19

After you find your first jump boost, you will be able to hop up onto a platform with another boost nearby. Go ahead and grab the second boost, but instead of jumping ahead, turn around and jump onto the rooftop behind you to find an artifact.
Artifact 20
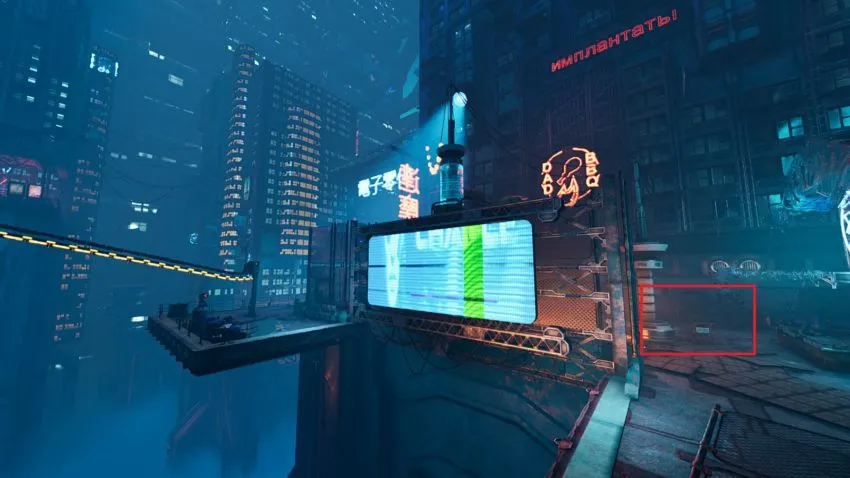
After you grab the previous artifact, go ahead and use the jump boost to move ahead. The next rooftop has two enemies on it, You will probably see the next item through the chain-link fence. Once you dispatch them the two Keys, circle around the rooftop instead of using the zipline to move on. You will have to wall run to the adjoining roof, but once you are there you can find the next artifact behind the fence looking out on where the two enemies were.
Artifact 21
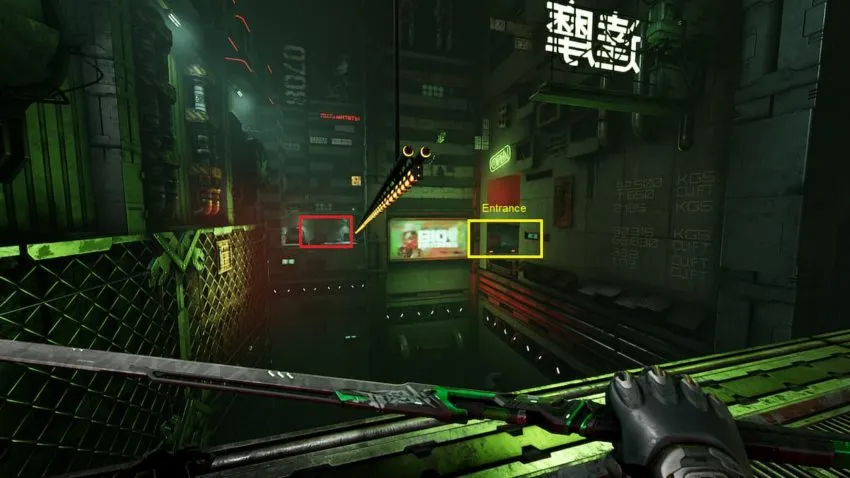
Partway through the level you very briefly enter an old subway station. Once you exit the tube you will have a grapple point leading to a zipline. Face to the right when you grapple towards the line and it will drop you off near the artifact. Go through the small door on the left to get to it.
Artifact 22
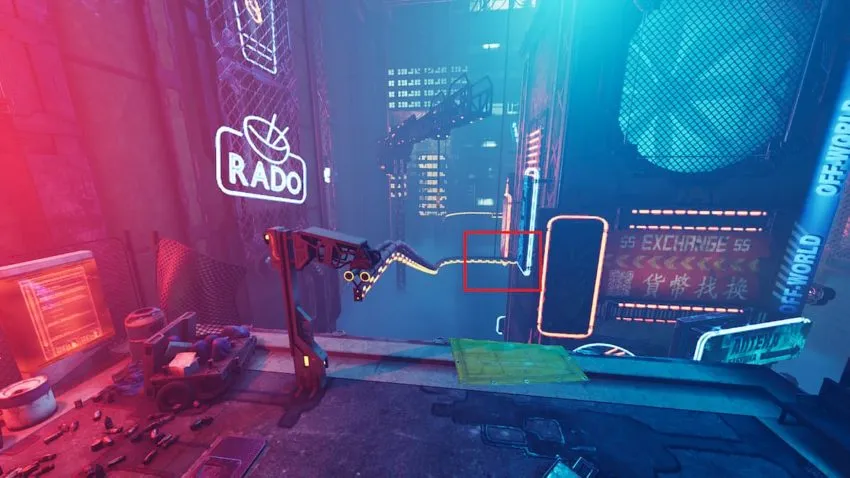
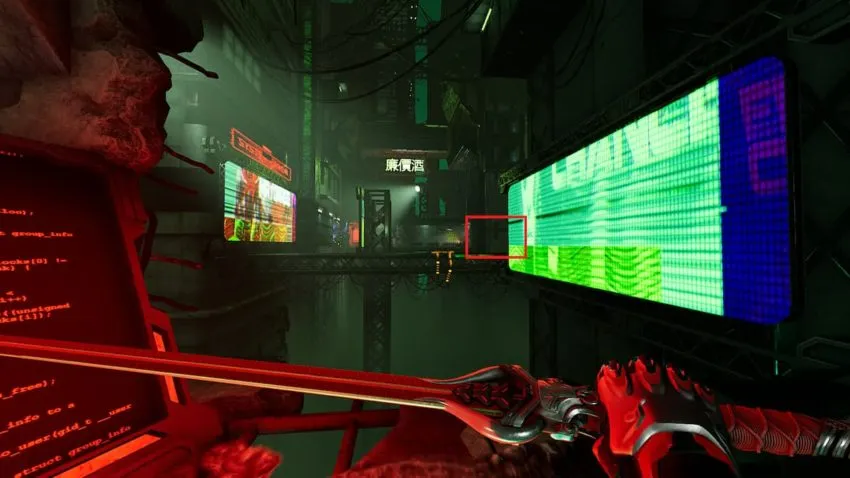
Near the end of the level, you will get to go on another ride on a trio of drones. In order to advance you will need to hack a billboard so you can run across it. Once you get to the other side, go ahead and hack the billboard again so it slides back into place. From there you can use it to cross over to the last item for the level.
Echoes
Sword 8
Your next sword shows up right at the start of the level. After you defeat the grunt and the second sword wielding warden, you will need to run across some billboards to advance. You will come to an area with a small opening for you to slide under. Before you go through the opening, turn to the left and you will notice you can run on the back of the billboards you just used to get to a new area. The sword, the TsuruGR Nini-Chan, will be sitting on a platform on the far end of the new area.
Sword 9
For the next sword, the Modified Carbon Yama, all you need to do is keep an eye out for the first mech of the level. There is a hole in the wall right above it. Wall run and use sensory boost to go through it and you will find the sword sitting on a ledge just on the other side.
Audiolog 4
Shortly after you get the Modified Carbon Yata, you will come into an area with a mix of grunts and mechs wanting to have a few words with you. The next audiolog is on a busted pipeline just above and behind the platform with the last mech. Take out the enemies and use the yellow zipline to get up onto the next platform. Once there, drop down onto the pipeline and dash across the gap to grab your prize. Whatever you do, don’t leave the area yet. The next artifact is close by.
Artifact 23
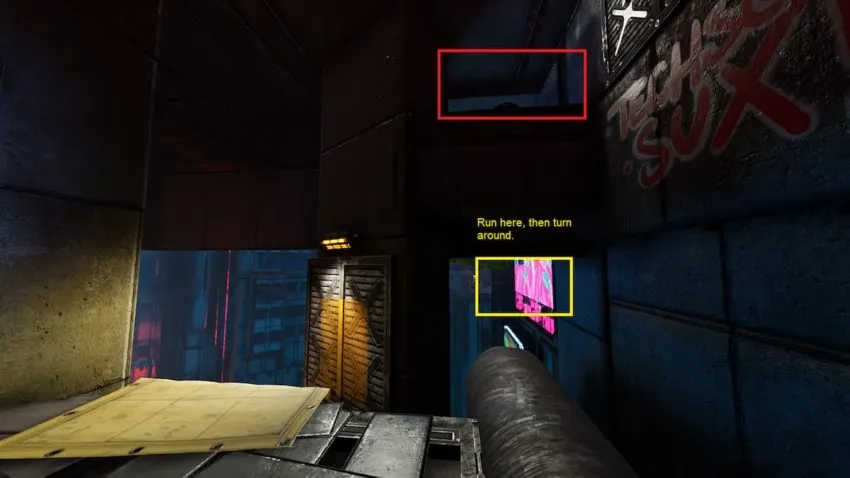
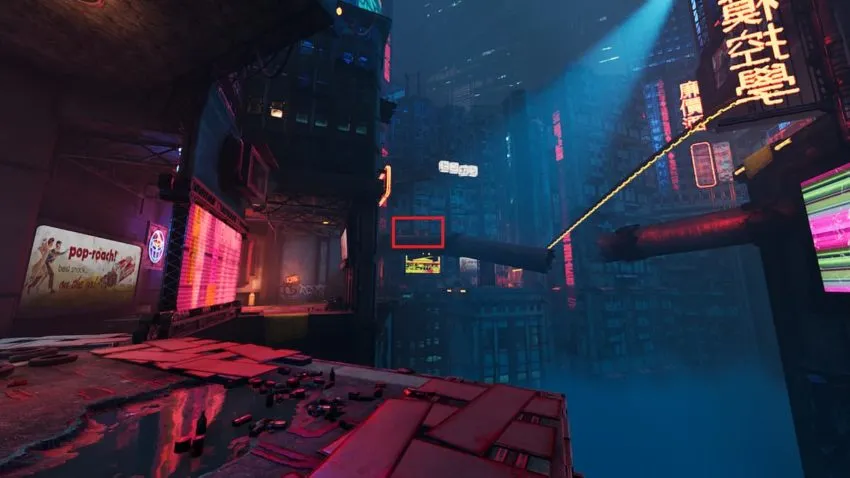
Go back across the pipe and heave yourself up onto the next platform. Wall run onto the pipes leading to the next area, but don’t drop down through the next doorway yet. Instead, turn around and look for a gap in the wall over on your right leading to a pink billboard. The artifact is on a ledge above the gap.
Run across the billboard, then use sensory boost to flip around and run back towards the next area. Jump up and grab on to the ledge above the opening in the wall to get the next artifact.
Artifact 24
This artifact is found right after you deal with the first sniper of the level and run into the second. When you enter the area with the second sniper, look to the left and you will see the artifact hanging out on a rooftop nearby. Hack the wall in front of you to move it across the sniper’s line of sight. This should give you enough cover to grab the artifact and go tell him to stop shooting at you.
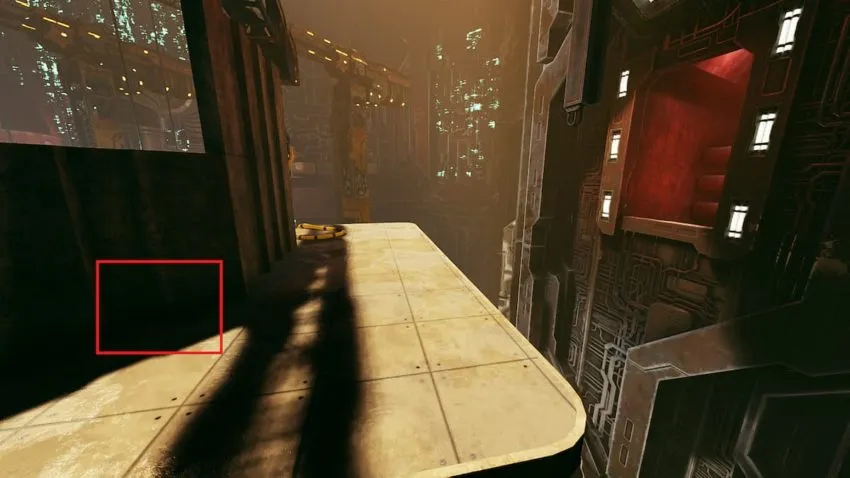
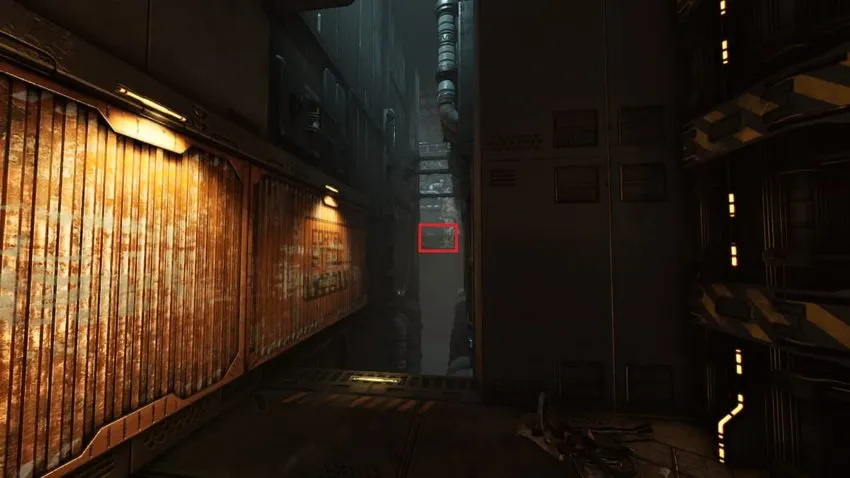
Artifact 25
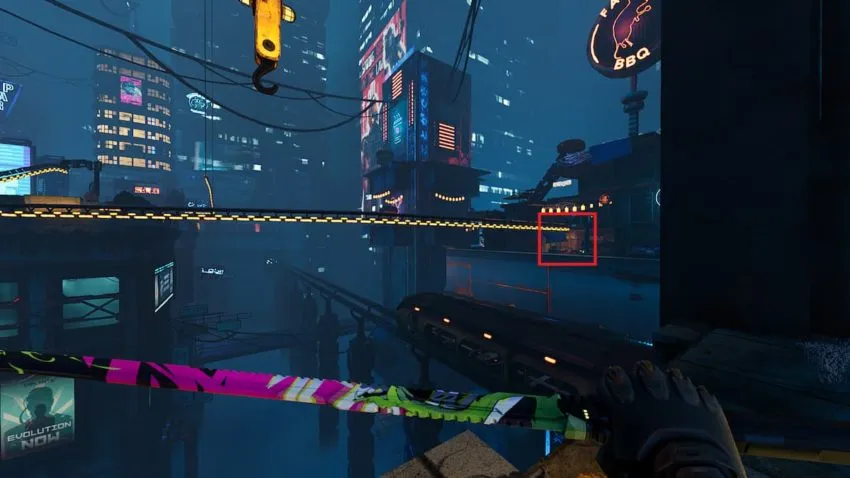
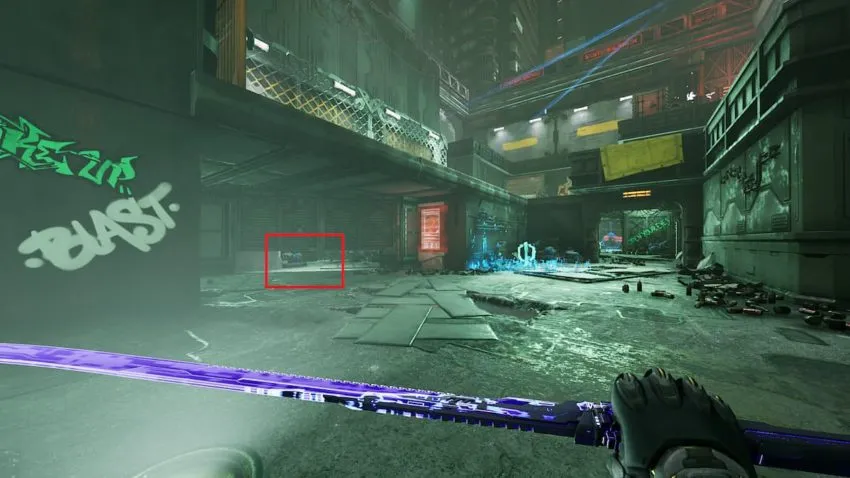
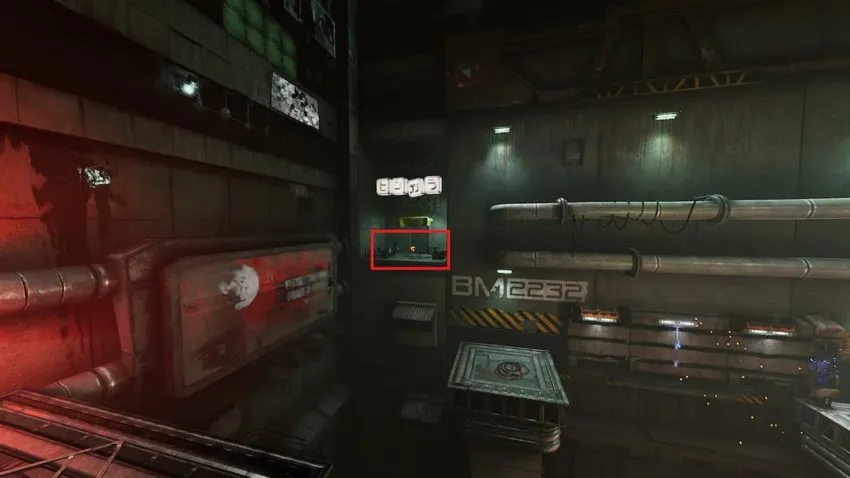
When you find the first jump boost of the stage, grab it and drop down into the alley below. Turn right and jump up onto the platform above the alleyway to grab the last collectible of the stage. The platform you are looking for is behind some pipes and above a yellow “Adaptation or Extinction” sign featuring a skull and a gasmask.
Faster
Artifact 26
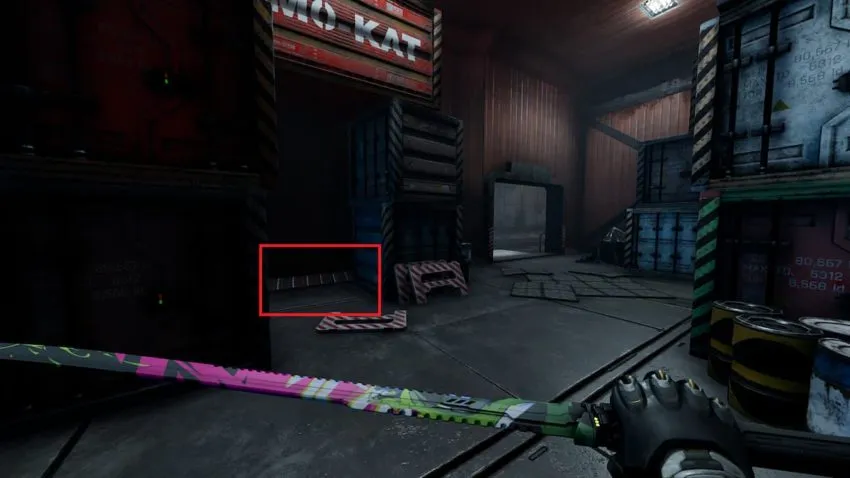
There is only one artifact on this level and it is pretty easy to find. Once you make it onto the train you will have a run-in with a grunt and a pair of wardens. After you take care of them the artifact will be in the car behind them. Head in and look between the containers on the left side of the car. You will find it sitting in a little alcove between them.
In Her Own Image
This level only has one collectible. The Izanami sword is earned from killing the false Ghostrunner, Hel. This entire battle relies on good timing and reflexes. You will need to parry Hel’s attacks to gain an opening to strike back at her. Her sword will give off a yellow glow when you need to strike so keep an eye out for it.
When Hel is finally defeated you will gain her sword, the Izanami, to use as your own along with access to her ranged attack. Once this level is completed there are only three more with collectibles available.
Forbidden Zone
Audiolog 5
The audiolog is right at the beginning of the level sitting on top of some large boxes. Head towards the first turret and turn right to stay out of its field of vision. There will be a wall on the right side of the room you can use to get up to the boxes and grab the log.
Artifact 27
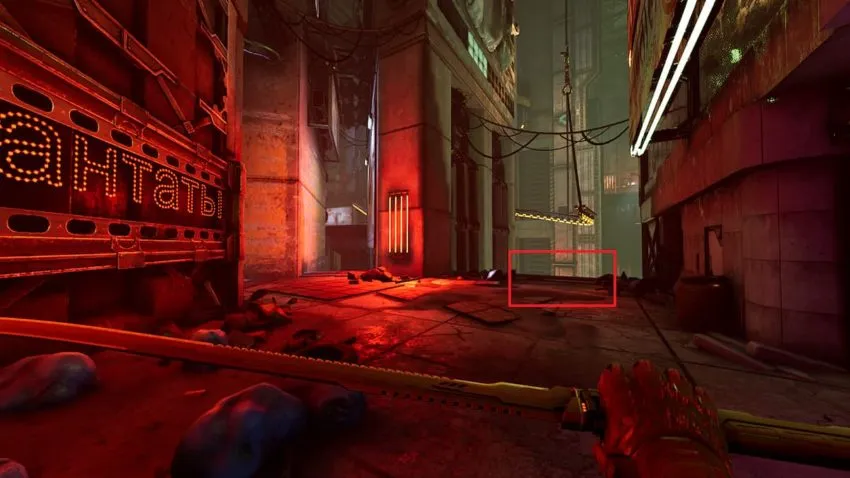
After avoiding a turret and using a couple of ziplines to advance, you will eventually come to a ramp. You can slide down it and run along the walls to scare the life out of a poor grunt waiting at the bottom. In this room the next artifact is on a railing above the platform where the first grunt was standing.
If you circle around the left side of the room you can use the walls to jump up onto a ledge just across from the artifact. Use sensory boost to get across the gap and the artifact is yours.
Artifact 28
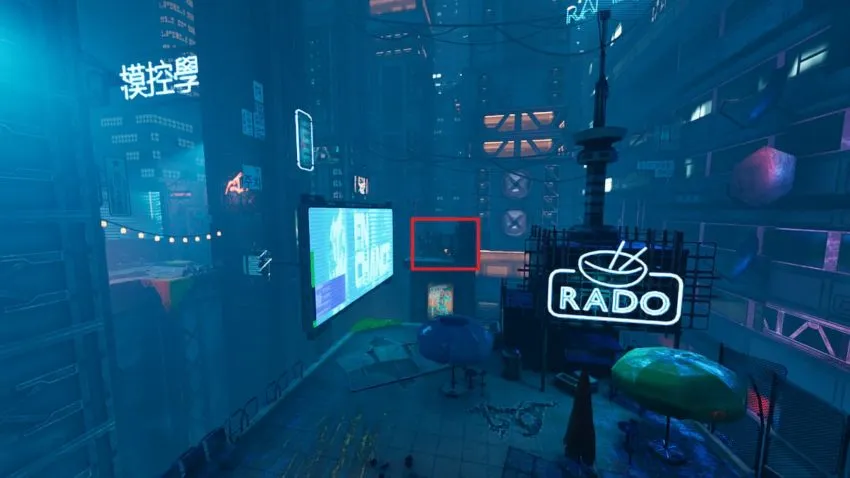
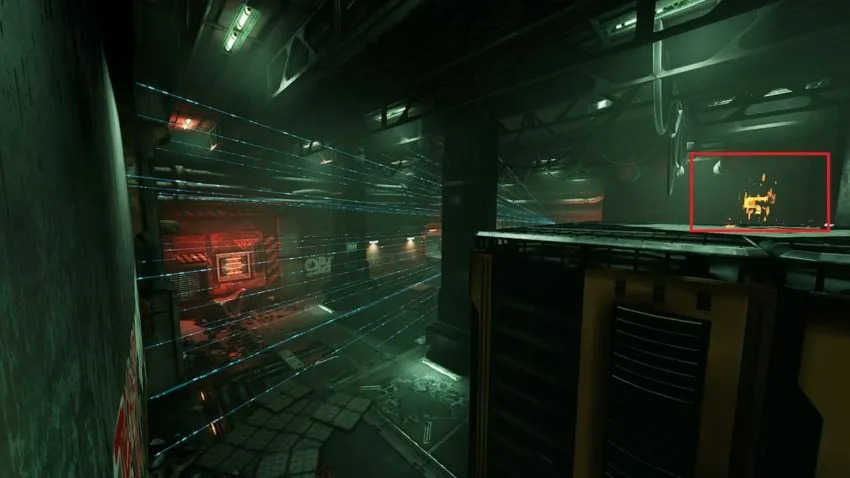
You will find this artifact in the room with the three turrets aimed at one another. Destroy the turrets, then look up from where the lowest one was sitting. You can probably see the artifact on the walkway above you. If you wallrun to the platform across from you there is a grappling point that will take you up to the walkway.
Artifact 29
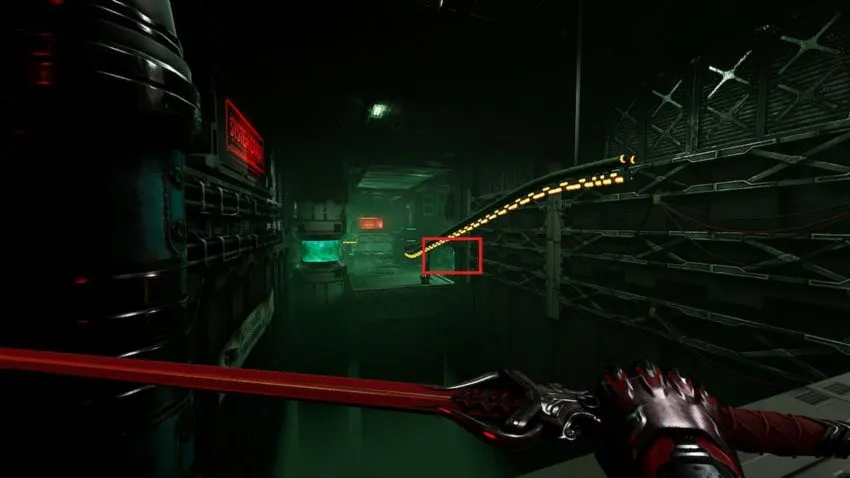
This artifact will show up right after you run into a duo of sluggers. After you defeat them you will be able to use a zipline to get up to the next area of the map. This area has several enemies waiting for you, but you will be able to get the artifact before you really have to deal with them. There will be another zipline right in front of you, Instead of hopping on it, drop down onto the ledge below to grab the artifact.
Once you have this artifact, you won’t be able to get back up onto the level you came from. Instead, circle around the wall and you will spot a grappling point where the two sluggers were earlier. You can use it to get back to the start of the area and catch a zipline back up.
Sword 11
This is one of the more difficult swords to get in the game, mainly because of the enemies you have to deal with to get to it. We recommend clearing the room before you attempt to grab it. After getting past more turrets you will come to a ramp leading into a large room. The first enemies you have to get by are a pair of raptor mechs close to the sword.
After you clear the room, go back to the jump boost close to where you beat the two mechs. Around the corner from it will be a garage door that is just slightly ajar. Slide under it and you will find the Void Dragon TsuruGR behind a crate.
Reign in Hell
For this next section of the game, we highly recommend installing the Surge: Range and Tempest: Multikill Refund modules in your upgrade menu. You will be facing a lot of exploding enemies that will appear in groups. Tempest is very effective for getting rid of them and the number of them you face will keep the ability charged.
Sword 12
Immediately after the start of the level, go down the hall and turn right like you are following the little creeper you just saw run by. You will find a blue terminal against the wall next to the door. Smash the terminal and the door will open to reveal the Izanami Unchained.
Artifact 30

After Mara starts giving her speech, you will need to use a switch to open a door and move on. After you pass through the door you will come out onto a platform and see more crawlers running up the wall. The artifact is right below the platform you are standing on. Drop off the ledge and use sensory boost to dash onto the ledge below and grab the artifact.
Sword 13
As Mara’s speech progresses, you will run into a group of four Wrecks (the creepy exploding creatures). After you get rid of them you will be able to run onto a billboard and grab a zipline. When you jump towards the zipline instead of heading to the left to get to the next area, turn to the right. The line will take you around the corner and onto a balcony with the Dharma Street Yama sitting on it.
Artifact 31
Right after you grab the sword you will have to take out a grunt and a coupld of wrecks in the next area. After they are gone you will need to jump onto an electrified wall, then grapple onto a billboard and run onto a new platform. Once you are on the platform, turn around and you will see the artifact on the other side of the billboard. Just run across it again to get your prize.
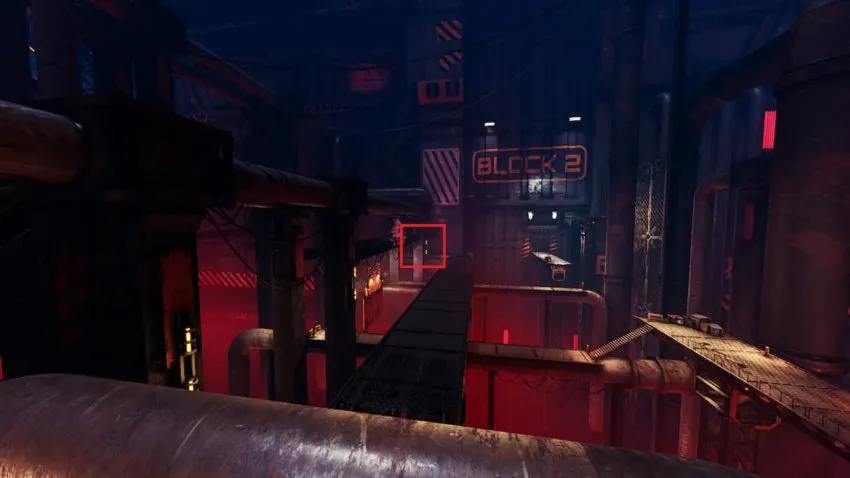
Artifact 32
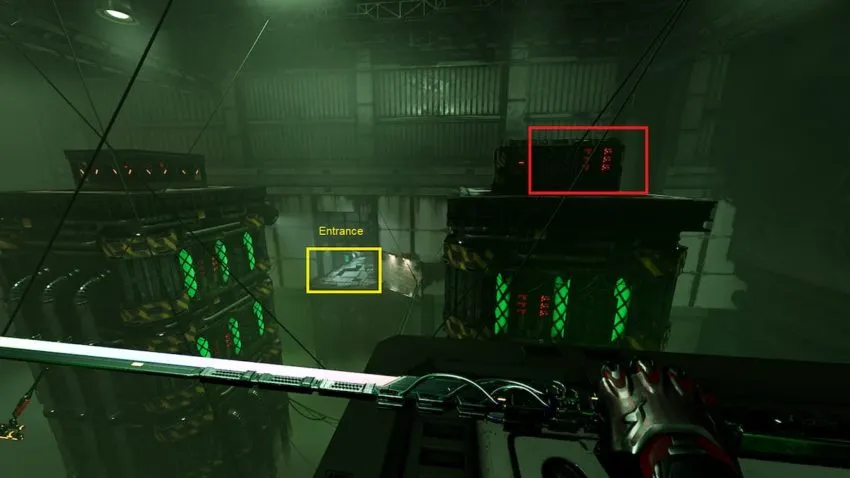
As you make your way through the facility you will eventually reach an area with a zipline leading down onto a platform with a few stasis chambers nearby. There will be a handful of wrecks for you to deal with, but tempest should let you make quick work of them. Once you use the line to get down onto the platform, turn to the left and you will see the artifact at the end of the hall.
Audiolog 6
After you exit the cybervoid with your new ability, you will get to meet a new type of enemy. Shifters are ranged enemies that can blink short distances and use an attack similar to the surge ability used by ghostrunners.
You will eventually get to a room with a pair of shifters fighting alongside some regular keys. After you beat them and leave the room you will come out of an old pipeline to see some billboards and a bridge. Run across the first billboard, then instead of heading to the next one turn to the right. You will see the audiolog on the far end of the bridge.
Things You Wouldn’t Believe
Artifact 33
After you get past the room full of wrecks, you will enter a room with a grapple point leading onto a platform ahead of you. There will also be a zipline stretching out above you. Go ahead and use the grapple point to get up onto the platform, then turn around and jump onto the line. The zipline will take you to the artifact on the roof of the room entrance.
Artifact 34
Right after your run-in with a group of keys, you will come to a room full of ziplines and walls for you to move through. When you first enter the room, the artifact will be on a ledge above you and to your right. After you use the first line to get to the next platform, turn around and use it again. It will take you to another zipline and a series of billboards that will let you jump up onto the ledge.
Sword 14
This last sword, the Chrome Izanami, is a bit tricky to get. You will enter a room with a substantial number of ziplines and hanging walls. There are 6 large structures in the room that you will use to help you traverse it. The sword is on the first large structure to your left when you enter the room.
To get to the sword, go ahead and jump on the zipline to begin making your way through the room. As you go you will eventually land on the middle structure on the left side of the room. When you do, turn back towards the entrance and use sensory boost to jump the gap to the next structure. The sword will be sitting on top of it.
Audiolog 7
The final audiolog of the game is located in a room full of vats surrounded by walls and ziplines. You will have to quickly navigate the room to get to the exit. Eventually you will land on the final vat and be able to jump down to the door below. Before you make the jump, turn left and hop off the vat to find a ledge with a jump boost below. Use the boost to leap across the room and onto the tall vat near the entrance. The audiolog is sitting on top of the vat and you can use sensory boost to jump back across.
Artifact 35
The final artifact of the game requires is near the end of the level. You will get to a room where you need to use shuriken to strike electrical panels and get through the door. You will need to use one of the jump boosts available in the room to get to it. If you get to the shuriken before you grab the artifact, you are going to have a bit of a hard time. Circle around the structure you are on and jump towards the one near the entrance.
Grab the second jump boost in the room and leap towards the structure with the shuriken. Instead of landing on the platform where you are supposed to be, use sensory boost or spring to jump up onto the railings above it. Once you walk across the railings you will find another jump boost. Use it to get to the top of the structure and you will find the artifact sitting on the corner overlooking the exit.


Published: Jun 22, 2023 04:13 pm