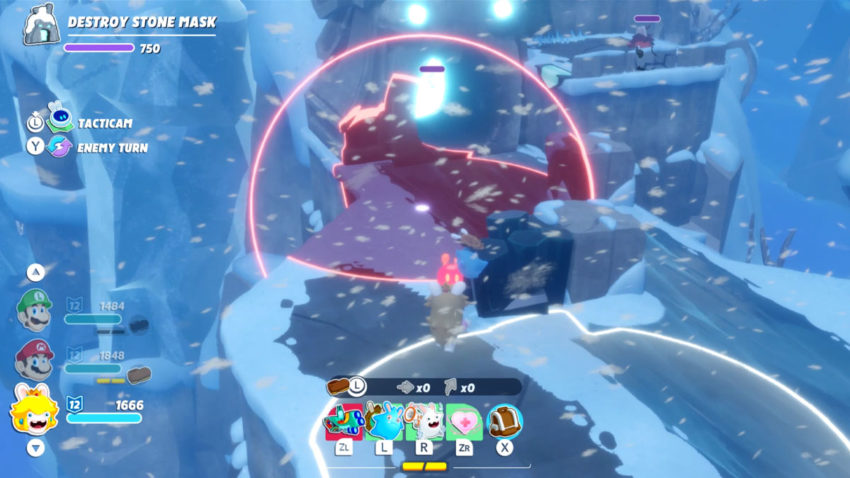
Your first task in Mario + Rabbids: Sparks of Hope’s second world, Pristine Peaks, is to scale the mountain. The path is long and winding, and before you pass the peak and enter the back half of the map, you’ll have to deal with the Stone Mask. This can be a tricky battle, so read on to learn the winning strategy.
Related: Mario + Rabbids: Sparks of Hope delivers a delightful free-form battle experience — Review
How to beat the Stone Mask

This is less a straight-up boss fight and more of an event battle or siege. You’ll need to break through three stone masks to clear the encounter; each one has more health than the last. Thankfully, the mechanics are the same for all three: when they exhale wind, it knocks you back if you’re standing in the way, giving you hardly any room to move once you regain your footing. Luckily, this also applies to enemies, so remember that for later — these Stone Masks can actually be used to your advantage in future battles.
For now, however, you need to destroy three of them. Luckily there are Bob-ombs about, and the first mask can be almost completely beaten with one explosion. You can finish it with a special attack or shot from anyone’s weapon. The battlefield gets bigger with each mask, so continue to time your movements in between exhales to avoid getting blown back. This is especially important when you reach the third Stone Mask because there are Lone Wolf enemies there. Getting blown back does count as movement, which means you’ll trigger their overwatch attack. Take extra care when this is active.
That’s really the rule of thumb for the entire battle: don’t let yourself get caught. That includes both the Stone Mask wind and the fire enemies’ burning attacks (running while on fire also triggers the Lone Wolves’ shots). You will likely get blown away once or twice, so pick yourself back up and press on. Mind your positioning, and you’ll make it through this gauntlet.


Published: Oct 20, 2022 08:30 am