
When it comes to streaming, the large majority of active streamers are broadcasting from a Windows PC or a console. However, that doesn’t mean that Mac users have to miss out. The main services that allow users to create their content have versions that will work on a Mac.
While there may not be quite as much support for games on the Mac operating system, your options are still plentiful to stream to your audience. There’s also the added benefit of being able to create an instance of Windows using the Bootcamp software, so if you think that your Mac can handle streaming from within this, you will have more options of games to stream.
Here is how to get started streaming on Twitch directly from a Mac.
Streaming Software

The first thing you are going to need is software that will allow you to broadcast your stream. There are three main options available to you.
Twitch Studio offers the most simple solution, with the ability to get your game, alerts for follows, and chat up on the screen and running very quickly. However, it offers a very basic feature set with little flexibility in upgrades and tools. If you want the fastest, most simple solution, Twitch Studio offers it.
Streamlabs OBS is available for Mac, and it offers largely the same features as its Windows counterpart, with themes and overlays for free to make your broadcast look professional. The option of the premium service is there should you feel it is worth your investment. There are still some limitations to it, but it’s a solution that is easy to use and can produce good results.
OBS Studio is also available for Mac, and offers the most in terms of flexibility and customization with plug-ins support, but also has the biggest learning curve of the three suites.
Which one to use is down to you and your level of technical know-how. For most, Streamlabs OBS will do everything that they need while keeping everything straightforward, but it’s worth taking your time with each to see what suits you. Once decided and you’ve installed your app choice, you’re not far from being ready to start a stream.
Twitch Studio and Streamlabs OBS will typically connect to Twitch when you log in as it uses your Twitch account, so it will be ready to go live when you are. For OBS Studio, head onto the Twitch website for your Stream Key in your profile, and then place this in the Stream tab of the settings. You should now be set to go live in OBS Studio once prepared.
Related: How to find your Twitch stream key
From here, add any scenes and game to your broadcasting software, include a title and game within your category option on your Twitch page, and then you are ready to go. However, there are some additional things you need to consider to improve the quality of your stream.
Lights, Camera, Sound, Action!
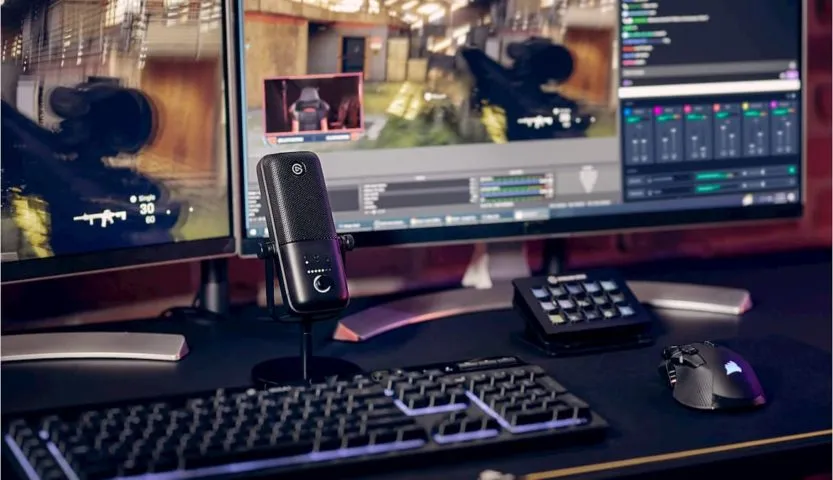
The better equipment in your setup, the higher quality you can output to Twitch to grow your audience. In order to give the best output you can from your place of streaming, there are a few pieces of equipment that you should consider investing in.
Arguably the most important is audio. The minimum you will need is your headset and microphone used for playing games so that you can communicate with visitors to your stream, but this will not provide a great experience for viewers as the quality is poor in comparison to a dedicated microphone.
To give yourself the best quality audio when chatting, an XLR microphone with a good quality preamplifier is typically the best set up to provide the most natural, flexible sound. However, USB microphones are growing in sophistication and can work well too for a more cost effective option.
Some top USB powered microphones include the Samson G-Track Pro and the Elgato Wave:3, both of which will offer an excellent upgrade to your voice quality.
Next, a webcam will allow your viewers to see you as you play. While you can stream without one, the high majority of successful streamers provide a camera view to allow them to match the voice to the person. It can also help with brand exposure as your channel grows. A popular webcam includes the likes of the Logitech C920, which does a great job in almost every instance so you don’t need to worry about getting a high-grade camera to look your best.
And finally with one that goes hand-in-hand with the camera is lighting. Even some of the best cameras in the world can look graining and undefined if your lighting conditions are poor. Consider some studio lights as this will immediately improve the quality of your stream camera.
With these additions, your streaming adventure on Mac should be smooth and great to look at. Good luck!


Published: Jan 13, 2021 07:52 am