The Solstice Shrines in Sea of Stars are filled with powerful items and play a part in a late-game challenge you will want to complete, so taking the time to pursue these puzzles is worthwhile.
The Western Solstice Shrine is one of these shrines, and it can be confusing figuring out how you can access it and might be a bit tricky for some players to crack. To make sure you can solve it easily, we’ve put together this guide with all the details on how to solve the Western Solstice Shrine, how you can get to it, and what reward you get for your troubles.
Related: Sea of Stars: Rainbow Conch Locations & Uses
Where to Find the Western Solstice Shrine
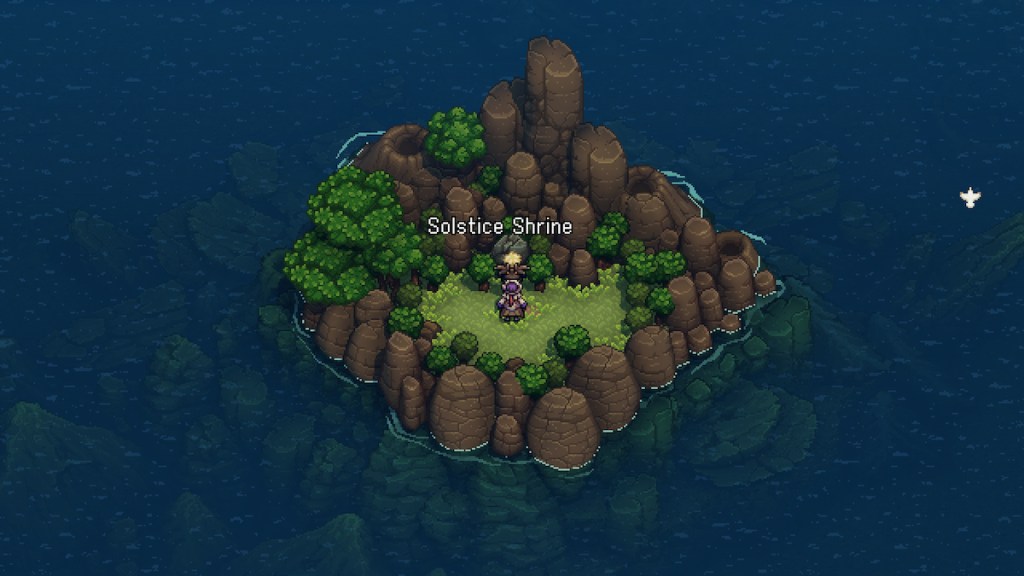
The Western Solstice Shrine can be found in the Home World between Sleeper and Evermist Islands, and you will need the Flying ability, which is unlocked towards the end of the game when you defeat the Dweller of Woe.
Once you have this ability, you are able to fly around the map and reach previously inaccessible areas, including several shrines like this one. All you will need to do is fly to the island and land, and you can enter the shrine with no issues or extra steps.
How to Complete the Western Solstice Shrine
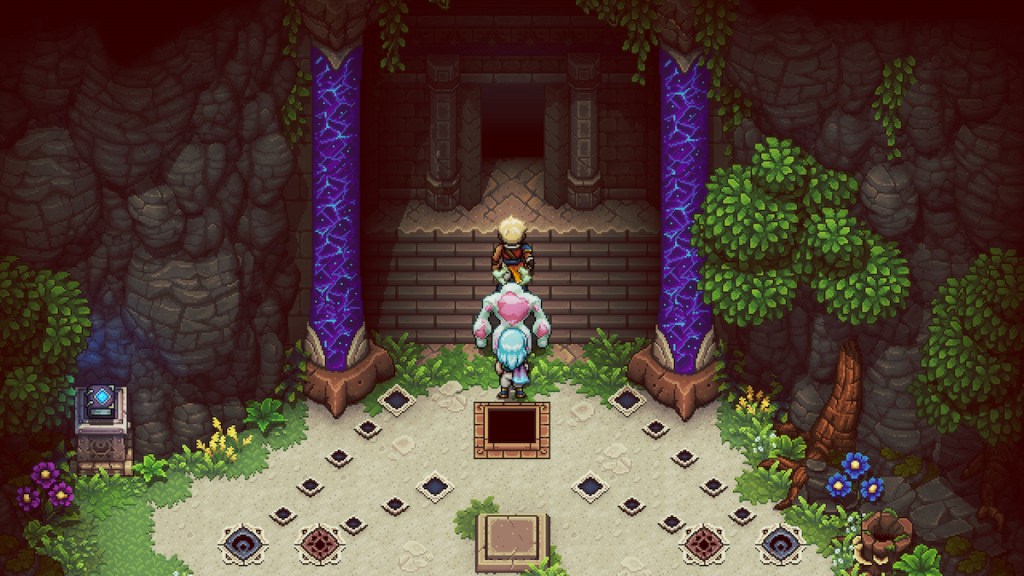
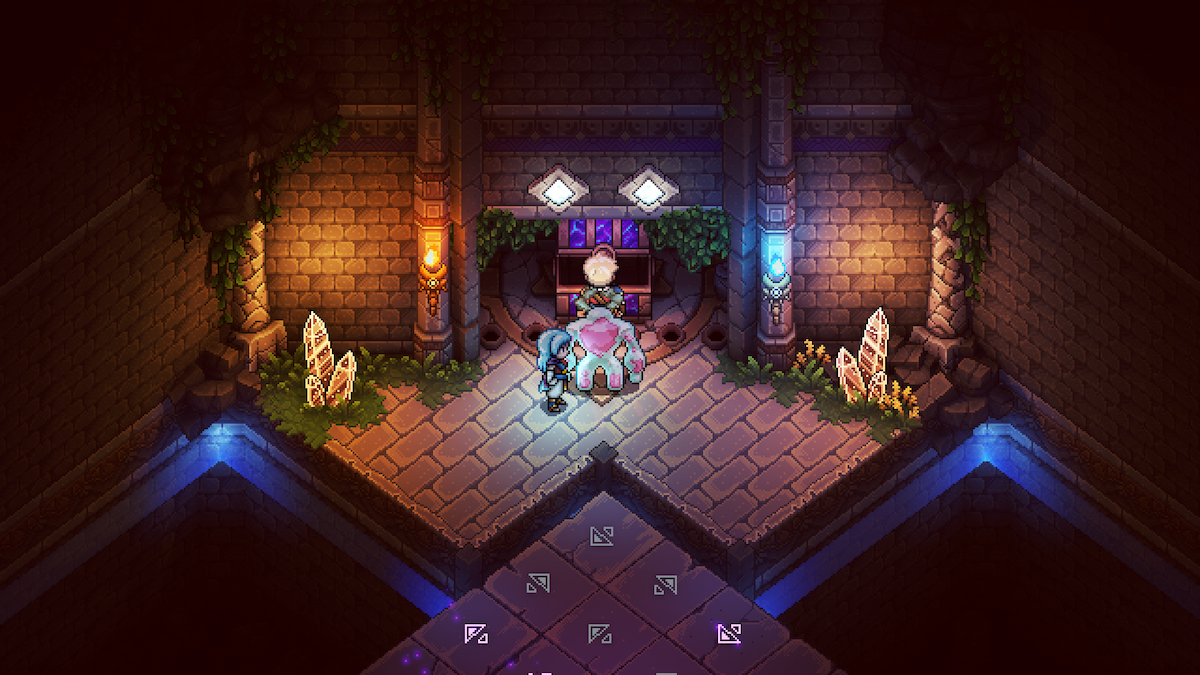
This puzzle requires the use of a single large platform that can only be moved using the arrows on its surface, with each arrow directing the platform across a large chasm. Admittedly, this took me a few moments to get to grips with since the platform doesn’t move in a simple up, down, left, and right style but at a slight angle.
However, once you get the hang of it, this Solstice Shrine can be completed very easily, and to make sure you do that without wasting time restarting, we will lay out how to complete this puzzle in a step-by-step guide below.
Getting the Left Button

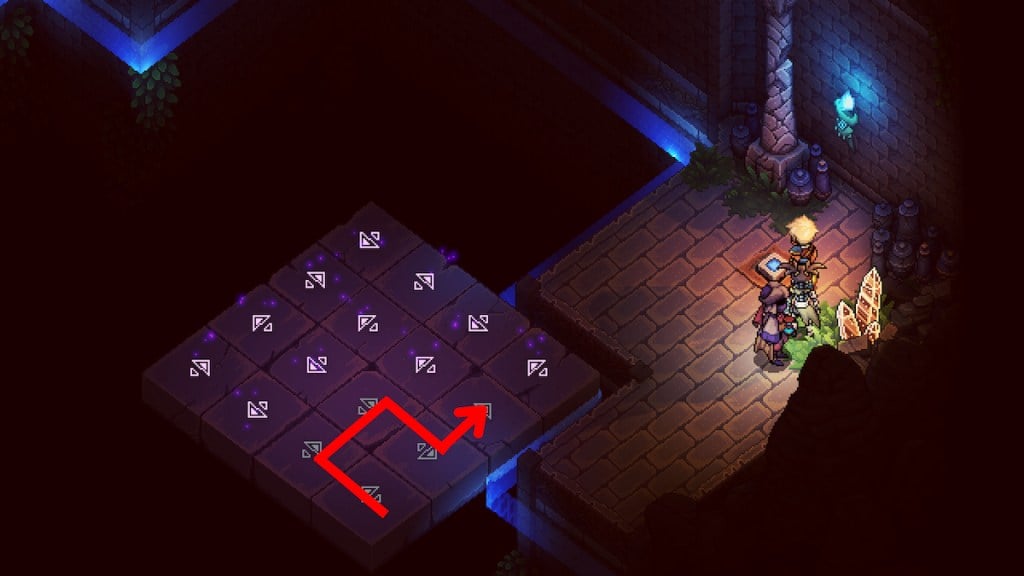
First, we are going to get to the left button. To do this, you’ll want to summon the platform by standing on the switch in front of you when you enter the puzzle room.
Once it’s summoned, you will need to climb on and make it move by walking on the correct arrows on its surface to make the platform move in the desired direction. In this case, follow the path illustrated in the image above, which is left, right, right, up, left, left.
Now, you can jump onto the side and press the button here, which will turn off the first lock of the chest.
Getting the Right Button
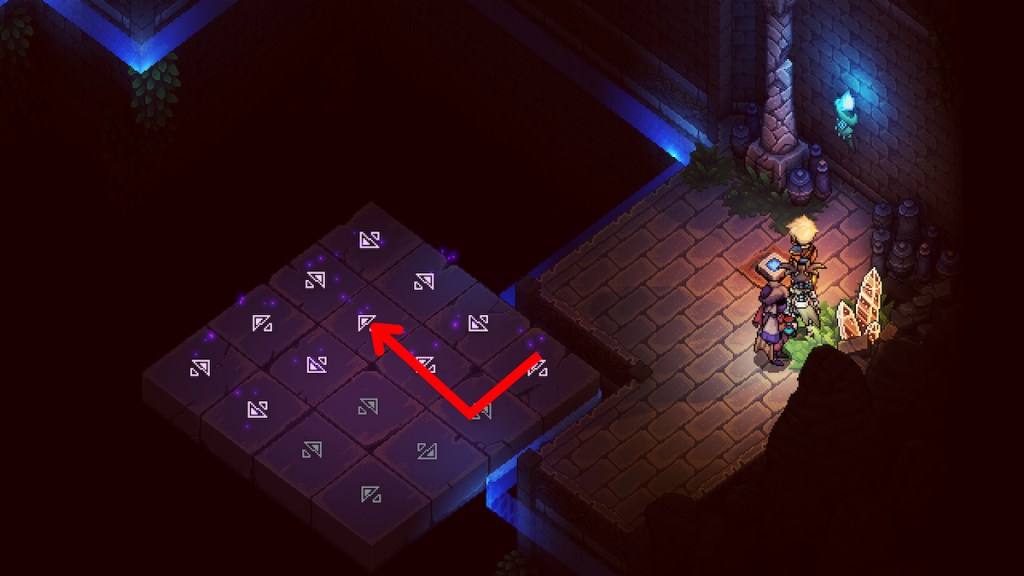
For the second button, you’ll want to reset the platform first, which you can do by jumping off the platform’s ledge into the chasm, which will drop you at the entrance to the puzzle room. Now, stand on the button again, and the platform will appear back at the start in front of you refreshed.
Now, jump on and follow the directions shown in the image, which are left, right, down, left. This will bring you to the second area with another button to press. This will then unlock the chest at the top of the puzzle area.
Getting to the Chest
The last set of platform movements is to get to the chest and claim your reward. If you have followed this guide, you will be able to reach the chest from the right side of the room without needing to reset the platform.
All you need to do is jump on the platform, making sure it’s a space that has been used, which will be the right corner taking you up to the left, and then move left, up, and up again, and you will have reached the chest, which contains the Eclipse Armor. Now, you can leave the Shrine and get back to your adventures.



Published: Sep 21, 2023 07:30 pm