Despite being deeply in love with Star Renegades, we are willing to admit that combat can be a little confusing when you first start playing. There is a lot to take in in this rogue-lite RPG, so in this article, we will be breaking down the important aspects of combat, and how it all works.
We are going to start off with the element that we consider to be the most important, Inspecting enemies.
Inspect Mode
Inspect Mode will show you a unit’s stats, the enemies they are targeting, and the types of attacks that they are weak to. This is all very important information for planning your moves, as you don’t want to do attacks that will not be effective or allow enemies to get off hard-hitting attacks on injured characters.
You should be referring to the Inspect mode a lot to get a clear picture of the best actions to take.
The Timeline
The Timeline dictates when characters will take their actions. If you choose an action, it will place your character into the timeline, and you can see when your character will react in relation to enemies. This means if you pick a type of action and it allows your enemy to go first, you can change the action so that you can strike first. Some of your actions will knock your enemies back in the time line, so you can do quick actions with some characters to set up another character for a more powerful attack later in the timeline. This will give you the advantage of getting Crits.
The timeline is constantly updating and changing based off the decision you make, so pay close attention to it at all times.
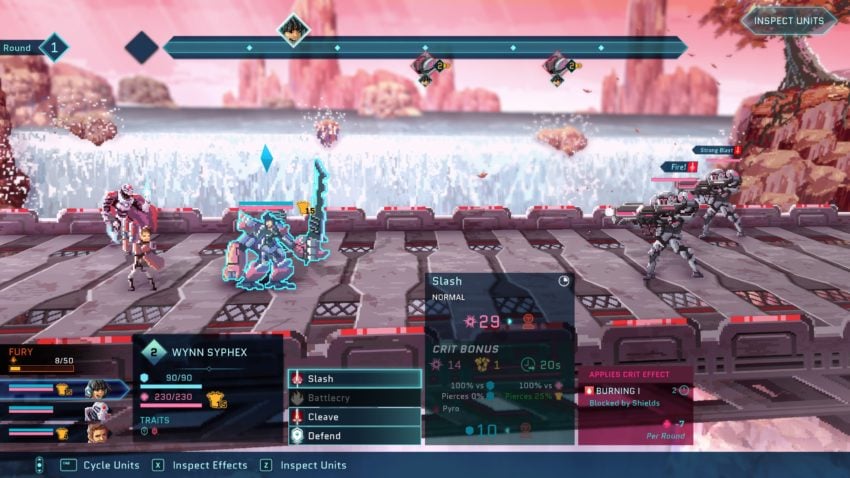
Attacking enemies and taking actions
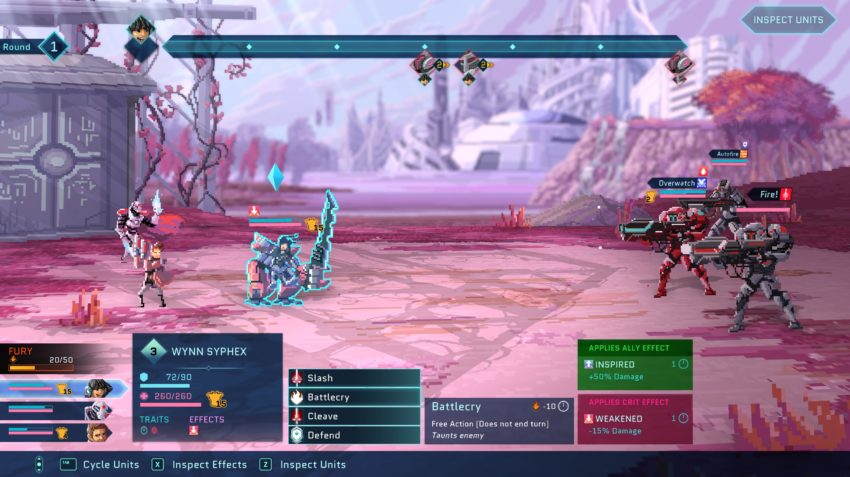
Each character will have a range of actions they can take each turn. You can find these by clicking on the character and looking at the dropdown list of actions they can take. Hovering over any action shows where it will place you in the timeline, while some actions will be free, such as Battlecry, shown above. This means you can perform Battlecry and another action.
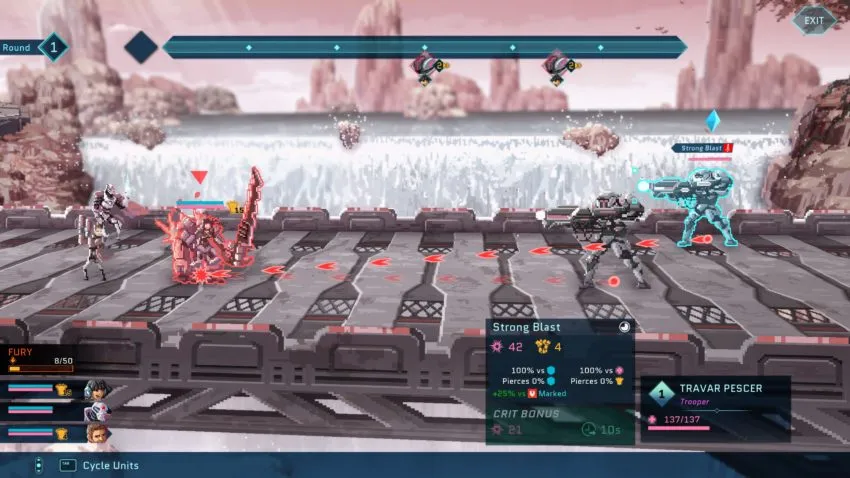
Crit Bonus
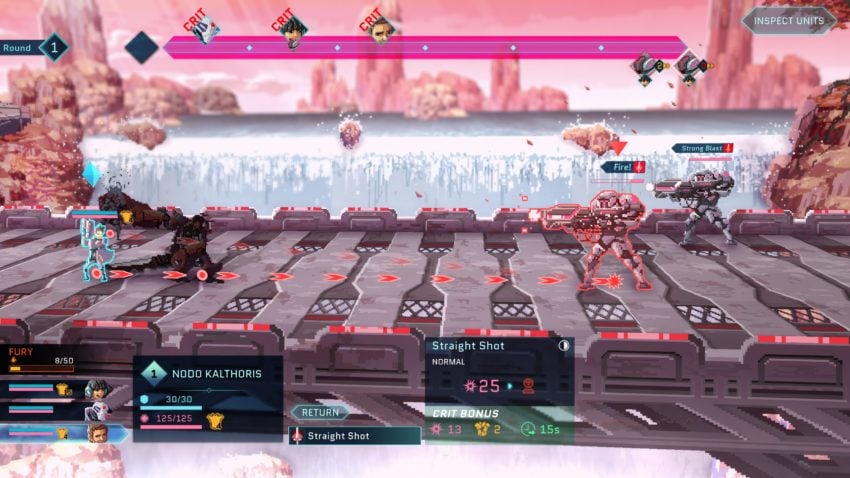
If you can attack an enemy before they can take their action, you will do a Crit, increasing the damage done to them. If you can set up your attacks so all your characters will have their actions before an enemy, then all attacks will get the Crit Bonus. As you can see in the image above, if a character is going to score a Crit that turn, it will be shown on the timeline above their portrait.
Stagger
Staggering an enemy is the aforementioned delay to their turn in the timeline. When your attack will Stagger an enemy, you will see them being pushed further back in the timeline at the top of the screen, so will be able to know what will happen before you commit to the attack. This allows you to plan your moves and set up your squad to be very effective.
Breaking enemies
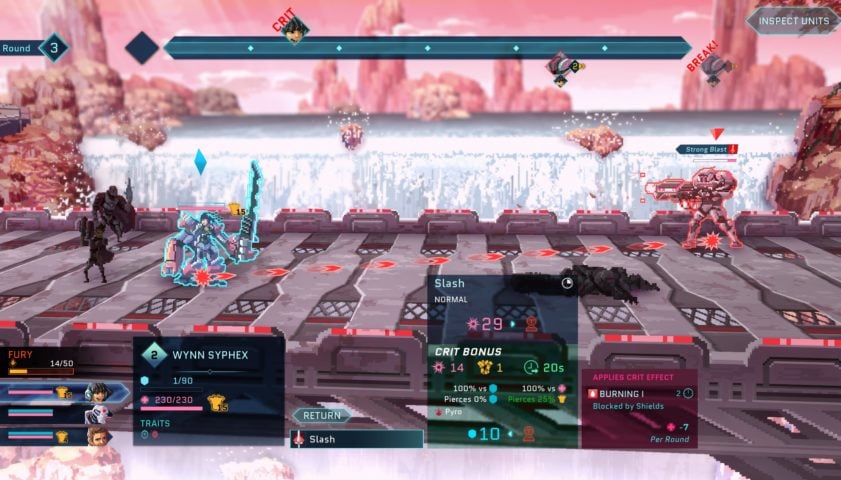
If you manage to Stagger an enemy all the way to the end of the timeline, this causes them to Break, and they lose their turn that round. With careful planning, you can focus on one enemy, breaking them, and reducing incoming damage for that round. If an enemy is going to be broken based on your actions, it will be shown on the timeline.
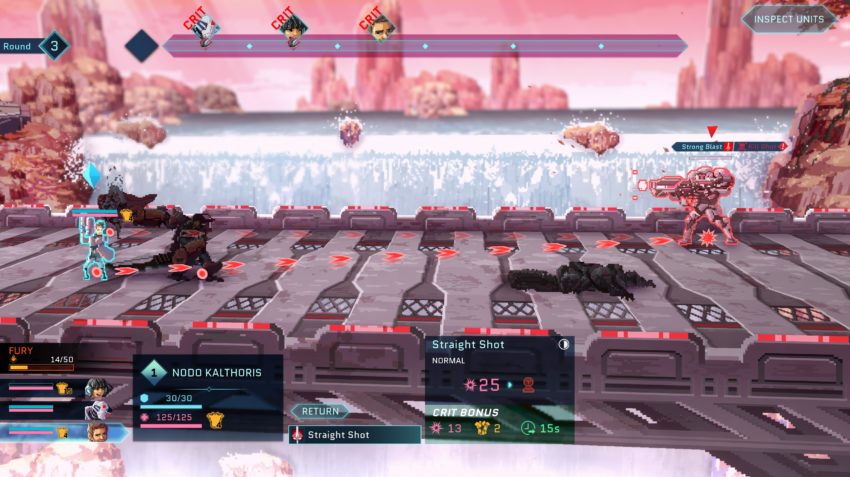
Fury
Fury is generated by landing Crits and Breaks on your enemies. A Crit will generate one Fury, while a Break will generate three Fury. Fury is a resource used to perform special attacks that will only become available in your actions list when you have enough Fury to perform them. These hard hitting attacks should be used against particularly tough enemies, especially ones that are weak to the type of damage they do.
Combos
Combos are very special moves that you also need Fury to perform. They will do immense damage, and are move effective when performed by characters that have a good relationship.
Shields and Armor
Shields
Shields are the first line of defense against incoming damage. Attack values will be subtracted from shields, first, but will reduce your shields by hitting them. Some characters will have abilities that will recharge shields, but for the most part, when shields go down they are down for the rest of the fight. This enables risk-taking earlier, forcing a more conservative style in later rounds.
Armor
Armor will defend a character’s health bar from incoming damage. Units with an Armor value will have that value subtracted from any damage done to their health. So, a unit with 10 armor, who takes 30 damage, will only take 20 damage to their health.
It is possible to strip away Armor with some attacks, and you will be able to see which ones by hovering over the actions name and reading the description. Attacks that reduce armor will have a shattered yellow armor symbol, and a number beside them denoting how much armor reduction they will do.
Reducing Armor reduces the amount of damage it will mitigate and is an important tactic in longer fights. Some attacks will pierce armor, meaning that they will ignore a certain percentage of the armor a character has. Armor-piecing values will be given in green text in the action description.
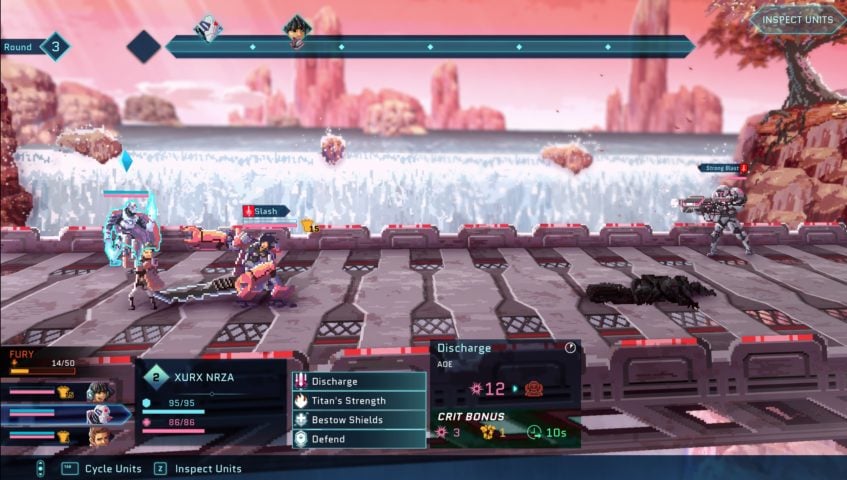
You can see in the image above, the Discharge attack will reduce enemy armor by 1 on a Crit, but will not do any armor-piercing.
Damage Types and Kill Shots
Kill Shots
When you line up a move that will do fatal damage to an enemy, it will say “Kill Shot” beside them. If you see this it is normally safe to stop attacking the enemy and planning moves against them from that point. However, it is possible for another enemy to do something in their turn that interferes with this, such as heal them, or give them shields.
Damage Types and Weaknesses
Most enemies in the game will be weak to some form of damage, and this can be discovered by using the previously mentioned Inspect Mode.
There are different damage types, and each attack will do a different one of those types. This can be found in the description of the attack. All attacks will do Light, Normal, Heavy, Flurry, Area of Effect, Counter, or Combo damage. Always try to hit enemies with damage that they are weak too, and it might take some clever timeline manipulation to make this happen.
For example, if a Heavy damage attack places you behind an enemy in the timeline who is weak to Heavy damage, be sure to Stagger that enemy with quicker attacks from other characters, knocking them back in the time line and allowing the Heavy attack to score a Crit on them.


Published: Sep 9, 2020 06:38 am