While exploring Hyrule in The Legend of Zelda: Tears of the Kingdom, Link can stumble upon a labyrinth in the north. Heading inside reveals a lengthy side quest that will send players down a deep rabbit hole in pursuit of one of the most elusive armor sets in the game. This guide explains how to find and complete The North Lomei Prophecy so no one gets stuck in the environmental puzzles it presents.
Related: Tears of the Kingdom – How to Complete Gerudo’s Colossal Fossil
How to Start The North Lomei Prophecy

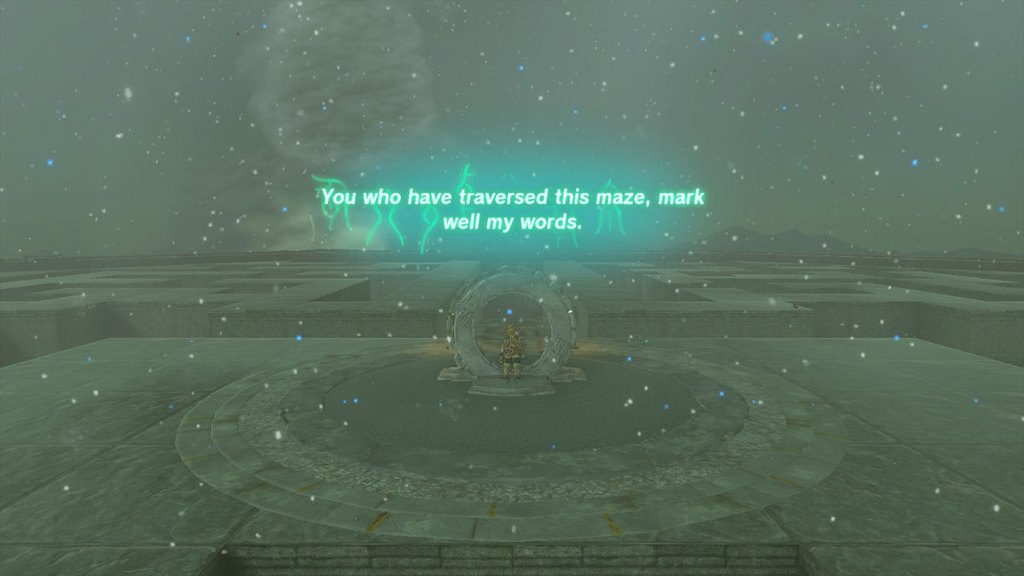
The North Lomei Prophecy side quest is at the center of the labyrinth in the Hebra Mountains region of Hyrule at map coordinates -0809, 3533, 0392. Reaching it is a puzzle in itself. Link will find notes from an explorer studying the area at the labyrinth’s entrance. By following the trail of Pine Cones, players can reach the center of the labyrinth, but they should crouch while walking to avoid enemies. If Link is too loud, a group of hands will hunt and attack them, as we discovered the first time we entered the labyrinth.
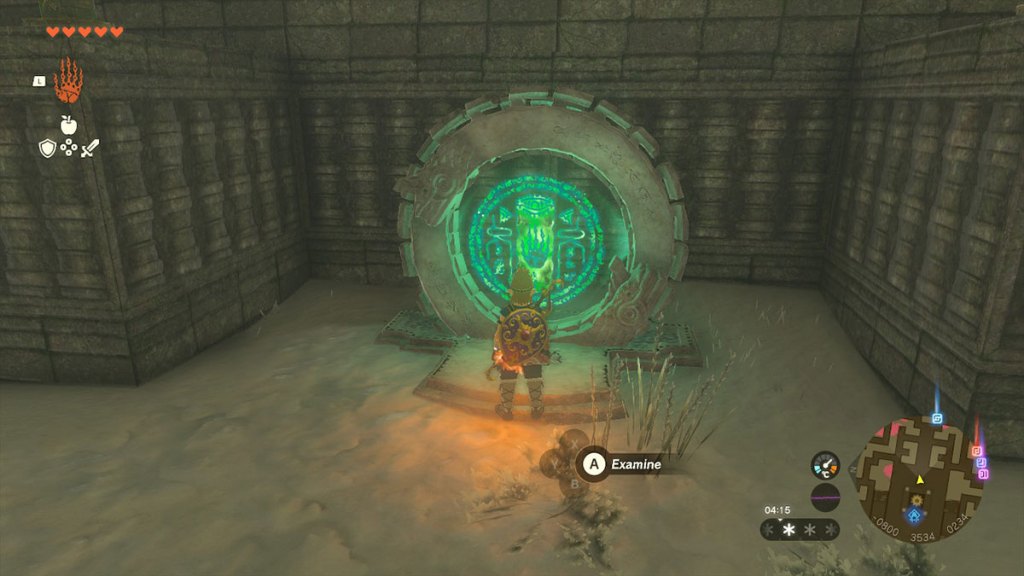
Once Link has entered the middle of the labyrinth, they need to use a heat source, such as fire, to melt the ice on the Shrine. Pro tip: the pinecones players have been following are extremely flammable and can be dropped on the ground and ignited to melt the ice fast.
This is a simple Shrine with no puzzle because the labyrinth is the puzzle. However, Link then needs to interact with the terminal at the opposite end of the chamber. This will trigger The North Lomei Prophecy side quest to begin.
How to Complete The North Lomei Prophecy Side Quest
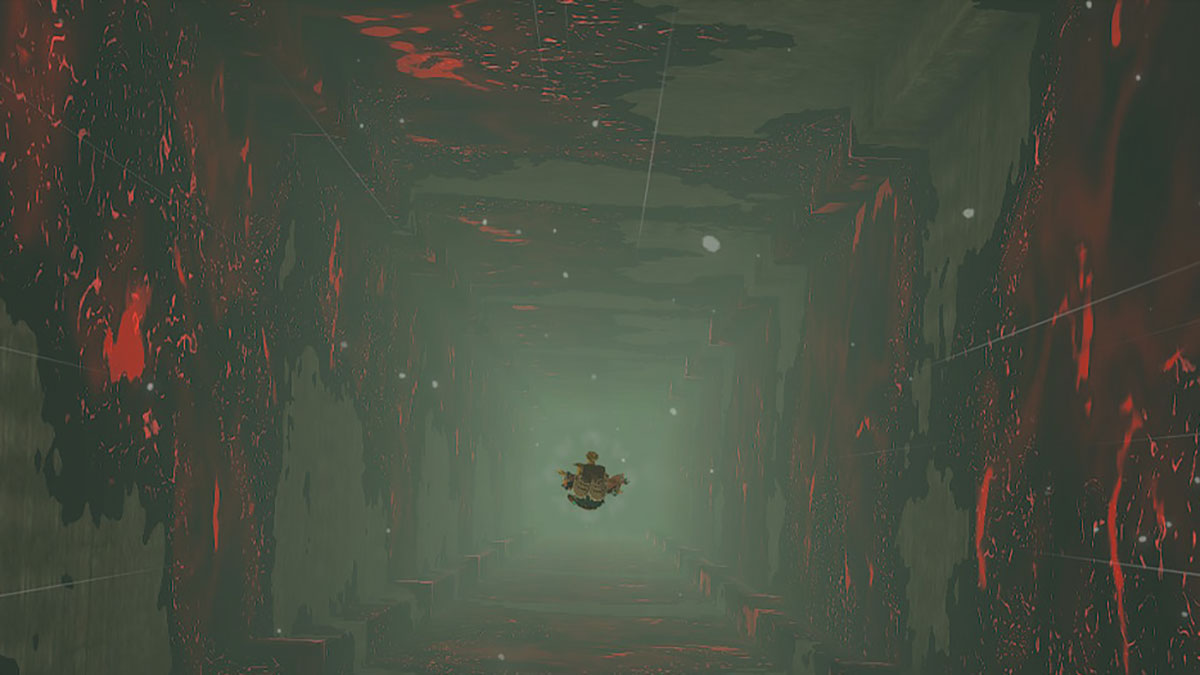
The first step in The North Lomei Prophecy is visiting the labyrinth in the sky above the one Link has just conquered. The best way to get there is to use a nearby Skyview Tower to reach the Hebra Mountains Sky and paraglide over to it or use a vehicle made of Zonai Devices.
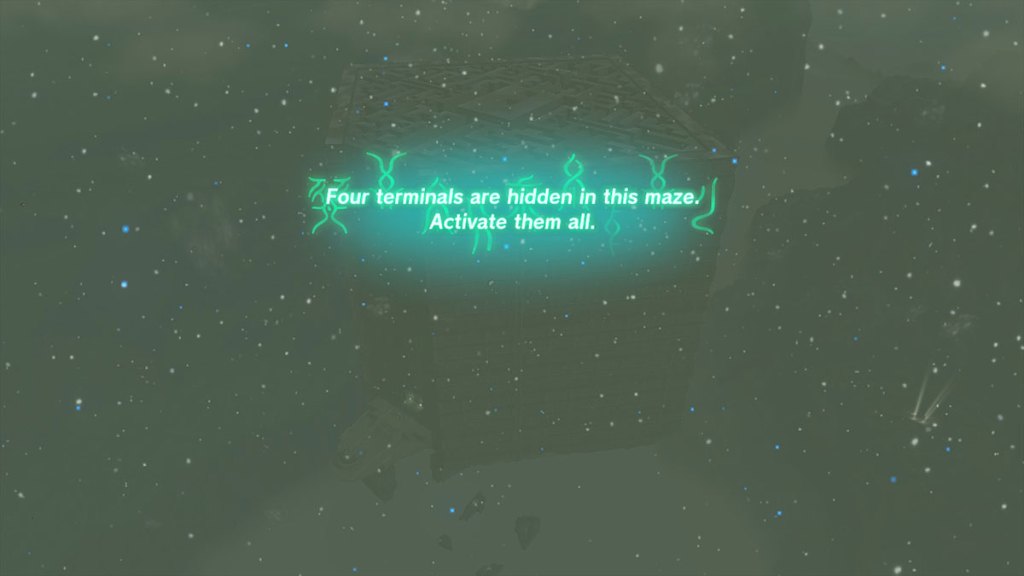
It’s worth activating the Shrine outside the labyrinth to create a fast travel point in case Link falls. In this sky labyrinth, Link needs to find and activate four terminals like the one they found in the labyrinth on the surface.
How to Complete the North Lomei Sky Labyrinth
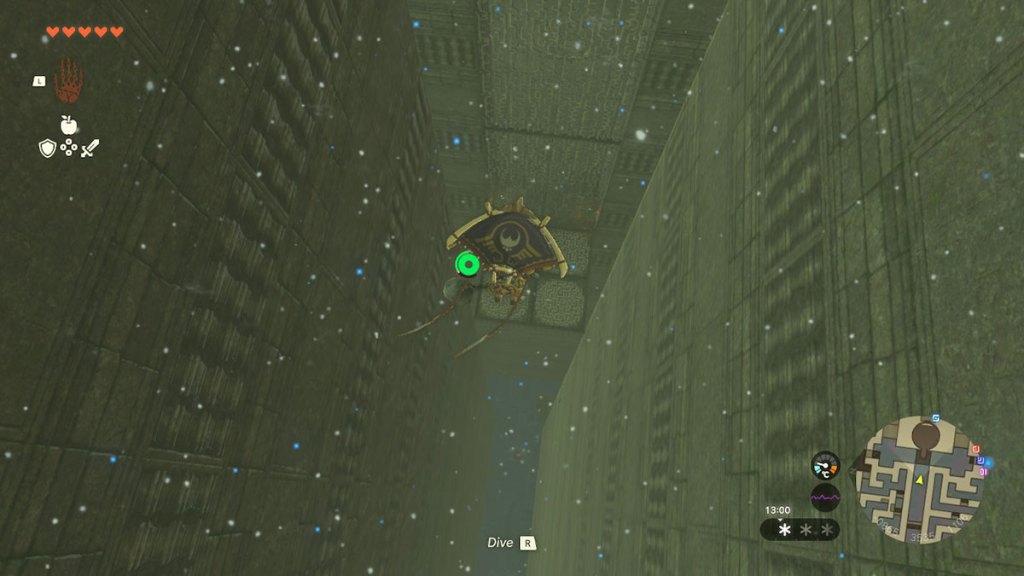
To navigate the sky labyrinth, Link must use their paraglider to explore the paths. A constant current of air will keep them at a level just above the lowest platforms, so there’s always somewhere to rest if Link’s stamina gets low.
This area confused us for far too long until we figured out the trick to where the terminals are. There’s one in the middle that’s easy to reach because the opening path directs Link to it. The remaining three are in the three corners of the labyrinth that aren’t the entrance.
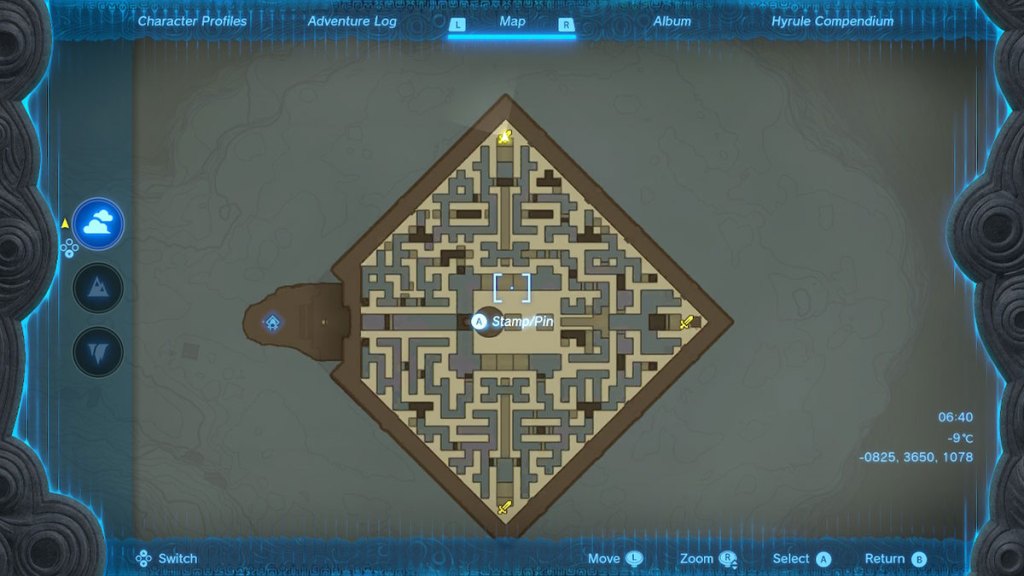
The image above shows the sky labyrinth and the three terminals in each corner. The sword icons mark these terminals. To reach them, Link needs to follow the paths carefully between them. The darkest areas mark solid rock that Link will need to glide over, so players must be quick and use gusts of air to boost Link’s height.
The purple sections mark areas where Link needs to drop to a low platform and then use their paraglider to soar up underneath an obstacle. With this key for the map in mind, all players need to do is glide through the paths, opening the map occasionally to figure out which direction to go next.
After activating all terminals, a new one will open on top of the sky labyrinth. Link can soar directly up to reach and activate this from the final terminal they’ve interacted with. This will open the grate in the labyrinth below so Link can descend into the last labyrinth in The Depths.
How to Complete the North Lomei Depths Labyrinth

The North Lomei Depths Labyrinth is a different challenge to the surface and sky labyrinths. Inside it, Link will find a Flux Construct III miniboss. The task is to kill this miniboss, but it’s a grueling fight if Link has no arrows to create light sources.
At this point, it’s a good idea to make Link consume a meal that applies the Glow effect or litter the arena below with arrows with Blightbloom Seeds fused to them so Link can see where they’re going.
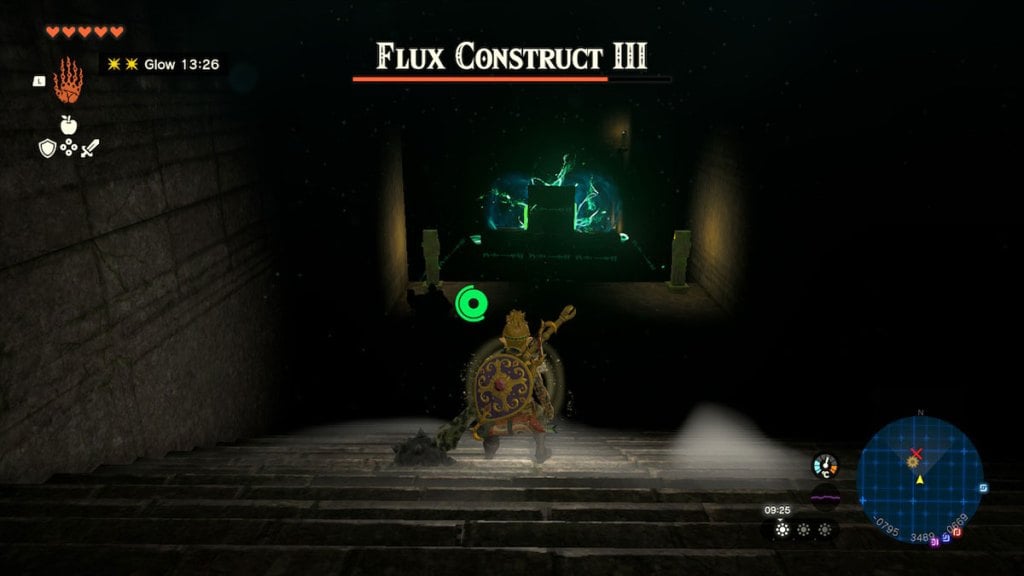
We found that the best strategy for this fight is activating the Flux Construct III, then climbing one of the ladders out of the arena. Link can still reach the miniboss with Ultrahand to remove the glowing block, but the Flux Construct III won’t be able to hit you with any attacks unless it’s in its flying mode.
Repeat the process of removing the glowing block, attacking it, then retreating up the ladder until the creature has been defeated. We started out with armor that increased Link’s damage but opted for the Mystic armor set in the end because it causes Link to lose Rupees instead of health. The Flux Construct III can kill Link with a single hit, so it’s worth using this armor to avoid losing the fight at the last second.
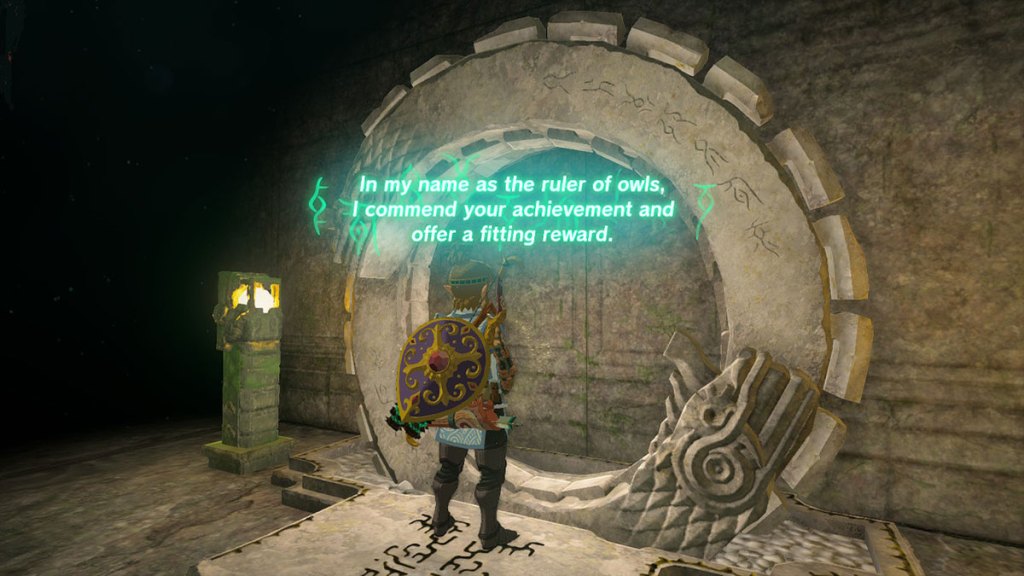
Once the Flux Construct III has been defeated, the terminal inside this labyrinth will activate. Interacting with it will complete The North Lomei Prophecy side quest and pull up a chest for Link. Inside are the Evil Spirit Greaves, one piece of the Evil Spirit armor set that increases Link’s stealth stat. Before leaving, players shouldn’t forget to use Fuse to take advantage of the Flux Construct III Core that the miniboss drops. We used it with a Mighty Zonai Sword, and it increased the damage to 52.


Published: May 31, 2023 11:18 am