To complete a mission and unlock the Silent Assassin challenge in Hitman 3, you need to kill only your targets, leave no witnesses, never be caught on camera, and have no bodies discovered. In this guide, we’ll walk you through how to achieve this in the Dartmoor location without even changing your suit, netting you the Suit Only challenge as well.
The loadout

There’s nothing special about the loadout we recommend for this location. It doesn’t matter what suit you choose, but if you want to complete the Suit Only challenge for Dartmoor as well, then you’ll need to be wearing one of Agent 47’s suits.
Since we’re going for the Suit Only challenge with this guide, the starting location must be the main road. It’s where you’d start the campaign mission from anyway.
The two items that you must bring with you are a silenced pistol, any will do, and the coin. These are key to our strategy, and without them, it’s impossible to pull off.
Step 1 – Get to the drainpipe
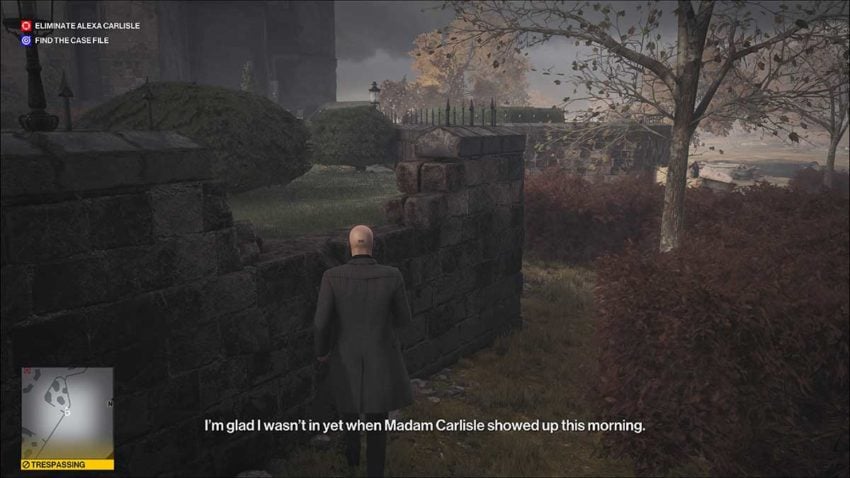
From the starting position, run towards the house. You need to get there as quickly as possible without being seen. Our path takes you off to the guards’ right at the gate and over the gap in the wall there. Agent 47 will automatically crouch once he’s over.

Now turn right and run across the stream here. Once you reach the stream, stand up and continue to run towards the house. It’s important to run like this as much as possible because it’s faster, and you’ll need that extra time later on.
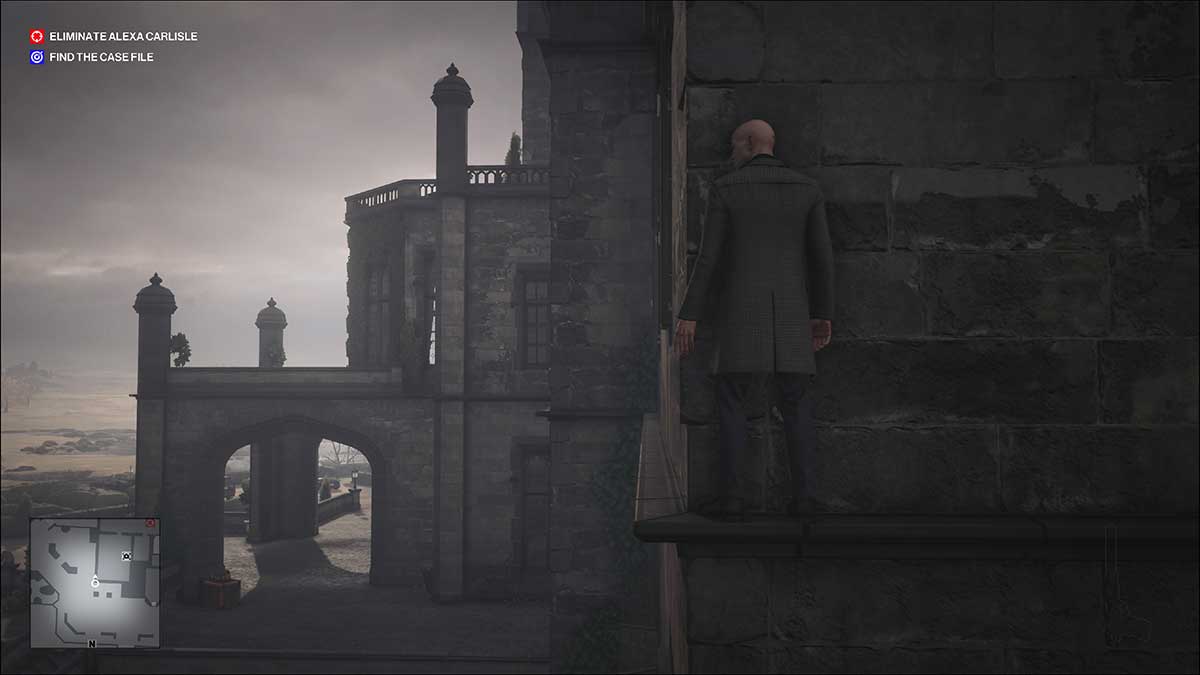
You need to keep running for the house. Once you’re close, vault up into the bushes.
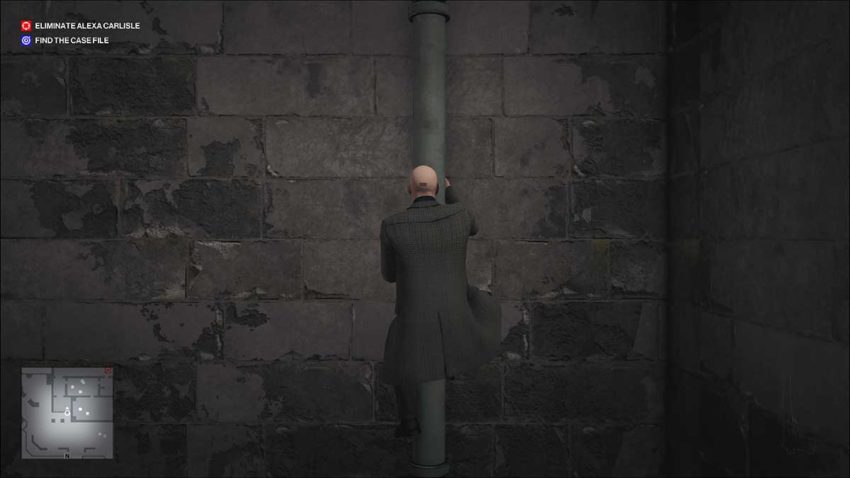
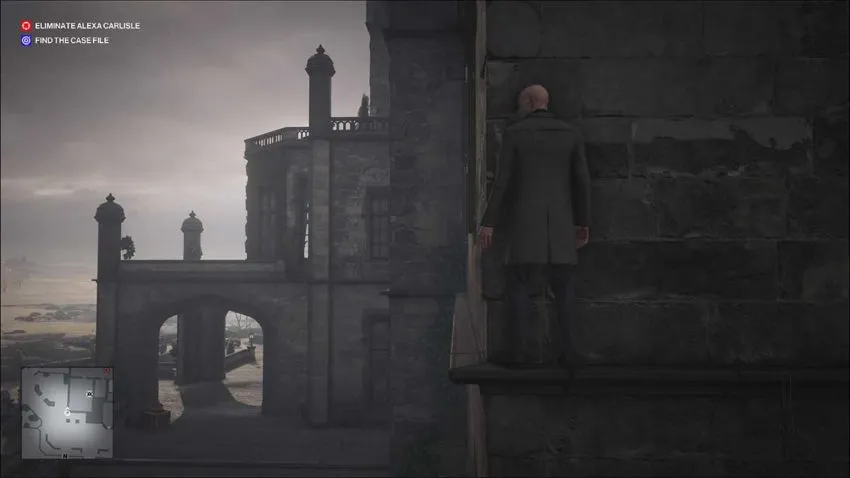
You can see where you’re going from here. There’s a drainpipe going up the house’s side in front of this area, right where those two walls meet. Be quick and hop the wall out of the bushy area and run for the drainpipe. If you’re on time, there shouldn’t be a guard around to spot you. Now you need to scale this drainpipe.
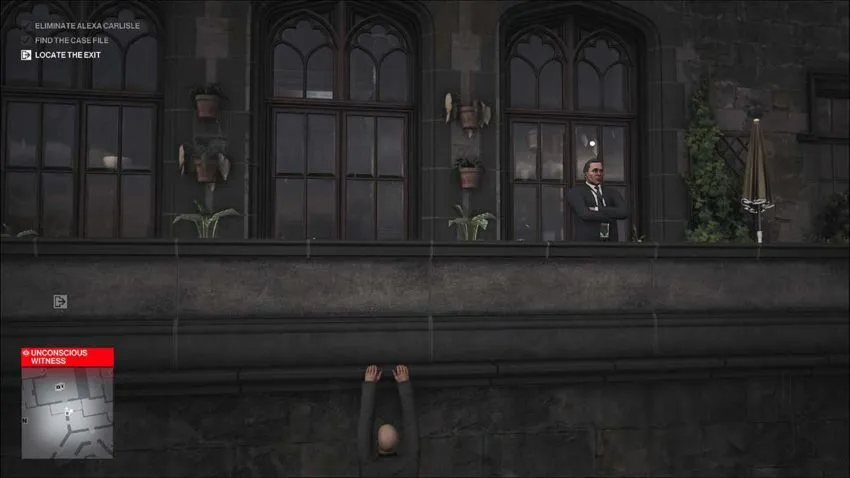
Step 2 – Shimmy
Once you’re at the top of the pipe, hop off to the left and start shimmying as if your life depends on it. You need to work your way around most of the front of the house to another drainpipe.
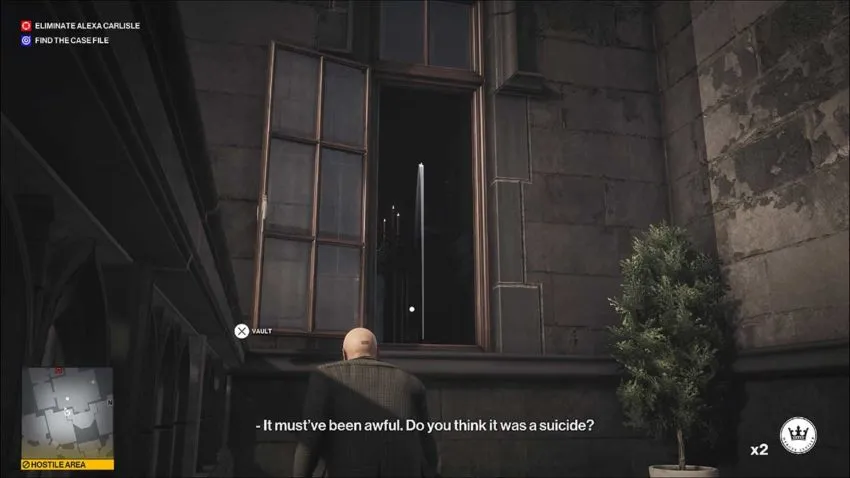
Keep moving past each window until you reach the second drainpipe. You need to climb this one and hang off the ledge to the left. This is the balcony of Alexa Carlisle’s bedroom.
Step 3 – The setup
Vault over the edge and move around to the open window on the opposite side of the balcony. Equip your coin now to save time. Through here, you can see a male staff member polishing various items of great value. We need to distract him.
Before we go on, bear in mind that Alexa Carlisle herself may be entering the room at this point. If she is, you’ve taken too long. She should be getting close but not quite in the room by the time you get here.
Flick the coin as far into the room as you can through the open window. This will cause the male NPC to turn around so you can vault the window and enter the room. Wait until he walks towards the coin before you run to the left and through the glass doors.
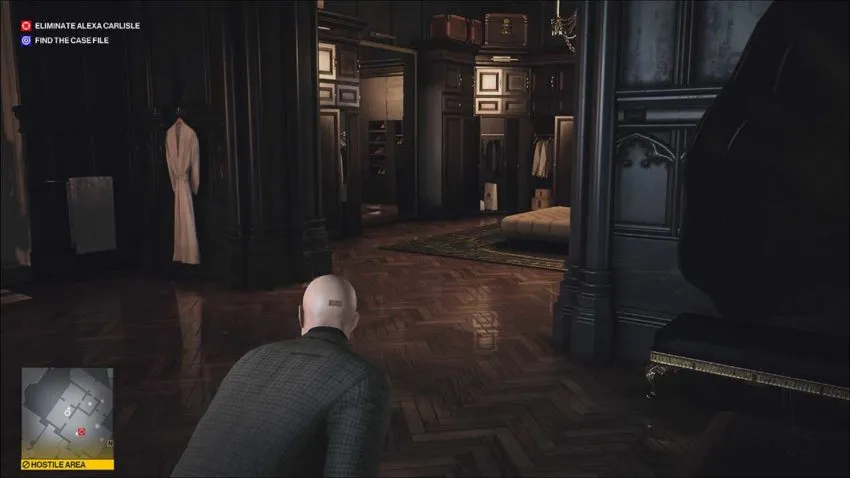
Now you need to go through the bedroom and into the adjoining laundry room.

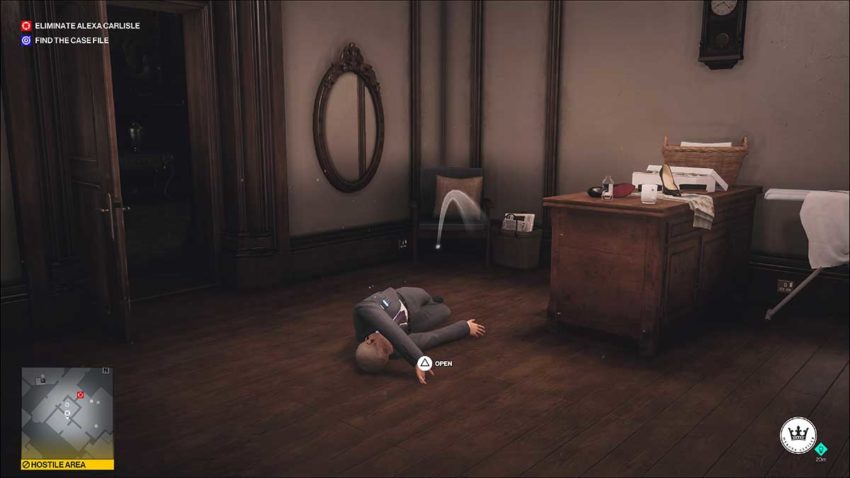
There will be a female staff member in here that you need to subdue. This should be easy.
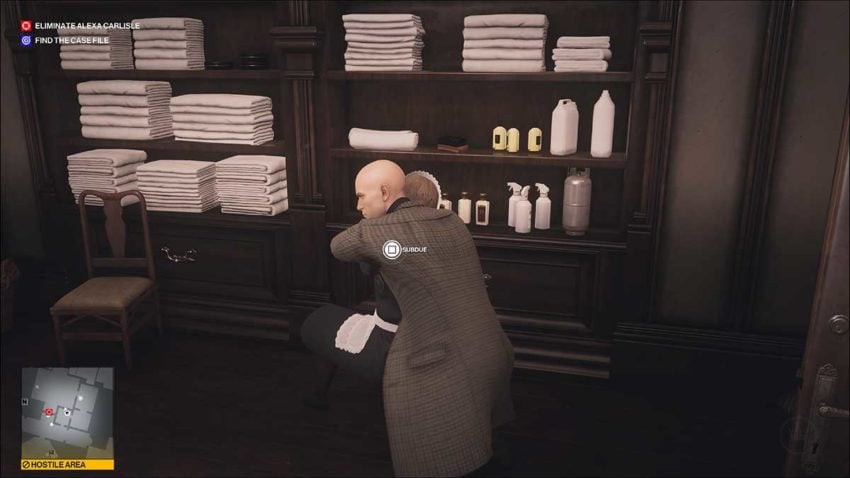
With her taken out, it’s time to hide the body. Drag her back into the bedroom. There’s a wardrobe right outside the door where you can store her. No one will see you do this.
As you drag her body through the door, stop and flick a coin into the corner of the laundry room. This will begin the process of distracting the guard outside of the room. He’ll make life very difficult in a few seconds if we don’t deal with him now.
Once you’ve hidden the woman’s body, go back into the laundry room and subdue the guard.
You might have time to hide this second body in the same wardrobe before Alexa Carlisle leaves the room, but you don’t have to just yet if she’s already leaving.
Step 4 – The kill
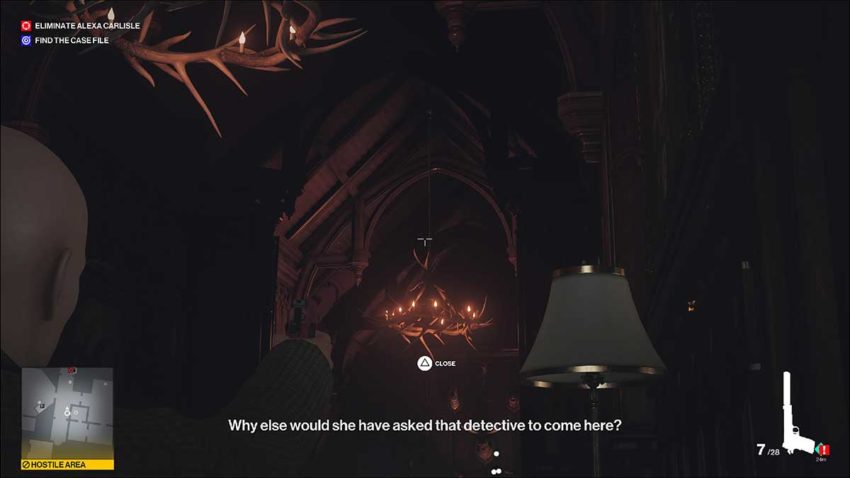
When Alexa Carlisle leaves the bedroom, she’ll walk right down the hallway. Conveniently, there’s a rather large chandelier made of moose antlers that’s just begging to be dropped on the old bag’s head. Help it out with your silenced pistol by shooting the wire it’s hanging by. If you haven’t got it already, this will unlock the “Find This Amoosing” challenge for Dartmoor.
If you haven’t hidden the second body yet, do it now. The guards will drag Alexa’s body into the laundry room and discover it otherwise.
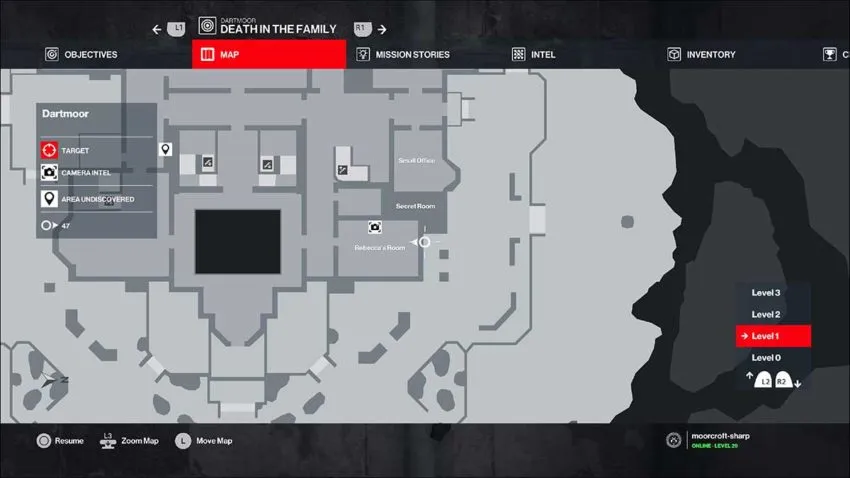
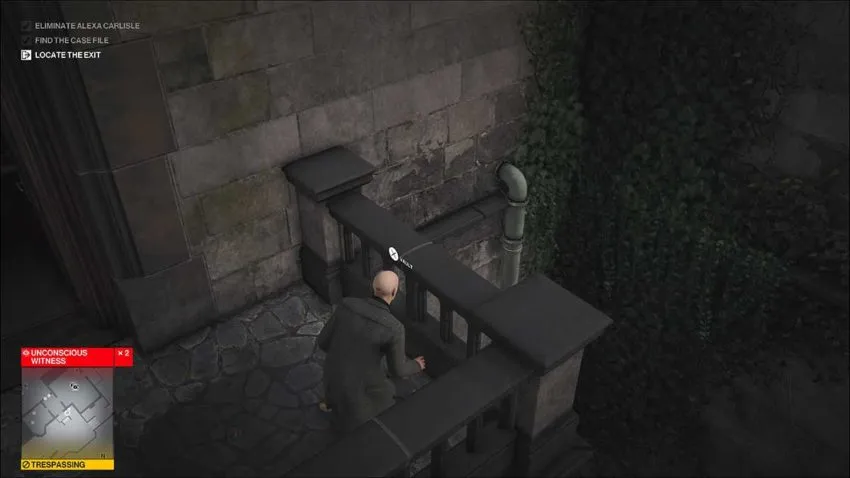
Step 5 – The case file
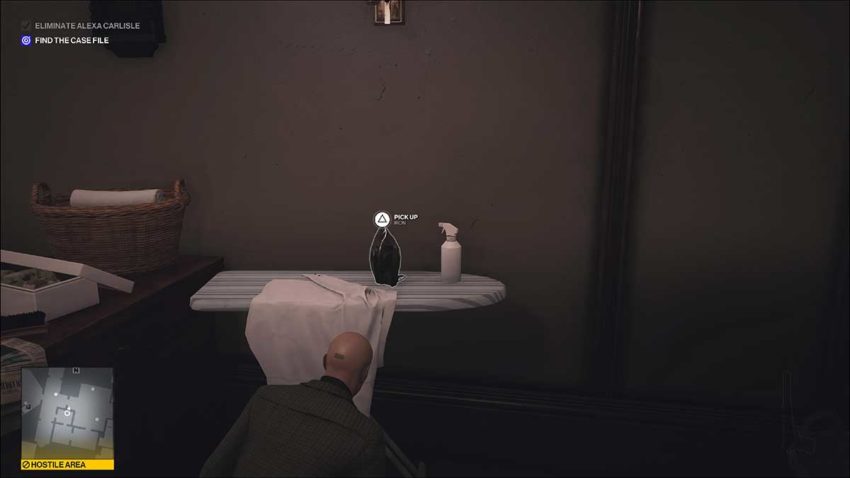
With your target out of the way, it’s time to pick up the iron from the laundry room and move across the hall into Alexa Carlisle’s office to collect the case file. There’s a guard in here with his back to the door. Throw the iron at his head and stow his body in the chest under the stairs.
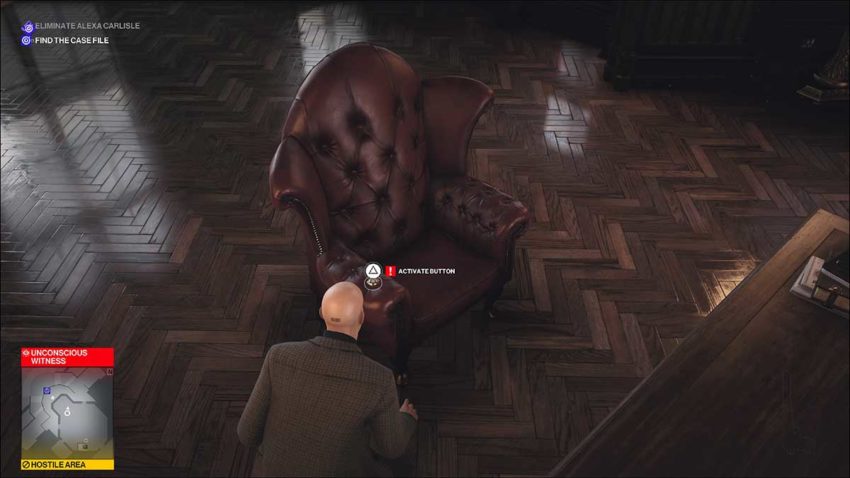
Activate the button on the gorgeous red chair behind the desk to reveal the safe behind a painting on the wall. Either work out the safe code for yourself or type it in if you already know it and then take the case file.
Step 6 – The exit
The easy way to exit the location from here is to follow your footsteps and return the way you came. It’s very safe, and you won’t be spotted unless you’re running directly in front of a single guard.
However, if you’d like to push yourself a little more, grab the priceless Faberge egg from the table, pick up your iron, and walk out onto the balcony. Be careful not to be seen by the guards there.
From this point, we’re going to be heading over the right-hand side of the balcony. If you look over there, you can see a guard on a lower level. Throw the iron over to his right, as far as you can. You want to distract him so that he won’t spot you vaulting the balcony.

Vault the balcony, slide down the drainpipe, and then hang off the ledge on the house to the left of it. You want to be hanging under the ledge of the balcony so that you can get past this guard.
Work your way as far left as you can. Keep an eye on which direction the guard is looking as well. You want to vault over the edge while he’s looking away from you. As soon as he is, vault over and throw the Faberge egg at his head to knock him out.
There’s no need to hide his body. He won’t be discovered out here. Now you’re going over the ledge to the right of where this guard was and down a third and final drainpipe.
Slide down this pipe as fast as possible. There’s an NPC who will start to notice you, but as soon as you’re down, they won’t be able to see you. The next step is to drop down through the gap in the wall to the left. You can use a nearby lead pipe to distract any NPCs who might be in a position where they will see you.
Once you’re down there, the exit is in sight. We’re trying to get across the wooden bridge where a guard and a gardener are currently hanging out. Pick up the hatchet in the nearby log pile.
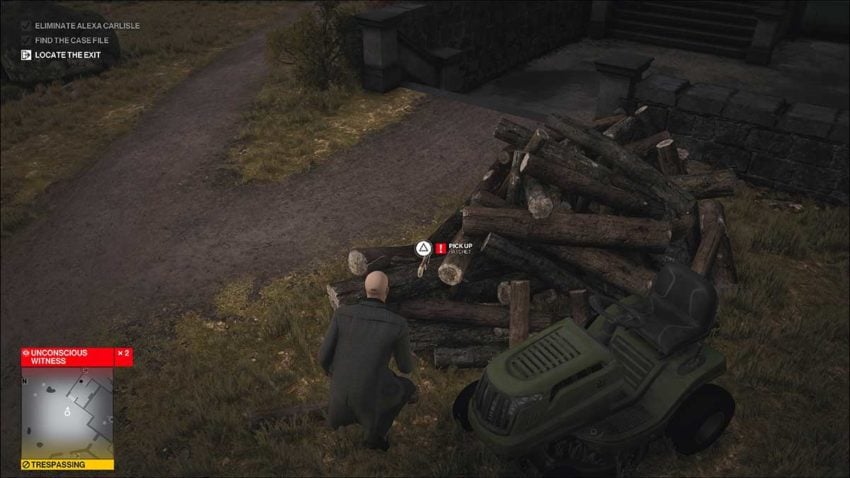
Do not kill anyone. If you do, you won’t unlock the Silent Assassin challenge. Instead, use the hatchet as a distraction to draw the guard and gardener’s attention away from the bridge.
Once they’re sufficiently distracted, run across the bridge. You should have enough time. The only thing you need to watch out for is a patrol of two guards who will move past your location. Once they’re gone, though, they won’t be back for ages.


Published: Feb 2, 2021 11:22 am