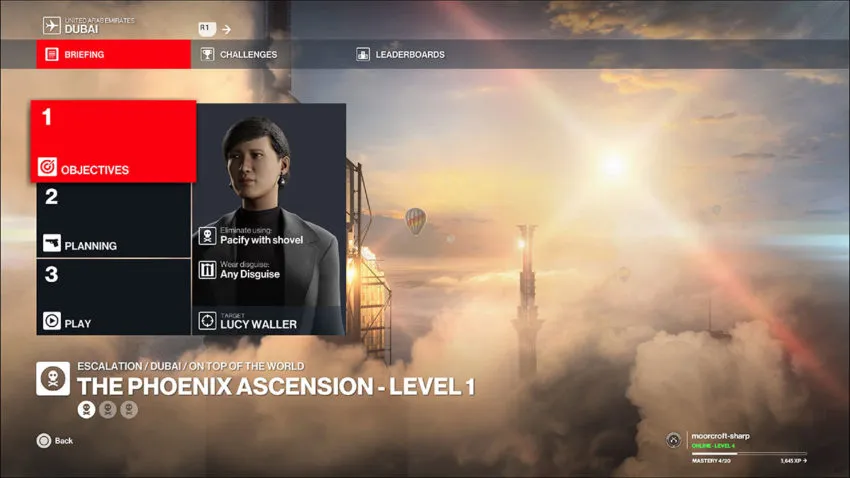
Escalation Contracts, or “Escalations,” are missions in Hitman 3 that you’ll probably start to tackle after you’ve finished the campaign once or twice. They begin as simple missions with a single target but quickly escalate through three levels, each one adding a new target or complication. In this guide, we’ll be explaining how to complete The Phoenix Ascension Escalation.
Step 1 – Pacify Lucy Waller with a shovel
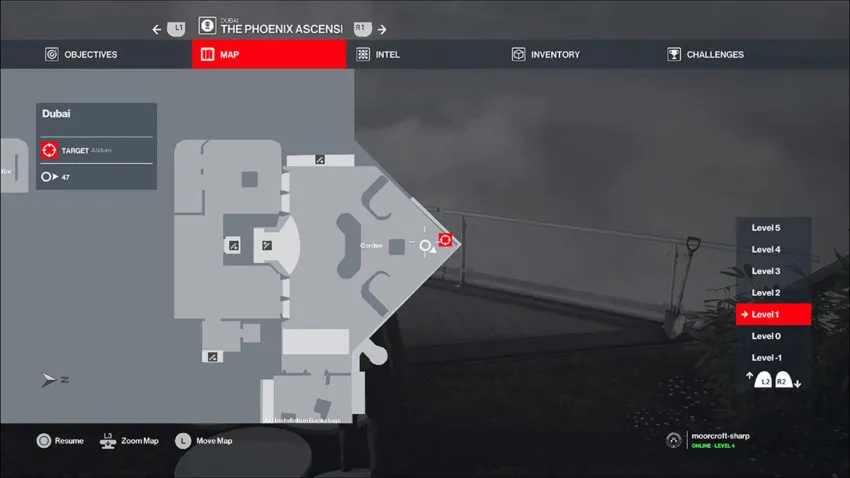
While this Escalation might feel like it starts complicated, it’s not that challenging. There’s no need to mess around with the planning too much at this stage. We recommend that you enter the mission in the Atrium though since it’ll give you the best starting position.
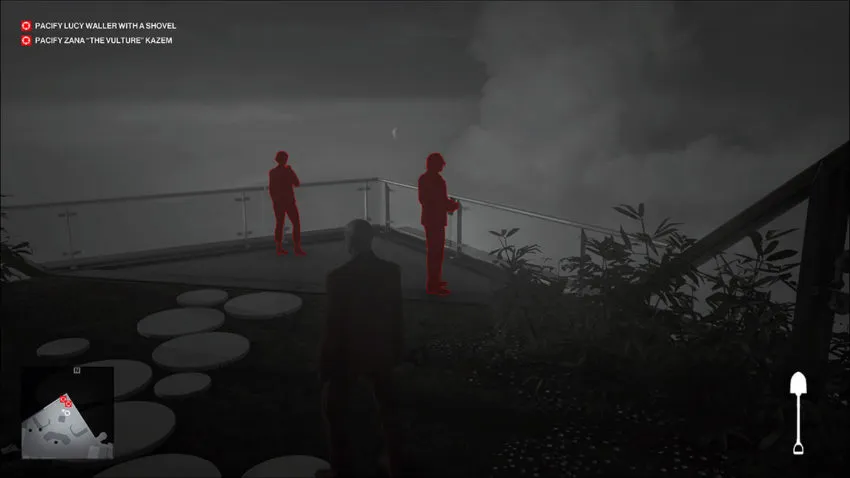
Once the mission begins, head up the stairs and to the right. You’ll find Lucy Waller in the Garden, a section of the Dubai location where there are lush plants to hide in. If you’ve already completed the Dubai campaign mission, you might recognize it as where you deal with ‘The Vulture.’
Conveniently, both Lucy Waller and the shovel you need to knock her out with are here. The shovel is leaning on the balcony on the right-hand side.
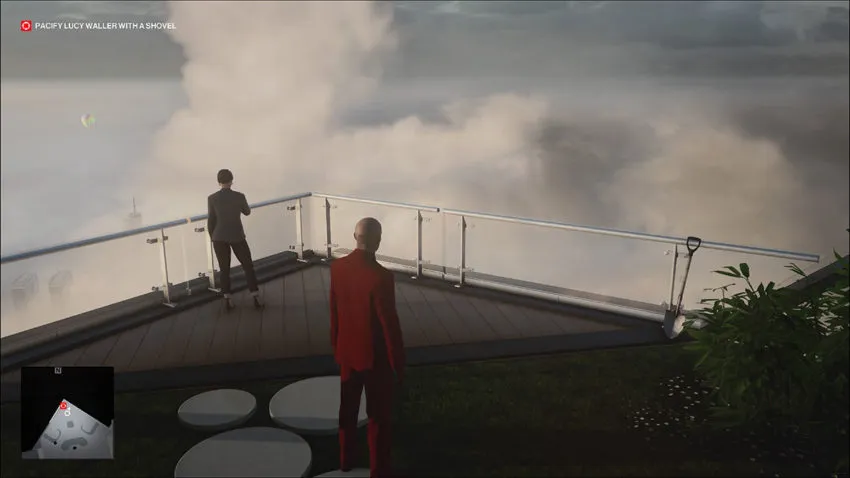
You can run to this area, pick up the shovel, and hit Lucy Waller with it as fast as you like. The Sheikh will still be addressing his guests, so no one will notice you. However, it’s best to crouch as you attack, just if the guards off in the distance happen to glance your way.
Once Waller is incapacitated, you can exit the mission. There’s no need to kill her.
Step 2 – A complicated bird
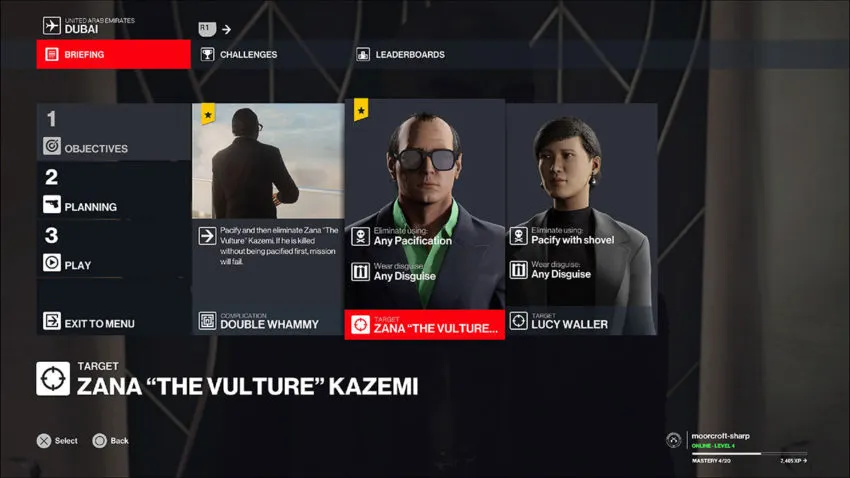
Level 2 of this Escalation adds in both a new target and a complication. The second target you must pacify is Zena ‘The Vulture’ Kazemi, a key part of one of Dubai’s story missions. That’s not all though. You’ll have to pacify The Vulture before killing him, then move on to pacifying Lucy Waller. If you don’t, you’ll fail the mission.
Don’t worry, this might seem complicated, but once again, it’s pretty simple. Don’t change anything about the mission planning. Jump back into the Escalation through the Atrium and run to the Garden. Now, wait.
The Vulture will organically head to the Garden as part of his normal route for the mission. In fact, he stands right next to your first target. He won’t be suspicious of you, not even while you’re holding a shovel.
As soon as The Vulture settles in to admire the view from the Garden, crouch behind him and hit him with the shovel. Now get behind Lucy Waller, who should have ignored the man that you almost certainly caused brain damage, and whack her head in as well.
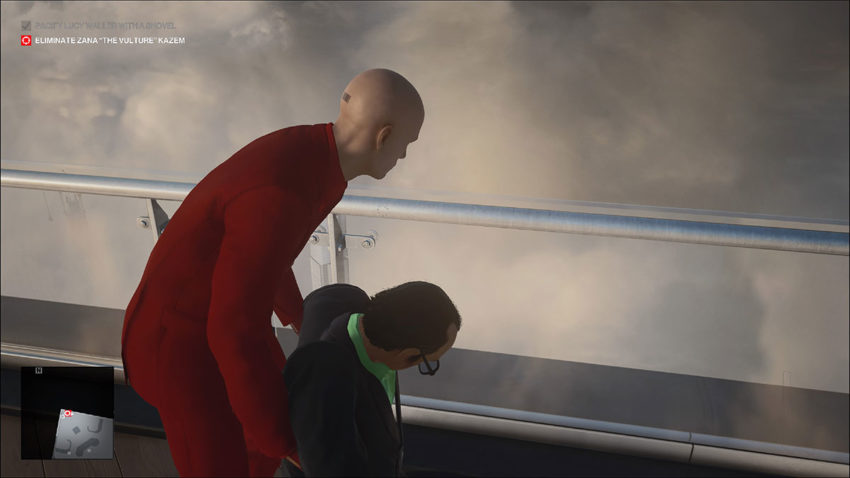
To kill The Vulture quickly, drag him to the edge of the balcony and throw him off. All that’s left to do after that is head for an exit and complete the mission.
Step 3 – Three is… complicated
So far, this Escalation hasn’t been too difficult to complete in under three minutes. All that changes with level 3. The mission briefing screen won’t give you any indication of what the final level will throw at you, making it almost impossible to prepare.
We’d recommend arming yourself with a throwable object that will knock a target out. You won’t need your fiber wire, so replace that. Keep a gun just in case, though.
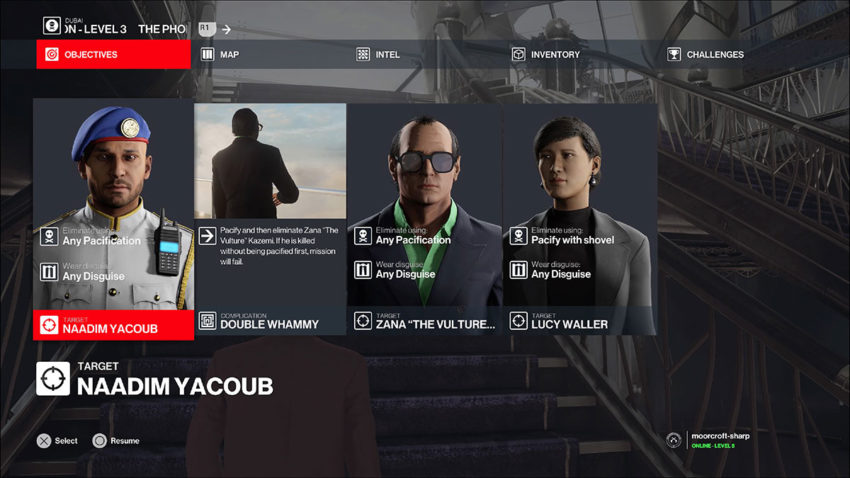
As soon as you begin the mission, you’ll be given your third target. This time it’s a security guard called Naadim Yacoub. As with The Vulture, you can pacify him in any way using any disguise, but his location is what makes him harder to deal.
Forget about Yacoub for the moment. Head to the Garden, as usual, wait for The Vulture, pacify him and then Lucy Waller, then throw The Vulture off of the balcony and get out of there before anyone sees you. That’s the easy part out of the way.
Turning your attention to Yacoub, you’ll notice that he follows a patrol path that takes him past two guards and down a flight of stairs in the maintenance area. Now you could just lob your throwable object at his head and run, we chose the Burj Al-Ghazali Snowglobe, but that’s not enough to complete the mission.
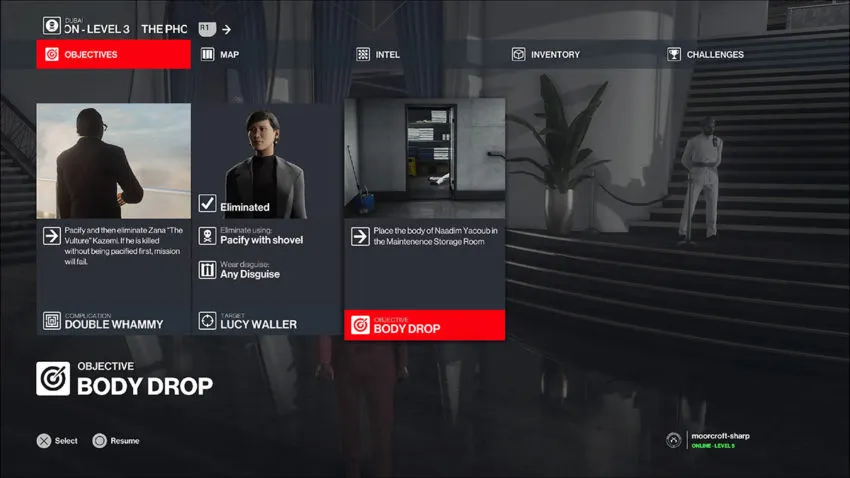
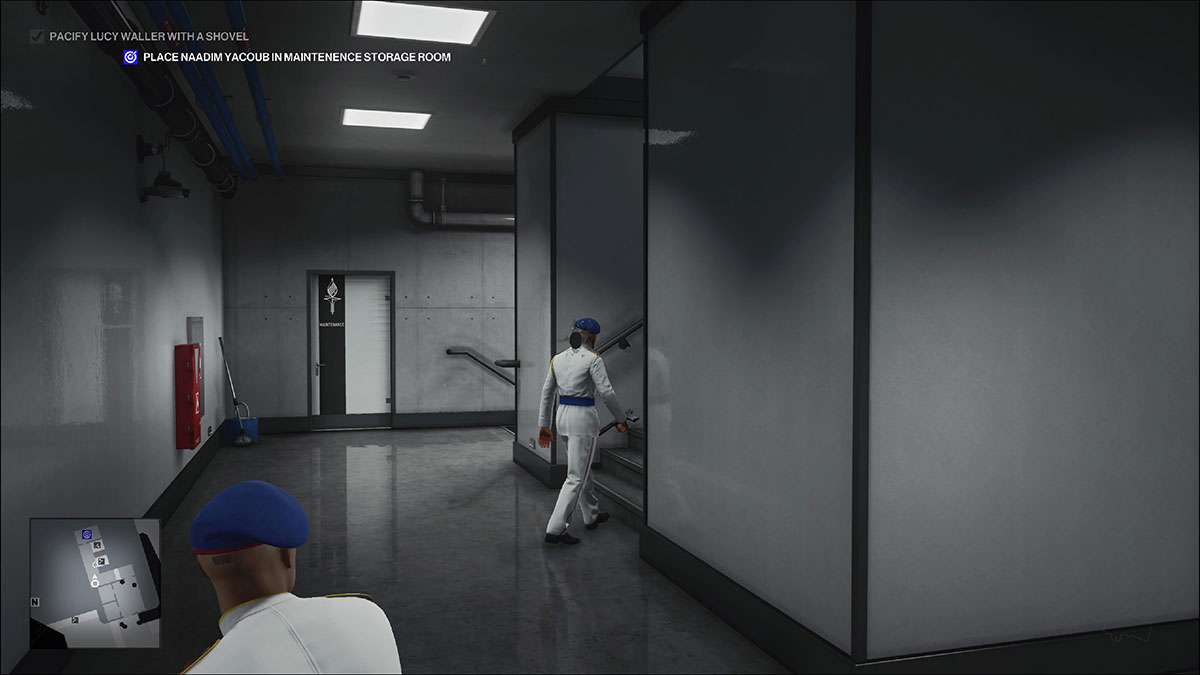
Once you’ve pacified Yacoub, you need to hide his body in the Maintenance Storage Room. For a while, this completely threw us, but don’t worry because we’ve got you covered with the location.
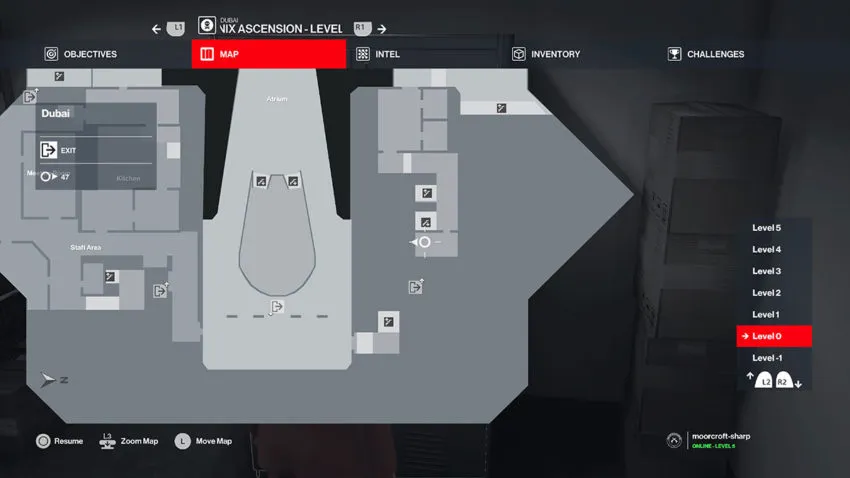
Now you could move around the location and find a security guard disguised to make this easier, but we found it far from essential. Instead, wait around the lobby directly opposite the Garden. It’s the area where Yacoub will patrol and lean against the wall for a while. See the red circle in the image below for the exact location.

You’ll see Yacoub walk towards the pair of guards sitting on a bench and through the door leading downstairs. Follow him closely. As soon as he opens the door, it’s possible to sneak through after him. You can also wait for a second security guard to open the door on their way out if you want to have a chance at getting in without Yacoub noticing you.
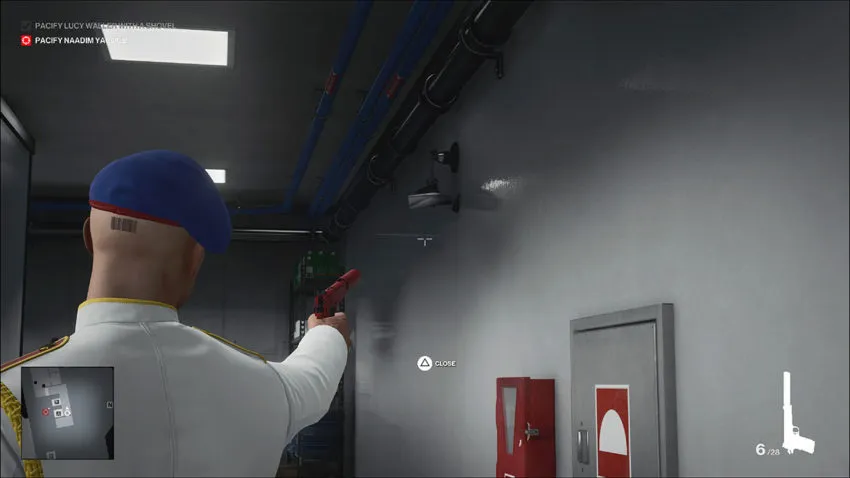
From here, you need to head down the stairs until you see the security camera. It will record you, but that doesn’t matter. As soon as you’re out of its range, shoot it so it can’t track your movement.
As we mentioned earlier, Yacoub will walk up and down these stairs, as will a second security guard. There’s also a maintenance worker on one of the landings, but they never move.
At some point, the second security guard and Yacoub will both come across your location. You can knock both of them out without anyone noticing. You should also pacify the maintenance worker and take their maintenance key.
Once you’ve pacified Yacoub, you need to drag his body into the Maintenance Storage Room. This is the door that’s unlocked with the maintenance key on the same landing as the security camera you should have destroyed. See below for the map location.
You only need to drag Yacoub’s body in here to fulfill the Escalation’s mission requirement. There is a storage locker if you want to stash the body properly and earn extra XP.
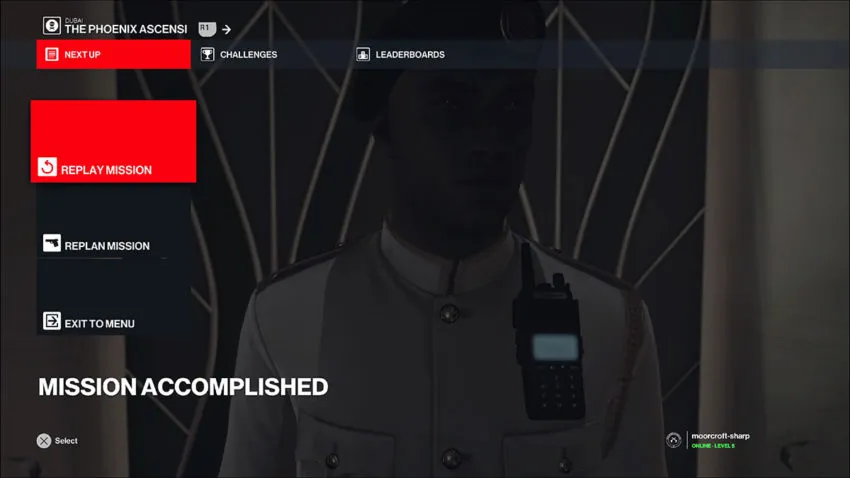
With Yacoub tucked away, it’s time to exit the mission. You’ll know you’ve fully completed the Escalation because you’ll get a ‘Mission Accomplished’ screen for the first time.


Published: Jan 21, 2021 09:00 am