There are few titles as tenured as World of Warcraft, and its expansion, Dragonflight, continues its tradition of being one of the longest-running MMOs, which began in November 2004. Now old enough to legally vote, this comes with a bit of difficulty, specifically its notably aged appearance. Other MMOs are far easier to work with the UIs and scaling, even after World of Warcraft’s UI update. This is where third-party mods, such as ElvUI, come into play — here’s how to set it up for Dragonflight.
Related: Where does the Dragonflight quest start in World of Warcraft Dragonflight? Answered
Downloading ElvUI for World of Warcraft: Dragonflight
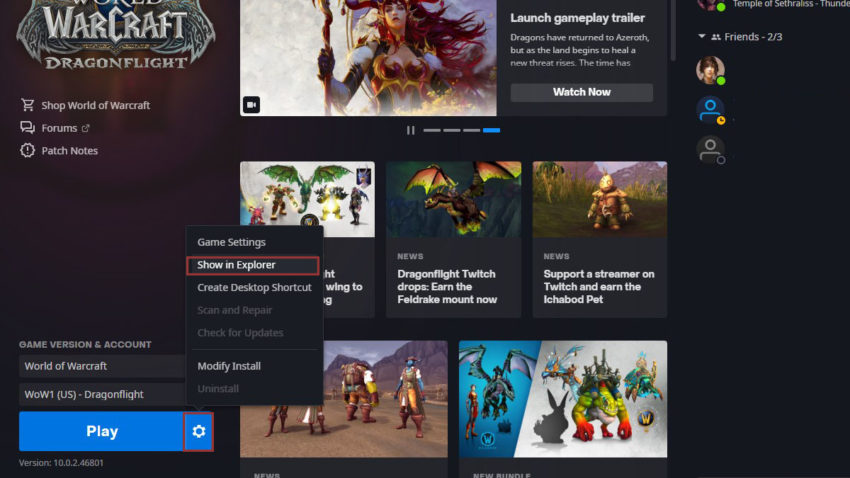
The first step to implementing ElvUI is to download it, but it’s far easier to download its overarching toolset Tukui. This application will ultimately handle the various plugins available for ElvUI, including ElvUI itself, in much the same way as Vortex operates for NexusMods. Download Tukui, install it, then locate your World of Warcraft install folder by clicking the cog in Battle.net next to the ‘Play’ button for World of Warcraft.
You want the root directory of World of Warcraft, so don’t dive into various versions such as Retail or Classic. The Tukui Client will appear in a new window after install — navigate to the ‘Browse’ window and click the ‘# Downloads’ tab header to sort so the most downloaded module is selected. Use this to browse various additional modules. You can further explore selected modules using the ‘Visit Site’ button beneath the browser, which will bring users to plugin page on the Tukui website, offering details and screenshots of the plugin. While you’re here, ensure that you download ElvUI.
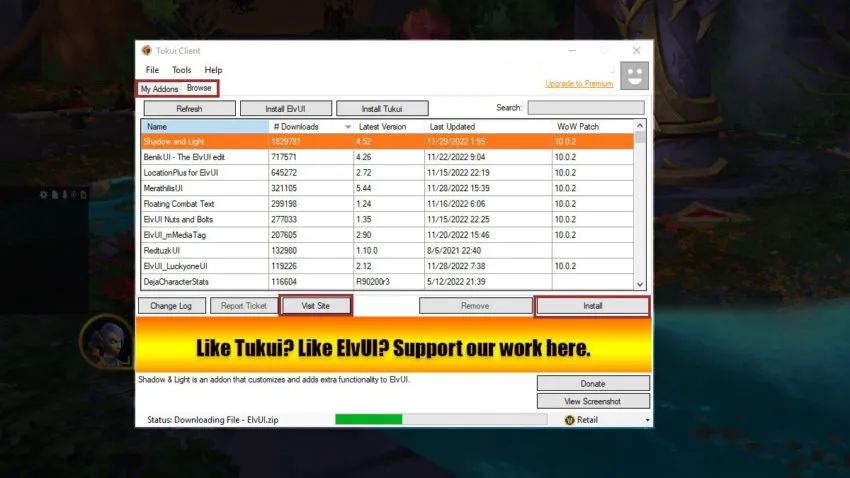
Once you’ve selected your plugins, navigate to the ‘My Addons’ tab near the top and ensure that the AddOns are installed and up to date.
Enabling ElvUI for World of Warcraft: Dragonflight
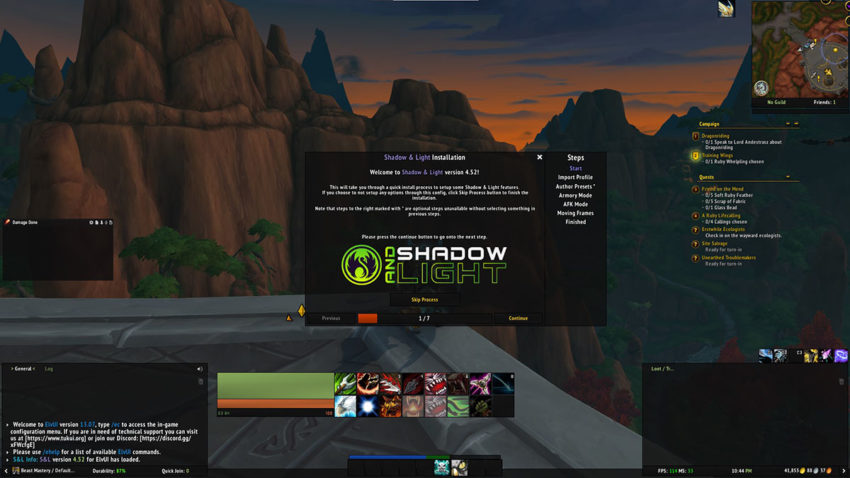
Once all desired modules have been installed, it’s time to enable them. Doing so is very simple, and users do not need to leave World of Warcraft for this. Once the install is complete, type in ‘/reload’ to force a UI reload. At this point, a new window will appear in the center, walking players through every necessary setting for each module they have installed, in order.
This is the simplest part, and ElvUI’s ability to bring a more modern feel to World of Warcraft: Dragonflight is made quickly apparent. Users will note that they can make changes to ElvUI by pressing Escape, and finding the button just below AddOns to tweak ElvUI to their preference. It’s highly recommended to spend some time touching the various settings and variables available in this menu: ElvUI offers a lot of power behind the curtains, and using this power will result in an easier game.


Published: Nov 28, 2022 10:32 pm