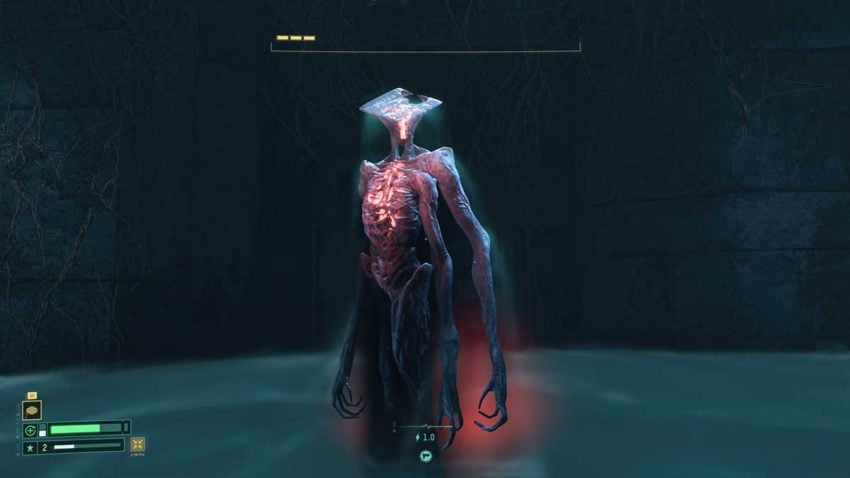
Phrike is the first boss you’ll face in Returnal. This enemy guards the key to leaving the game’s first biome, Overgrown Ruins. Compared to the other enemies you’ll have fought up until this point, Phrike is a cut above them all. Thankfully, you only have to face one of them. In this guide, we’ll arm you with all the knowledge you need to beat the first boss and get on with your playthrough.
How to find Phrike
You’ll know you’ve found Phrike because you’ll come across the biggest door in this biome. It’s marked in red on your map as soon as you get there. You’ll need the Anathema Key to unlock it, but once you have, it’ll be unlocked for every run that follows. You’ll find the key as you explore more of the biome.
As soon as you find this door, progress through the next room until you trigger the Translocator on the other side. You’ll need to kill a few enemies first, but it’s worth having this fast travel point unlocked for when you’re exploring the opposite end of the map.
Best preparation for the fight
Since the world resets each time you die, some runs will see the boss door appear only a few rooms away from your starting location. However, if you want to beat this boss, you need to explore most, if not all, of the map before you take it on.
The loadout you have completely depends on the particular layout of your run and what Augments, Parasites, and weapons suit your play style. Some Augments will always be useful, such as any that increase your Maximum Integrity. Anything that boosts healing is also a massive benefit. As for Parasites, you don’t want to have too many disadvantages in this fight. Only pick up the Parasites that are genuinely useful to your play style. For example, one Parasite boosts your Weapon Proficiency whilst adding one extra kill to your Adrenaline Level counts. This was an acceptable deal for us because Weapon Proficiency boosts your killing power in almost every way.
Artifacts are another tricky aspect of your loadout. You can never guarantee what will be in a run. However, you can pick up pretty much all of the Artifacts you come across in this first biome because you won’t fill up your suit’s capacity. Grab as many as you can. Even if they don’t help you out in the boss fight, they’ll help you explore the world, and the items you find out there will definitely benefit you in the final encounter.
Finally, you should try to take an item into the fight with you. Once again, only bring in an item that works with your play style. For us, this was a Shield. It blocks a single attack and helps out in a pinch in the last phase of the boss. You can stack multiples of the same kind of item, so keep an eye out for anything useful that you can bring a couple of into the arena.
Best weapon for killing Phrike

Like everything in Returnal, the best weapon is subjective based on how you play. For us, the weapon that helped us finally kill Phrike was the Electropylon Driver. We found a five star version with the Blast Shell alt-fire, two levels of bonus damage and pylon duration, and one level of projectile speed by exploring the world. We’d also unlocked the Finisher and Oblete Extractor traits by using it so much, meaning it dealt increased damage when enemies were at low health.
This weapon deals damage over time, so you can fire off a few shots, use the alt-fire, and then focus on dodging attacks. All the while, damage is being dealt to the boss. We found that it hit harder than anything else we had access to, but that’s because we’d spent hours using it in almost every run. If you’ve been using a different weapon for most of your runs, and find it easier to use, then you should use whatever you’re most comfortable with. Try to ensure that it’s got a high star rating and at least two traits.
Attacks and strategies
Now, let’s go through Phrike’s attacks. We’ll offer some advice on how to cope with each one through each phase. Phrike will use the same attacks for all three phases of the fight. In later phases, each attack gets a little stronger and harder to avoid. We’ll cover all of those changes for you as well.
Every phase counts as a single health bar for the boss. Once you’ve depleted one, the next one will begin. Phrike will scream for a few seconds between them. During this window, you’re able to get a melee attack in if you’re quick. Don’t be greedy, though. Stay away if you don’t think you have time. Phrike will also attack more frequently in phases two and three. It’ll shift from one attack to the other frantically, so you’ll need to be much more careful towards the end of the fight.
Blue Homing Lasers
Phrike will hold its arms up and send out a burst of blue homing lasers. These chase you around the arena but quickly fall to the ground after about five seconds. This attack is the same for all three phases, but in phases two and three, the lasers move slightly faster.
When Phrike shoots these lasers, back away from it, the lasers are easier to avoid if you run to either side and continue to shoot the boss. If you’re too close, they’ll hit you almost instantly. Use a dash to get some distance if you see the lasers getting too close. Otherwise, continue to deal damage throughout this attack.
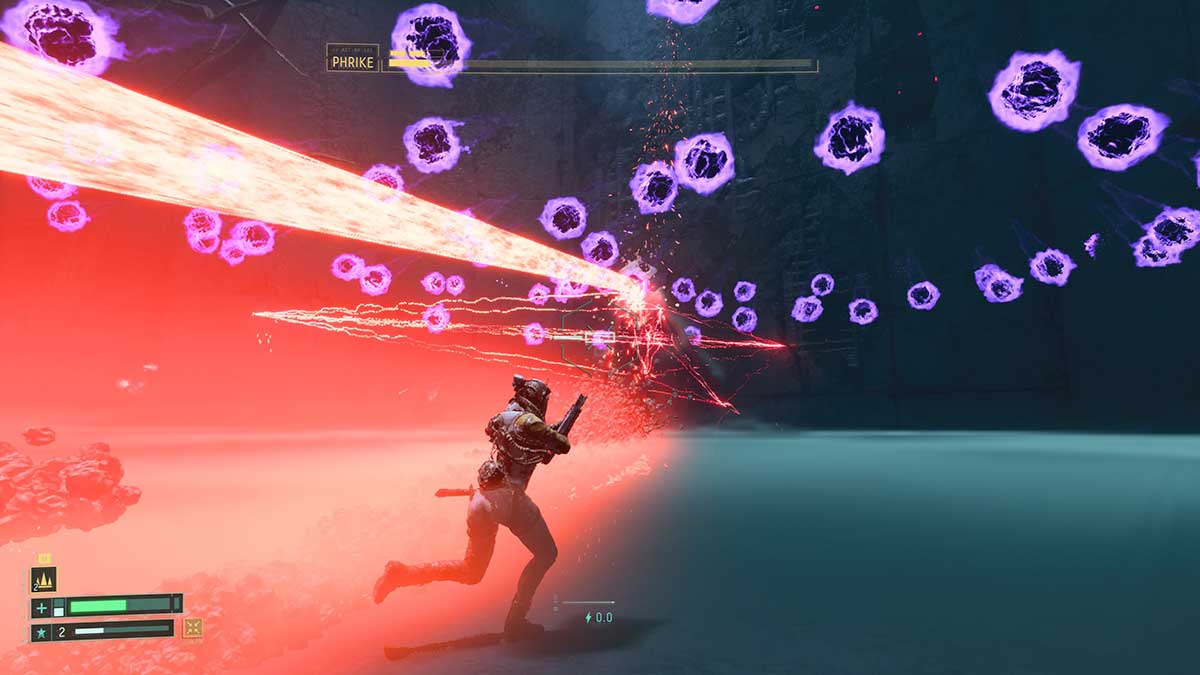
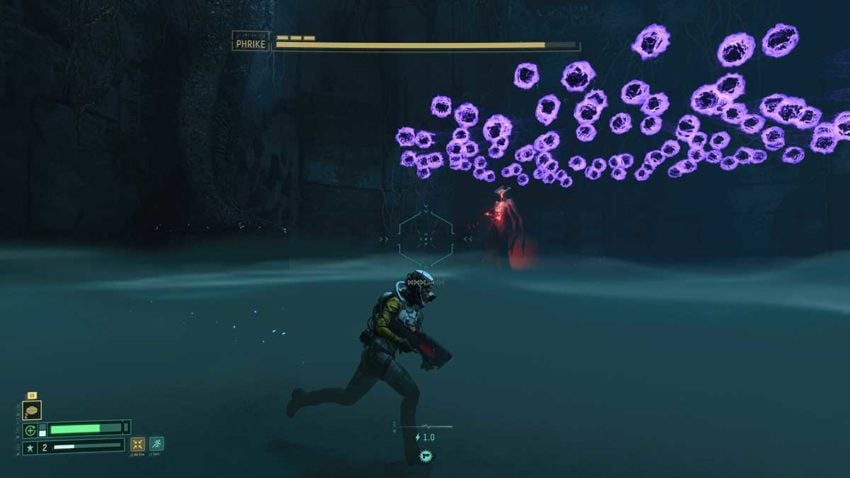
Purple Orbs
Phrike uses this attack straight after the Blue Homing Lasers. The boss raises its arms into the air and summons dozens of Purple Orbs. In phase one, these descend to the ground in a circle and spread outwards. Phrike will dart away and fire a Laser Beam. Phrike will use more Laser Beams during this attack in phases two and three than in phase one. The Purple Orbs will also fall in a new pattern, making a maze through which you have to dodge if you want to avoid damage.
On phase one, head to the middle of the Purple Orbs. It’s a clear spot where you won’t take damage. You’ll need to dash to avoid the incoming Laser Beam, but otherwise, you can continue shooting. You can also keep shooting in phases two and three, but you’ll have to be wary of how the orbs are moving towards you. Phrike can also pull out more Blue Homing Lasers in these phases. Keep an eye on what the boss is doing and dash to avoid damage. It’s more important that you stay alive rather than dealing damage.
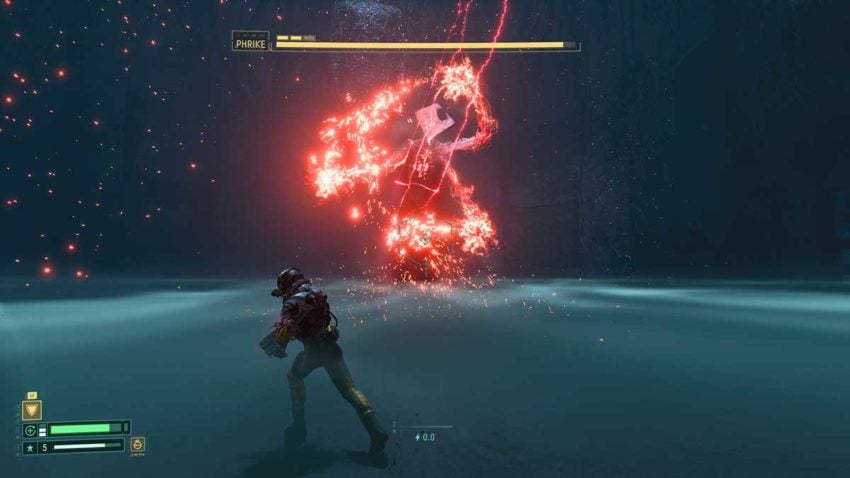
Laser Beam
There are two versions of this attack. The first is a laser that is sent directly across the ground towards you. The second is a laser that moves in an arc across the arena. Phrike shifts between these throughout all phases.
If Phrike puts its head down to charge the Laser Beam, dash to either side to avoid the attack. If Phrike charges its head to the side, then the arc is what it’s about to do. Dash forwards or backward as the attack comes to avoid any damage. You can keep shooting throughout these attacks, but it’s better to focus on avoiding taking any yourself.
Laser Pulse
With this attack, Phrike points its head down and blasts a Laser Beam into the ground. This creates a circular pulse that moves outwards. If it hits you, you’ll take damage. Phrike only makes one Laser Pulse in phase one, but in phases two and three, it’ll make two.
Dodging the dame here is easy. You just have to jump over the rings as they approach. Phrike will dash to your position to perform a melee attack right after creating the Laser Pulse, so you’ll need to save a dash for when it appears. Try to jump the Laser Pulse early. That way, you can wait for Phrike to try a melee attack and then dash to avoid it and slash it with your own melee attack instead.
Dive
This last move is an avoidance tactic. Phrike will drop underground and move to a new location. You can track it by the orange glow on the ground. You can either retreat to get some distance and ready your aim, or you can stay close and get a quick melee attack in as soon as it rises. Both will deal a decent amount of damage, but the melee attack is a lot riskier.
Rewards
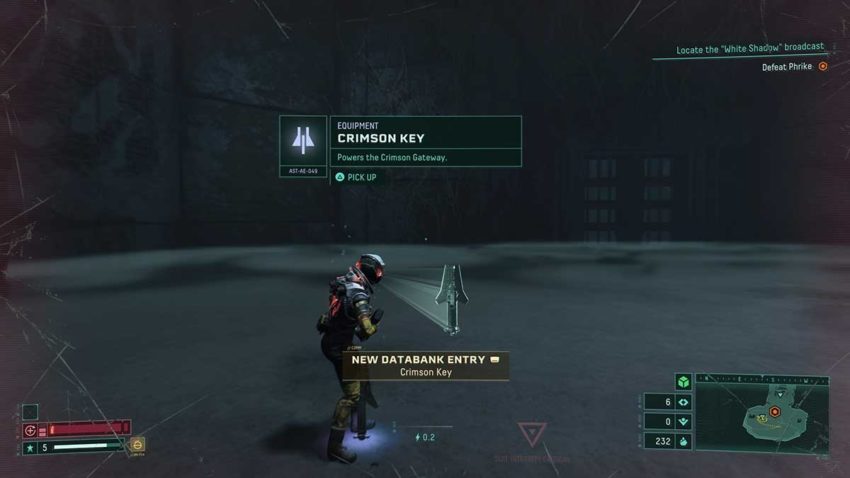
When you kill Phrike, you’ll obtain the Crimson Key. It’s the device that unlocks access to the next biome. You’ll also have the ability to earn some new permanent upgrades and even remove one Parasite in exchange for some resources if you want to.


Published: Apr 30, 2021 01:27 pm