
Streamlabs OBS is one of the most accessible and popular applications for streaming, and for a good reason. The application allows users to easily stream to any streaming platform without the need for a stream key. Not only that, but if users are using Streamlabs for their alerts, they are able to easily connect to the platform to display these alerts on stream without any hassle. If you’re new to streaming and have decided to download Streamlabs OBS, you might be wondering: what are the best settings for Streamlabs OBS?
Related: How to do a Twitch stream from your PC
The best stream settings for Streamlabs OBS
The best stream settings will depend a lot on your set-up, what resolution and FPS you want to stream at, where you’re streaming, and your internet speeds. Your internet speeds are the most important factor in this because if you have low speeds, your stream will lose frames (causes lag) or disconnect entirely. To check your speeds, we strongly recommend going to Speedtest. This site conducts a short test where it will show you your ping, download, and upload at the end of it. For streaming, you’re going to want at least a 4 Mbps upload speed, but having more, especially if you’re sharing the internet with other people is better because that way, you can ensure that your stream won’t go out.
Bitrate
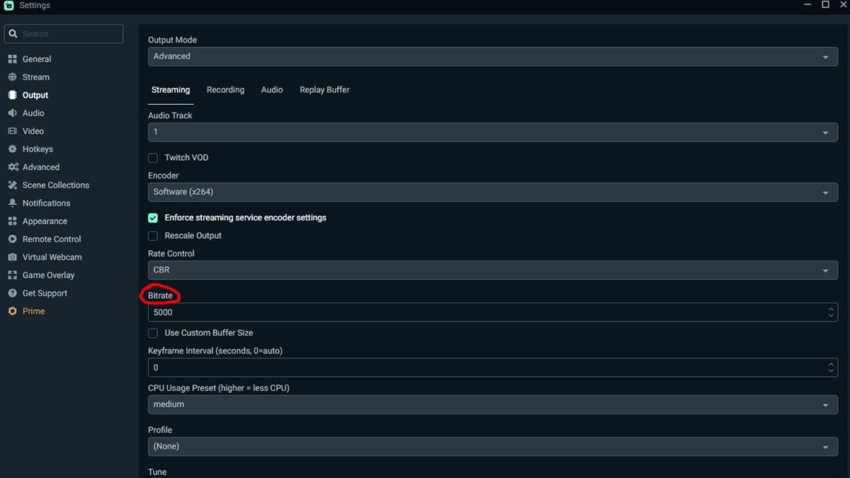
When you go into your Streamlabs settings (click on the gear in the lower left-hand corner), go to Output. You’ll need to input that number into Bitrate. Bitrate is kbps rather than Mbps and MB is 1000x bigger than KB. So if you have 5 MB to spare, for example, you’ll want to put the number 5,000 into Bitrate. Now, it’s important to note that if you have an upload speed higher than 6 MB, there is no reason to input anything higher than 6,000 kbps. For sites like Twitch and YouTube, 6 MB is what you need to stream at 1080P with 60 FPS. YouTube does have the option to stream at higher resolutions like 1440P and even 4K, which does require a lot more upload speed, but take into consideration that your audience may not be able to even watch your stream in these resolutions, and oftentimes, if they try to, they may have issues because their own internet can’t handle it. Think carefully about if you really want to stream in anything higher in 1080P if you have the option to.
Encoder
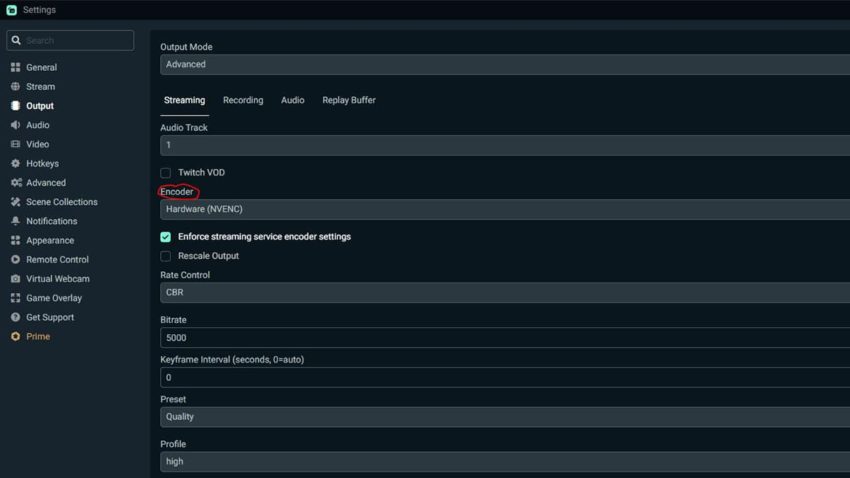
Encoder is what encodes your video. With Streamlabs OBS, you have two encoders to choose from NVIDIA NVENC and x264. The difference between the two is that NVENC will use your GPU to encode the video while x264 uses your CPU. If you have a powerful GPU, you’ll want to use NVENC. However, if you don’t, x264 will work fine as long as your CPU is solid. You can re-adjust the settings to make the load on either your CPU and GPU lighter by changing your quality and resolution.
Video Quality
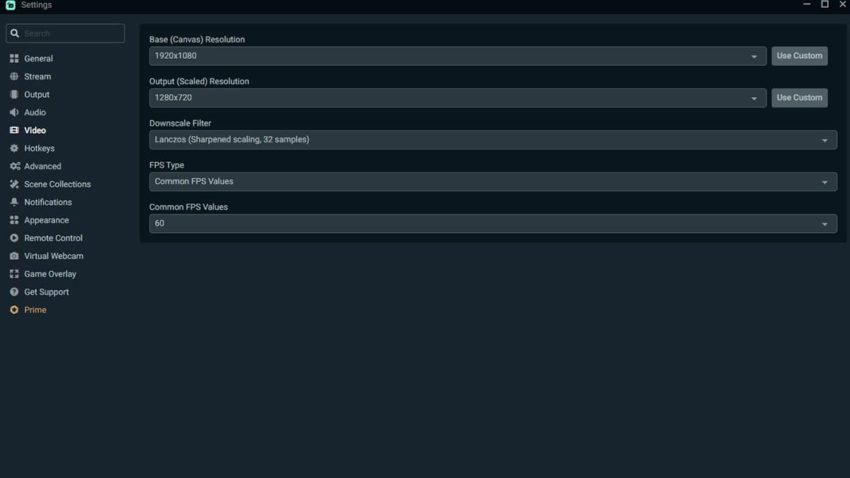
If you go to Video, you can change those settings here. The settings you’ll want to change are output (scaled) resolution and common FPS values where the numbers are displayed in the listing. Output resolution is the resolution you’ll be streaming at and the common FPS values is the frames you’ll be streaming at. Lowering either or both of these will help with performance.
Preset and Profile
These are the last two things you’ll be tinkering with in the settings. Preset will affect your video quality. There are a load of presets here and if you have a lower-end PC, we recommend sticking with one of the performance presets. If you have a higher-end PC, feel free to mess around with any of the quality presets. For profile, use high. Profile helps with better encoding and gives your viewers a cleaner, sharper video.
Microphone Filters
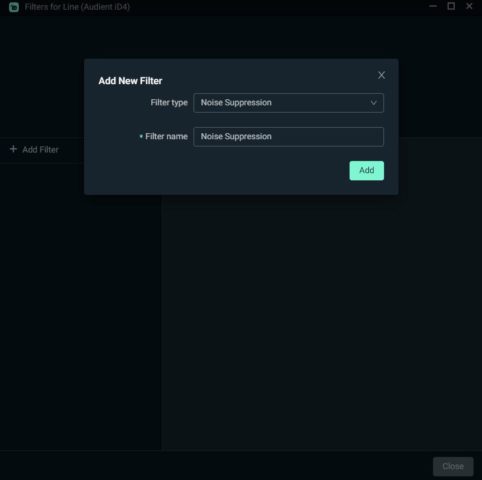
Now that we’re done with the video settings for Streamlabs OBS, you may need to use filters for your microphone. These settings will vary depending on your microphone and its quality and if it’s an XLR or USB. To access filters, click on the gear next to your microphone under the mixer and then hover over to filters, then click on edit filters. There are a ton of filters to choose from and we strongly recommend messing around with these to see what works best with your own personal setup. However, one that we will recommend to everyone is Noise Suppression. This will help eliminate any background noise you won’t want being picked up on stream.
If you are having trouble adding your microphone to the application, here’s what you need to do. Go back to the settings, go to Audio, and then under Mic/Auxilliary Device 1, click on the drop-down menu and look for your microphone.


Published: Oct 26, 2022 12:12 pm