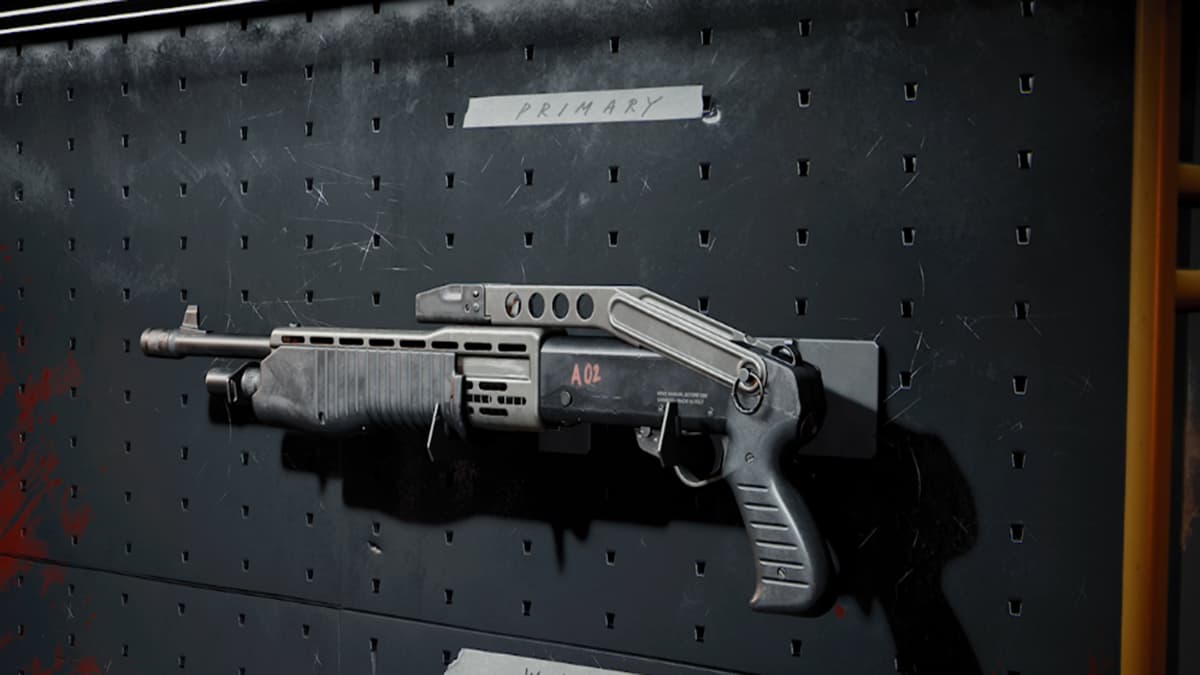
When it comes to selecting your starting weapon in Call of Duty: Black Ops Cold War Zombies, the shotgun class stands above the rest as our favorite. Weapons in this category deliver the most firepower in quick successive blasts and are probably the best option for taking down special and elite enemies outside of the wonder weapons. The Gallo SA12 is one of the more high-profile weapons in the shotgun category and should be one of the first weapons you take to max level in Zombies. When you do so, consider using the following attachments for the best loadout possible for the gun.
The Gallo SA12 can have at most five attachments at any time. This means we will need to leave off two sections in our loadout build. First, we will avoid optics because shotguns don’t need to have dedicated sights on them. Next, we will not include any handle attachment because we feel that section is lacking compared to the others.
Infantry V-Choke
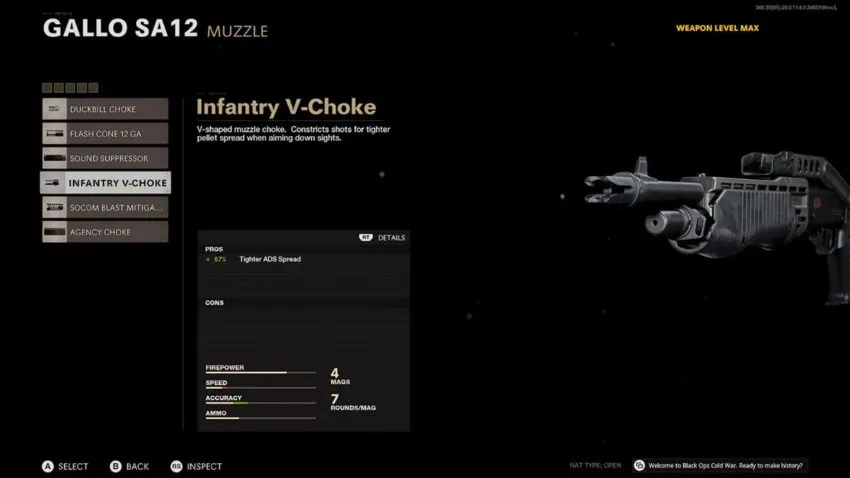
Shotguns can potentially have a large spray with their shots, potentially knocking down the max power they can put into a single enemy. Because of this, we attach the Infantry V-Choke in the Muzzle section to add a 67% tighter aim down sight spread. With this attachment in place, you can focus your power on critical shots easier and take down enemies with more health much faster than a widespread shot.
24.6” Ranger

In the Barrel section, we attach our Gallo SA12 with the 24.6” Ranger. Of all the guns in the game, the Gallo can have the shortest effective damage range, which can be frustrating at times. While zombies will be running at you the entire time you play, the further away we can quickly kill them, the better. For this reason, we want to extend that by 30%, so you don’t always need to be right in the jaws of a Mimic to kill it quickly. You will see a 35% hit to your walking speed while you aim down the sight, but with shotguns, you should only be doing that for quick bursts and then running and using hip-fire. The Infantry V-Choke will help protect you when you aim down the sight with a more concentrated damage spread.
Ember Sighting Point
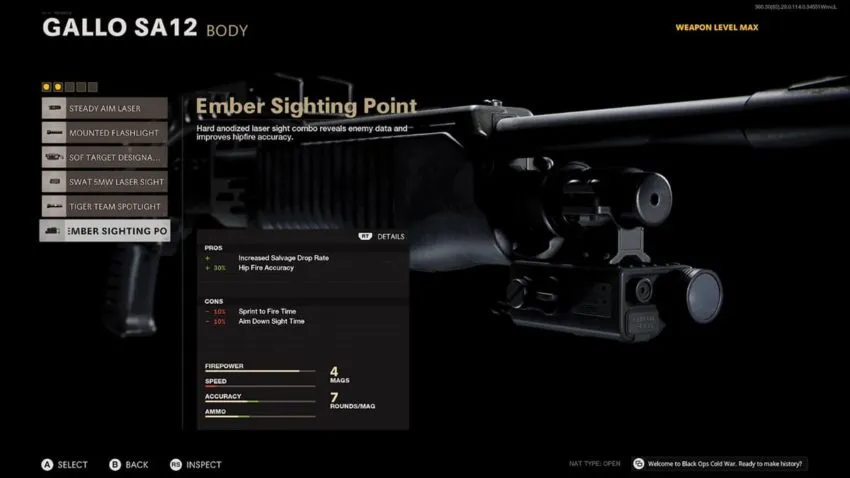
We like to equip the Ember Sighting Point in the Body section for the Gallo SA12. It gives a boost to salvage drops from enemies so you can upgrade the damage tier at Arsenals quicker, but we also like the 30% boost to hip-fire accuracy, which will come in handy with another attachment later. You will see slight drops in your sprint to fire time and aim down sight time, which will hurt a little, but with the firepower you should be putting out on your Gallo, you shouldn’t feel the effects too terribly.
STANAG 12 Rnd Tube
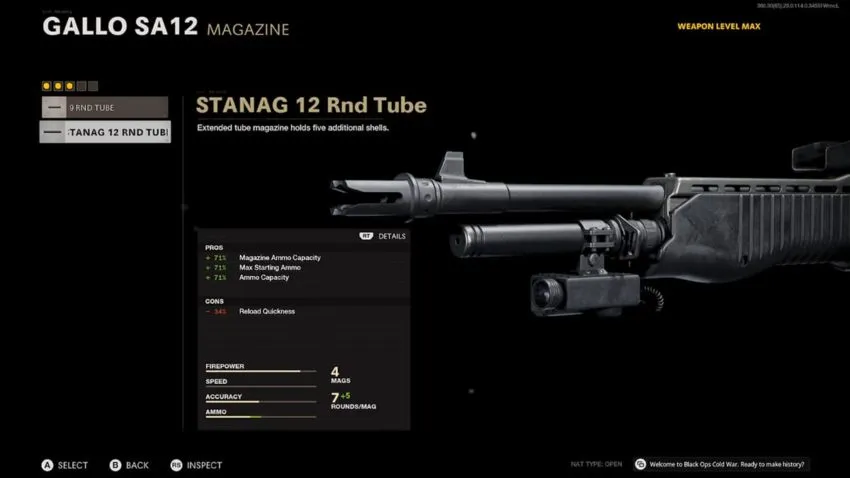
The STANAG 12 Rnd Tube in the Magazine section will make it so your Gallo will have 24 shots on a full reload when Pack-a-Punched. This number is significant for shotguns and is overall a great buff. You also will reload four shells at a time with each insert during the reload animation, and with Speed Cola, you hardly notice any difference in reload time. Even with the slower overall reload, you can cancel your animation at any time and fire into enemies that get right on top of you.
No Stock
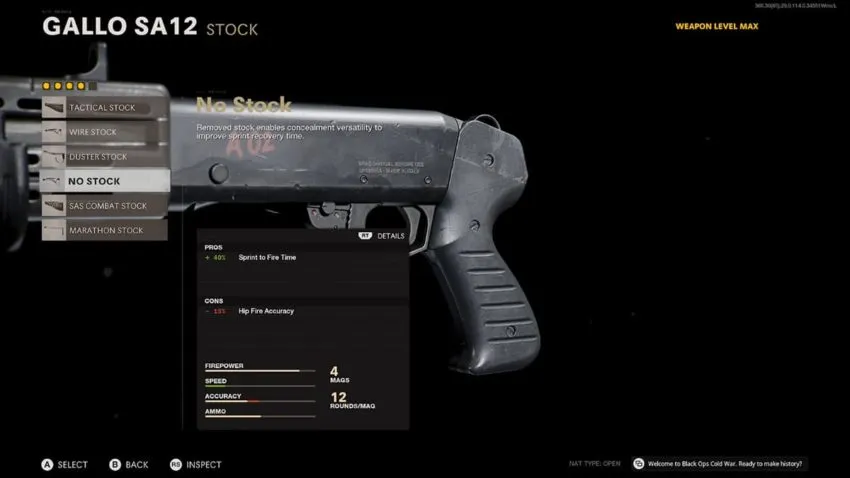
The final attachment that we use on the Gallo SA12 comes in the Stock section, where we choose the No Stock option. We wanted the 30% boost in hip-fire with the Ember Sighting Point because No Stock will hurt your hip-fire by 15%. With these two attachments combined, we still see an increase in overall hip-fire while also getting a 40% sprint to fire time buff, making your bursts of damage come even quicker and allowing for more comfortable escapes to safety and reloading.


Published: Mar 7, 2021 11:28 pm