
Edge of Eternity hides a lot of equipment and materials behind its puzzles. While the main story and side quests focus on the game’s grid-based combat, those wanting additional variety need to actively seek out its optional puzzles. Our guide will help you complete one such puzzle during Edge of Eternity’s second chapter.
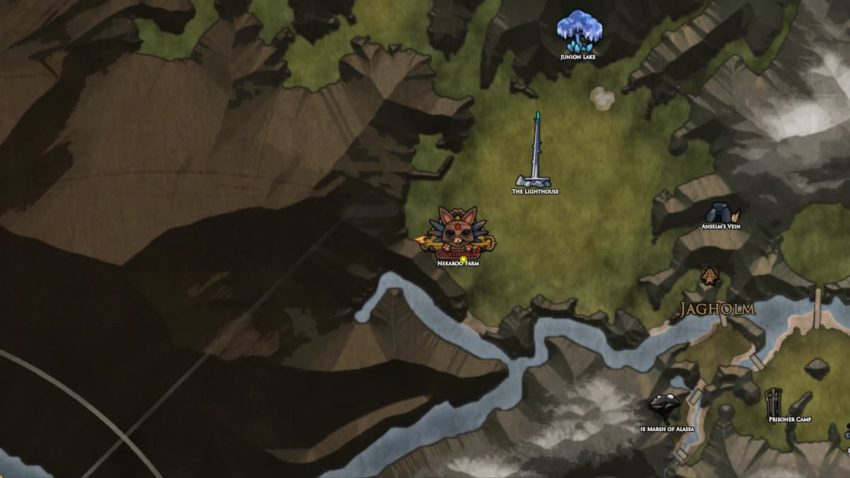
This structure is found right beside Nekaroo Farm, tucked away behind a rock formation. Its exact location can be spotted in the screenshot below, indicated by the player arrow.
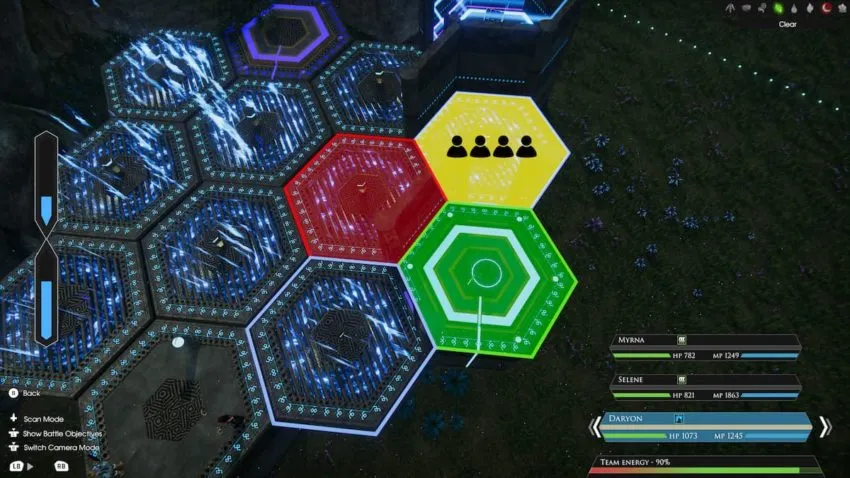
This specific puzzle throws another curveball in that it’s the first puzzle thus far that only grants control of one character. It combines this new gimmick with the grated tiles introduced in the prior puzzle. Since only one character is controllable, we’ll refer to them as Daryon since that’s who we used.
Take note of the grid’s layout. If you remember from the previous puzzle, any tile you step on becomes engulfed in flames the following turn. You need to navigate this space, stepping on each tile only once.
Begin by moving Daryon onto the leftmost tile. From here, simply trek through the tiles stacked on top of this starting tile. Once at the end of the leftmost stack, step onto the purple tile. This opens a passage to the light blue tile. From this position, take the tile underneath the purple switch, then step on the tile underneath that one.
At this point, your path forks in two directions, not counting the spawn point. Take the southern fork, which brings you within arms reach of the light blue tile. The rest of the way through is completely linear. After activating the light blue switch, keep following the non-activated tiles until you reach the end.
The chests at the end house two membrane consumables, the Winged Soulblade crafting recipe, and the Thousand Word Sash armor piece for Selene and Myrna.


Published: Feb 12, 2022 03:03 pm