In Starfield, you will be taking to the stars frequently, and knowing how to pilot your ships properly and how Power Distribution works will be a major help during your space-faring adventures. The game doesn’t do the best job of explaining this all to you, so it can be easy to forget, get confused, or be unsure of how to handle space flight and combat.
This guide details the basics of how to pilot your ship, how power distribution works, and the controls so you can be the best pilot in the galaxy.
Related: Starfield: How to Build Ships
Piloting the Ship in Starfield
Ensuring you can properly fly your spaceship will be an incredibly helpful skill in Starfield since you will be doing it quite a bit, unsurprisingly. The game does give you some tutorials on how to fly your ship, but it’s not very extensive, so we’ll give you a rundown of some of the main bits to know.
For one, here are the controls for PC and console when piloting your ship and when you are on the ground/docked:
Starfield Flight Controls (PC/Console)
General
- Fire Booster (Acceleration): Left Shift/Left Stick
- Toggle POV: Mouse Wheel/View Button
- Switch Flight Mode: Space/RB
- Open Scanner: F/LB
- Ship Action: 1: R/X
- Toggle POV: Q/View Button
Combat
- Fire Weapon 0: Mouse 1/RT
- Fire Weapon 1: Mouse 2/LT
- Fire Weapon 2: G/Y
- Select Target: E/A
- Cancel: Esc/B
- Repair: O/Right Stick
Dock/Landed
- Undock/Take-Off Ship: Space/Y
- Get Up: E/B
- Exit Ship From Cockpit: X/X
- Zoom Camera In: Mouse 1/LT
- Zoom Camera Out: Mouse 2/RT
Ship UI in Starfield
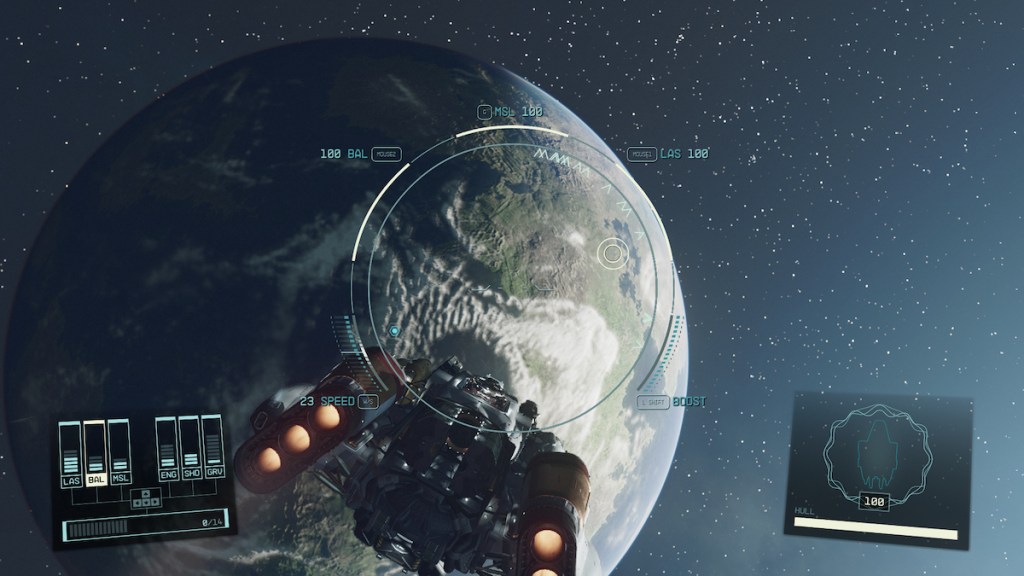
As any pilot would, you might be interested to know where everything is on your heads-up display so you can keep track of what is happening while you are flying.
Below, we’ve got an image with the key information you will need while piloting your ship. We’ve highlighted each part and listed them below so you can see exactly what and where each part is.
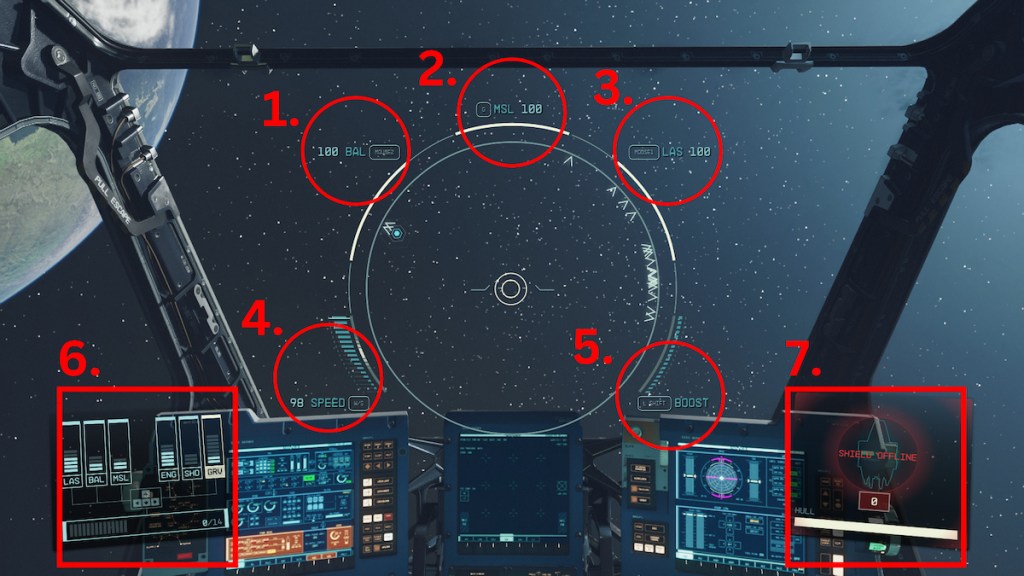
- Ballistics ammo
- Missle ammo
- Laser ammo
- Speed
- Boost
- Power Display and Available power
- Shields
Whether you are in first person or third person, you will also have a full view of these elements, so you can choose or switch between the two whenever you choose
Related: Starfield: How to Swap Ships & Make a Home Ship
How Power Distribution Works in Starfield
When piloting your ship, you have a set amount of power that you can use across the different systems of the ship. You can adjust these whenever you are sitting in your pilot chair, and doing so will become an essential part of space travel and combat.
Depending on the situation, you will want to change and redistribute power to different parts of the ship, such as more in shields if you are being attacked rather violently or more into a specific weapon type to handle their shields. The key is knowing how to do this quickly and effectively, and the game doesn’t do a great job of explaining this. So, we will give you the details.
First, here are the main controls for Power Distribution:
- Access Power Distribution: Left Alt/D-Pad
- Next System: Right Arrow/Right D-Pad
- Previous System: Left Arrow/Left D-Pad
- Increase System Power: Up Arrow/Up D-Pad
- Decrease System Power: Down Arrow/Down D-Pad
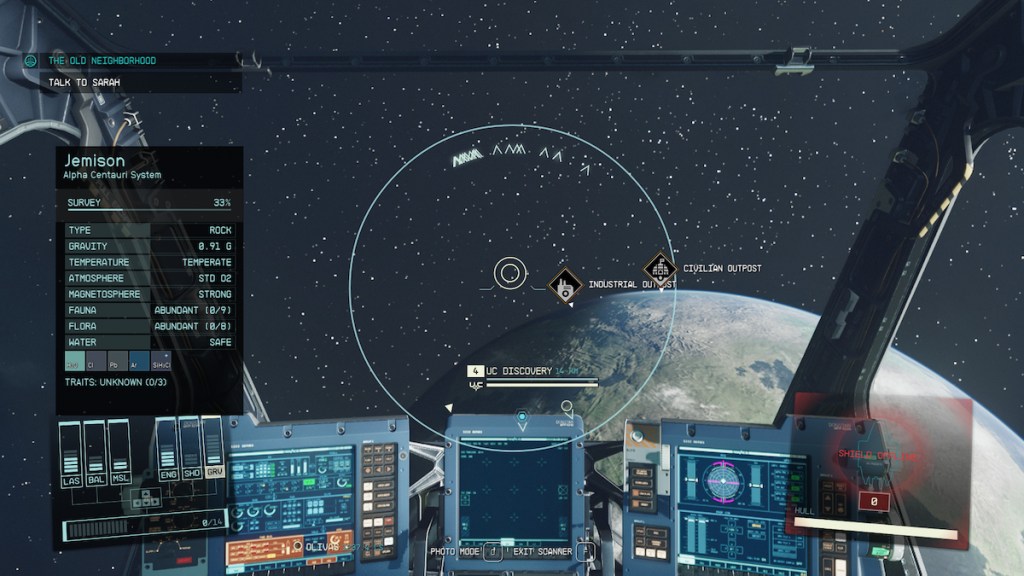
To keep track of what power is on your ship, you can look in the bottom left corner of the screen, and you will see several small columns, all with initials underneath them. This is your power and all the systems it affects.
There are six options available for power, these including:
- LAS: Laser weapon damage and recharge rate
- BAL: Ballistic weapon damage and recharge rate
- MSL: Missile damage and recharge rate
- ENG: Maximum speed
- SHD: Shield strength and recharge rate
- GRV: Jump charge rate
Depending on your ship, its upgrades, and what parts it has, these can vary in number, with some ships having a lot of speed and weaponry power, while others are made for moving large amounts of cargo over long distances. The point is you pick the best ship for the job or your playstyle, and depending on what you have, you will set different power capabilities.


Published: Sep 8, 2023 09:29 pm