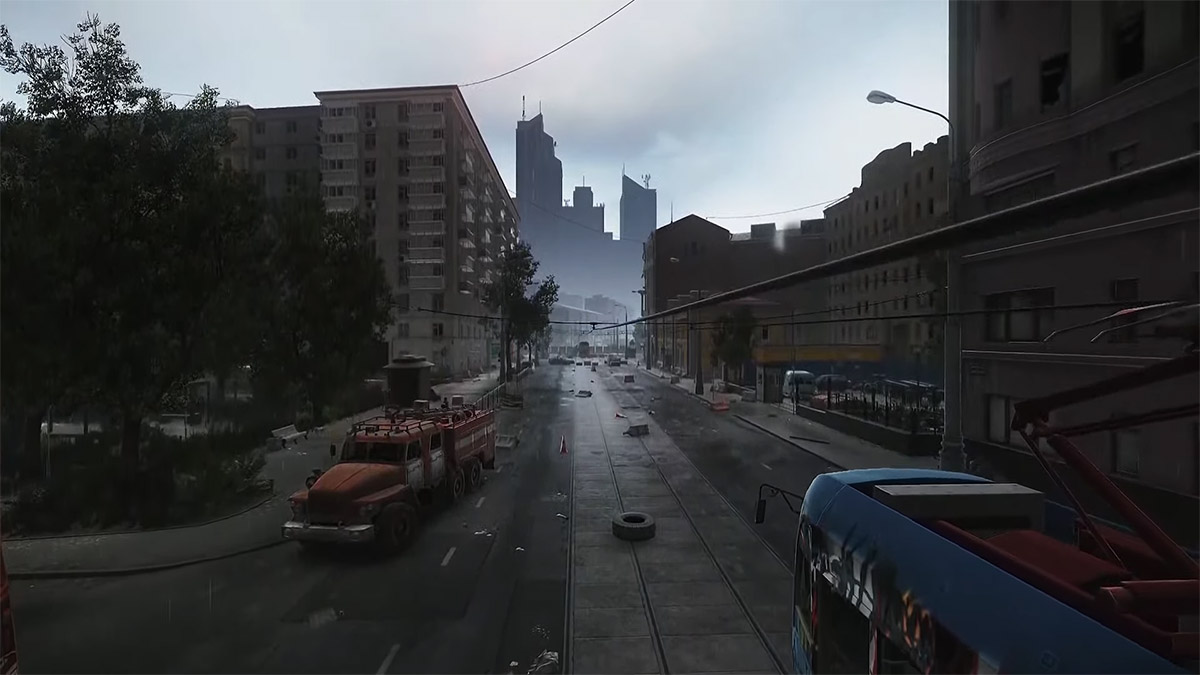
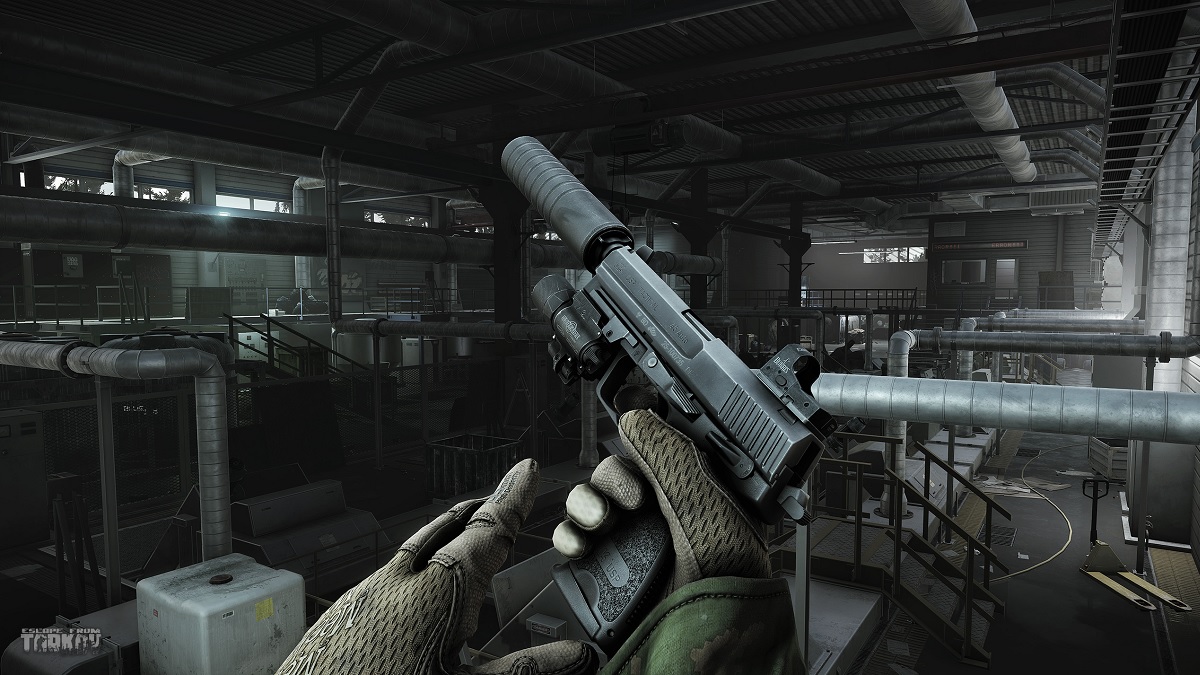
Escape From Tarkov is becoming one of the most popular games available. Surviving in this game is a challenge for veterans and new players alike. One of the most challenging maps in the game is The Lab. Navigating the Lab can be as frustrating as navigating Upper Blighttown in Dark Souls. Many veteran players actively avoid it. To enter the map, the player needs to obtain a keycard, and each extraction point has a task that needs to be completed before it can be accessed. Luckily this map also has some of the best loot in the game, making it well worth the frustration. This guide will cover the basic layout, extraction points, and other highlights for the map.
Something that all players should keep in mind about this map is that insurance does not work. If a player purchases insurance, they will receive a message from Prapor later stating that his men either couldn’t find the Lab or never returned. The Lab is set in an underground facility beneath Tarkov. This map has three claustrophobic floors to explore filled with Scav Raiders.
Getting the key to the Lab
To be able to access the Lab players will need to get the TerraGroup Labs access keycard. One is required for each player entering the map and is consumed on use.
There are a few places to find the keycards:
1. In drawers on the Shoreline map and in The Lab itself
2. Loot from Scavs and Scav Raiders
3. Loot from Bosses like Gluhar and Killa.
Searching the drawers on Shoreline is the safest bet. If players want to try killing a boss to get the keycards, they should go after either Killa on the Interchange map or Gluhar on the Reserve map. These two bosses spawn slightly more frequently than the others.
Other keycards
While the TerraGroup Labs access keycard will give players access to the lab itself, several other areas require additional keycards to enter. These cards are color-coded, and each area they unlock has different kinds of loot.
There are a total of three keys and six keycards. The keys open up the manager’s office, the testing area, and the arsenal storage room.
- The Green keycard is found on a shelf between some binders in the hallway leading to the security arsenal. It unlocks the door to the laboratory block (G22).
- The Black keycard is in the laboratory block (G22) on a desk next to a computer. It unlocks the door to the experimentation area (G12). The green card will be needed to get to this area.
- The Blue card is not found in the Lab. It can be looted off Gluhar’s body in the Reserve, or found on the Shoreline map in the passenger door of the ambulance parked in front of the resort. The blue card allows players to access the door to the Lab’s quarantine zone (G11).
- The Red card is also found on the Shoreline map. It is found in room 221 of the resort or in the gym in the basement. This key unlocks the door to the Lab’s arsenal (R23).
- The Violet keycard is found on the Woods map. It is in the trunk of the SUV parked near the warehouse by the lumber camp. It unlocks the Lab’s security post (R23).
- The Yellow keycard is in the Lab. It is found on a table either in the cafeteria (R24), or outside the manager’s office (O21). This card unlocks the door to the parking garage alarm control panel.
- The Arsenal storage room key, also shown in-game as Lk.ASR, is found on the Customs map. It is found either in a chair in a shack on the hill with the transmission tower, or on the counter behind the register at the gas station. This key unlocks the Lab security arsenal (R23).
- The Manager’s office key, Lk.MO in-game, can be found in the passenger seat of an SUV in the garage, or in the conference room (O22). This key unlocks the door to the manager’s office (O21).
- The Testing area key, Lk.TA(w) in-game, can be found on the first floor in the gym (R15) on a stool, on the kitchen counter in the server farm (B12), or on the bottom shelf near the door to the security post (R23).
- The Keycard with a blue marking can open up Sanitar’s stash on the second level. It can only be looted from Sanitar on Shoreline after killing him.
With the exception of the key to Sanitar’s stash, all of these keys can also be looted from Scavs.
Enemies
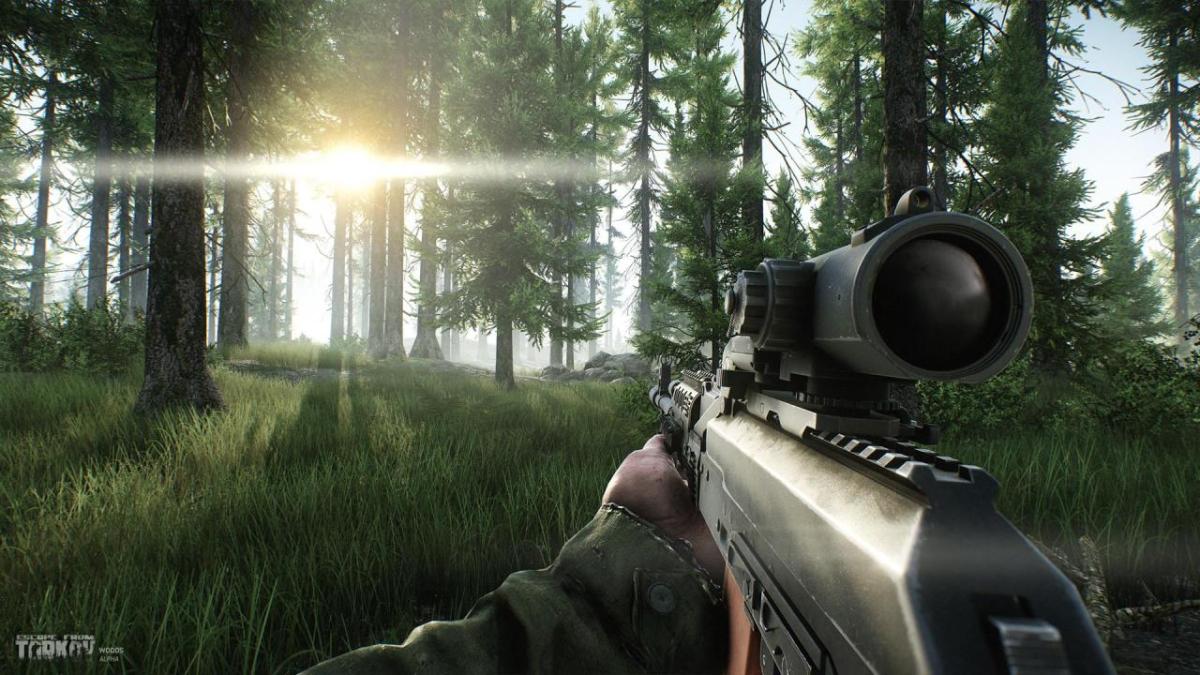
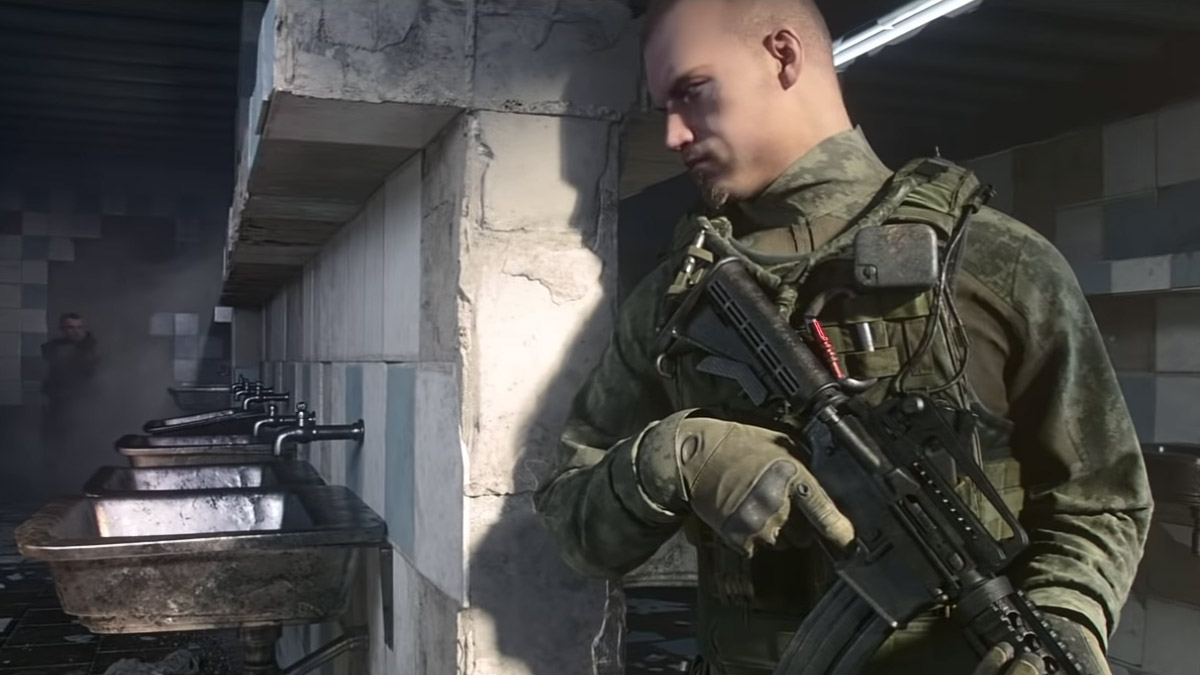
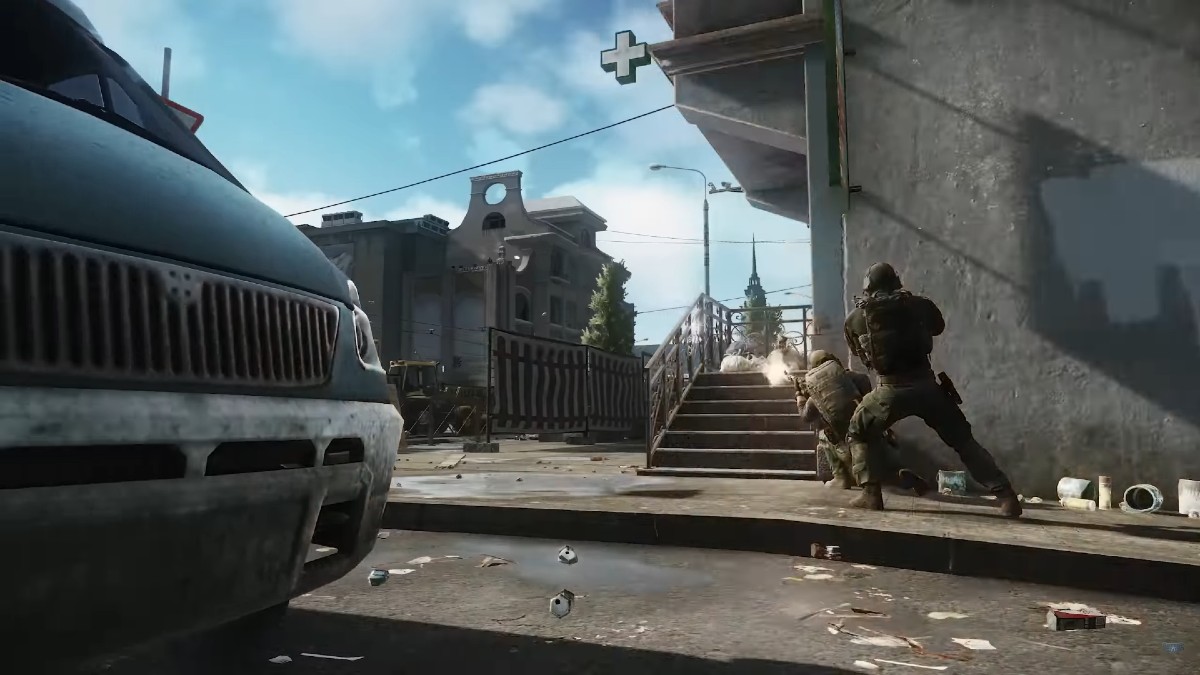
Unlike the other maps in EFT, the Lab does not feature regular Scavs or a Boss. The Lab is filled exclusively with the tougher and more accurate Scav Raiders. The Raiders patrol the Lab in groups of three. They have much better equipment than normal Scavs, which means they have better loot but are also much more dangerous. Players will need to check each corner and move carefully when navigating the Lab or risk being surprised by patrolling Raiders. Players should be prepared to enter the Lab with armor-piercing ammo, higher tier armor, and plenty of meds. Raiders are stronger than other Scavs but rarely wear headgear in the Lab. Players should try to use headshots when taking on Raiders instead of aiming for their upper tier chest armor.
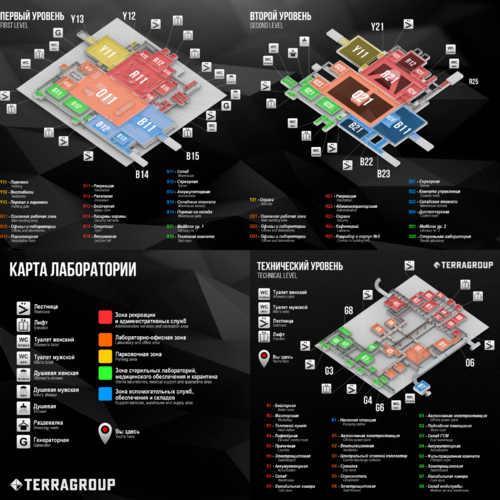
Second Floor
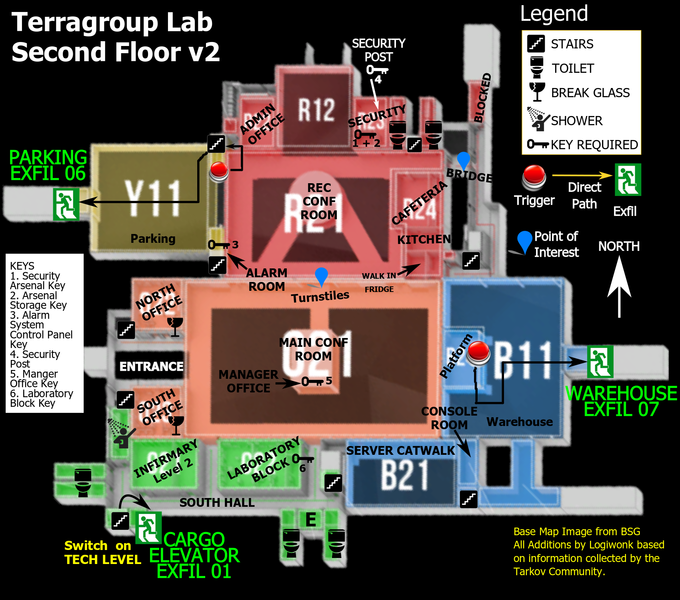
This floor has three extraction points, which are discussed below. This floor mainly has offices. For the most part, the offices will have basic loot like ammo. The offices are also useful for finding items like cigarettes to turn in for quests. The rec conference room, or Cat room, is one place players should check out. It is a round room with cat statues flanking the doors. This room often has valuable loot such as gold chains, VPX, and virtex processors.
Northeast of the Cat room is the security office. Getting in will require the Red keycard. The security office itself has some good loot, but the best items are found in the gated area. Getting into the gated area required the arsenal storage key. The shelves inside the arsenal storage area often have rare loot that players should not pass up.
Across the hall from the office is the violet area. The Violet keycard is required to get in. It is a tiny area but has a lot of good loot, including COFDM Transmitters and Virtex processors needed for quests.
South of the security office is the cafeteria. There is not a lot of valuable loot in this area, but the food items found in the kitchen can be useful for newer players. The yellow keycard can be found in the cafeteria on one of the tables.
Through the kitchen and around the corner to the left are some blue and white pallets. These pallets can have random loot spawn on them, including items that can be traded in for better equipment.
Almost in the center of the map on this floor is the manager’s office. This office can have an MPX spawn along with some other loot. This is also a possible spawn location for both the Green and Yellow keycards. The area around the office can have some excellent loot, but it is even crawling with Scav Raiders. If players aren’t careful and quiet, they will likely end up in a firefight.
Sanitar’s stash can be found on the south end of the floor. The stash is in a closet near G22 across from the server room. Look for a short hallway running north to south with a large “Terragroup Labs” sign. The door to the stash is right next to the sign. Use the keypad next to the door to access it. The stash contains loose loot, medical supplies, and several of the new stims from the 12.7 update. This is a good spot to farm for items for certain colleague quests. This closet can only be accessed with a single-use Key card with a blue marking. The card is dropped by Sanitar on Shoreline.
First Floor
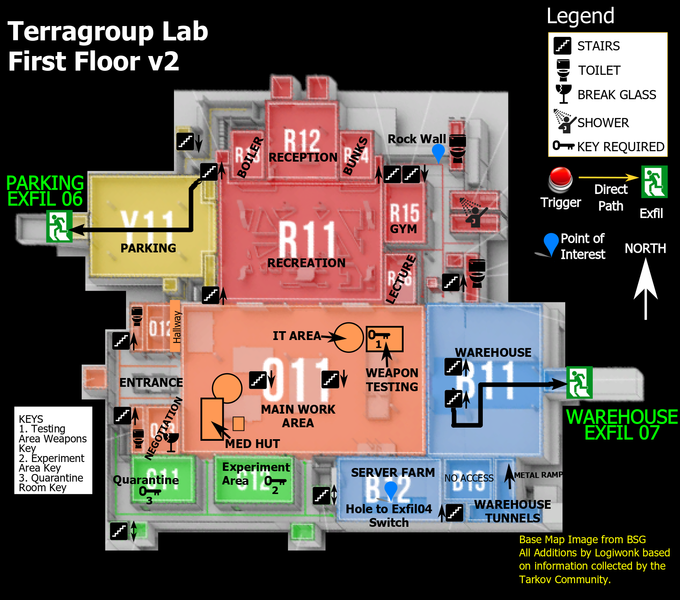
The first floor has two extraction points that are shared with the second floor. There are a few areas on this floor that have some valuable loot. The lecture area is right below the kitchen on the second floor. This room has a projector and several laptops on desks. VPX and money often spawn near the laptops and around the tables. Occasionally a VPX will spawn near the podium at the front of the room. Outside of the door nearest the podium is a server rack that has been knocked over. Virtex processors often spawn on this collapsed server.
Down the hall from the lecture hall is the gym. The gym has nothing really of note except for the Testing area key. The key can spawn on a stool somewhere in the gym.
The parking garage can also be accessed from this floor. The cars and crates in the garage can have some basic loot, but the most important part of the garage is a black SUV containing the Manager’s office key.
South of the parking garage is the main work area beneath the manager’s office. This area can have a lot of basic medicine as well as money, graphics cards, VPX, and the Black keycard. Players should definitely check out the IT area, the mud hut, and the weapon testing area. All of these spots within the main work area have decent loot. Inside the dome in the main work area, players can find a LEDX on top of a barrel. The LEDX is needed for the Private Clinic quest and to upgrade the medstation in the Hideout.
The Testing area key is needed to get into the weapon testing area. This area usually has ammo and some weapon attachments, and occasionally a fully assembled M4.
Opposite of the weapons testing area on the south side of the main work area is a set of cranes and disassembled cranes that have been fenced in. These areas usually have good loot like virtex, COFDM, fuel conditioner, firesteel, and fireklean gun lube. The cranes are generally surrounded by Scavs, which makes looting them dangerous but still worth it.
In the southeastern section of the first floor is the server room. The server room is hazardous; there are usually a lot of Scav Raiders as well as players trying to exfil. There is a hole in the floor of the server room that will drop down into the room below in the basement. This hole is handy for getting to the power switch needed to use the Medical Block Elevator. Despite the danger, the server room and the surrounding rooms all have good loot, including weapon attachments and LEDX.
Across the hall from the server room, near the med hut in the main work area is the experiment area. This area requires the Black keycard to access it. These rooms have several very valuable colored stim injectors throughout the area, as well as lots of medical supplies.
Basement

The Basement or Technical level is the third and bottom level of the map. It mainly features utility rooms such as the boiler room (R1) and the powerplant (G1). This room is one of the most important in terms of extraction. There are four extraction points in the basement, the sewers, the ventilation shaft, the main elevator, and the medical block elevator. There is also a switch in the basement that needs to be flipped to use the cargo elevator on the second floor.
There isn’t a lot of loot in the basement, aside from basic things like ammo and occasionally cigarettes. The importance of the basement comes from the extraction points. The only two relatively safe extraction points on this map are in the basement. The ventilation shaft and the sewers are both easily accessible and don’t often attract enemy Raiders.
Extraction Points
There are seven extraction points in the Lab.
- The Cargo Elevator: This extraction point can’t be used until power is restored to the elevators. To turn on the power, take the southwestern stairs down to the basement. Once in the basement, turn right and head to the powerplant (G1). To the right of the powerplant’s southern entrance is a fenced-in area with a switchboard that has an interactable switch on it. Flip the switch then head back up to the second floor to press the elevator button. The elevator is located in the southwestern corner near the stairs to the basement.
- Medical Block Elevator: From the southwestern stairs in the basement, turn right and head down to the end of the hall past the powerplant. The elevator will be on the right wall standing open but needs to be powered first. To power the elevator keep going to the end of the hall. There will be a door on the left that will need to be breached to open. Against the back wall is a switchboard with an interactable switch. Flip the switch, an announcement will sound, and the elevator can be used for extraction. Alternatively, there is a hole in the floor of the server room (B12) on the floor above. Players can drop down through this hole to access the power switch instead of breaching but may take some damage.
- Hanger Gate: This extraction point is on the eastern side of the main floor. Inside the warehouse is an elevated platform with an office sitting on it. The office looks like a white storage container with blue Cyrillic letters and a red outline. Enter the office and look out the window. Directly across from the office is a garage door between two trucks, that is the exit. Interact with the panel with the microphone on the table. It will take a little while for the door to open, and it makes a lot of noise attracting everyone in the area. Just past the now open door are two rooms filled with Scavs waiting for anyone that tries to exit. The dark corridor past the Scavs is the extraction point.
- Main Elevator: The main elevator is in the northernmost part of the basement between a bunch of blue barrels and some tall red gas tanks. Directly across from the elevator doors is a room with a bunch of switchboards. Pass through the switch room and turn left. Go down the hall towards the boiler room. There is a set of stairs with a switchboard right next to them. Interact with the switchboard and the elevator will be available.
- Parking Gate: This is one of the quickest extraction points, but also the most dangerous. The parking garage is located on the first floor on the northwestern side. There is an office overlooking the garage. From the center of the garage face east towards the main part of the building. Head through the door on the left with the sign flashing “error” above it. Go up the stairs, and the office will be through the first door on the right. Walk up to the panel with the microphone on the desk. Interact with it and run like hell. A large door on the far west wall of the garage will start to open. It will make a lot of noise, and there will be an announcement attracting every Raider and player on the map.
The alarm for this extraction point can be disabled using the Yellow keycard. From the office where the garage door is opened go down to the opposite end of the hallway. There should be some big screens taking up the wall and displaying scenery. Past the screens on the right-hand side is another office. This office is accessed using the Yellow keycard. Once inside there is a grated area with some loot and a desk with a computer. Interact with the computer to shut off the alarm. Even though the alarm is off Raiders can still spawn when the extraction point is activated. This will only work for the Parking Gate extraction, the alarm and announcements will still sound for all other extraction points. - Sewage Conduit: The sewage conduit is in the basement. This is the safest extraction point but also the most time-consuming. The entrance to the sewers is in the middle of the eastern wall of the basement. The entrance is down the center hall past the vent room (O1) and will have blue stripes and a large 02 on the walls next to the door. Once through the door, turn right and follow the tunnel. There is an open area with a water conduit in the center. Go to the far right side of the room and activate the switchboard, then head to the opposite side of the room and interact with the control panel on the wall. The water level will begin to sink. This makes a lot of noise and takes a little over a minute to empty, so Raiders and some players may come down to investigate.
- Ventilation Shaft: This extraction point cannot be used with a backpack. This point is in the basement. Go down the stairs from the second floor to the basement. From the bottom of the stairs, go straight to the end of the hall, then turn right and go through the door. There will be a dark hallway with a grated door. The shaft is high on the wall to the left on the other side of the grated door. This extraction point can be used without triggering an announcement.
Announcements
Each time one of the extraction points is activated, an announcement in Russian will come over the Lab’s loudspeakers alerting every Player and Raider in the facility. Part of the announcement will include the location of the extraction point being used. The only exceptions for this are the ventilation shaft and sewage conduit extraction points.


Published: Feb 11, 2020 10:51 am