Gunfire Reborn has multiple bosses that it will throw at the player, and the Golem is one of them. An alternate boss for the conclusion of the second stage, many newer players of Gunfire Reborn have experienced an untimely death to this construct thanks to its enormous size and wide-sweeping attacks.
There are a heft of tricks you can use against the Golem to mitigate its attacks and farm it for long-standing buffs depending on ascendancies gained. Trivializing the Golem is a cinch once you know what you’re looking at.
Related: Gunfire Reborn character tier list – Best characters in Gunfire Reborn
Tips to defeat Golem in Gunfire Reborn
The Golem arena occupies the same space as the Lu Wu fight, a rectangular arena where the far side has been destroyed to make space for the boss. Players will note that rocky pillars, or stalagmites, occupy much of the floor between the entrance and the boss. These obstacles are actually a threat to life with this boss and should typically not be used as cover.
What are the weak spot of The Golem?
The Golem’s crit spot is two-fold: its eyes, which is an easy target during its laser attack, and its chest, which should always be prioritized between its attacks. Faster players using light, rapid-firing weapons, such as the Angelic Aura or Argus, are best positioned near the Golem itself to exploit the large crit hitbox of the chest.
Fire is an ideal element for this enemy as the Golem holds neither shields nor armor. If it can be managed, do not fire unless engaging a critical zone: the Golem has a flat-damage percentage mitigation thanks to its rocky outer. It’s possible to empty on ammo in this fight, resulting in players needing to use the default weapon.
How to deal with The Golem’s laser attack
After a bit of introductory animation, the first attack that the Golem will send at the players is a green laser attack. This attack cannot be outrun; it locks onto the player position, an audio cue of a short charge will be played, and the laser then fires at the players. Hiding behind the rock pillars seems like an ideal position to take, but it will actually not only elongate the fight, but the pillars may burst, and the player will take massive damage.
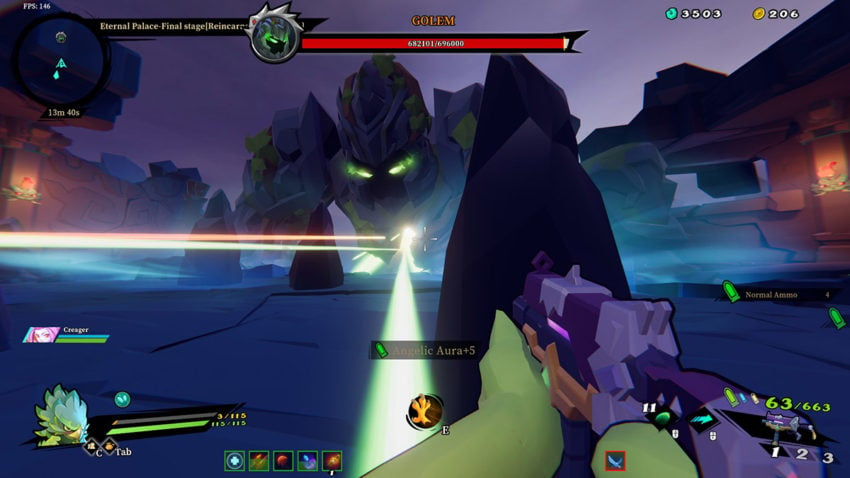
The tell for this attack is the Golem leaning towards the arena and placing both hands more than shoulder-width apart. During this attack, its chest and head are both open for attack, although bear in mind that some weapons slow heroes when being fired.
Move either directly left or right, and hop before the laser fires. A jump in Gunfire Reborn takes over half a second to complete, giving an ample timing window for players to dodge the attack. If movement speed for the hero has dropped below five due to curses, scrolls, or ascensions, this method is still possible, but the window of movement for dodging effectively drops— use a dash with the jump to ensure damage avoidance. If your hero speed is high enough to easily sidestep this attack, save the dodge for the meteor shower.
The purpose of this strategy is immediately apparent: it allows players to continue engaging the Golem during one of its longest-lasting attack animations. This strategy can be valid at point-blank range of the Golem (for Cleaves, Tidal Punches, and the like), although the timing necessary is almost frame-perfect and not recommended.
How to deal with The Golem’s rock throw
This can be a frustrating attack to deal with, but it also brings forth the ability to endlessly farm the Golem for combat buffs depending on ascendancy. The Golem will lean back and stretch its arms upwards, summoning multiple rocks that appear above its head, then begin flying towards players within the arena.
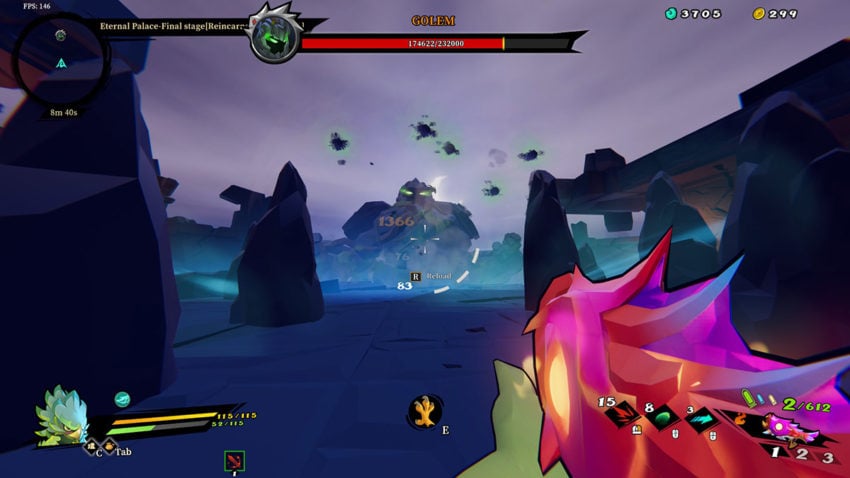
The tell for this attack is apparent: when the Golem reaches upwards, move backward. It’s either a rock throw or an arm slam, and either way, players will want to step into the middle of the arena. After reaching upwards, the Golem flexes his arms downwards to either side, summoning the rocks. During this attack, its chest is open for critical attacks, but players should focus on the summoned rocks instead.
These rocks count as individual enemies for Gunfire Reborn, and the attacks are endless if the Golem isn’t killed. Thus, if a player is holding a per-enemy-killed buff, such as Qing Yan’s Easy Kill Cleave ascendancy, these rocks can be endlessly farmed to stack damage astronomically high. This strategy works best when a range-increase can be coupled with the per-enemy-killed buff to ensure the rocks are eliminated prior to impact, as their damage is quite high in later difficulties.
With a high enough movement speed and some dash enhancements for good measure, the meteors can be mostly avoided by moving from back to front after they’ve begun their descent. In this case, patience is rewarded: when you see rocks, all players should shift damage from the Golem to the rocks unless someone is actively farming the damage proc. The pillars can only block a few of the rocks prior to breaking, which can leave players vulnerable.
How to deal with The Golem’s arm slam
The second possible attack when the Golem stretches upwards; this arm slam can do massive damage to anyone that has been playing the encounter at close range. As mentioned in the rock throw segment, dash towards the middle of the arena if you’ve been playing this encounter close.
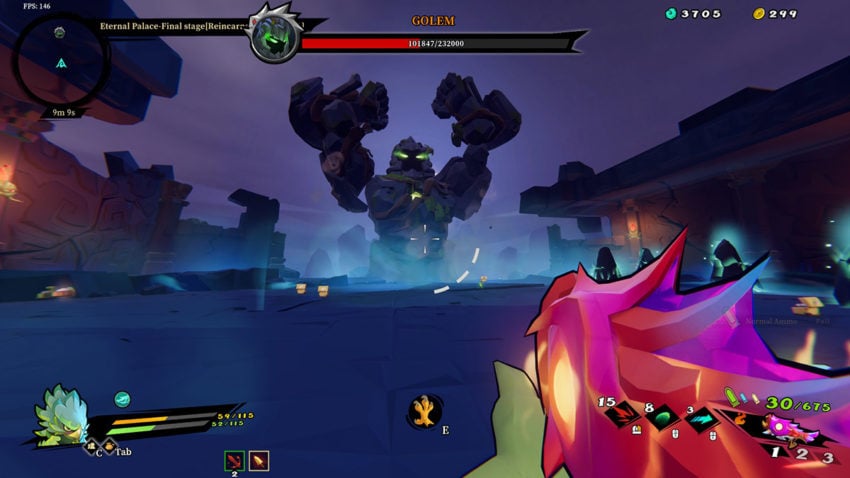
The tell for this attack is similar to the rock throw, but the Golem will keep its arms together instead of separate. The chest is vulnerable during the first part of the attack, and its eyes are the ideal target once the arms close in front of its chest.
Once the arms come down, all rock pillars in the entire arena will explode with a low-AoE/high-damage attack. Keep away from the pillars and watch the ground in front of you in preparation for the follow-up attack. You can continue to damage the Golem during this attack and its follow-up, but be aware that the greatest threat comes from the arena floor from the destruction of the pillars.
How to deal with The Golem’s pillar summon
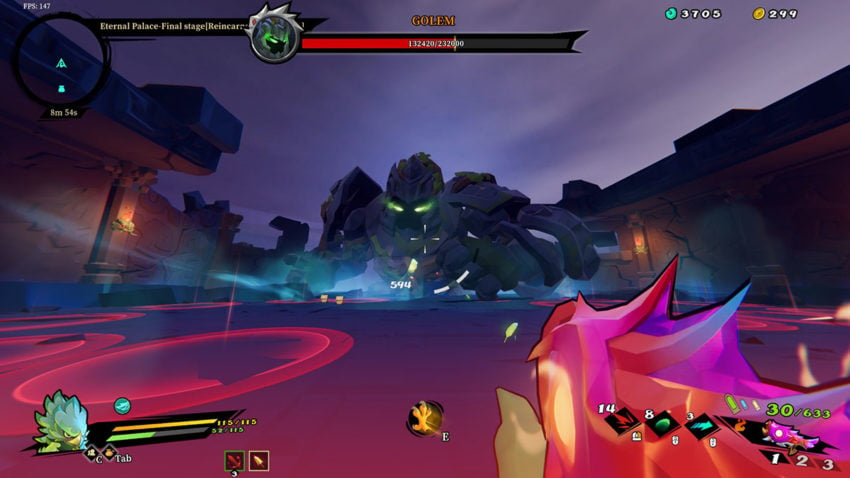
After every arm slam attack, the Golem will summon new pillars. A red circle is seen briefly on the ground before the pillar is wrought to creation — if you’re inside of a circle, your only hope is to dash unless you have a high movement-speed hero. It’s a quick attack, so heroes will need to move just as quick.
How to deal with The Golem’s rocket punch
Once the Golem reaches low health, this is the only attack that is added to its retinue. The rocket punch throws both fists towards a single targeted player, with a massive AoE covering both sides. The damage, if struck, is colossal in later difficulties.
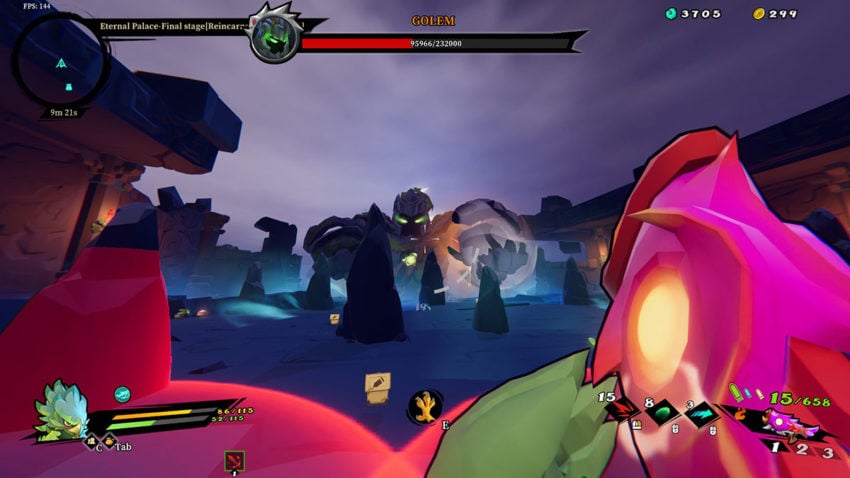
The tell for this attack is the Golem having roughly 50% health or less and reaching both arms outwards towards the arena. If playing forwards, the chest is the best critical zone to aim at — if playing in the rear, try hitting the chest unless an arm is covering it, then engage the head.
The dodge, if you’ve been targeted, is relatively simple: either dash forwards, or backwards. Dashing left or right will result in a fist hitting you thanks to its wide lateral AoE. Dashing forwards will allow players to continue attacking the Golem without interruption, and the reset for the rocket punch (before the Golem can enter the next attack) is quite long at nearly four seconds.





Published: Jul 7, 2022 02:05 am