Final Fantasy XIV’s newly released Variant Sil’dihn Subterrane brings with it new minions, new mounts, new gear, but most importantly, a hidden boss route that can only be unlocked by doing specific actions on a run. Here’s what you need to know about the secret boss of Sil’dihn Subterrane.
How to unlock the Thorne Knight secret boss fight
Start by picking the rightmost pathway, then kill the mob packs and first boss as you would on the other routes. Follow the path out of the first boss area to the winch, and go right, which will lead you to a series of rooms with mobs in them.
Kill the first pack normally, but when you get to the Forgotten Drakes, make sure you kill them in the following order: Drakefather > Drakemother > Drakebrother > Drakesister > Drakeling. The Drakeling is very squishy, so the entire party should refrain from spamming AOE skills and instead focus down the mobs one by one. Tanks can AOE one or twice safely to maintain aggro, especially if you have a White Mage who is burning their spare lilies.

The path will then lead you to a room with another pack of mobs. Kill the mobs, but stay in the room, as Nanamo will be doing a sequence of dialogue. Shortly after this, a Myrrh Incense Burner will appear. Note that running past Nanamo will advance her dialogue, making the burner disappear if you have not already interacted with it, so make sure you grab it before heading out of the room.
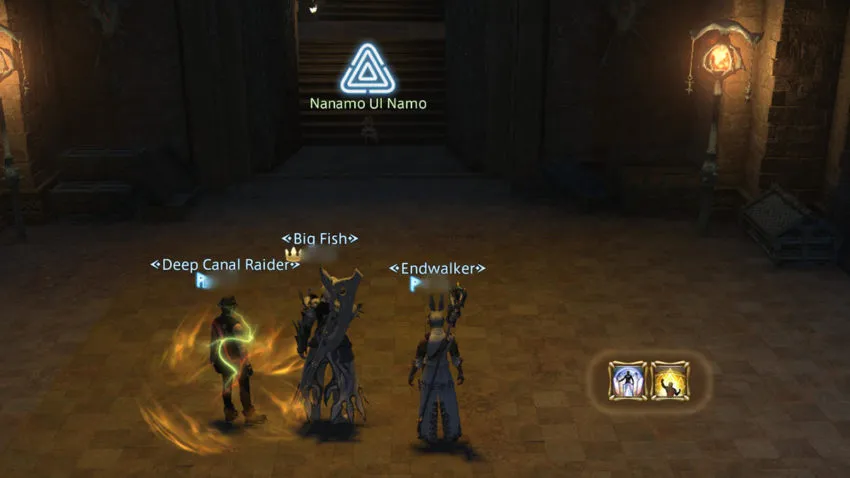
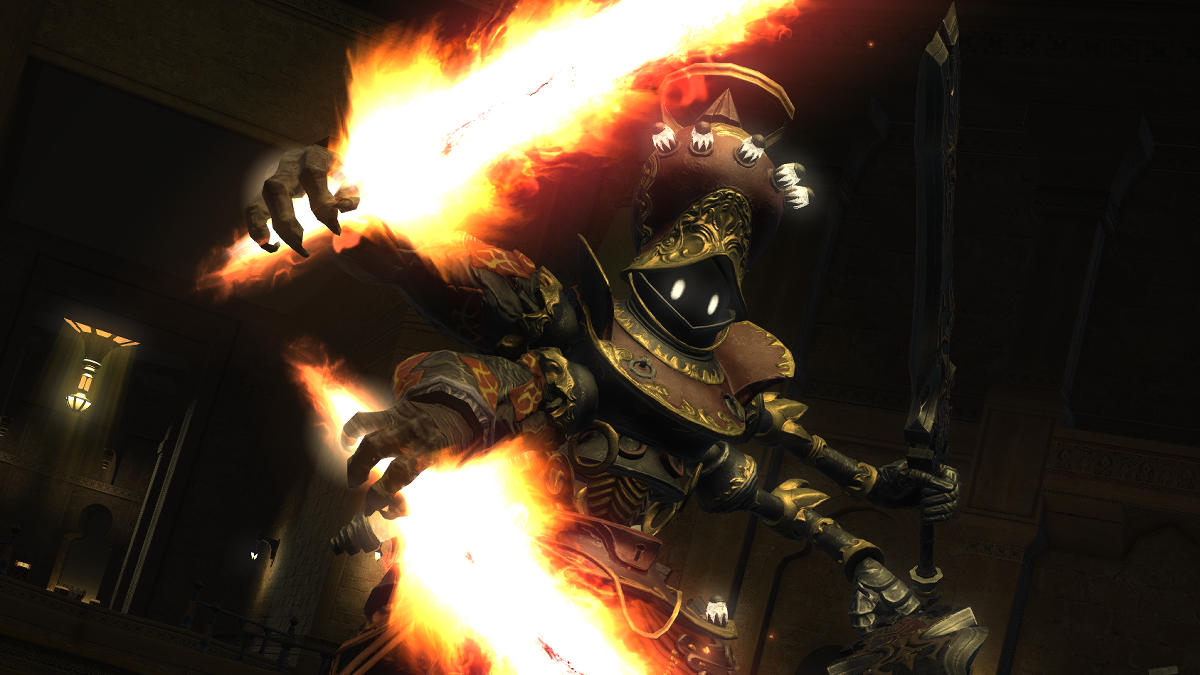
After you have grabbed the incense, head up to the coffin. Nanamo will say a few lines of dialogue, and then the Fallen Hero’s Sarcophagus becomes interactable. Do not interact with it. Instead, do the following emotes in this order /bow > /respect > /vpose > /kneel, making sure to pause briefly between each emote to let the animation play out. This will reveal a secret passage behind the original boss arena. Head through that and you will trigger a cutscene that heralds the arrival of the dungeon’s secret boss — the Thorne Knight.
How to beat the Thorne Knight
Bear in mind that this a fight that relies heavily on visual cues/tells, so keep your eyes peeled as you keep that GCD rolling.
The boss will begin by casting Cogwheel, a raidwide AOE. Shield and heal through it accordingly. Tanks should use Reprisal and/or their other party-wide mitigations on this whenever they can.
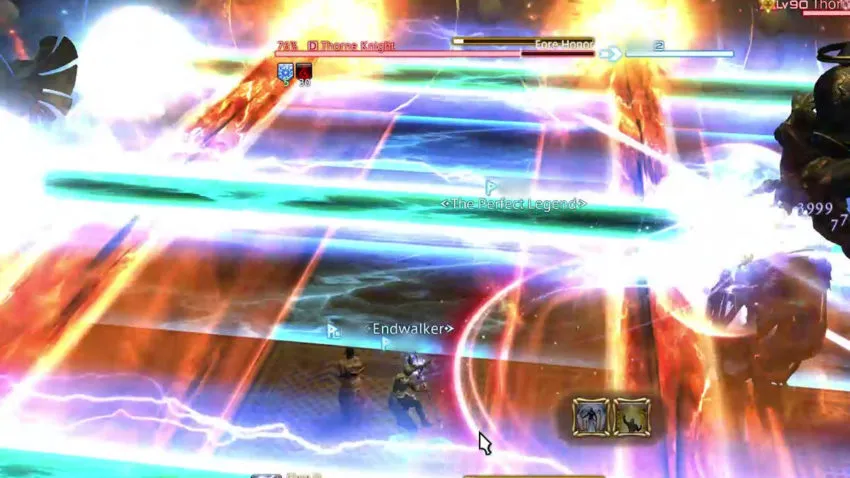
Then, Spring to Life will show the boss’ arms channeling two beams, one blue and one orange. This will activate all beams of that color on that particular side of the room. So if the boss’ left arm is glowing blue, all the blue beams on the left side of the room will activate, and vice versa. Using that, find the safe spot. This is especially important in the later part of the fight, as the boss will start combining mechanics.
Next up will be Blistering Blow, a tankbuster. Tanks will have to pop their mitigation skills accordingly, especially if they have a vulnerability up debuff prior to taking the hit.
Another Spring to Life will fire off before the boss does Fore Honour, a 180-degree frontal cleave. Watch out for the cast bar and be prepared to move behind the boss the moment you see the cast.
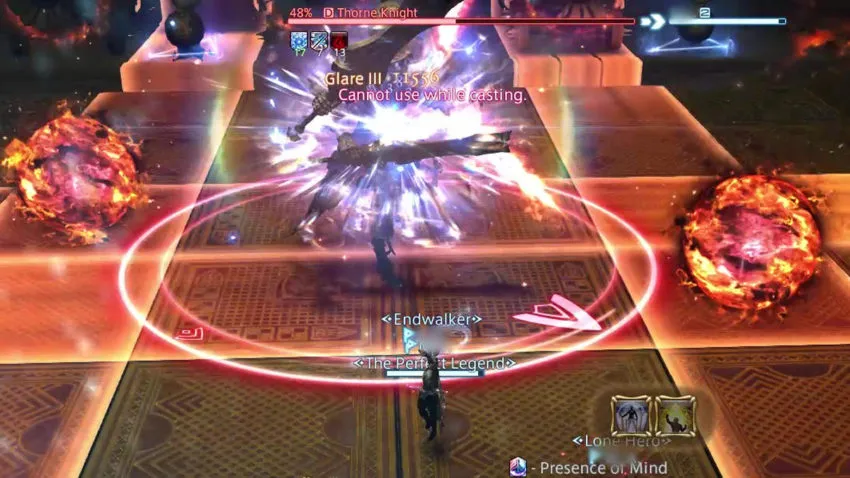
The next new mechanic is Slashburn — which spawns 1 orange and 2 blue AOE markers on the ground. Move to safe spots, which are either at the sides of the orange marker or in between the 2 blue AOE markers. There should be enough room for melee uptime without you having to eat a stack of vulnerability up.
After dodging those AOEs, Signal Flare will spawn 3 sets of 3 circular AOEs that will cover the whole arena. Dodge the first set of AOEs and move into the resulting safe spot, then stay there until the rest of the AOEs have gone off. Another Blistering Blow will come out, mitigate and heal accordingly.
The last new mechanic is Blaze of Glory, which spawns two fire orbs in the arena, each of them firing off a long plus-shaped AOE after a period of time. This is always combined with other mechanics, so be mindful of the AOEs when dodging.
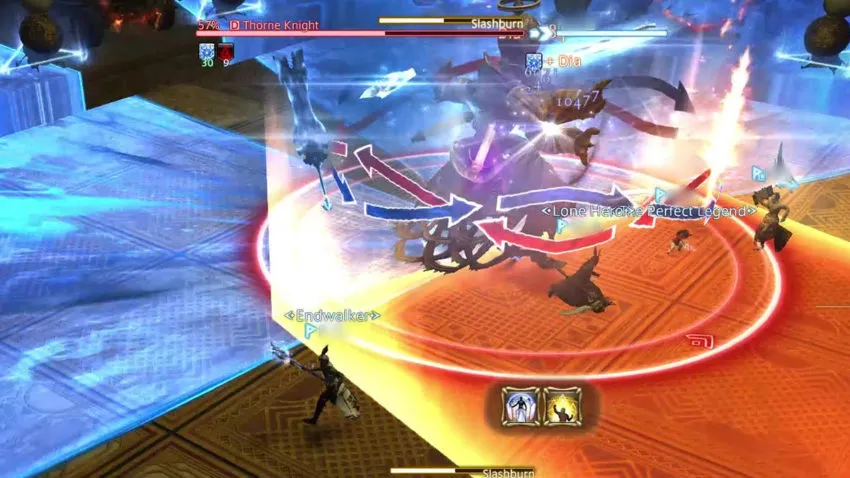
An alternate version of Slashburn will also spawn a series of twisting red and blue arrows. This will swap the locations of the blue and orange AOEs. Thus, the safe spots will be at the far sides of the blue AOEs or in the middle of the orange AOE.
After the boss has cycled through this initial set of mechanics, it will begin combining them with each other. Things will get chaotic if it is your first time fighting this boss, so healers will have to be prepared for some spot healing, especially if you and your party have accumulated a nice collection of vulnerability up debuffs. Once you get the hang of the combinations, you’ve got the clear in the bag.


Published: Oct 22, 2022 08:46 am