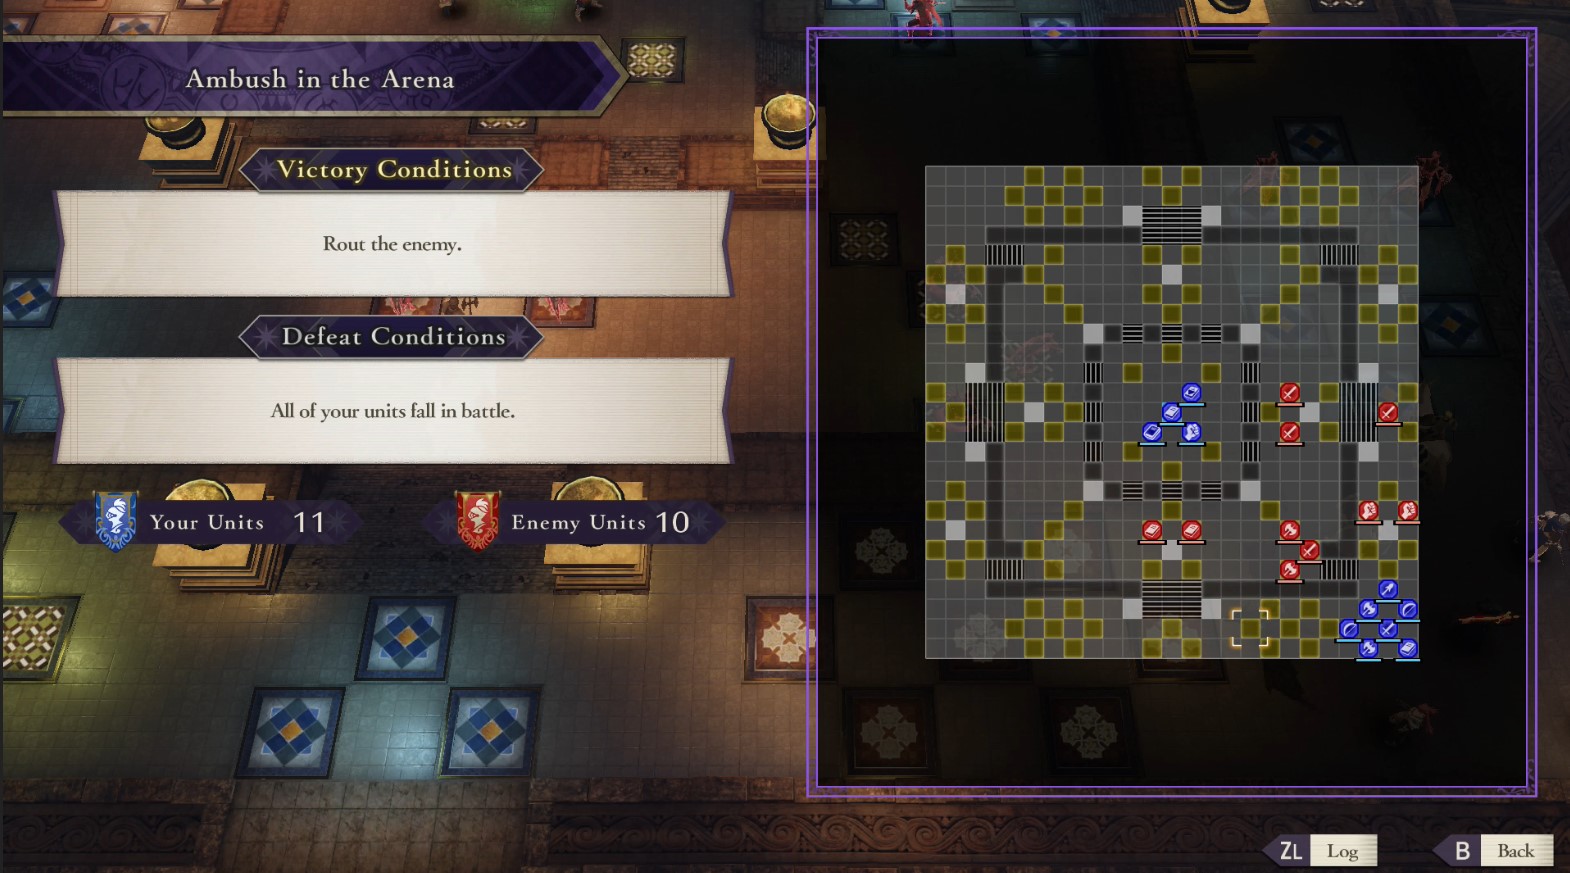
Ambush in the Arena is the second battle in Fire Emblem: Three Houses‘ Cindered Shadows DLC, and it is quite the event. It is the first time you will have control of the Ashen Wolves, the new unofficial House that has been hiding out below the church. It also marks the appearance of a fearsome enemy.
Ambush in the Arena

Ambush in the Arena takes place in a layered room with multiple tiles strewn around it. The outer area is raised, with steps running down to a lowered area before more steps rise up towards the center of the room. For this battle, it is best to take your lead from the Ashen Wolves, who will start out in the center of the room. Your own students, and Byleth, will begin in the lower-left corner. There will be a scattering of enemies between you, and three moves waves on the way.
- Wave 1 will appear in the top right corner
- Wave 2 will appear in the center of the left side
- Wave 3 will appear in the bottom left corner
- A Death Knight will accompany Wave 3 and will appear in the lower right corner
As you can see, if you stay in the bottom right corner with Byleth, Claude, Edelgard, and the rest, you will eventually come face to face with a Death Knight, and the Ashen Wolves will be overrun in the center.
At the start of the battle, you want to crush the first wave between both groups, rapidly wiping them out. Use Claude, Dimitri, and Edelgard as your front line and work up the right side, then down the wider stairs towards the center. You can use the Ashen Wolves to either hold the center or press out slightly to engage the enemies around them. It can be tempting to use Balthus as a front line, but he is actually quite easy to take out, so use him to move in and finish off isolated targets instead.
Drag out wiping out the first wave a little bit, to give you time to set up all your units on the center platform. This is a vital spot, because the stairs will act as a funnel for enemies, making it easier to hold, and right in the center is a healing tile. Rotate hurt characters onto this tile for some help healing them up. Lindhard and Ashe should stay near the center, to back up anyone that needs it, while Edelgard, Claude, and Dimitri should always be the front line facing the direction the Wave will come from.
Once again, you can set things up quite easily by just dragging out each wave a little when you have them down to one or two enemies, allowing you to take the time to position well for the next wave. If you wish, you can hold Claude and Dimitri back for some lightning-fast attacks on positions that are weakening, but both of them can also be very effective flanks on the front line, with Edelgard taking up the center position with her huge shield.
The secret to this battle is slowing the pace when you need to take time to heal or reposition. Focusing too much on rapidly wiping out an entire wave could just leave you sorely exposed when the next wave arrives. Remember, Byleth and The Sword of the Creator can do some exceptionally high damage, so keep them close to Edelgard, so they can be hacking away where the enemies are thickest.
Despite the healing tile and healing spells, it can be a good idea to keep units in pairs, as if one gets in trouble the other can finish the fight while they use a Concoction. This is war of attrition, and healing opportunities are vital to get through it on higher difficulties without casualties.
Finally, do not engage the Death Knight. He won’t make a move towards you and you can safely leave him alone. Once you wipe out all other enemies, he will leave and the battle is over.


Published: Feb 13, 2020 12:08 pm