In Chapter 1: Prologue Walkthrough of Metal Gear Survive, you will play a mission that will give you a brief idea about the Metal Gear Survive plot, explains combat system, crafting, hunting, and many other things.
Before starting Chapter 1 Prologue Walkthrough of Metal Gear Survive, I would like to remind you guys that you have to be online (constant internet connection needed) to play the game. Right at the start of Chapter 1: Prologue, there is a short intro cutscene and later you will get the option to create your own character through various customization.
Once the character creation is done, you will another cutscene and later after landing into a different dimension your journey in Metal Gear Survive universe begins. There will a small prologue mission that will teach you in-game tactics and elements. Like movement, gathering items, types of enemies, crafting, etc. At the start, you can create a spear, break wooden barriers with that and gather more items. There is a workbench in every base that allows you to create fresh items on the basis of items you have in your inventory.
It is necessary to learn the movement tactics, like moving in stealth mode, keeping a watch on the ring, and understand how enemies react to sound. Along with this, you will also have to keep an eye on your health and stamina meter that is used whatever activity you do in the game, but recovers when you are still for some time.
Prologue Mission Walkthrough
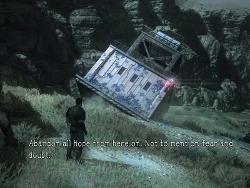
After understanding the basic things in the game, we will move forward with the walkthrough. As a soldier, you will also understand your objective that is to rescue others from last mission, gather Kuban Energy and find research led by the last party. The prologue mission is not time-consuming but it has a lot of cinematic and dialogues. It begins with the character creation part. Once you pick the avatar you will land into the hostile environment where you are pulled by a wormhole and have to fight alien zombies.
After waking up, your first objective is to reach the Base Camp. So just keep following the marker and learn the basic movements, climbing, and jumping. Next, after finding another soldier Reeve, you will learn an about the enemy behavior. They have a red light on their head that glows which means you are detected. The first one you will fight are the wanderers. Use the weapons to shoot a few of them and run towards the next marker. In your way, on the dead bodies, you can get ammo. The best thing here is to avoid all kinds o encounter and reach a safe location.
You will find the few items in the room also a tutorial on finding the objects in the area. By getting some irons, fabric, etc in from the room you can make a spear. You can use that to break a wooden barricade on the left side of the workbench to move forward. Now you will learn from stealth mode, Enemy Vision, Enemy Hearing and Threat Ring. The Threat Ring will give you the location of the enemy, in the form of glowing white color, you have to avoid that direction at all cost. Move ahead and kill a Wanderer on the left in stealth mode called Backstabber. After killing the Wanderer break on the door on your left and keep moving up through stairs. Come outside and follow towards the marker. This completes the initial mission of the game and you will earn a trophy Dite.
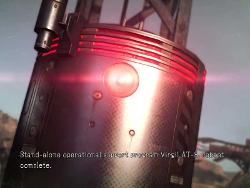
In the next cut scene, you will see soldiers and debris pulled into the wormhole. Next, you will see Goodluck’s voice, and he will give you briefing on the mission in another dimension and info on the life form that is turning humans into Wanderers. Once it is over, the next big objective is to learn everything about the base. You will also get a support, an AI Virgil AT-9.
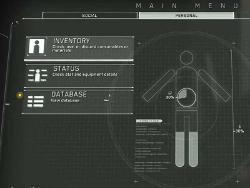
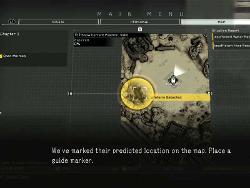
This device will be introduced after a cutscene and a long conversation. The device will give you access to check the Inventory, Status, Database, also you will have the Social and Map menu. You can see your location and your current objectives through it. You can keep a watch on your Life and Stamina meter, you will also have a Hunger and Thirst meter that you have to check always. You have to feed yourself when the levels fall. Open the Map Screen, and have a look at the UI. On the right top, you will see Situation Report that you have to check it will tell you to gather resources like in this part you will have to gather Water and Food.
So a small mission of finding food and water begins, the AI will give you the location of place from where you can gather food and water. You have to lace the guide marker and you will get your further objectives. By interacting with the AI you can see Order/Report, you can pick 5 Orders/Challenges quest that you have to complete in a time limit. You can earn various rewards after finishing them. So this can be played later you can move through the order page to look what all challenges are available. Another way to get food and drink is once searching in the Repository, a storage facility for changing equipment and managing inventory. It is located in the base camp, open it up to select Supply Box. You can find a Bottle of Clean water in it as a login bonus, or gears.
If you are not able to get then just go towards the marker, and you will find some sheep kill them and gather some food. Just go quietly behind the animal and attack it. You can get meat and leather from the sheep. You can consume your food and drink from the inventory. You can navigate around the area, look for metal cylinders, cabinets, etc for more items to gather. Once done return to base camp and stand near the campfire to cook food and then you can consume it from the inventory. AI Virgil will give you the location of a Memory Board. Go and access the AI. There will be a short conversation. You will have to craft a Normal Fence Defense Unit in-order to progress to next chapter where you will locate all the memory boards. For crafting the fence go at the Gadget workbench and go to Craft, select Defense Units. Craft it and place it in your load-out.
This is where the Chapter 1 ends, which consists the Prologue mission and objectives that taught about movement, attack mechanism, crafting, etc. You can read our walkthrough on next two Chapters Secure Memory Board or you can also read our Metal Gear Survive Wiki guide for more info and update.









Published: Feb 22, 2018 07:22 am