Learn the lay of land with these tips and techniques. Here’s everything you should know about setting up your farm.
Stardew Valley is a relaxing, simple farm-life simulator in which you gradually build up your farm, forge lasting relationships and help a bunch of lovable little forest spirits called Junimos rebuild the town’s Community Center—or simply bulldoze it to make room for a storage warehouse for your local JojaMart. After all, that’s what the game is really all about: your choices, and how they affect the community of Pelican Town (and your own farm within). If you happen to make fat stacks of gold in the process, that’s awesome, too.
When you’re first getting started with Stardew Valley, it can be easy to get overwhelmed. After all, there’s a farm to run, friends to make, chores to complete, gathering to do. That seemingly simple farm-life, with its daily chores and respectable hard work, has the possibility of becoming an overwhelming stress-fest if you worry too much about maximizing your farm’s output. However, there’s certainly nothing wrong with wanting to get the most out of your experience while creating a reasonably profitable farming empire!
Selecting your farm map
When creating your character, you are given the option to select your desired farm map. For the sake of simplicity, this guide is written with the Standard Farm map in mind. This map offers the largest amount of tillable tiles (3,427) and is the easiest to build on, since the layout is mostly uncluttered by scenery and water. It’s worth noting that the other map types are quite beautiful, and many general layout strategies will still apply.
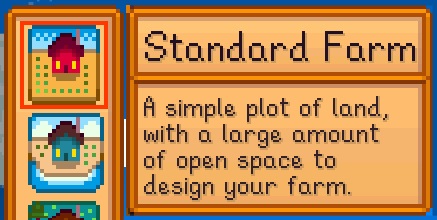
Other map options include Riverland Farm, Forest Farm, Hill-top Farm, and Wilderness Farm, each designed with a specific player skill in mind: Fishing for Riverland Farm, Foraging for Forest Farm, Mining for Hill-top Farm, and Combat for Wilderness Farm.
Huge tract of land
After an enjoyable bit of introductory gameplay, you’re ready to take on the responsibility of running your own farm and can begin using your tools to clear patches of land. You have access to only the most basic tools, including the Axe, Fishing Pole, Hoe, Pickaxe, and Watering Can, which can be upgraded as you progress. Each tool consumes Energy when used—run out of Energy, and you’ll become exhausted to the point of passing out. You’ll be dragged back home, charged a fee, and a new day will begin.
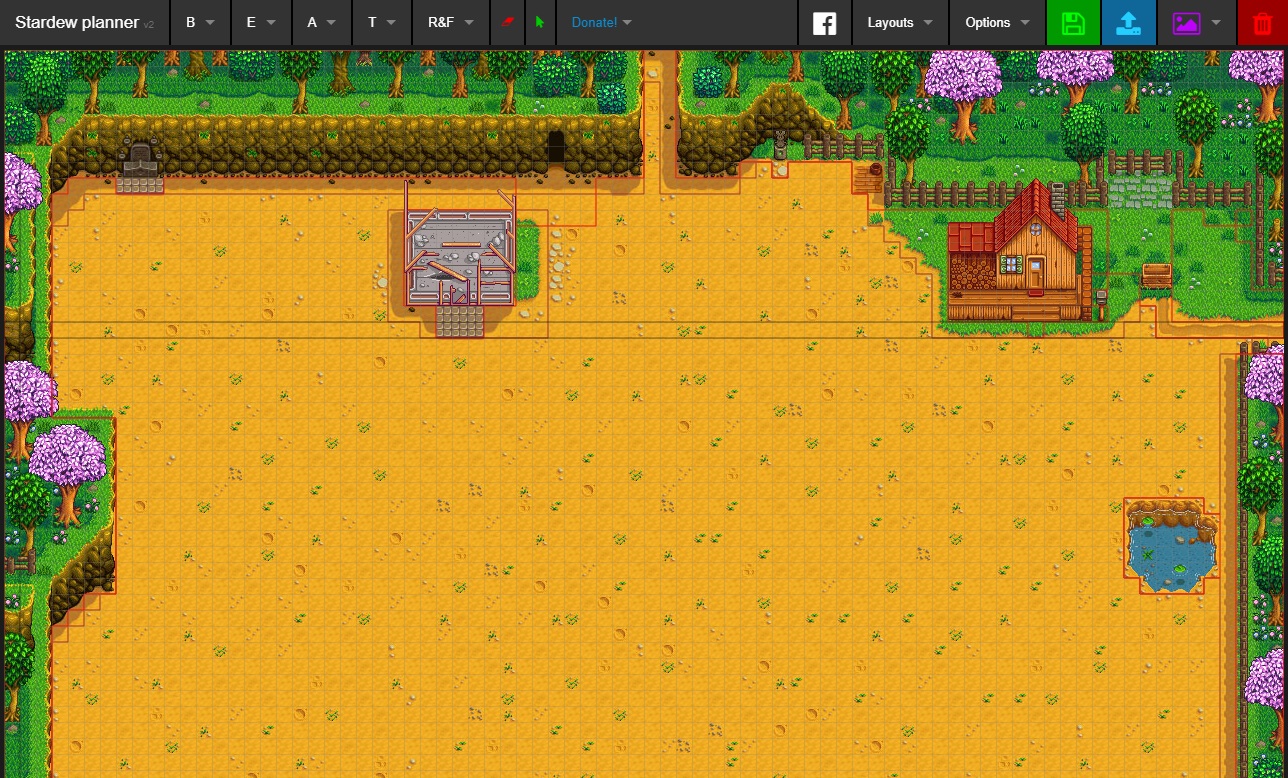
When you’re ready to start putting your ideas on paper, Stardew Planner is an incredibly valuable tool that allows you to digitally design your complete farm layout, placing buildings, terrain, crops and more, on a grid of the farm map you have selected.
Playing it for the plot
Once you’ve made some space amidst the chaos of twigs, stumps and rocks, it’s time to start working on that layout. You’ll be starting small, of course, but it’s best to have a general idea of how you want your overall farm to look, so you can gradually work towards that goal. A great way to do this is by “zoning” your farm’s layout to set a general idea of where you’ll be placing crop beds, barns, storage buildings, etc. This is where Stardew Planner will truly shine, as you can use it to get the exact measurements of each in-game item to make sure you’re allowing for enough room. Doing so can be especially difficult to do early on in-game, as you’ll still have much land clearing to do, with some debris requiring upgraded tools.
Of course all of this long-term development will require money, so you want to start farming as soon as possible. You’re given some seeds early on and can purchase additional seeds from Pierre’s General Store, JojaMart, and (occasionally) the Traveling Cart, a vendor that is available in Cindersap Forest on Fridays and Sundays. Much later, at Farming Level 9, you can obtain the Seed Maker through questing or crafting, with which you can turn most crops into seeds.
Farming for fun (and profit)
When it comes to setting up your plots, you can actually choose any layout you’d like. Shake off those old Harvest Moon habits—you don’t need to plant in 3×3 arrangements! You can safely walk through your crops without causing any damage, so you don’t have to put paths between your plots, either. You’re free to make plots as large and wide as you want. Keep in mind that you’ll be unable to pass through crops grown on a trellis, such as hops or grapes, so if you’re dealing with those, you’ll want to leave space as needed to pass by. If you plan to use Sprinklers (and you should), you may wish to set up your plots to take advantage of their output early on so you don’t have to completely redesign later (more on that below).
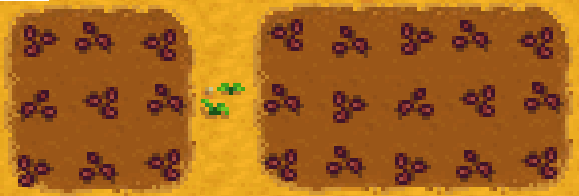
It’s worth noting that there are benefits to the trusted 3×3 layout, especially when starting out. You’re limited by your low level tools and have only so much Energy to spare, so you’ll want to start with small plots that are easily maintained. Additionally, when planting Cauliflower, Melons or Pumpkins, 3×3 plots have a chance to grow into a giant crop, which have a much higher yield.
One of the most important things to keep in mind when planning your crop layout is to remember that you’ll actually have to be able to maintain the plots. This includes tilling the soil, planting the crops, watering the crops, gathering the crops and re-planting the crops. Any tasks which involve use of tools will consume Energy, so you don’t want to be too ambitious! Early game, especially in the first Spring, you won’t have access to the fancier, upgraded tools that make your life easier, so you’ll be stuck working your farm the hard(er) way.
The crops themselves are relatively low maintenance. You plant them, water them, harvest them and sell them (or use them to create other goods, then sell those). You can choose to use Fertilizers which offer different bonuses including and increased chance of growing quality crops, give your crops a chance to stay watered overnight (cutting down on your workload), and can increase the growth rate of your crops (so they can be gathered earlier).
Better farming through hydration
Early on, keeping your crops watered daily can be one of the more tiring tasks. As you upgrade the Watering Can, it will be able to hold more water and will water multiple tiles in straight lines, eventually watering 3×3 and 3×9 grids, instead of having to water each crop individually. You can begin upgrading the Watering Can as soon as you want, but know that upgrading tools will take two days, which means one full day you won’t be able to water your plants. However, on days that it rains, you won’t need to water your crops, so be sure to check your TV regularly for the weather forecast so you can plan accordingly.
Once you reach Farming Level 2 (through farming, of course), you’ll unlock the recipe to craft Sprinklers. Sprinklers will automatically water your crops every morning, freeing up your Energy for other tasks such as Mining! There are three different tiers of Sprinklers, each watering a specific number of adjacent tiles.
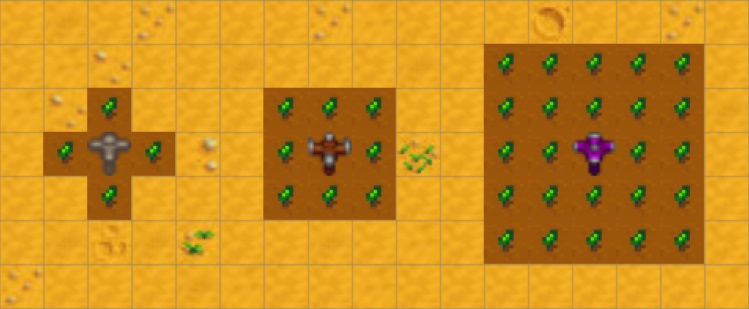
Sprinkler – Unlocked at Farming Level 2, waters 4 adjacent tiles
Quality Sprinkler – Unlocked at Farming Level 6, waters 8 adjacent tiles
Iridium Sprinkler – Unlocked at Farming Level 9, waters 24 adjacent tiles
Unfortunately, the first tier Sprinkler is pretty weak, and many players feel that they’re not even worth bothering with. If you do decide you’ll be using them, you may wish to plan your plots early on to keep optimal output in mind. For Quality Sprinklers, you can create 3×3 plots with the Sprinkler in the middle to ensure proper watering. Once you’re using Iridium Sprinklers, it is generally easiest to place 5×5 plots side by side, with a Sprinkler in the middle of each one for proper watering coverage.
Helpful layout tips
Ultimately, your farm is exactly that: your farm. While it’s true that strictly following all optimization advice can certainly lead to higher profits, be sure to also leave some of that focus for doing what you like! If you’re looking for inspiration, you can visit https://upload.farm and the Farms of Stardew Valley subreddit to browse tons of different, user-submitted farm layouts. Here’s some additional advice to keep in mind when designing your farm’s layout:
Stop digging up your Sprinklers
The Hoe, by design, will till soil. Unfortunately, this can result in the accidental removal of items placed on soil, including your Sprinklers. To avoid this annoyance, place your Sprinklers on a path tile so you don’t hoe ‘em up by mistake.
Use scarecrows to (you guessed it) scare crows
Your crops are vulnerable to more than just dehydration. Scarecrows will keep crows from eating your crops, and a single Scarecrow will protect the 248 tiles in a circle around it. They’re easy to craft and cover so much space that you really don’t have to worry about being too exact in factoring them into your layout.
Lightning strikes are more common than you’d think
Your crops are also vulnerable to lightning strikes. You won’t be able to acquire Lighting Rods until much later in the game, once you reach Foraging Level 6, so don’t worry too much about this when you’re just getting started out. Lightning Rods can be placed anywhere on your farm to absorb lightning, so they will not need to be worked into your plot layout. Each Rod can only hold a single strike at a time, at which point it will begin a 24 hour process of creating a Battery Pack, which are used to create (among other things) Iridium Sprinklers!
Trellis crops will stop you in your path
Unlike soil-planted crops, which are perfectly content to be trampled on a daily basis, crops that grow on trellis will stop you in your path. This makes sense, as the trellis is an actual solid, impassable object. It’s important to keep this limitation in mind if you plan to farm these crops, as you’ll need to be able to actually reach each crop in order to harvest them. Because of this, you may consider utilizing the trusty 3×3 layout (which will allow for access to all crops while also positioning a Sprinkler in the middle). Once you’re using Iridium Sprinklers, you can expand this plot to a 5×5 by planting other, non-trellis crops in the outer tiles.
Barns: not just for animals anymore!
If you’re looking for extra storage space for chests, kegs, farming equipment, look no further than the trusty Barn! If you’re low on gold, Sheds are cheaper than Barns and are a good starting point, but the Deluxe Barn will offer double the storage capacity with a similar footprint (Sheds are 7×3, Barns are 7×4). Definitely something to keep in mind if you’re a habitual hoarder (or just want to make lots and lots of beer and wine).
Horses are fat (but they can wear a hat)
Once you’ve built a Stable, you’re now the proud owner of a quality horse, which allows you to move 30 percent faster when riding. If you’re planning to ride your horse around your farm, be sure to keep the horse’s strange tile requirements in mind. When moving horizontally, the horse can pass through one space tiles with no trouble, but when moving vertically, it will require at least two spaces of room. You can’t use your tools or while riding, so you don’t need to worry about making room for him among your crops, but be sure the rest of your farm (or, at least, anywhere you’re planning to ride) is horse-friendly!
Winter is coming—time to tear down the farm!
In Winter, you won’t be able to plant any crops until you can access Winter Seeds, crafted using the Wild Seeds (Wi) recipe unlocked at Foraging Level 7. This makes Winter the best time to catch up on the “everything else” besides farming: relationships, foraging, fishing, etc. It’s also a great time to make changes to your farm’s layout, based on your experiences over the past three seasons.
Good luck running the farm!


Published: Jun 5, 2018 07:58 pm