One of the most noticeable elements of a streamer’s content is the overlay being used with their game and camera. It’s a visual element that allows you to bring personality and structure to your stream’s look and can lead to extra stream interaction when done well.
However, while the overlays available through the likes of Streamlabs OBS and other pre-made packs available online are often of good quality, they aren’t going to be unique. As the pool of free overlays is shared by many other streamers, you may decide to want something for your stream more bespoke or add personal touches.
Making your own and customizing it as you wish is not as difficult as you might think. There are tools available that will allow you to create custom elements for things such as followers, bits, and subs, bring them together into an overlay for your streaming software. One tool that you can use to create your own Twitch overlay is Canva.
Canva is a free, browser-based design program that allows you to use many shapes and elements on a canvas that you can then export to your computer to put onto your stream.
You can use Paint and GIMP applications as alternatives, but they typically don’t offer as much in the way of designer-focused features and elements as Canva does. This guide will focus on Canva as a resource for your designs.
While the ability to export with a transparent background requires their paid service, you can make the background a color that you don’t intend to use and simply chroma key the background out of the frame. This means that you can have your design on stream in front of your gameplay.
Creating a new overlay
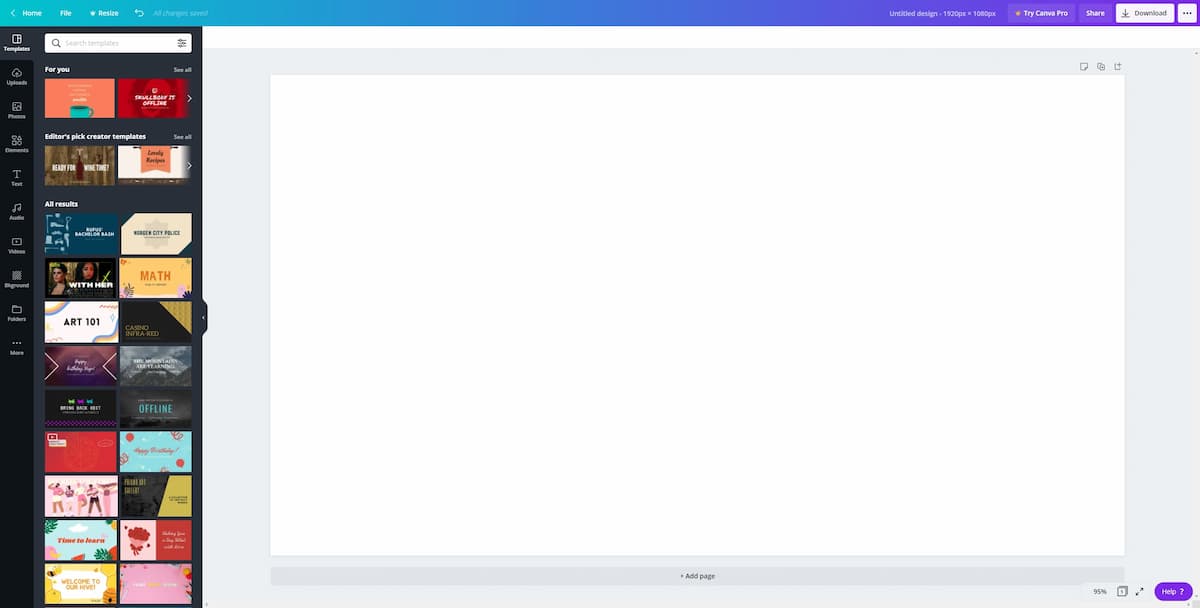
To create an overlay that will work with your setup, head to the Cavna website and create an account. After this, on the home page, go to Create a Design in the top right. Here, you will be given choices for a template to use, but to get the size you need, pick Custom Size at the bottom.
For this, you will want to use 1920 by 1080 pixels, and then click the Create new design button. So long as the canvas is the same aspect ratio as your stream, which is typically standard widescreen 16:9, you can import it into your streaming software and scale it down to any of the standard resolutions in that aspect range. Typically, your output would be either 1080p or 720p.
Once there, you will be taken to a blank canvas, with tabs on the left side that will allow you to add and remove elements to it. This is where you can begin to shape how you want your overlay to look.
Use the elements tab to pick some shapes and objects to place on the canvas and any text you think is suitable. You can also import images from your computer if you have an asset ready to use, such as a logo, and have it as a permanent fixture on your overlays.
While Canva includes a premium service to offer expanded graphics to use if you wish, the shapes and text elements are plentiful in the free offering to allow you to create something personal and of good quality.
You can go as easy or as simple as you wish, using the shape elements to place areas you would like to contain alerts, such as your latest followers or top donators. By combining different shape elements together, you can create unique-looking visual graphics for your overlay.
In a gameplay scene overlay, you can create visuals to your own design to sit in front of your capture. You don’t have to follow the same convention as most premade overlays, where there are areas at the top of the screen with graphics to place your alerts.
It is often put there to provide maximum exposure to anyone from your community interacting with the stream, but it’s up to you as to how much you want to deviate from standard design conventions. With time and effort, Canva is flexible enough to allow you to create a great-looking design.
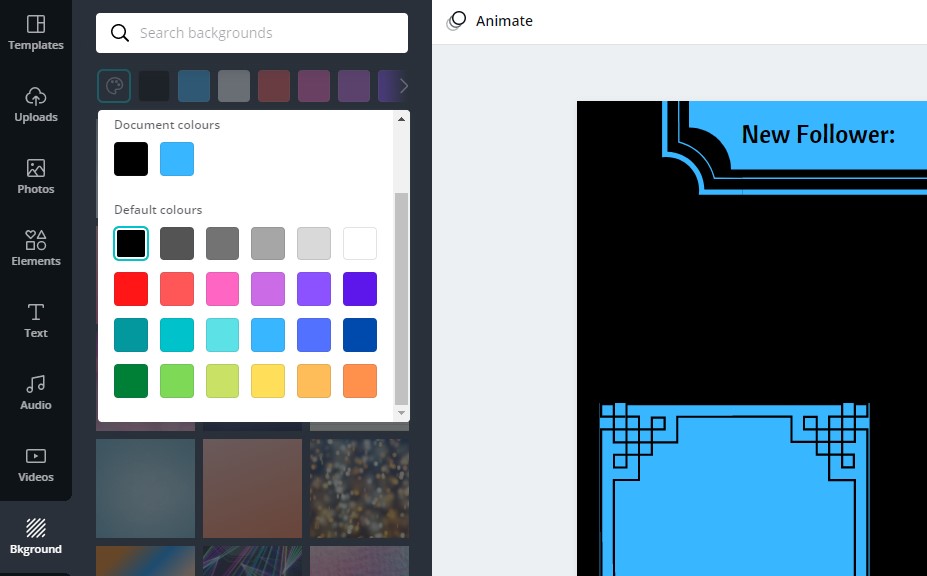
During creating your overlay, you can change the color of the background layer to contrast the color of your elements. This will help you to see if they stand out from the background for your stream. Black or white are neutral colors, good to use against more vibrant colors to test how they look during construction.
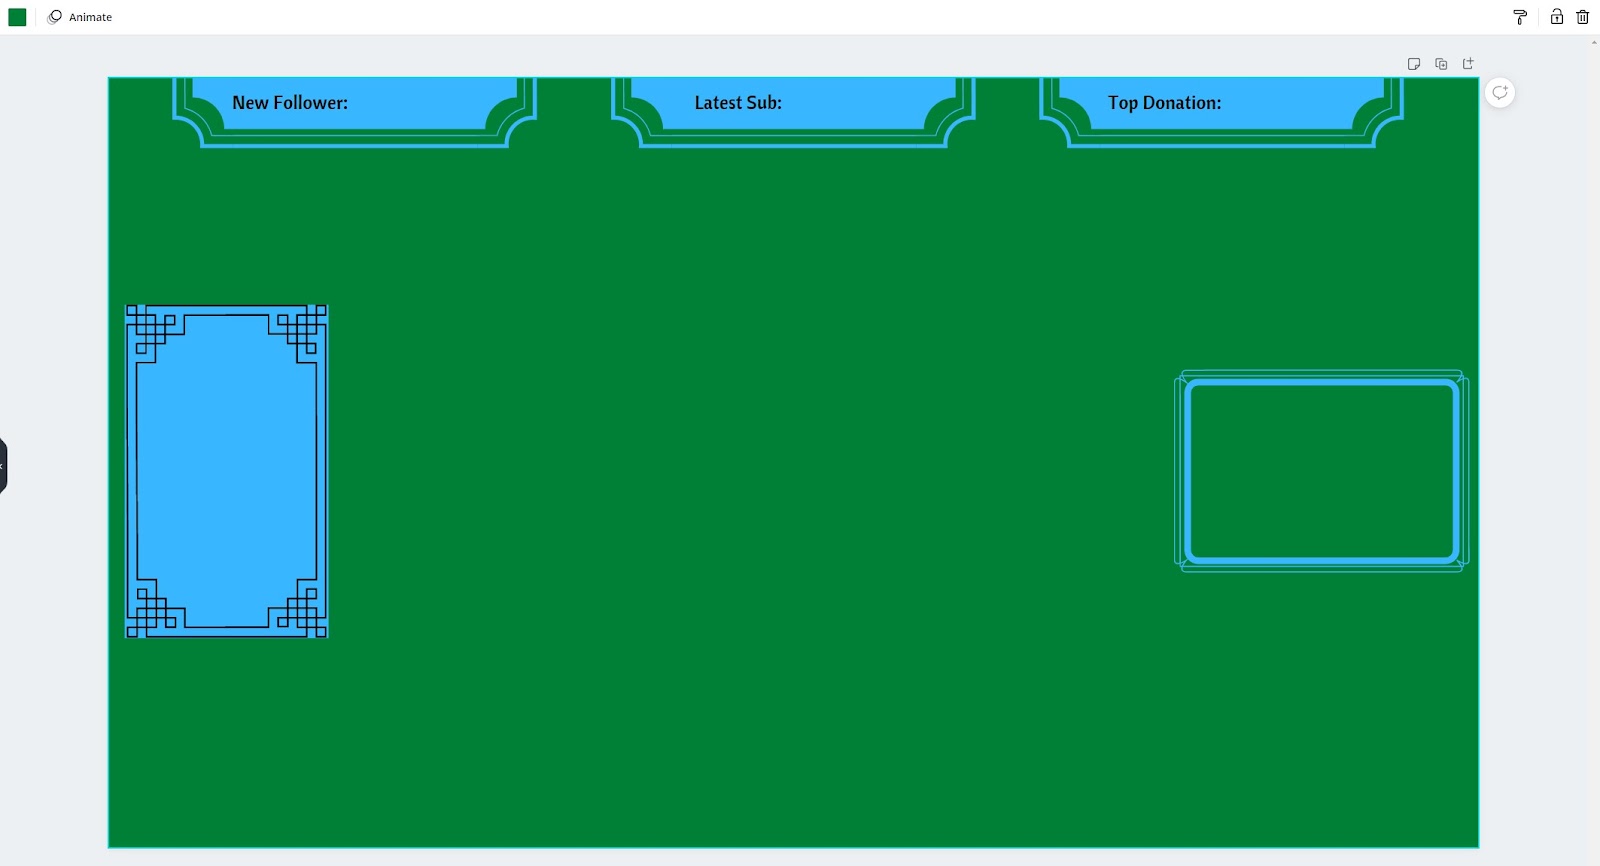
As you add layers, your overlay should begin to take shape. For elements such as your face cam, you don’t have to be entirely accurate to the size of your camera. OBS Studio and Streamlabs OBS will allow you to crop sources from each side, so you don’t need to be precise with sizing. This can be amended in your streaming software.
Simply place the elements where you would like them to be and offer labels in the instance that you want an area to contain something specific. This includes an idea of where you want to place recent alerts, such as the latest followers, subscribers, or donations.
Once you are happy with how your overlay is looking and want to see how it looks in your stream software, first head to the background tab and change the background color to one that is different from all the other elements.
Green is the most common color used in chroma-keying, where you remove it from a piece of media to allow for background transparency. This will be what allows you to place it over your gameplay.
You can also experiment with the animation settings in Canva to allow for an interesting effect when you switch scenes. These can be added to OBS and used for making your overlay animate in when you switch to it, with the only change being that it would use a media source rather than an image. Adding this to your stream will be explained below.
Adding your design to your stream
Once completed, at the top of your browser will be the option to download the image. Click this, and you will be given the option of which file type to use. If you have an overlay with no animated elements included in it, it is recommended to export this as a PNG file to give the best quality. A JPEG will also work if you need to conserve space on your computer.
With an overlay using one of the available animations, you will need to download the file as an MP4 from the list.
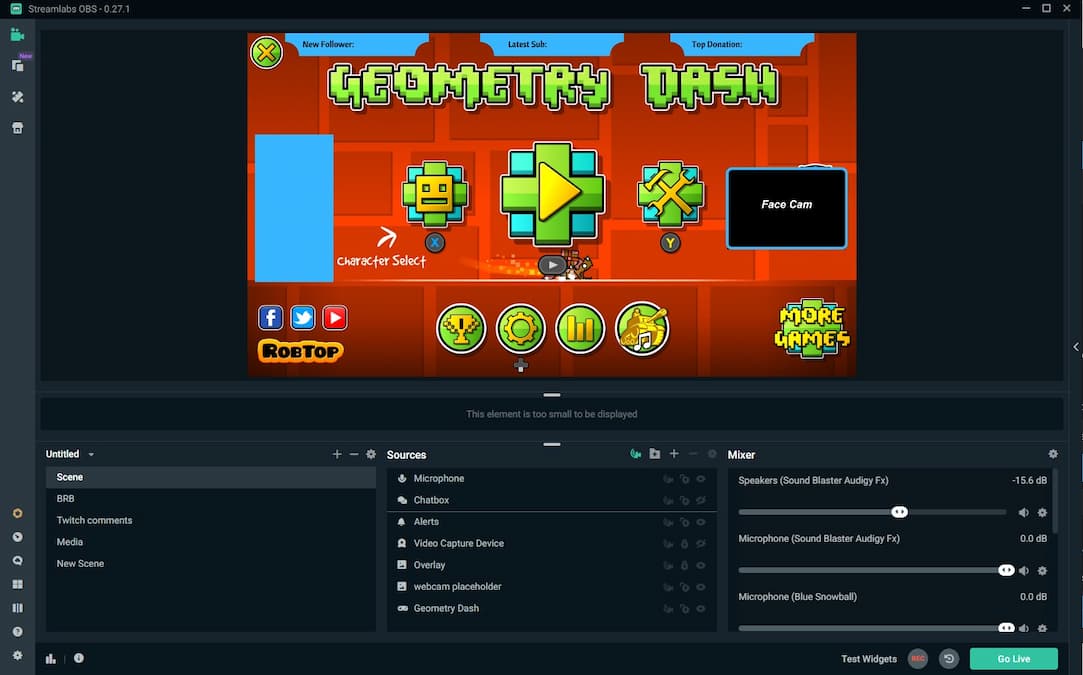
After downloading it, move the file to a location that you can find easily. Then, open up your broadcasting software and head to the scene that you would like to use your newly created overlay in. In your sources, add an Image source, and make it your PNG of your overlay. It will be at the top of your source list, but you can move it to as necessary in your stream software, above your gameplay source and camera if you are using one.
The process of removing the green background is similar across the stream software options. Once the image file is added to your scene, right-click on it in your source list and head into Filters.
In OBS Studio, under the Effects filters box, click the plus icon and then add a ‘Chroma Key’ filter.
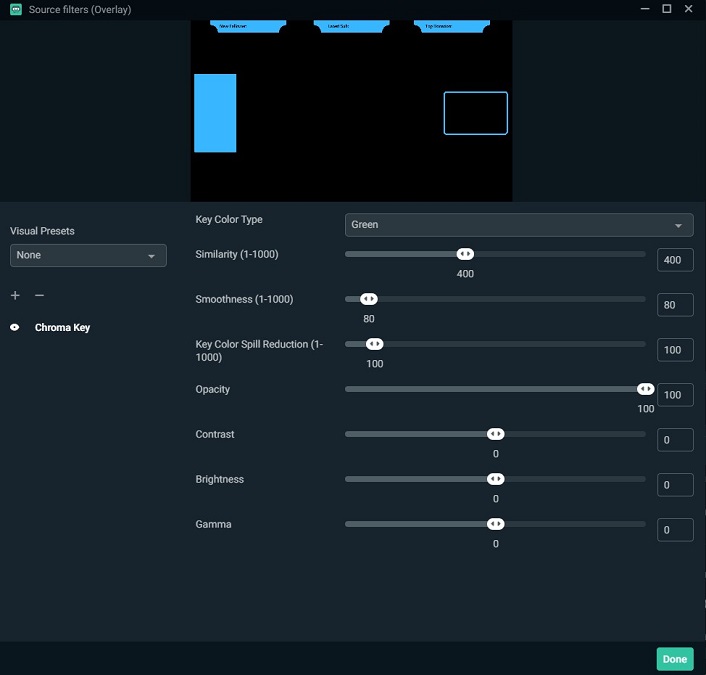
For Streamlabs OBS, underneath the Visual Presents, click the plus icon and add a ‘Chroma Key’ filter from the bottom of the list.
You will be asked to pick a color to filter out of the image. Pick the color that you have your image’s background set to, and you will find that it is now transparent in front of your gameplay source.
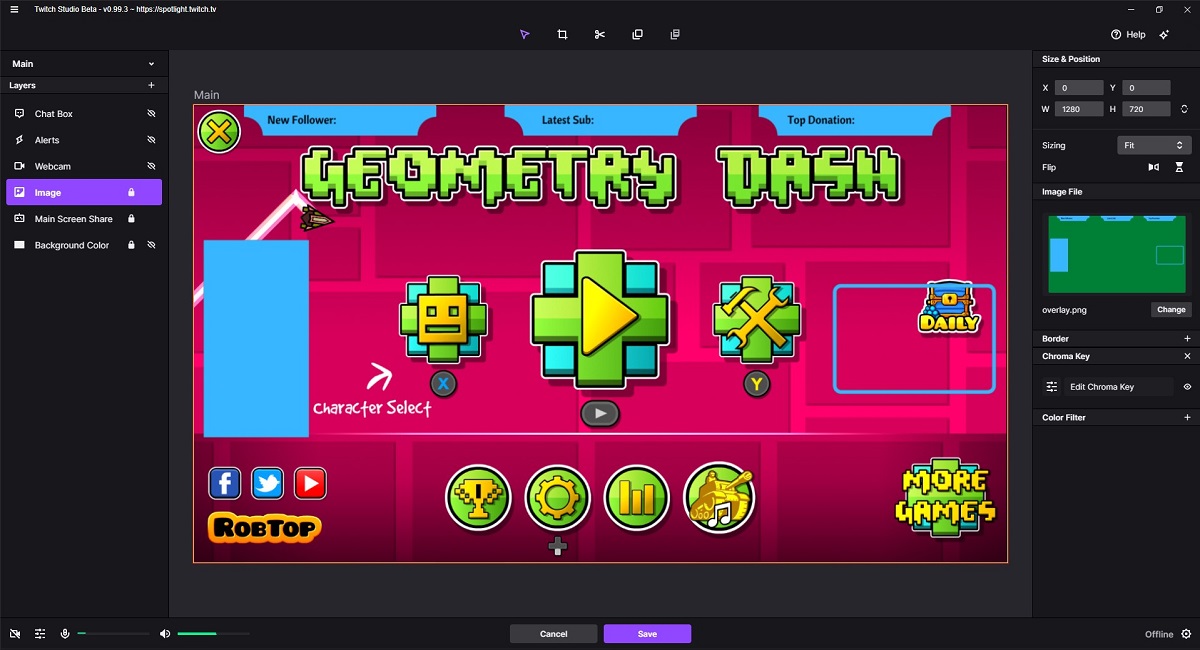
For Twitch studio, on the scene that you want to add your overlay to, from the main screen, click Edit Scene at the bottom, and then in the Layers section on the left, press the plus icon.
Here, you want to add an image and then hit Add. A new layer will be added to your layers section, but to import your overlay to that layer, on the right under ‘Choose an image’, hit ‘Browse’.
You will then see a small library of some of Twitch’s emotes and images. To add your overlay to this, press the Browser option, which will take you through your computer’s directory. Find your image and open it, and then with it highlighted in the media library, hit select.
Resize the image to fit your screen. Then, use the plus symbol under Chroma Key on the right side of the interface, and it will automatically apply the filter and remove the background. It will be green by default, but you can change it using Edit Chroma Key and using either Auto-Detect Color or pressing the color swatch and picking the color to remove.
If you have an animated overlay, you will need to add a Media source rather than an Image source. Apply the chroma key as you would with an image file, but to avoid the animations looping, in OBS Studio and Streamlabs OBS, right-click the source and go to Properties.
Ensure that the ‘Loop’ and ‘Show nothing when playback ends’ options are turned off, and ‘Restart playback when source becomes active’ is enabled. This will ensure that your overlay will stay on screen after the animation finishes.
On Twitch Studio, while you have the media layer selected, you simply need to turn off the ‘Loop’ option, and it will keep the overlay at the end of the animation.
From here, your overlay is almost ready to use. Simply place your camera source in the right place, and move your browser elements, such as your chatbox and alerts, into the right place.
You can create as many overlays as you want for each of your screens, playing with opacity, background images, and shape elements to fit your style. You can also use the same style if you are looking to stream on YouTube and Facebook when still using OBS Studio or Streamlabs OBS.
Once all imported, you will be ready with your new custom-made overlays to show off to the world.


Published: Feb 20, 2021 06:19 pm