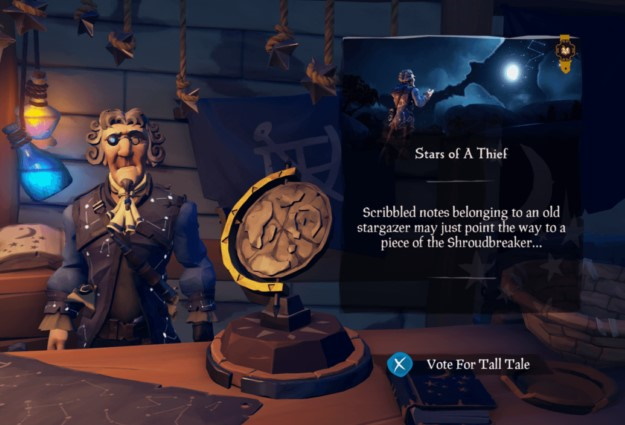
The Stars of a Thief Tall Tale in Sea of Thieves is a hefty questline for those who want to complete this epic journey. You can expect to work your way through it on your own or you can choose to take a small pirate crew with you. Here’s the break down for what you need to do. Before you can start this tale you need to have finished the Shroudbreaker Tall Tale.
Starting the Stars of a Thief
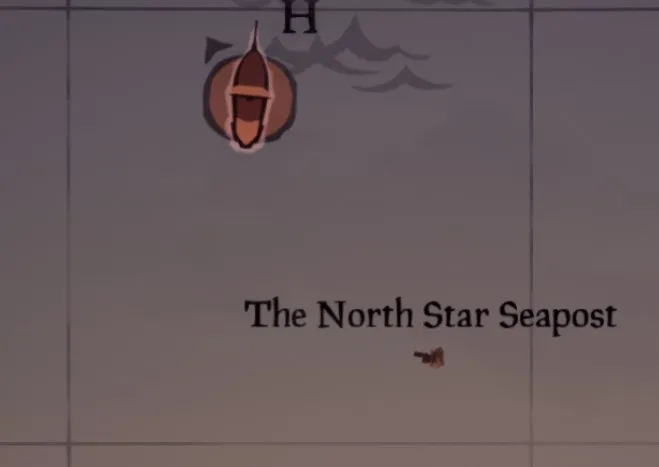
To begin your quest you need to visit The North Star Seapost and locate an NPC named Sudds. You can find him on map tile H10.
He has a Stars of a Thief Tale Tells on the right side of his countertop. Interact with it if you’re able to, and you can start the quest, adding it to your map. After accepting the quest Sudds starts to talk to you, speaking about how he assisted a friend named Briggsy and traveled the seas using the stars and the Enchanted Spyglass. While Sudds does not part with the one he has, there is another one you can seek.
Locating the Enchanted Spyglass
After starting the quest and speaking to Sudds he provides you with an array of notes that direct to you one of two islands: Rum Runner Isle or Twin Groves. Unfortunately, it does not directly tell you which one you are looking to visit. It wants you to find them based on the stars, and the text provided. Here’s the text for each of the respective islands:
- Rum Runner Isle: Face north star, see island, buried by a solitary hanging lantern. Dig by lantern on the island to find notes and telescope.
- Twin Groves: My back to the north star, saw an island where we parted not far from here. One small island made of two.
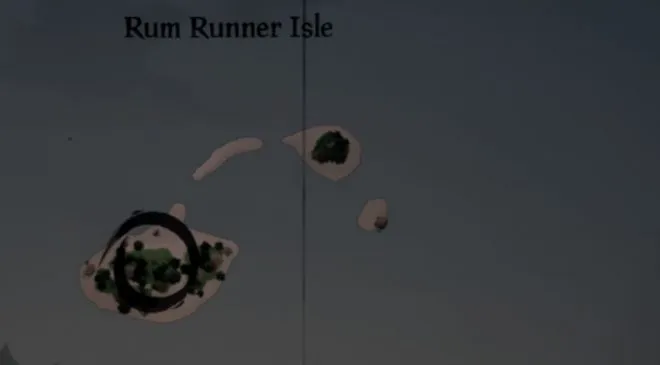
The location on Rum Runner Isle is fairly easy to find at H9. You’re looking for a lantern hanging in the middle of a palm tree. Dig underneath where is the lantern is hanging, and you’re good to go.
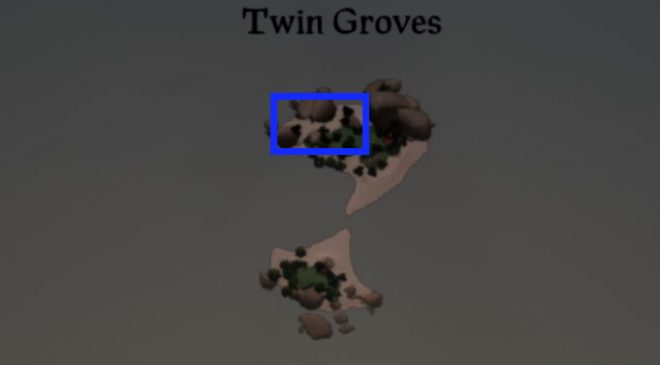
Twin Groves is a larger island found at H11, and you’re looking for two large rocks on the north side of the island. You want to dig between them and find the Enchanted Spyglass.
Stories and Riddles
Once you have your Enchanted Spyglass you can now dive into the stories in your Tale Tell book. There are two short stories available to you. To solve these stories you need to use the stars above you, which you can see with your Enchanted Spyglass.
Your Enchanted Spyglass is now available on your radial menu. Equip it, and you can look above yourself to see any of the constellations in the sky when its night or day. The ones you want to locate are brighter than the traditional ones you might see at night.
The stories inside of the Tale Tell associate with the different constellations in the sky, and they serve as directions to follow on your compass.
- Arrow is southwest
- Bear is south by southwest
- Boar is northeast
- Boat is west
- Crab is east by southeast
- Eagle is northwest
- Feather is south by southeast
- Fish is east by northeast
- Flame is west by southwest
- Kraken is north
- Queen is north by northeast
- Scarab is southeast
- Shark is south
- Snake is west by northwest
- Turtle is north by northwest
- Warrior is east
The possible stories include:
- Great Eagle Landing
- Your journey for this story begins at Lonely Isle found at G8 and you want to make your way towards Lone Cove. Move yourself on the island so that the Eagle constellation is sitting at the highest point, which places you southeast of the large rock, and you want to face northwest. Dig around this location to find the star jewel.
- The Man who Lost His Gem
- You want to go to Mermaid’s Hideaway found at B13 and C13. Go to the center pond and dive down into the water to search for an underwater cave. Once inside, go to the right and the star jewel will be inside ontop of a pillar.
- A Hunt
- You want to go straight to The Reaper’s Hideout found at I12. From here, dive straight down at the island’s location to discover a large ravine. While in the ravine, go to the east to find a kraken skeleton and locate the star jewel inside its mouth.
- Lost an Eye
- Go to Shark Bait Cove, which is H19 and H20. You will find this star jewel at the center of the island underwater. It’s on the north side of the statue, in small tunnel under the water.
- The Patient One
- Proceed to Thieves’ Haven at L20 and M20. Find yourself to the shipwreck on the island, and once there, search for the campfire. The star jewel is in between the campfire and the shipwreck.
- Battle in the Heavens
- This story has you visiting Mutineer Rock at N19. Go to the west side of the island to find four large rocks, and the star jewel is between, which you have to dig up.
- Sea Queen’s Promise
- Go to the Isle of the Last Words found at O9. Once here, look under the water on the west side of the island to find the jewel.
- They Were Voyagers
- Go to E17 to the Discovery Ridge island. You want to go to the tip on the west side of the island, and it’s under the water.
- Snake’s Deception
- This story has you going to Rapier Cay found at D8. You can find the star jewel on the southeast portion of the island after digging around.
Place the Star Jewel
Now that you have the jewel, you need to place it in the ancient statue found at N13. Proceed to this location on the map, and you’ll find nothing on the surface of the water. You and your crew need to dive down to the depths of the ancient ruins. You can find the entrance closer to the west side of the map tile.
After you place the star jewel a totem reveals itself. The totem varies on where you need to go next.
Boar Totem location

The location for the Boar totem is at Devil’s Ridge, which you can find at position P19. Once you’re on the island, go to the southeast corner of it and look for cave drawings of boars painted on rocks. To the left of those is the totem lock.
Crab Totem location
For those who obtained the Crab totem, you won’t have to go far. From where you’re standing at the ancient statue, turn around and you should see a series of crab paintings on the wall. Look to your left to find the totem lock.
Moon Totem location
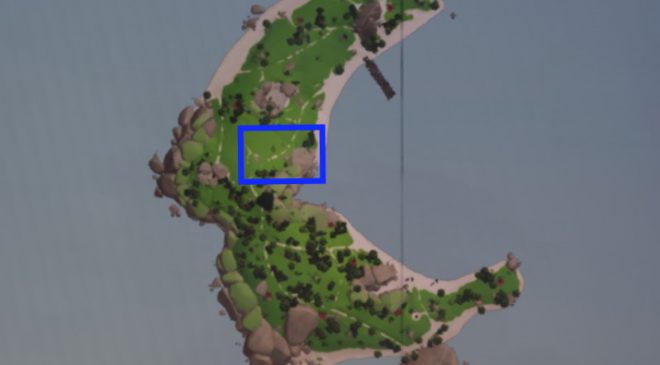
If you grabbed the Moon Totem you need to make your way to Crescent Isle found on map tile B9. When you reach this island, you want to go to the center of the island, closer to the north side. You’re looking for a cave, and once inside, look to the right where you should see small moon drawings on the wall. Below those is the totem lock.
Scarab Totem location
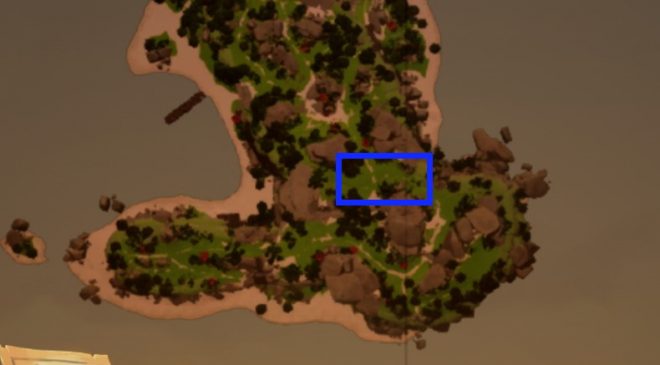
The Scarab Totem wants you to go to Crook’s Hollow, which you can find in the middle of map tile M16 and N16. Once on the island, go to the east side of it, at the middle, look for a cave that has a waterfall flowing over its entrance. Inside, locate the Scarab paintings on the wall, and look for the totem lock on the south side.
Snake Totem location
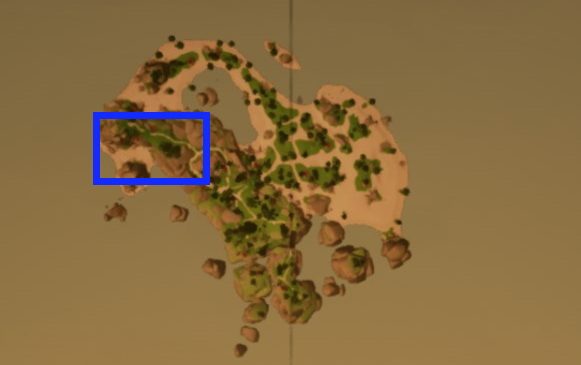
The Snake Totem needs you to go to Mermaid’s Hideaway where you need to go to the west side of the island. You can find it on map tile B13. On the west side of the island look for the totem’s lock at the base of the large rock formations, near the snake rock paintings.
Shark Totem location
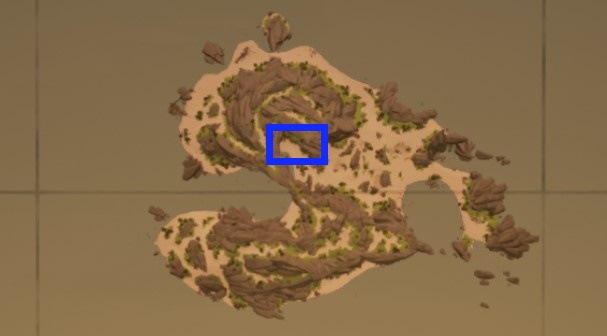
The final totem option is the Shark Totem and it wants you to go to Kraken’s Fall, found at R12 and R13. Once there, go to the center of the island on the north side. Look for the totem lock underneath the main arch, to the right of the palm trees.
Opening the Vault
Once you have activated the totem you were given you will have opened the entryway to the ancient vault. From here, you need to solve the riddles to open the vault and gain access to its treasures. Do not light any of the fires yet, because once you do the room will start to fill with water and you have a limited amount of time to finish the puzzle. Make sure you’re ready before proceeding. If you fail the puzzle and drown during this attempt you have to start over from the beginning.
When you’re inside of the puzzle there are four pillars you need to rotate to have in a correct sequence. The proper sequence is detailed on the Tale Tell page detailed “The Unsolved Story?” where a scrambled story breaks down what constellations you need to rotate the pillars, and have the correct order. There are six potential sequences, each with two different patterns. The first pillar is the one to the left of the room, going to the right. After you switch all of the pillars in the room to their proper placement click the button in the center of the room to confirm your choice.
- Sequence 1a:
- Pillar 1: The Warmonger was Angry is the Warrior
- Pillar 2: The Tear of the Son is the Flame
- Pillar 3: The Proud One’s Help is the Eagle
- Pillar 4: The Part of Himself is the Feather
- Sequence 1b:
- Pillar 1: Proud One made a Weapon is the Arrow
- Pillar 2: Old Mother’s Spy is the Shark
- Pillar 3: Teacher Warned of Needless Violence is the Scarab
- Pillar 4: The Warmonger Did not Listen is the Warrior
- Sequence 2a:
- Pillar 1: Tear of the Sun is the Fire
- Pillar 2: Way for Man to Sail is the Boat with Multiple People
- Pillar 3: Warmonger is the Great Warrior
- Pillar 4: Taught more than Wore by Iron Shell is the Scarab
- Sequence 2b:
- Pillar 1: The Courter is the Crab
- Pillar 2: The Glimmer is the Fish
- Pillar 3: The Oldest Creature is the Turtle
- Pillar 4: The Queen is the Mermaid
- Sequence 3a:
- Pillar 1: The Old Mother is the Kraken
- Pillar 2: The Everlasting Promise is the Mermaid
- Pillar 3: The Rowed by Hand is the Boat with Multiple People
- Pillar 4: The Warmer Seas is the Fire
- Sequence 3b:
- Pillar 1: The He Watched from High is the Eagle
- Pillar 2: The Singer Whispered is the Snake
- Pillar 3: The Vessel is the Boat with Multiple People
- Pillar 4: The Eternal Warrior is the Warrior
- Sequence 4a:
- Pillar 1: The Old One Raised a Spit of Land is the Patient Turtle
- Pillar 2: The Eternal Man is the Warrior
- Pillar 3: The Tar and Tree is the Boat with Multiple People
- Pillar 4: The Last of its Kind is the Fish
- Sequence 4b:
- Pillar 1: The Vessel is the Boat with Multiple People
- Pillar 2: The Respected by All is the Bear
- Pillar 3: The Grump now Happy with the Season is the Boar
- Pillar 4: The Warmonger is the Warrior
- Sequence 5a:
- Pillar 1: The Old Judge is the Bear
- Pillar 2: The Last of its Kind would Guide them is the Fish
- Pillar 3: The Iron One would Teach Them is the Scarab
- Pillar 4: The Patient One raised them Land is the Turtle
- Sequence 5b:
- Pillar 1: The Tar Covered Vessel is the Boat with Multiple People
- Pillar 2: The Old Grump is the Boar
- Pillar 3: The Queen’s Lover would Guard her Beaches is the Crab
- Pillar 4: The Slinger is the Snake
- Sequence 6a:
- Pillar 1: The Queen Plotted is the Mermaid
- Pillar 2: The One-eyed Spy is the Shark
- Pillar 3: The Teacher is the Scarab
- Pillar 4: The Two-Legged Pupil is the Warrior
- Sequence 6b:
- Pillar 1: The One Eye Attacked is the Shark
- Pillar 2: The Warmonger is the Warrior
- Pillar 3: The Weapon of the Victim’s Tooth is the Arrow
- Pillar 4: The Hunt a Bigger Foe is the Kraken
After you enter the proper sequence into the pillars the doors open and the Shroudbreak stone is beyond you. Obtain the stone, and you can return to your ship.
Return the Shroudbreaker Stone to Sudds
You now need to return to Sudds with the Shroudbreaker stone. You can find him waiting for you at the North Star Seapost, which is on map tile H10. After speaking to Sudds you will receive the Stone of the Heavens and the Stars of a Thief commendation.


Published: Apr 20, 2020 08:29 pm