
When a new Zombie map in the Call of Duty franchise is released, it is always the most exciting time for the community. There are tons of secrets to find, including the main Easter egg and everyone wants to find the best strategies to survive. Firebase Z in Call of Duty: Black Ops Cold War Zombies may be a little intimidating for newer players with its unique location and the constant barrage of Mimics and Manglers. However, if you know what you are doing, you are much more capable of surviving long into the match and quickly leveling up your weapons and profile. Here are some tips and tricks to help you survive longer in Firebase Z.
Recommended weapons
We are big proponents of the Gallo SA12 shotgun in zombies. When leveled up and combined with attachments, it is one of the most powerful guns in the game. As you Pack-a-Punch it and upgrade its damage tier, it also proves to be a mighty weapon into higher rounds.
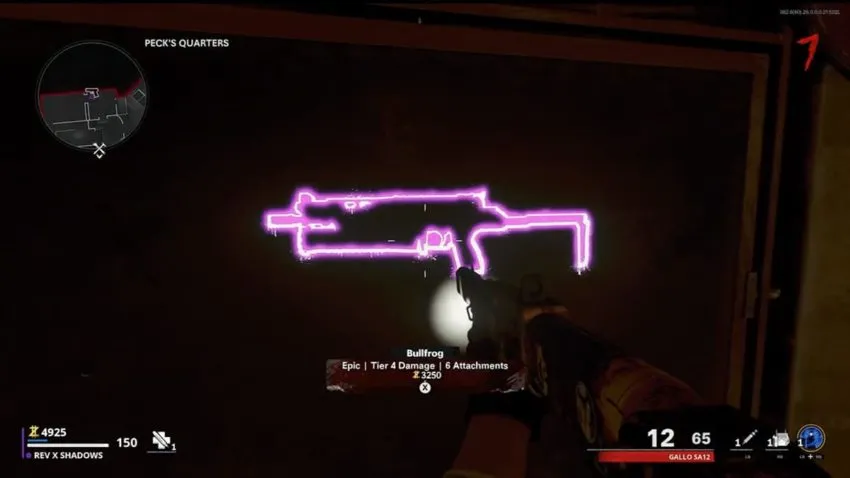
You can purchase an epic tier Bullfrog SMG in the Pack-a-Punch building very early as an alternative to the shotgun. It is up the stairs and in the room to the right from the machine and costs just over 3,000 points. While we have reservations on using the Bullfrog after round 30 or so, getting this before round 10 is a massive boon to you and allows you to stockpile salvage without needing to upgrade weapon damage tiers for awhile.
RAI-K84

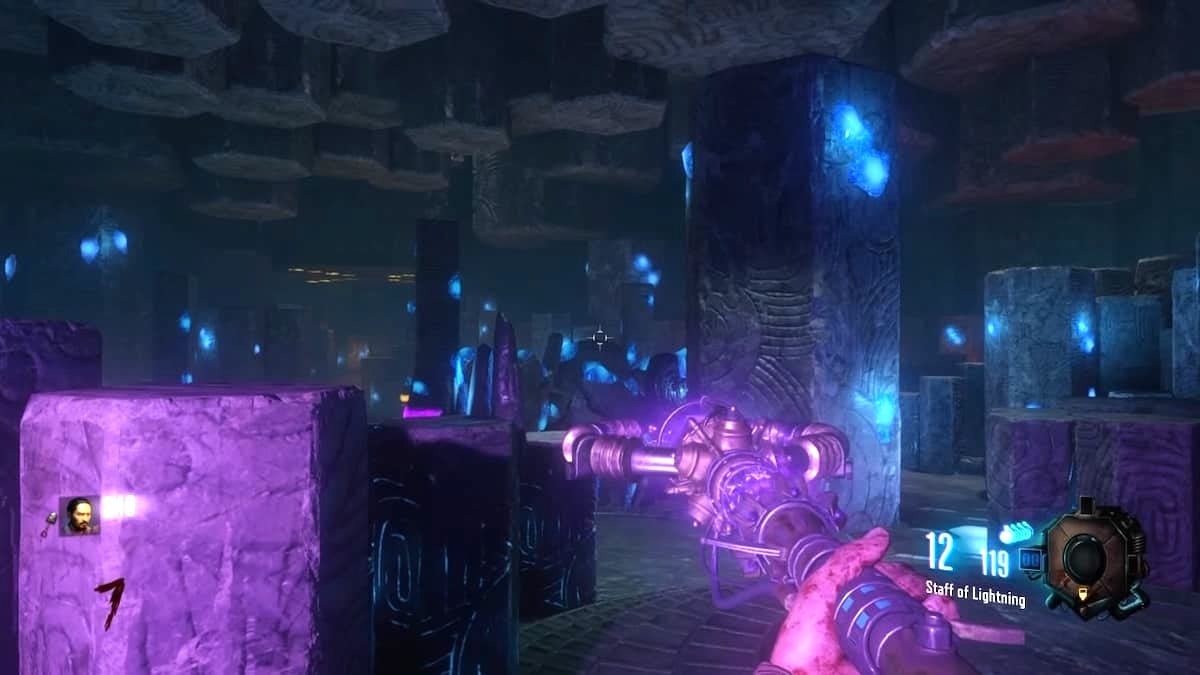
Outside of standard weapons, we highly recommend obtaining the RAI-K84 wonder weapon. You can build it, get it in the Mystery Box, or receive it in trial rewards (more on that in a little bit). There is no Ray Gun in Firebase Z, but this weapon is a very nice alternative. Its primary firing mode is similar to the Ray Gun but automatic, and it has an alternative lob shot that can be hit using regular shots to cause a shockwave explosion. The resulting blast is excellent for slowing enemies, wiping out hordes, and significantly damaging Mimics and Manglers. If you are going for high rounds runs, the RAI-K84 is a must.
Bunny Easter egg
There is a secret in the Pack-a-Punch machine room that is easy to pull off and is so useful that we recommend doing this at the start of every game. This bunny Easter egg will transport you to the Dark Aether, which will end in a nice reward for you and your teammates. Shoot the three bunnies, and a chest will appear that rewards a free Juggernog perk, salvage, equipment, and occasionally a weapon up to the RAI-K84.
Trials
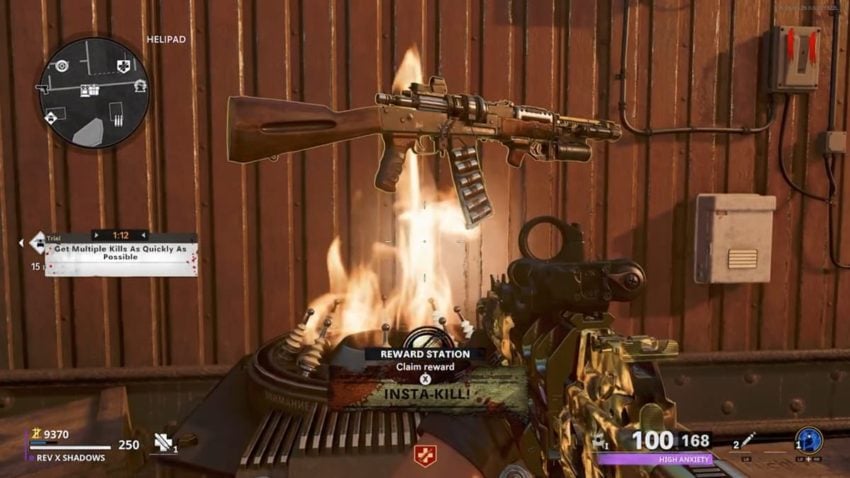
When teleporting to the Firebase, there is a trial station directly to the right when arriving at the Helipad. It works like it did in Die Maschine, where you pay points to start a challenge and can upgrade your reward tier until it reads legendary. We highly recommend hitting these trials as soon as possible as the price increases, and the top tier rewards are almost always either a free RAI-K84 or perk. There is also a chance for a Pack-a-Punched epic tier weapon.
Whatever you get, the rewards are beneficial and will save you points in the early game. The only trial that can be tricky to complete is rebuilding barriers as there are not many on the map. Otherwise, everything is very doable and can kit you out with needed gear much sooner than you might typically get it.
Good train locations
Firebase Z is a map filled with many viable train locations. Training is the vocabulary used to describe leading a horde of zombies around so you can group them together for faster kills. Our favorite spot for this is the Helipad. As zombies spawn in, you have plenty of opportunities to maneuver around them, and if you get in trouble, you can jump on nearby crates to slow down their pursuit. There are also four different escape paths between the three gates and the teleporter.
After the Helipad, the Barracks is a great location for training. Running between the buildings is a great way to throw pursuing zombies off, and you can quickly run to Scorched Defense or the Helipad if things get hairy.
Finally, outside of defense rounds, the paths the zombies take in Jungle Defense is a very wide-open field great for gathering a group of zombies in. There are almost no structures to deal with out here, but there are also no resources to take advantage of, so you need to come kitted out already.
Killing Mimics, Manglers, Hellhounds and Orda
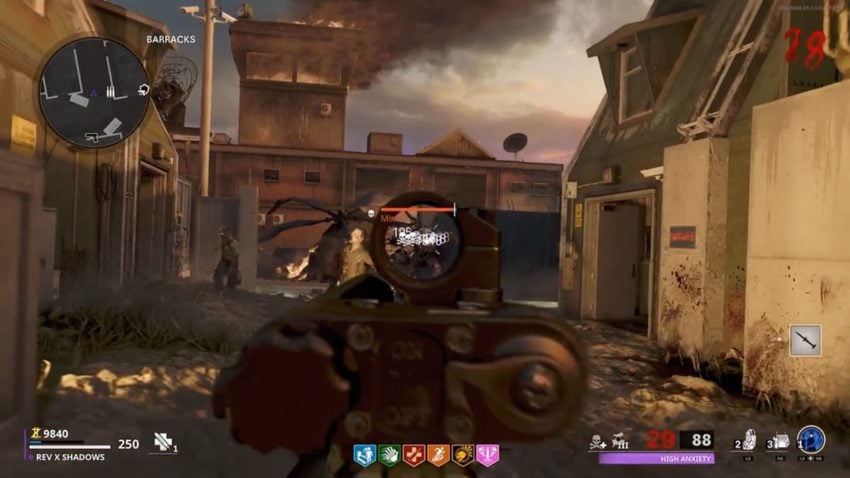
This group of monsters is the “special” enemies you will face throughout Firebase Z. Mimics and Manglers appear very regularly in the early game but have distinct weaknesses we have covered before. The Gallo SA12 and RAI-K84 are probably the best weapons to use to take them down quickly. While tons of these enemies will appear on the map, they reward ammo and armor pieces upon death, making them a good target to take down when running low on either.
Hellhounds will begin spawning naturally into the map at round 25. There are no dog rounds in Firebase Z, so you will never have the “Fetch me their souls” rounds that reward max ammo at the end. These hellhounds will run on you and explode in a ball of fire, leaving a burning area that will hurt you over time. Like in the past, Hellhounds are easy to kill, but sometimes it is better just to let them explode behind you as you run away.
Finally, Orda is the final boss of the main Easter egg that makes an appearance in the defense rounds starting at round 30. When these rounds happen, the usual horde of zombies will attempt to shut down power, but now the giant Orda will be in the background, slowly making its way forward. Its attacks involve volleying out Hellhounds and shooting a cluster of bugs that will damage over time.

You can shoot that cluster as it comes in to stop it. When fighting Orda, you want to hit it from far away. If you have Ring of Fire, activate it and shoot into it. When it opens its mouth, fire there as it does increased damage. The RAI-K84’s primary fire is excellent for this fight.
Scorestreaks
Like in Die Maschine, certain scorestreaks like the Chopper Gunner can save you when you activate them and be built at the crafting table. Three new streaks have been added with Firebase Z, however. The Napalm Strike, Artillery, and Cruise Missile are all brand new, and while they can be crafted, you can also obtain them during defense rounds at the terminals you are defending. The first purchase at each location is always free, with them costing 8,000 points afterward.
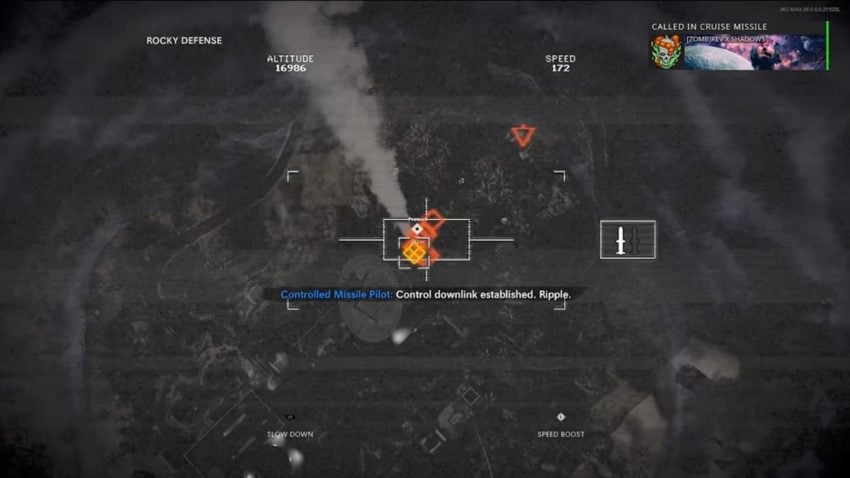
Of the three new streaks, we prefer the Cruise Missile. Like the Chopper Gunner, when you activate it, zombies will ignore you, giving you a chance to save yourself in a challenging situation. After that, the Artillery is excellent for taking out a large group. The Napalm Strike did leave a little to be desired for us. It’s not terrible, but compared with the other two, we prefer them.
Take advantage of the village
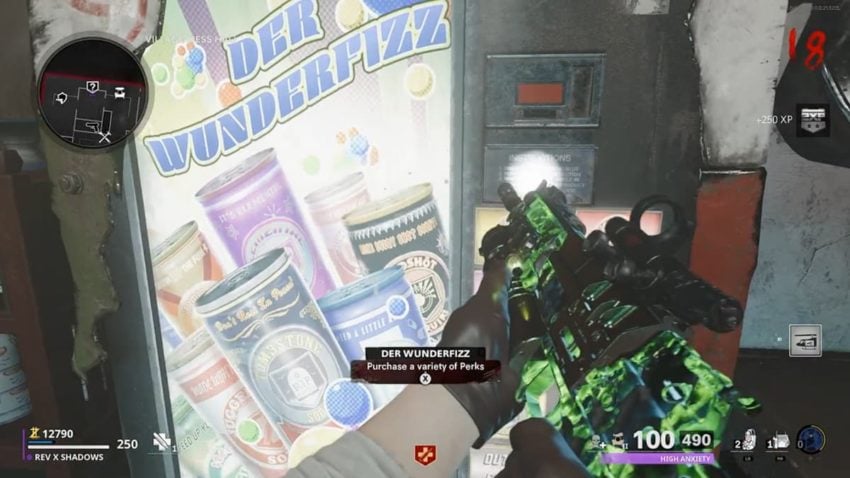
Our last tip for people looking to survive into higher rounds in Firebase Z is to take advantage of the village you start the game in. For some people, you may think that besides Pack-a-Punching, there isn’t much use in this area. However, the Wunderfizz machine is directly next to the Pack-a-Punch and can give you perks that don’t even have machines on the map, including Deadshot Daiquiri and Elemental Pop. You can also buy all other perks here, so if you have a ton of points and want to get perks quickly, go here to grab them instantly.
There is also an armory here. If there are no teammates in this area, it can be a decent location to train zombies throughout the Courtyard and buildings. It is a bit more dangerous than the places we recommended above, though.


Published: Feb 8, 2021 10:13 pm