The first non-linear dungeon in World of Warcraft Classic, the Wailing Caverns, can be pretty tricky to navigate for new players. Its easy to roam around, haphazardly, and getting lost in its winding, intersecting, areas. So be sure to get your bearings with this guide before you and your crew head into the depths of this dangerous place.
Recommended classes and levels
- Rogues and Mages are a great choice for this dungeon given the large amounts of humanoid mobs. Druids aren’t a bad idea either since they can use some abilities to deal out damage to many enemies at once.
- Shamans can counteract the CC that will be frequently used by the enemies and bosses in the dungeon with their Tremor Totem.
- Bring a Warrior with a shield to tank a lot of the enemies.
- Priests can also dispel the sleep effects that are everywhere in this dungeon at level 18.
Regardless of your class, the recommended levels for the Wailing Caverns is 17-24, but on the lower end of that range, it can be pretty difficult to get through.
Location
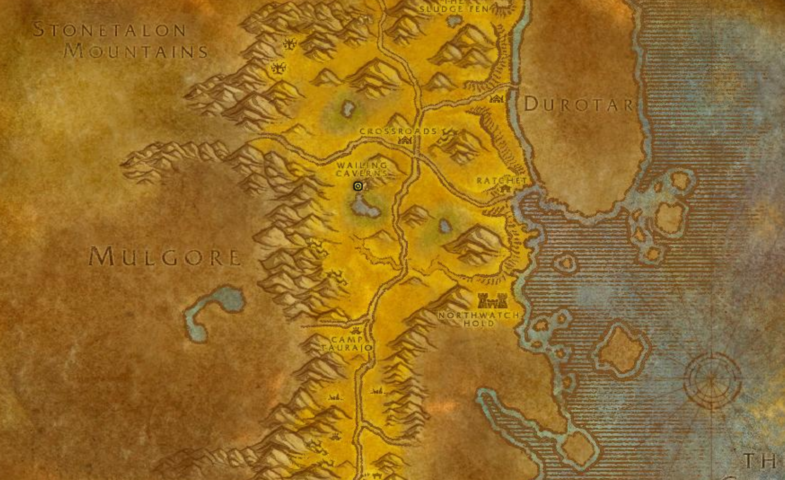
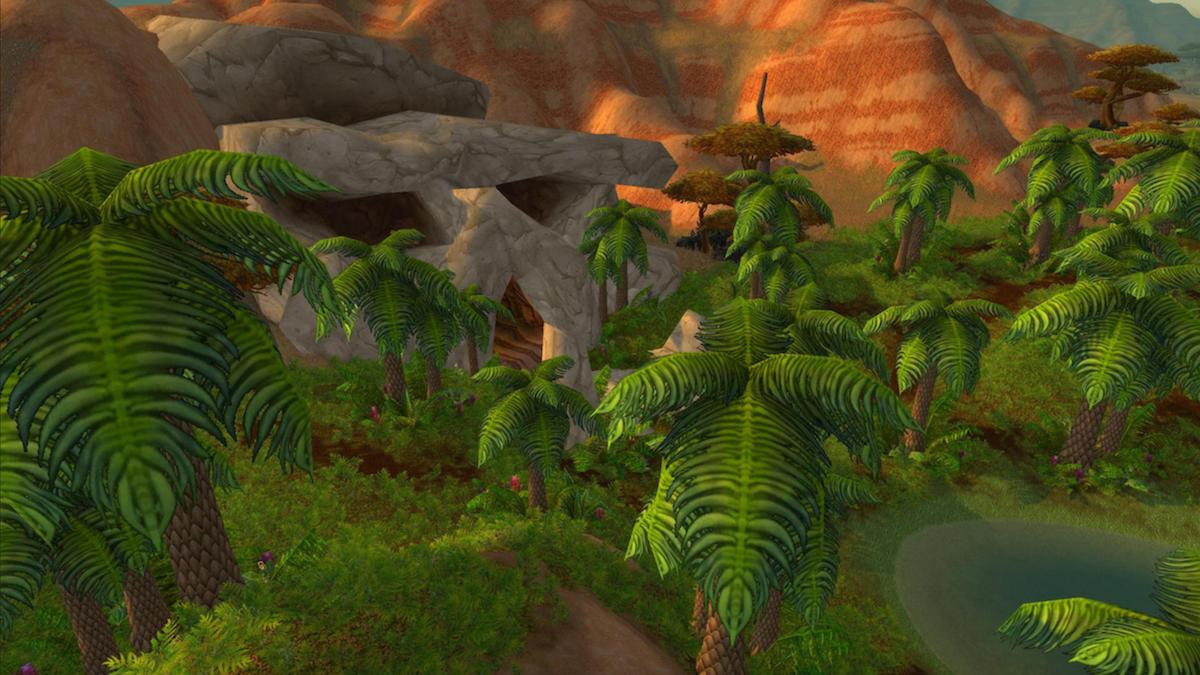
You can find the entrance to this dungeon in The Barrens, to the southwest of The Crossroads.
Start at the northern side of The Oasis where you will find a large rock formation that is leading into a cave. Head inside and take a right at the first intersection, then a left, and you will come to an area with shallow water. Proceed straight ahead to follow the curving tunnel until you come into a large cavern, full of large plants and a pool of water. Follow the path leading down to your right and you will come across the dungeon entrance.
Quests
There are a handful of quests that deal with the Wailing Cavern, most of them starting outside the dungeon and one of them inside.
Quests starting outside
We recommend picking up all of these quests that you can before you head into the dungeon to be the most efficient you can be.
Horde-Only
Leaders of the Fang – loot a gem from each of the four Leaders of the Fang in teh dungeon. You have to complete the questline from Tonga Runetotem and be level 10 to get this quest.
Serpentbloom – collect 10 Serpentbloom from the dungeon. Given by Apothecary Zamah and requires level 14.
Neutral Quests
Deviate Eradication – kill 7 Deviate Ravager, Deviate Viper, Deviate Shambler, and Deviate Dreadfang. Picked up above the entrance to the cave and requires level 15.
Deviate Hides – collect 20 Deviate Hides from trash within the instance. Picked up above the entrance to the cave and requires level 13.
Smart Drinks – collect 6 portions of Wailing Essence. Given by Mebok Mizzyrix in Ratchet and requires level 13.
Trouble at the Docks – retrieve the bottle of 99-Year-Old Port from Mad Magglish in the Wailing Caverns. Given by Crane Operator Bigglefuzz in Ratchet and requires level 14.
Quest started inside
There is only one quest that starts inside the dungeon and it is available to both factions:
The Glowing Shard – this requires you to find someone in Ratchet that can tell you more about the Glowing Shard. You will need to take the shard to Sputtervalve in Ratchet, then head to Falla Sagewind, who is found on top of the mountain that covers Wailing Caverns. Dropped from Mutanus the Devourer and requires level 15.
Locations in the dungeon

Since the dungeon is non-linear, it can be difficult to navigate through its location. If you follow the path below then you will have a much easier time getting through it and completing everything you need to:
- Go along the winding path from the entrance until you reach a cavern with a river flowing through it.
- Fight the first boss, Lady Anacondra, who can spawn in any ring of torches at the top of the cavern.
- After the fight, get in the river and head to the west side of the instance. Follow the winding path until you reach Lord Cobrahn, the second boss.
- After defeating him, jump down the cliff opposite the boss, using the small ledge to help your fall. Make your way back up the river to the east side of the instance.
- You will find Kresh in the river. Kill him, even though his status is neutral.
- Keep heading east until you reach Lord Pythas.
- After killing him, keep heading east and you will reach Skum. This is an optional boss but we recommend doing it since it’s pretty easy.
- After skipping or beating Skum, keep going until you reach Lord Serpentis and Verdan then Everliving in the same room. Take on Serpentis first, and then Verdan.
- After finishing both fights, use the shortcut behind Verdan to get back to the river. Just fall off the cliff and drop into the water.
- Return to the dungeon entrance and speak with the Disciple of Naralex. You will then escort them to the final boss, Mutanus the Devourer.
Bosses
Here is a breakdown of all the bosses you will fight in the dungeon:
Lady Anacondra

The first boss of the dungeon is a level 20 elite humanoid. She can spawn in any of the torch circles at the top of the cavern she is in.
Wipe out the enemies around her before pulling her your way. Be mindful of her Sleep and dispel whenever you can. Other than that, the fight is pretty straightforward.
Loot
Loot
Required Level
Slot
Serpent’s Shoulders
Snakeskin Bag
Belt of the Fang
18
N/A
16
Shoulder
Bag
Waist
Lord Cobrahn

The second boss is another level 20 elite humanoid. This boss is pretty straightforward the whole way through. There aren’t any unique mechanics you should worry about with this guy.
Loot
Loot
Required Level
Slot
Robe of the Moccasin
Cobrahn’s Grasp
Belt of the Fang
17
19
18
Chest
Waist
Legs
Kresh

The first optional boss is neutral unless you choose to attack him. We don’t recommend you take him on unless you have a tank shield character.
Loot
Other than that, it isn’t a boss that you need to worry too much about.
Loot
Worn Turtle Shell Shield
Kresh’s Back
Required Level
15
15
Slot
Off-Hand
Off-Hand
Lord Pythas

The third boss of the dungeon is a level 21, you guessed it: elite humanoid.
You will want to look out for the boss casting Healing Touch and interrupt it. Also avoid his Thunderclap attack if you are a ranged character.
Loot
Loot
Armor of the Fang
Stinging Viper
Required Level
18
19
Slot
Chest
Weapon
Skum
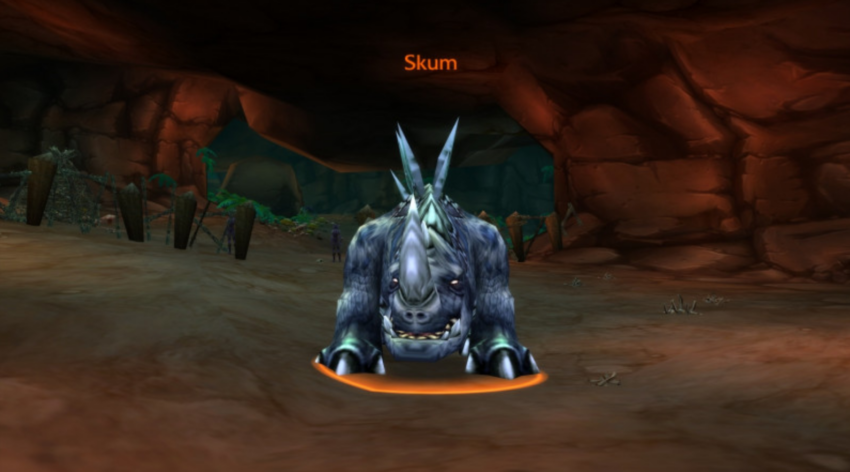
The second optional boss is a level 21 elite beast who will cast Chained Bolt. The attack will deal out AoE damage, but is minor enough that you don’t really have to worry about it and just heal through it.
Loot
Loot
Tail Spike
Glowing Lizardscale Cloak
Required Level
17
17
Slot
Weapon
Back
Lord Serpentis

This is the fourth boss of the dungeon and also the last Leader of the Fang. He is a level 21 elite humanoid. Just like with Anacondra, watch out for his Sleep attack, which needs to be dispelled as soon as possible or removed by a Tremor Totem from a Shaman.
Loot
Loot
Savage Trodders
Serpent Gloves
Venomstrike
Footpads of the Fang
Required Level
18
18
19
18
Slot
Feet
Hands
Weapon
Feet
Verdan the Everliving
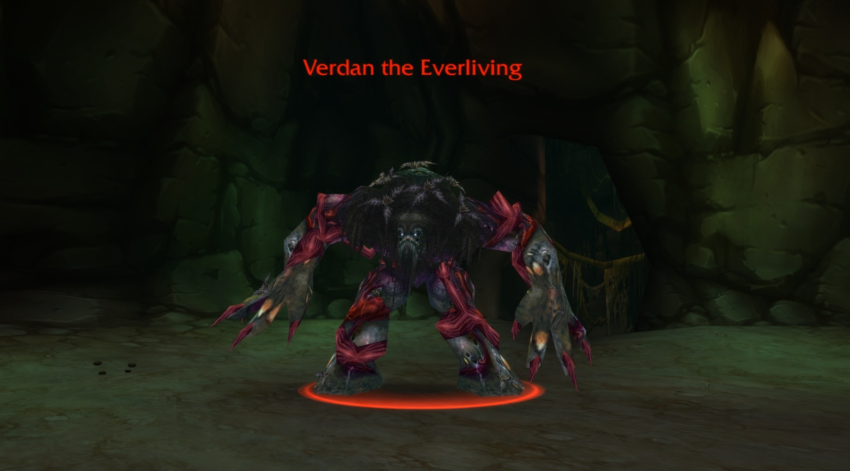
The fifth boss of the Wailing Caverns is also decently harder than the other bosses you have fought before it. He is a level 21 elite elemental.
Verdan has a lot of health that you will have to deplete. This means your DPS characters will have to work quick to take it out before your Healers run out of Mana. This isn’t going to be an easy feat as Verdan deals out a lot more damage than the Fang’s leaders.
His melee attacks are the main thing to watch out for. They can deal a ton of damage, even to Warriors with tanking shields. He can also do a stomp attack that deals out AoE damage and roots players hit by it. Ranged players need to stay away from these attacks.
Loot
Loot
Sporid Cape
Seedcloud Buckler
Living Root
Required Level
18
20
20
Slot
Back
Off-Hand
Weapon
Mutanus the Devourer

The final boss of the dungeon will be triggered when you are trying to wake up Naralex. He is a level 22 elite Murloc.
In addition to the boss, there will be waves of adds that you will have to contend with as you fight. Some players will be hit with a Naralex’s Nightmare attach, which will put them to sleep. They need to be attacked to break it. He can also use Thundercrack to hit ranged players.
Loot
Loot
Deep Fathom Ring
Slime-Encrusted Pads
Mutant Scale Breastplate
Required Level
21
22
23
Slot
Ring
Shoulder
Chest


Published: Oct 8, 2020 02:39 pm