Floor 12 of the Spiral Abyss is the biggest challenge in Genshin Impact, available to you after clearing all eleven floors before it. Unlike the last Spiral Abyss rotation, this Spiral Abyss is relatively more straightforward, so there’s not as much to stress about when it comes to your DPS. There are many strategies here when it comes to manipulating the enemy movements rather than big DPS checks.
Because this is Floor 12, however, you do not need to get a lot of stars. But clearing the Abyss as fast as you can give you access to even greater rewards. Floor 12 has no Leyline Disorder, so focus on dealing as much damage as you can. You still have the “Blessing of the Abyssal Moon,” so use that to your benefit.
(This week’s Blessing of the Abyssal Moon grants a 6.5% ATK Bonus every second, with a maximum of 10 stacks, while your Elemental Energy is above 50%. This buff is cleared once your energy drops below 30%.)
Characters to consider
This week’s Floor 12 is relatively simple, and there’s not a whole lot of depth to the floors. The biggest challenge is making sure you can manipulate the enemy AI well enough to maximize your AoE damage. There are the usual characters you want to bring, such as Bennett, Zhongli, Xingqiu, etc., but you can also consider:
Fischl + Beidou: There’s a lot of room for AoE damage on this floor, and making sure you deal enough damage to groups of enemies fast. The Fischl + Beidou combo is a great way to maximize your AoE damage.
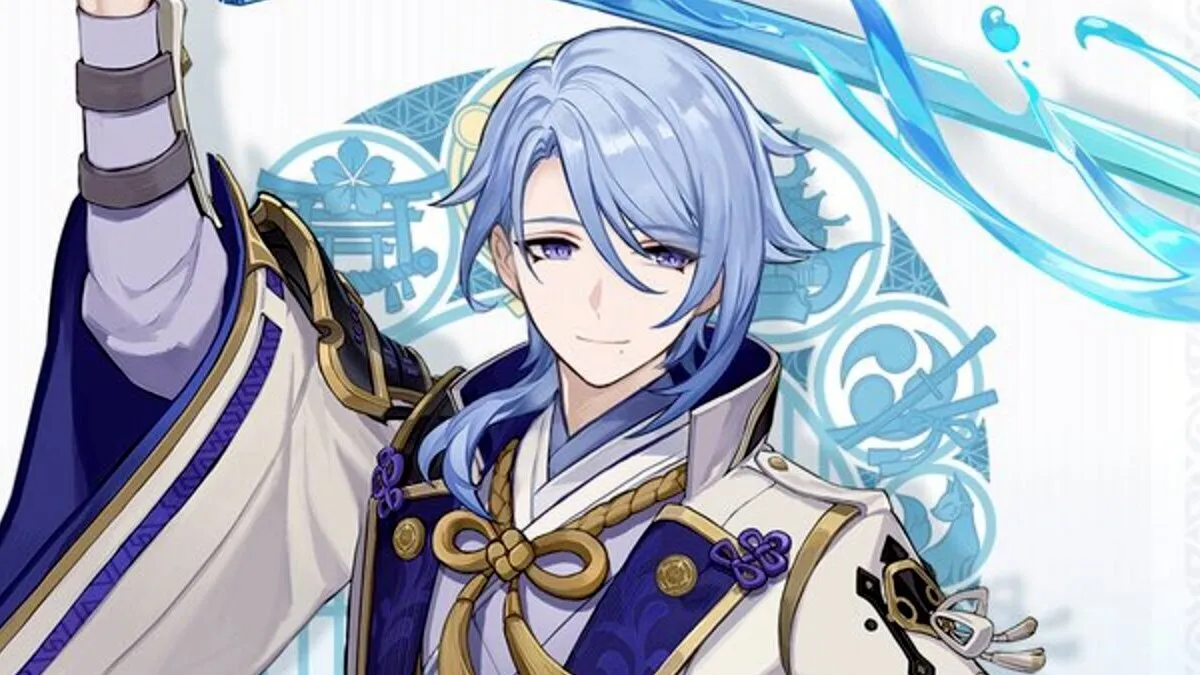
Tartaglia + Xiangling + Bennett + Kazuha/Sucrose: This combo continues to be one of the strongest pairings in the game, with the potential to deal massive damage. Tartaglia is useful on the last chamber in case you need to shoot down the Ruin Hunter as well.
Eula: Many of the enemies on this floor allow Eula to get her ultimate off, and she’s a strong main DPS contender for this floor in particular.
Floor 12, Chamber 1
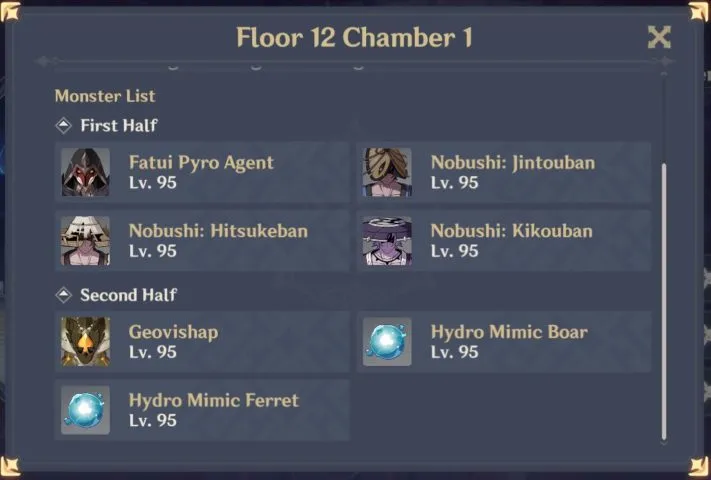
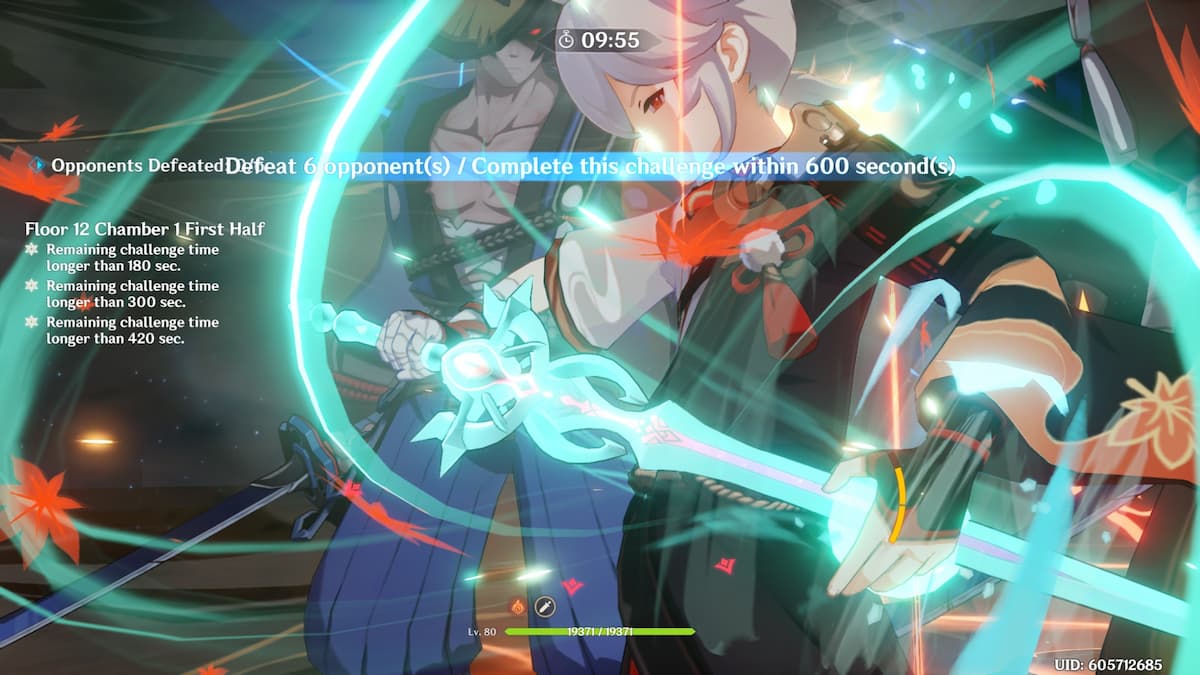
The first half of Chamber 1 can be difficult due to the Pyro debuff present on the floor. This buff infuses the enemies with Pyro, and you’ll deal less damage to them overall. Unfortunately, this battle is mostly attrition of whether or not you can deal damage fast enough in time.
The second half of Chamber 1 is a little different. There are eight enemies total, 2 Geovishap and 3 Hydro Mimics of each kind. The Mimics go down quickly to Vaporize, Electro-Charged, or Freeze reactions, but you’ll want to group them up properly. Heading straight towards the Geovishap will cause the Mimic Boars to run in your direction. After you clear that wave, the Mimic Ferret’s will appear, and they group up themselves.
Floor 12, Chamber 2
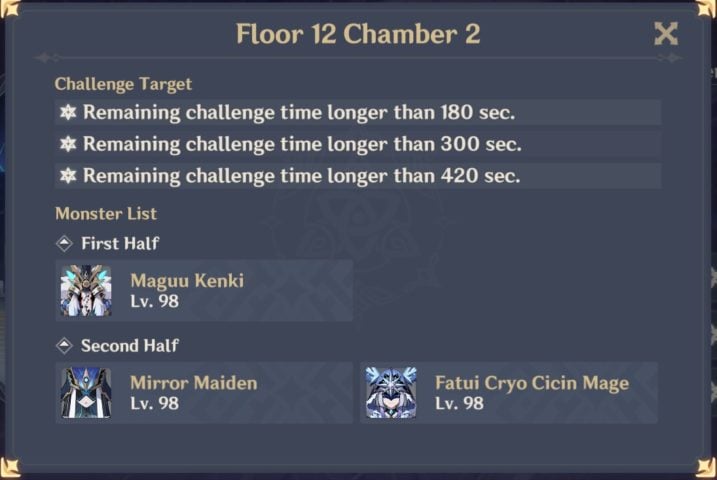
The Maguu Kenki returns for his third Spiral Abyss rotation in a row, and the fight hasn’t changed much from his last appearances. If you have enough DPS to take him out in about a minute and a half, you should be able to get a perfect run on this chamber.
The second half sees two waves of enemies. A single Cicin Mage in one wave, and a single Mirror Maiden in another, both accompanied by Treasure Hoarders. It’s tremendously helpful if you can send the Mages towards the center of the map, so you can easily group the Hoarders and Mages. Otherwise, focus on the Mages, as they have the most health.
Floor 12, Chamber 3

This chamber is difficult, but it’s not like the Perpetual Mechanical Array found last week. While there’s still a lot of health to burst through, the big challenge of the floor is getting the Ruin Cruiser and Destroyer to group up.
For the first half, immediately run to the left or right, heading towards a Ruin Destroyer. The Ruin Destroyers will spawn on opposite sides of the map, but heading to one of them specifically tends to make the other one teleport to your location. The Ruin Hunter will also come to you naturally. After that, a wave of two Ruin Cruisers and one Ruin Guard will come. Focus on the Ruin Cruisers first. The Ruin Guard will always walk towards you, so he will take collateral damage. You want to remove these Cruisers as fast as possible since they don’t always group up nicely.
In the second half, you want to employ the same strategy at the start of the battle. The wave is identical to the second wave of the first half. Focus the Ruin Cruisers, and let the Ruin Guard take collateral damage. The next wave should be a bit easier since the enemies don’t stray far from each other. Deal as much AoE damage as possible, and you’ll win the floor.
Once you master this fight, you’re finished with the Spiral Abyss! The Spiral Abyss resets once every two weeks or so, so you can return to this challenge during the next reset to earn even more Primogems.


Published: Oct 18, 2021 01:33 pm