
In the final mission of Operation Paper Trail, known as ULP — Cleanup, you and up to three other GTA Online players track down the last remaining trace of Clifford, the doomsday AI. Partially stored on the servers located inside the recently abandoned missile silo on Mount Chiliad, you’re tasked with tracking down the last of Clifford’s files, downloading them to your phone, and returning them to the IAA before the FIB can intercept them. Despite this silo being presumably abandoned, there’s more to complicate this otherwise quick in-and-out than initially meets the eye.
Finding the four breaker fuses
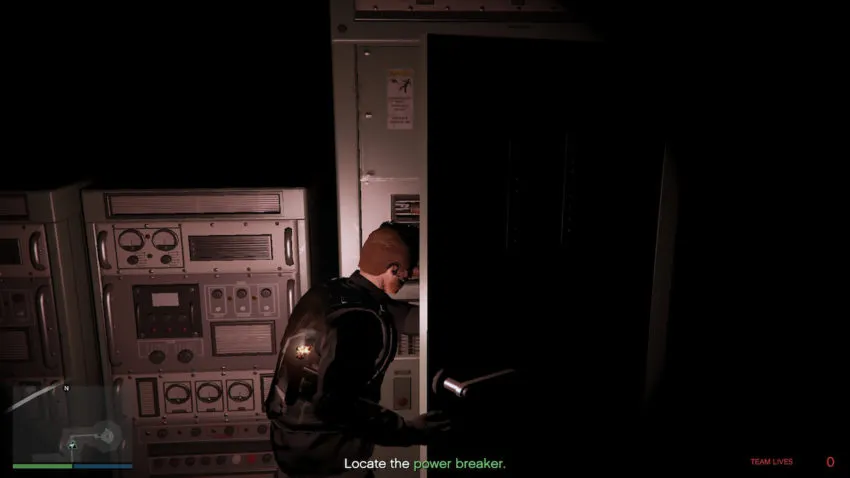
Upon first climbing into the silo, you’ll notice that its interior is pitch black. Clambering through its narrow, dark hallways with little more than a lit flare strapped to your back and whatever gun flashlight attachments you may have, your attention is initially drawn to the breaker located next to the central computer room. Flipping it would restore power to the entire facility, but its four external fuses have all blown, each needing replacement.
Related: How to complete the Operation Paper Trail – Operation Paper Trail mission in GTA Online
The first of these fuses is a bit of a gimme, but its position located on a crate just down the hallway from the breaker serves to help you recognize the small red cylinders as important mission objectives. Somewhat counter-intuitively, aiming with a gun flashlight to light your way obscures the message at the top left of the screen prompting you to press a button to pick up nearby fuses. This design choice will further complicate your process of finding the next three fuses, each of which is more difficult to find than the last.
Finding the second breaker fuse
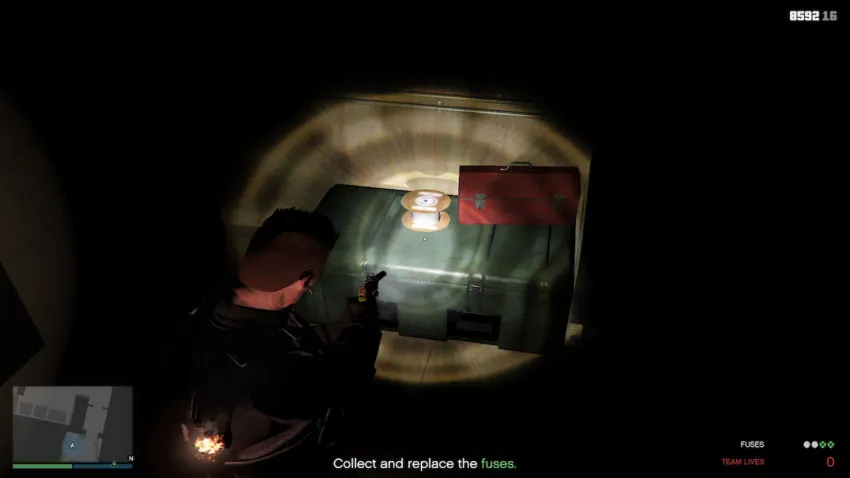
The second fuse is on top of a green plastic case located further down the hall from the first. Next to this fuse is a red metal toolbox and what appears to be a spool of wire. By now, it’s likely that you’ve picked up on a pattern between all four fuses in that they’re all placed on top of some sort of waist-high object within the silo, each easily within grabbing range.
It’s also worth noting that, by now, you may hear some heavy breathing coming from the rooms around you. This is of low concern right now but will become much more important once you restart the power.
Finding the third breaker fuse
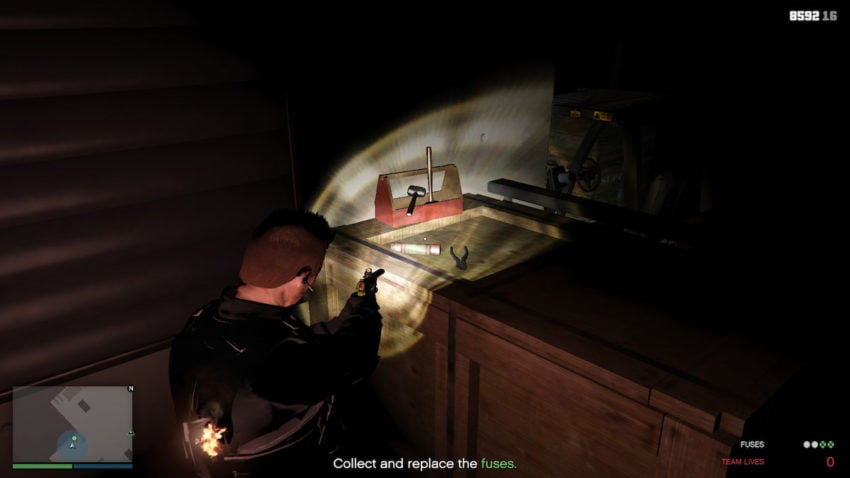
When the narrow hallways open up to a broad, warehouse-like room with stacked crates, generators, and a few forklifts, walk toward the back of this room and up a small flight of stairs toward a double doorway. When facing this doorway, turning right toward a medium-sized wooden crate will reveal another fuse lying beside a wooden toolbox and a pair of pliers. For reference, if you’ve encountered the room with the metal detectors, you’ve gone too far.
Finding the fourth breaker fuse
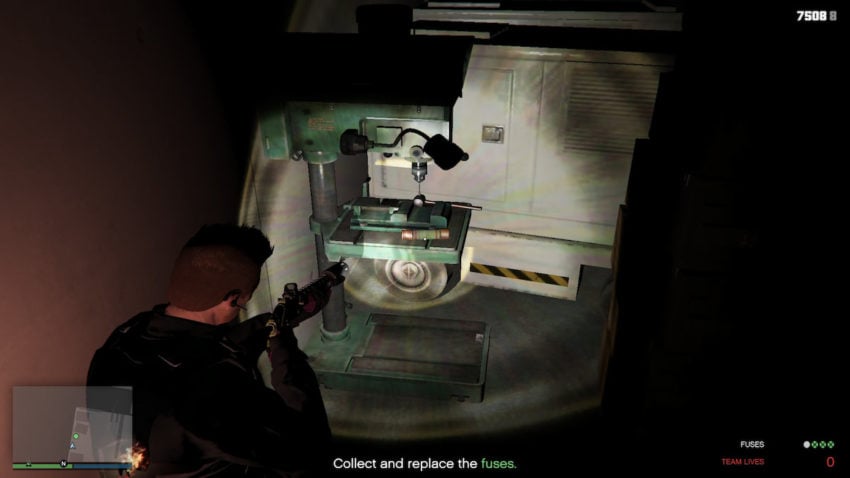
In the same room as the previous fuse, the last fuse sits alone on a green hydraulic press. However, this piece of machinery is densely packed against the leftmost wall, behind a ceiling-high stack of breakable wooden crates. You’ll need to shoot or blast your way through these obstacles in order to get to it.
Downloading Clifford’s files from the servers
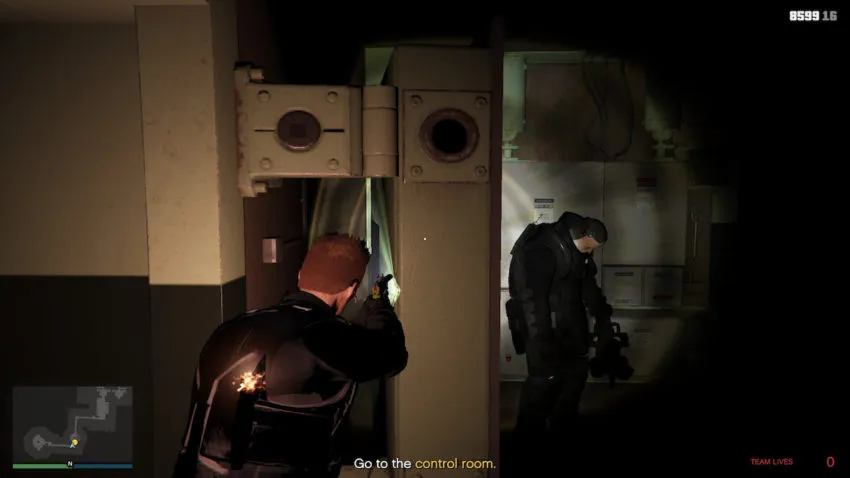
With all four fuses in your possession, you can successfully restart the breaker, providing power to the server room and shedding some light on what had been hiding in the darkness. The breathing you heard had actually been deactivated Clifford juggernauts, each clad in riot gear and wielding miniguns. They aren’t hostile to you right now, but they will be relatively soon.
Pressing forward into the server room, four particular consoles — one at each corner of the room on the second floor — will mark themselves on your mini-map. These can be hacked by pulling out your phone and activating the SecuroServ Hack app at the bottom right when close to each target server. Keep in mind, however, that after hacking the second of four servers, all juggernauts in the missile silo will suddenly become hostile and converge on the player’s location.
These juggernaut enemies can deal devastating amounts of damage when within close range, so we recommend that you engage them from a distance and utilize as much cover as possible to avoid their fire. They’re also incredibly sturdy, usually tanking two explosions or four heavy sniper headshots before dying. With no alternative routes to leaving the silo, you have no choice to fight your way out, back through the way you came in. Surviving this shootout, the helicopter scuffle that occurs topside, and the BASE jump to escape Mount Chiliad will successfully complete Operation Paper Trail.


Published: Jul 26, 2022 07:06 pm