
The ultimate challenge of Genshin Impact Version 3.6 is here. Each update brings a new change to the Spiral Abyss, featuring new enemies and challenges. This Spiral Abyss requires a mix of heavy single-target and AoE damage, so be sure to bring various characters to meet the DPS checks required on this floor. Some of these enemies are beefy, so you’ll need well-built characters if you wish to perfect this rotation.
How to clear Floor 12 of the Spiral Abyss in Genshin Impact
Each Spiral Abyss update grants a unique buff to help you out in your battles. This update is the Blessing of the Abyssal Moon: Reverberating Moon. This buff has the following effect:
“When the active character’s HP decreases, a shockwave will be unleashed at the character’s position, dealing True DMG to nearby opponents. This effect can be triggered once every 0.8s.”
Most of the time, each Spiral Abyss floor features a Leyline Disorder that potentially buffs your team. However, like most Floor 12s, you do not receive an additional buff. This means the only buff you’ll receive for Floor 12 is through the Blessing of the Abyssal Moon.
Related: How to clear Floor 11 of the Spiral Abyss – tips and tricks
Which characters to consider to clear Floor 12 of the Spiral Abyss?
This Spiral Abyss floor is a bit easier than the last one, with bosses that aren’t too complicated. However, this rotation still has some tricks up its sleeve that can make your clear a difficult one. Here are some teams that should help you smoothly clear these floors and maximize your potential rewards:
- Be sure to bring a Bow character for your first team. Regardless of whatever team you run, the Aeonblight Drake is a boss featured on this floor that requires you to shoot it down from the sky with a bow character.
- Alhaitham / Nahida / Yelan / Kuki Shinobu is one of the strongest Hyperbloom teams with an impressive amount of single-target and AoE damage. The high damage from Alhaitham, Nahida, and Yelan will also mow through the heavy HP on this floor. Yelan can shoot down the Aeonblight Drake, while Alhaitham and Kuki Shinobu can make quick work of the Algorithm of Semi-Intransient Matrix of Overseer Network boss.
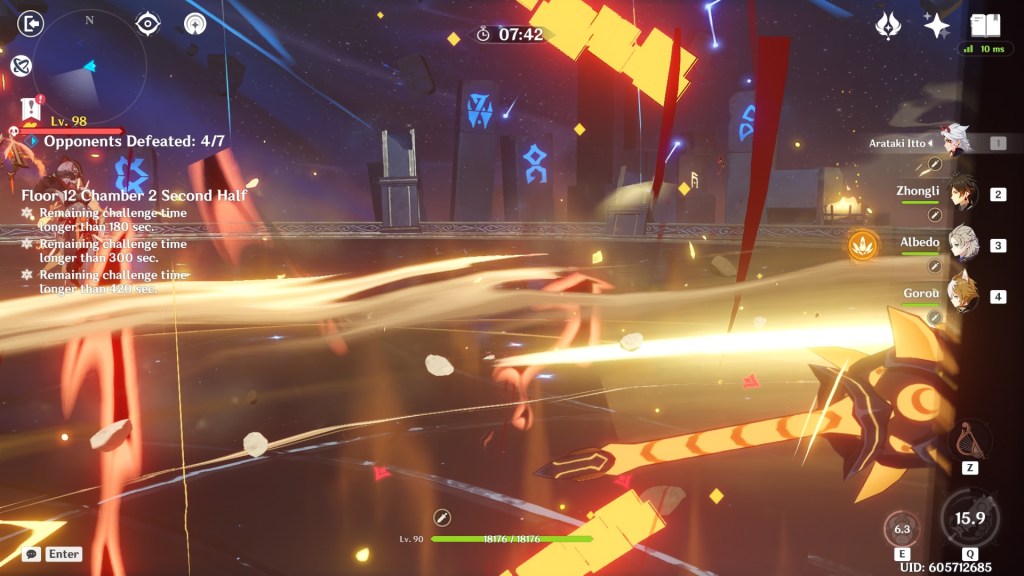
- We also recommend Arataki Itto / Zhongli / Albedo / Gorou or other variants for this floor. The bulkiness from this team, as well as Itto’s high damage, makes a Geo team actually a very attractive option. If you do decide to use a Geo team, you should only consider them as your second team, as they won’t be much help in the first half’s Algorithm of Semi-Intransient Matrix boss.
- Xiao / Zhongli / Faruzan / Bennett synergizes with this rotation’s Blessing of the Abyssal Moon and has strong AoE damage for the second half of this floor. Xiao should be able to mow through these enemies with ease, particularly the triple Maguu Kenki boss in the final chamber.
Floor 12: Chamber 1
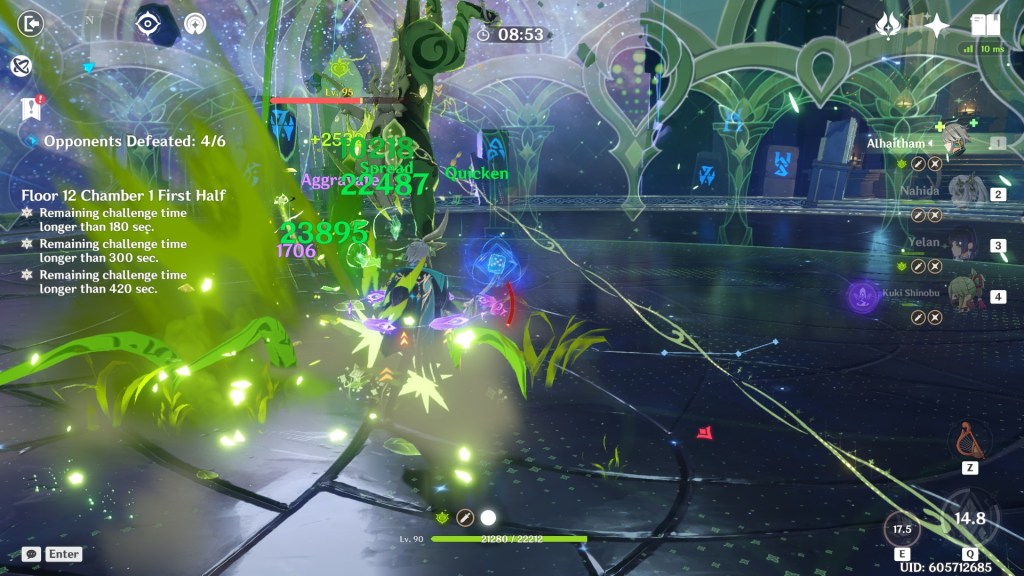
In the first half, you’ll have to fight two waves of enemies. You’ll first encounter a group of Ruin Hunters, Ruin Destroyers, and Ruin Defenders. These enemies will spawn fairly close to each other, so head to the center to ensure they stay grouped, allowing you to easily deal more AoE damage. Following this, you’ll have to fight two Consecrated Beast enemies.
These enemies are really what makes this Spiral Abyss rotation challenging, as these enemies are bulky and damaging. Make note of their attack patterns, and potentially defeat one at a time. Be sure to bring a strong healer or defensive option to keep you alive as you attempt to dash through a barrage of damaging attacks.

In the second half, you will have to defeat three waves of enemies. Similar to the first half, you will have to face some Consecrated Beast enemies. Geo characters can brute force their way through the damaging effects of these enemies, giving you an easy clear. Prior to the Consecrated Beasts, you will fight some simple Shroom enemies and Kairagis. As a reminder, Kairagis need to be defeated at the same time to avoid their HP-refilling mechanic.
Floor 12: Chamber 2
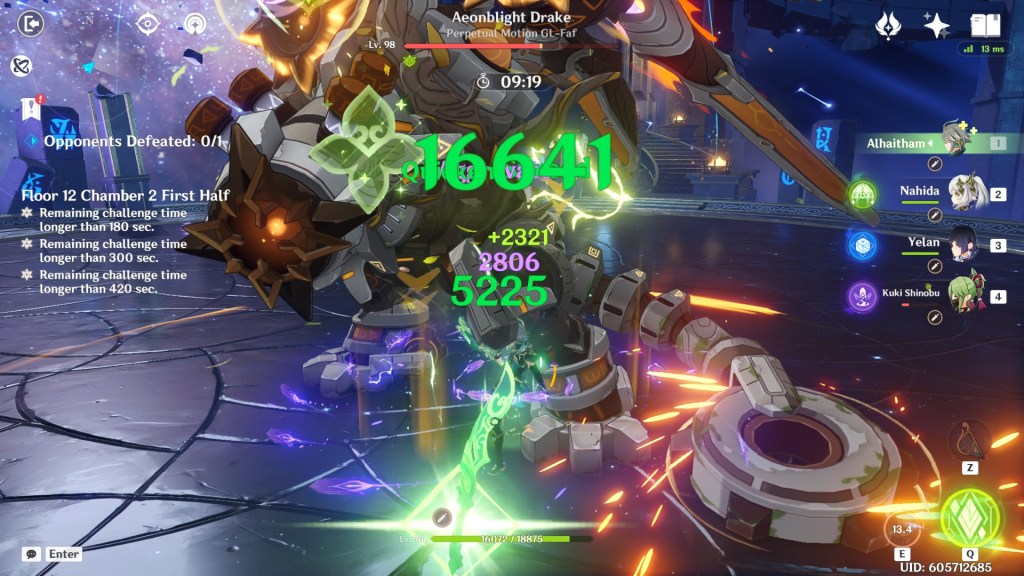
The first half of Chamber 2 sees the return of the Aeonblight Drake. This boss is quite easy in terms of mechanics, making this fight more of a DPS check to see if you have enough damage and invested characters. The Aeonblight Drake will fly in the air. The two jets at the side of its head or the area on this boss’ chest will light up. Use your bow character and shoot the lit-up areas of the boss when it flies into the air. This will stun the boss, causing it to crash to the ground. The second time this boss flies into the air, it will predicate the attack with a barrage of air bombs. Learning the Aeonblight Drake’s other attack patterns will help during this fight.
In the second half, you will have to defeat two waves of enemies. The first wave consists of three Hydro Hilichurl Rogues. Head to the one in the center and the other two enemies will group toward you. Following this, you’ll have to fight four Eremite enemies. These enemies can spawn additional monsters. When you defeat this monster, the Eremite who spawns it will take heavy damage and become briefly stunned.
Floor 12: Chamber 3
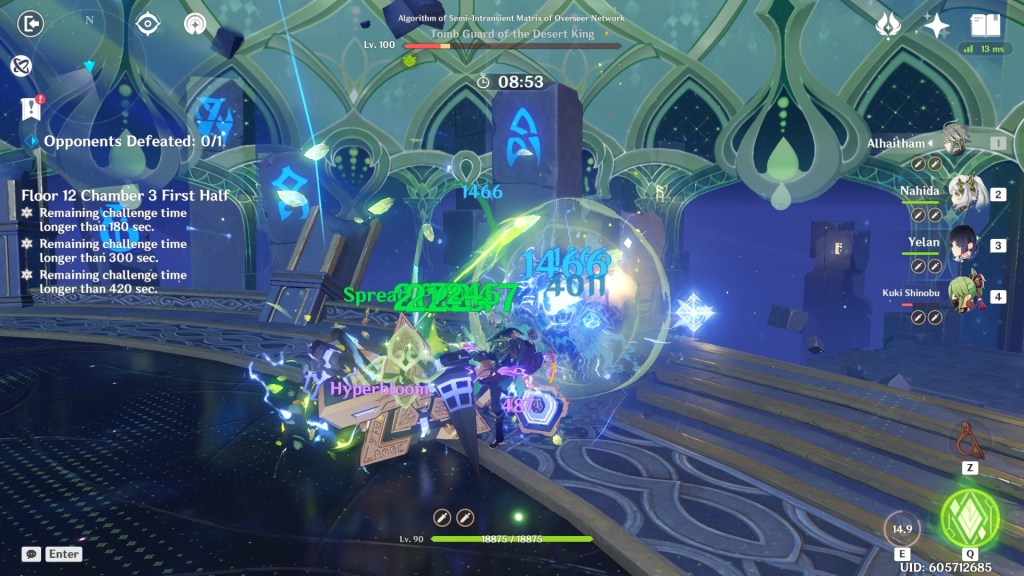
In the first half, you will have to defeat the Algorithm of Semi-Intransient Matrix of Overseer Network boss. This boss is an absolute mouthful, but Dendro plus Electro units will make this boss pretty easy. The boss will spawn taking reduced damage. After a bit, the boss will go invisible and rush towards the location it was facing. Chase down the boss while invisible and perform a Quicken reaction. This will stun the boss, allowing you to deal heavy damage, while also taking it out of its invisibility state.
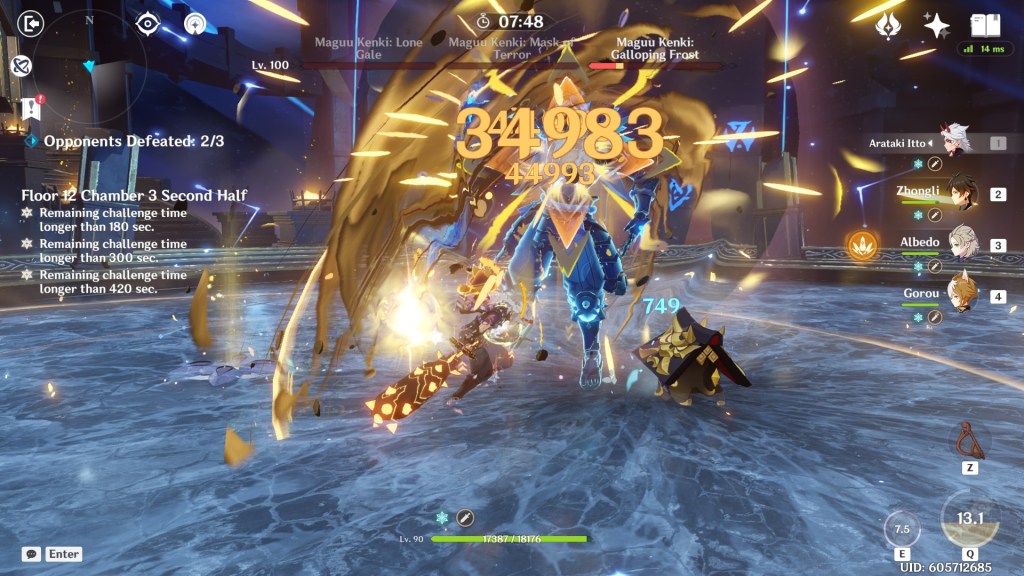
The second half features the triple Maguu Kenki bosses. This fun challenge requires you to have some good AoE damage. We recommend attacking the regular Maguu Kenki or Lone Gale Maguu Kenki first. This should ensure the Maguu Kenki’s don’t stray too far from each other, making it easier to deal AoE damage.
If you are having trouble staying alive, then you can target the Maguu Kenki: Galloping Frost boss first. This boss slows your team down and creates a field of ice that will deal damage as you stand on it. Defeating this boss first will make the entire fight easier.


Published: Apr 16, 2023 08:23 pm