At the end of the first set of steps for the More Than a Weapon questline, you’ll unlock the first weekly mission — Operation: Archimedes, a delve into another one of Rasputin’s bunkers and recover another piece of his subminds. The mission is on the longer side, and while most of it is relatively easy, the first and final sections require effort and skill. We’ll be going over every part of the mission in this guide.
Infiltrate the Power Substation
When you load into the mission, your first task is to traverse the snowfield to reach the entrance to the bunker. The catch? The bunker’s defensive systems only give you 15 seconds to move from cover to cover before they incinerate you. There is, however, a safe path that will lead you to the bunker without needing to sweat much.
Related: How to complete the Persys, Primordial Ruin encounter in Spire of the Watcher in Destiny 2
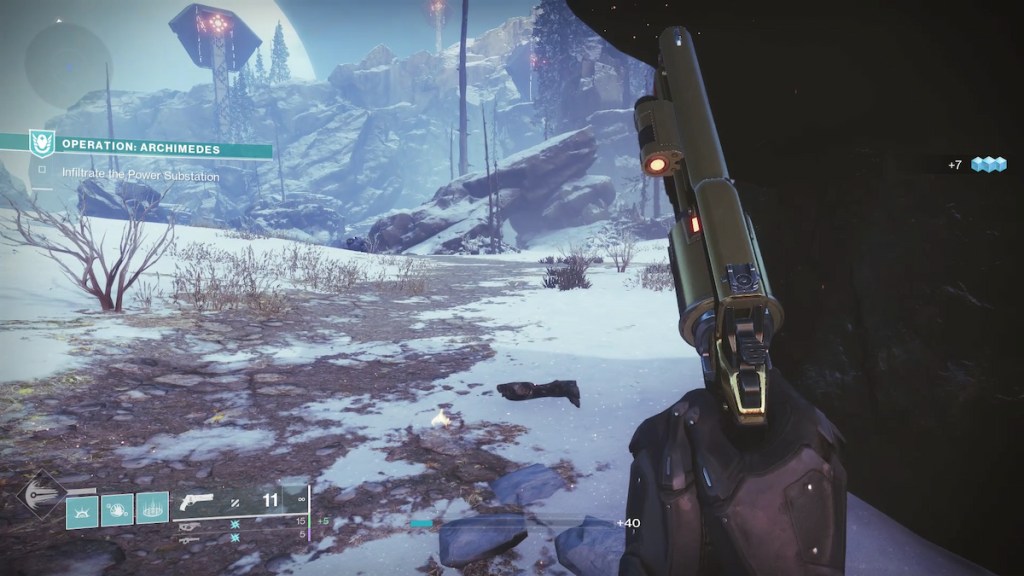
The area is littered with rocky outcroppings with convenient openings in them. There are about ten of these you’ll need to make your way through to reach the bunker entrance. You’ll be able to see each new bit of cover from your current rocky overhang, and because your timer quickly resets when you leave the defense towers’ line of sight, you can make sure you’re headed the right way before running into danger.
You’ll eventually make a crescent shape headed to your right to reach the bunker, but the entrance will take about thirteen seconds. Make sure your Threat Detection timer is completely gone, then beeline it for the open hatch. If you fail, you respawn at the final bit of cover, letting you try again with ease.
Head down through the hatch and follow the tunnels down. When you reach a room with a Hive cage trap in front of a door, you’re headed for the next stage of the mission.
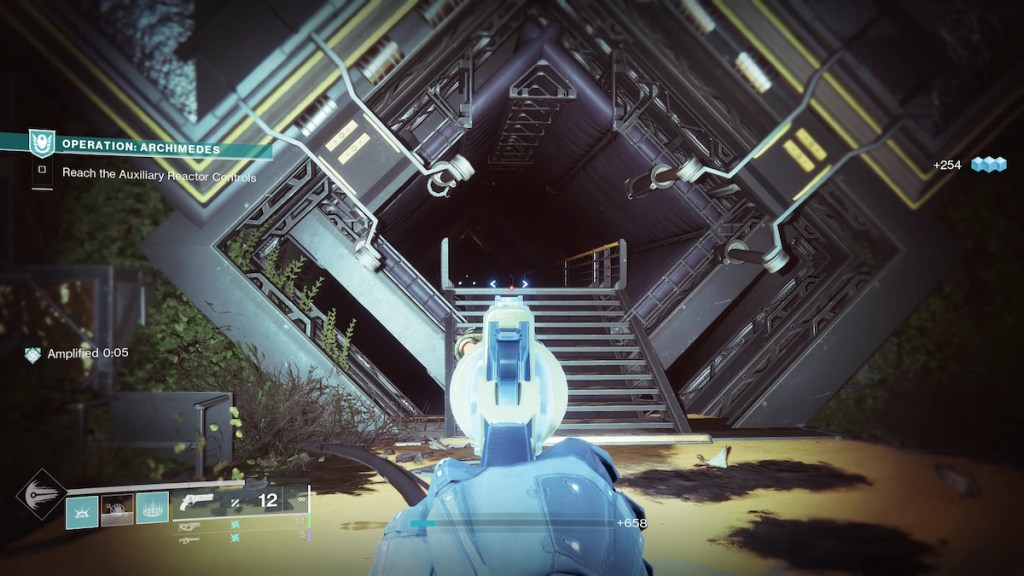
Reach the Auxiliary Reactor Controls
Now it’s time to fight. Head through the door, and you’ll enter a roughly circular room with some Hive enemies. Clear them and proceed through the door at the back of the room. The area beyond is more Hive; clearing them will open a larger hatch at the back right of the room. Proceed through.
In the next room, you’ll need to clear all the Hive you see to force a yellow-bar enemy, an Arc-Charged Knight to spawn. Kill it to spawn its Arc Charge, which you can then take to the power station near the door at the far end of the room.
Related: How to complete the Akelous, Siren’s Current encounter in Spire of the Watcher in Destiny 2
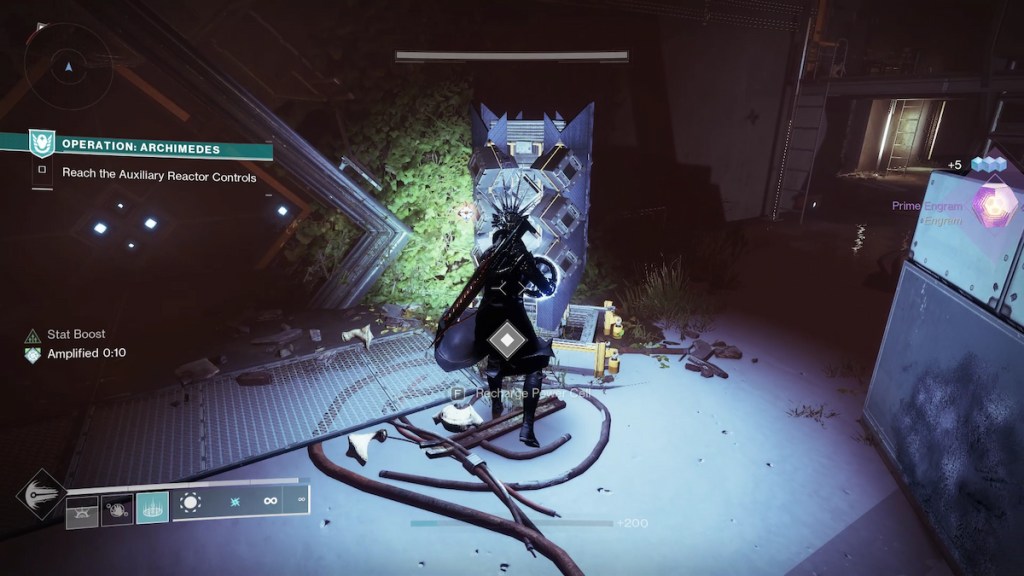
Through the said door is a long hallway with more Hive and another Knight to kill. Place the Arc Charge it drops in the second power station to open the door to the final room. Place the Rally Banner if you’re low on ammo or ability energy, then get ready for a big fight.
Clear the Hive and Charge the Final Battery
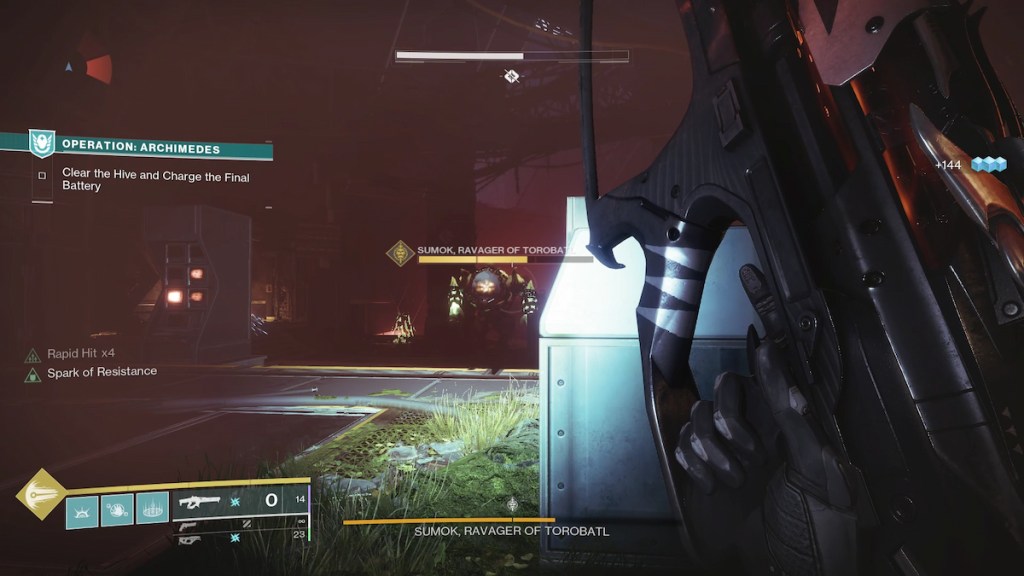
The boss fight for Operation: Archimedes takes place over two phases. First, you need to reduce Sumok, Ravager of Torobatl’s health, by half. The Ogre occasionally blocks your attacks with a black mist shield, but if you stay far enough away from it and pick your shots wisely, you can start whittling it down. We recommend a Linear Fusion Rifle for fighting Sumok, as his entire head is a crit spot.
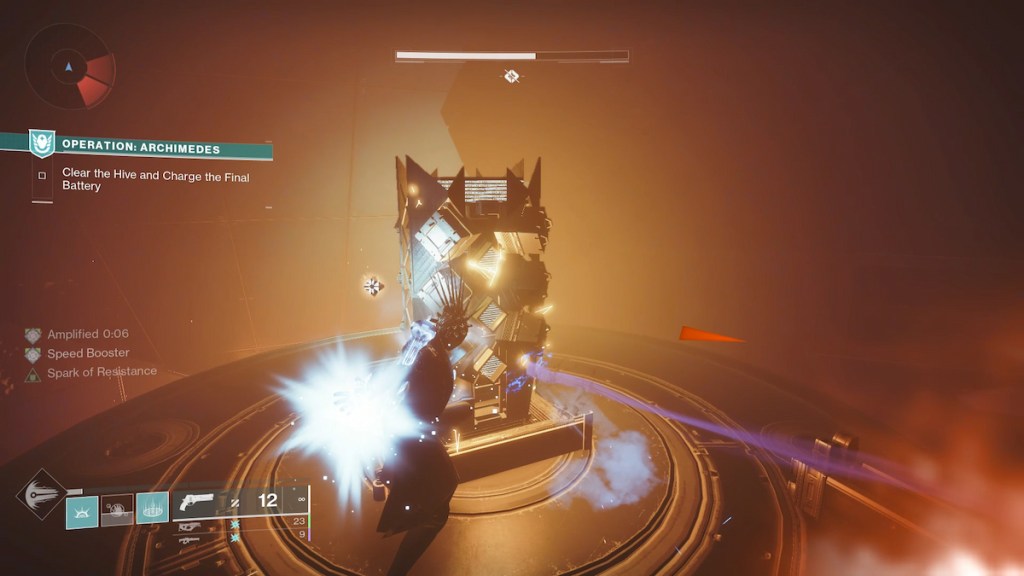
Use Hive Wells from Wrathborn Knights to Damage the Boss’s Shield

Once Sumok’s health reaches half, it will retreat to the back of the chamber and create an immunity shield. To break the shield, you need to have the Wrathful buff, which you can only get by standing in green energy pools dropped by Wrathborn Knights. These Hive Knights will start spawning as soon as the second phase starts, and you’ll know them by the green glow around their heads. The buff lasts as long as you stand in the energy, and the pools last for 15 seconds. Dealing enough damage to Sumok’s shield will break it, and you can defeat him like usual.
Clear the Hive and Charge the Final Battery, Restore Auxiliary Power
When Sumok dies, it will drop one last Arc Charge. Take it to the back of the room and deposit it in the power station. If you haven’t already, clear the rest of the Hive from the room, then head to the side opposite the power station to press the Reboot Reactor button.
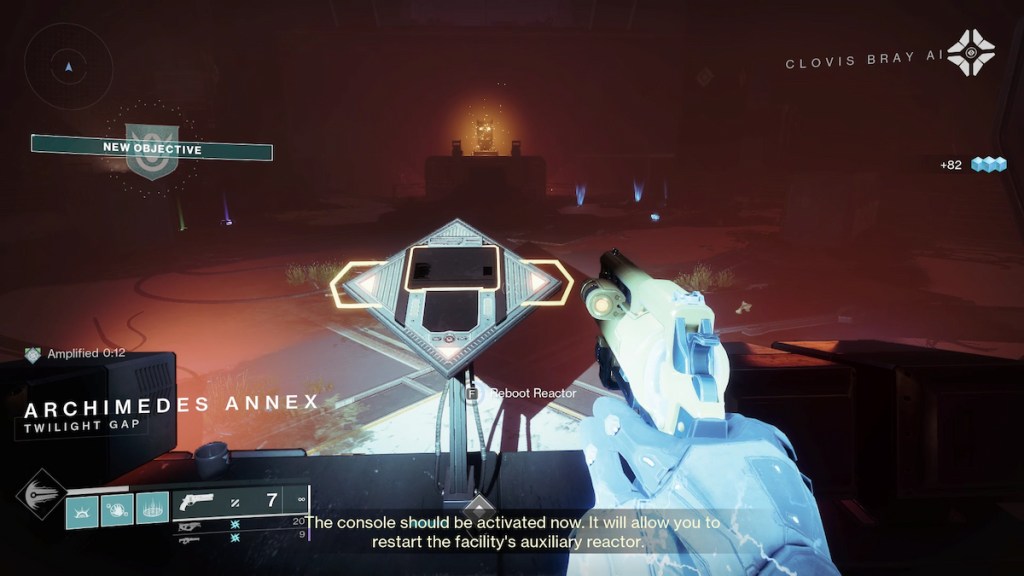
Once the reactor reboots, you’ll hear some final exposition from your NPC allies and will have completed Operation: Archimedes.


Published: Dec 6, 2022 04:28 pm