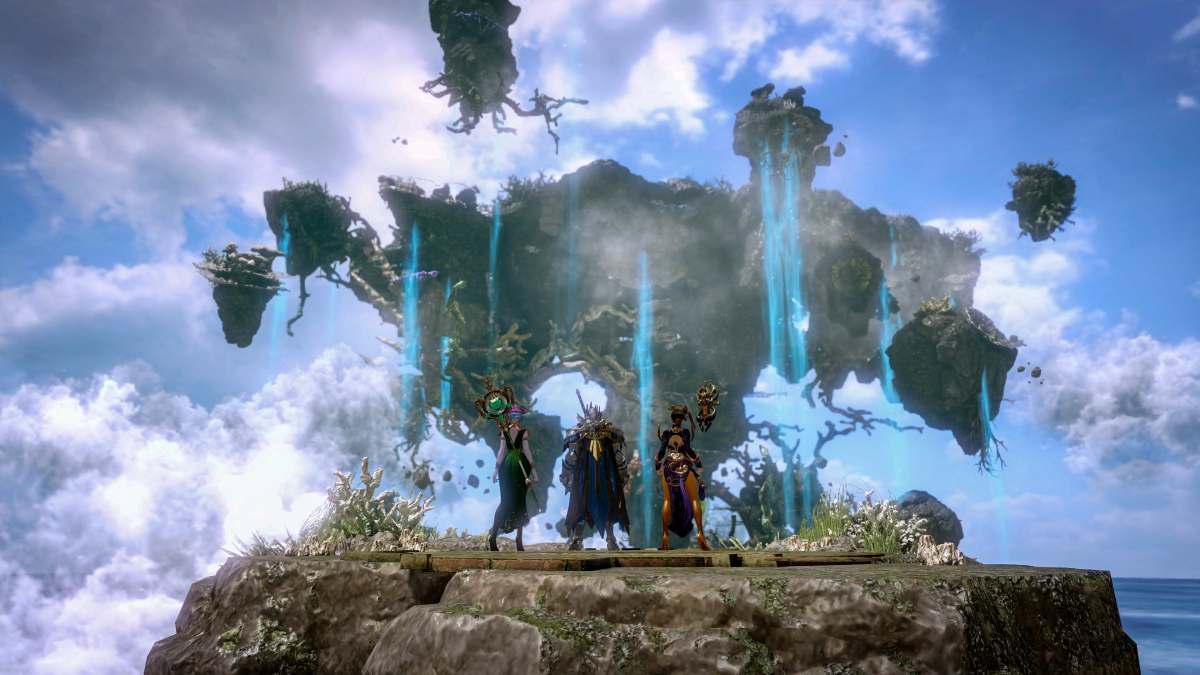
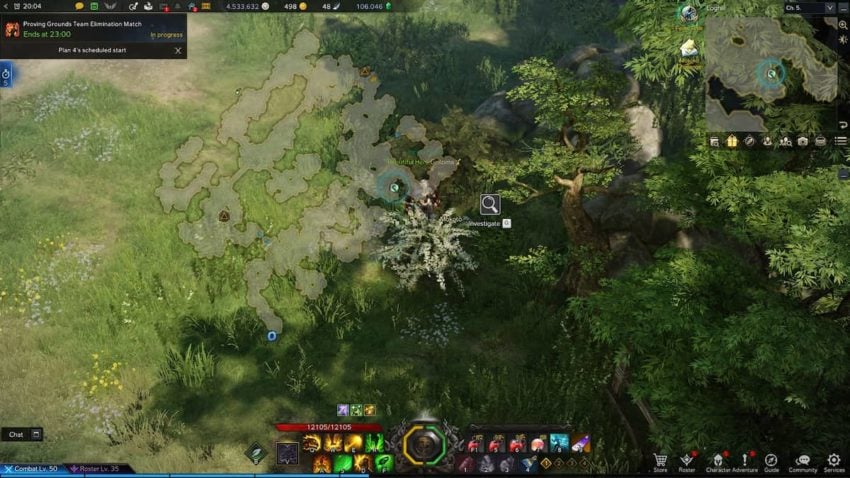
As you explore Lost Ark’s Rethramis for the first time, you’ll notice that, after completing a handful of activities, a scroll and quill symbol will keep popping up above your head, and a message will display saying that something has been added to your Adventurer’s Tome. The Adventurer’s Tome is used to track your completion in every continent through enemies slain, places visited, and specific items gathered. This guide will break down every item included in the Adventurer’s Tome for the continent of Rethramis, detailing how to complete each category.
Rethramis Adventurer’s Tome Overview
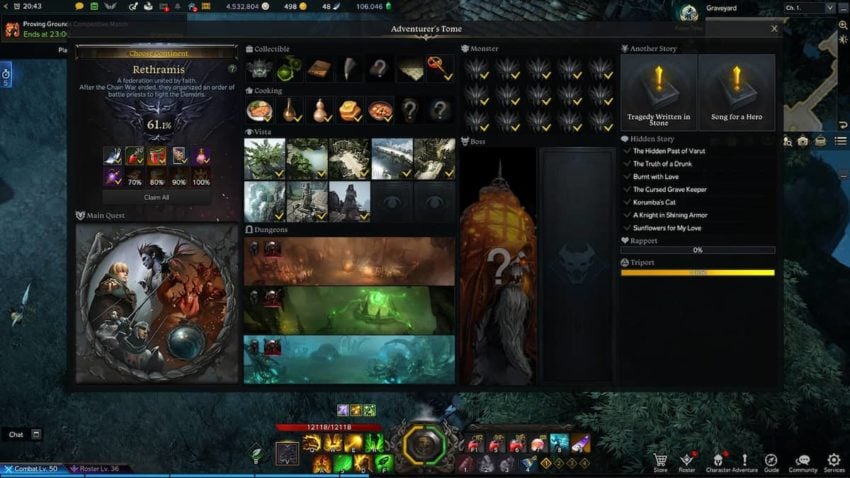
The Adventurer’s Tome for Rethramis is divided into 11 categories, with each including several related pieces of content native to the region. To achieve full completion of this tome, every item of every category must be accounted for, often indicated by a yellow check mark at the bottom right corner of an item, or a once grayed-out image gaining color.
A few of these categories are self-explanatory, either completable in-full through casual completion of Rethramis’s surface-level content, or straightforward enough to see natural accomplishment given enough time. For example, completion of Rethramis’s main quest and its three dungeons — Aquilok’s Head, Aquilok’s Tail, and Toxiclaw Cavern — will happen intertwined with one another during your first few hours of play spent in the region.
Related: How to complete the “Tragedy Written in Stone” quest in Lost Ark
Unlocking all Rethramis Triports, as well as reaching Trusted Rapport with Neria and Siera of Prideholme, will complete their respective categories as well. In addition, quests listed in the Another Story category are marked sidequests on your mini-map, meaning that you shouldn’t have to worry about missing out on this content during your first trip through the area.
Rethramis Adventurer’s Tome Collectibles
A major component of grinding out the Rethramis Adventurer’s Tome is gathering as many of its Collectibles as possible. These Collectible items are different from other monster drops in that they have a small, notepad-like icon at the bottom right of their inventory slots, and have no use in gameplay other than being added to the tome.
Collectible items have a rare chance of dropping from slain enemies in a given continent, where they first appear in your inventory. Right clicking a Collectible will then add it to the collection of that item type in your Adventurer’s Tome. Keep in mind that, depending on the rarity of a certain Collectible item, you will need to collect multiple duplicates of each item for a given Collectible to be considered “completed.”
The following Collectibles are necessary for full completion of the Rethramis Adventurer’s Tome. The Number listed correlates to the amount of duplicates needed.
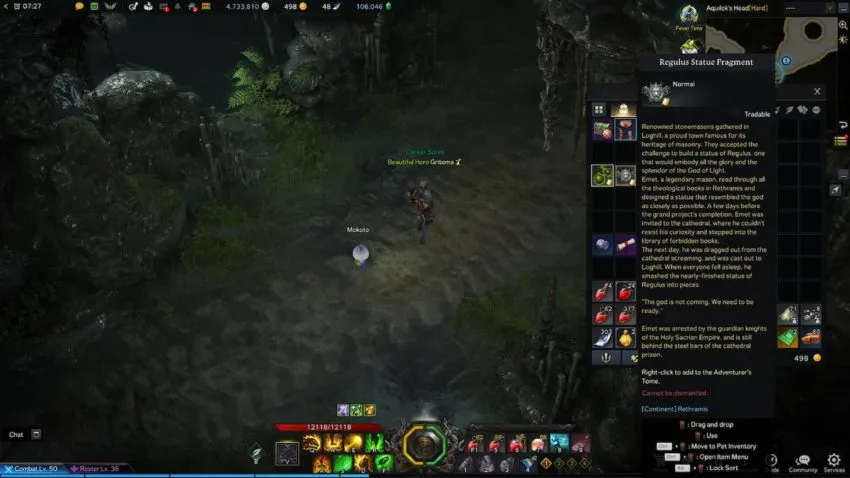
- Regalus Statue Fragment — 25
- Plague Spores — 25
- Book of the Priest — 10
- Grangor’s Tooth — 10
- Portal Stone — 4
- Aquilok’s Skin — 4
- Bloody Rod — 1
Getting a Collectible item to drop is an entirely RNG-dependent gameplay mechanic. The only way to improve your rates for dropping certain items is to increase the amount of standard enemies you kill in that particular region. This means that, for the sake of completion, you’re better off roughing up every monster you see.
Rethramis Adventurer’s Tome Cooking
Dining on all of Rethramis’s local cuisine is a must when it comes to completion. You must find, prepare, and consume seven different meals to clear the Cooking category. While one dish can be bought outright while browsing the shops in Prideholme, the ingredients for the rest must be tracked down somewhere in the continent’s wilderness and brought back to a competent chef.
Veda’s Prideholme-style Home Food
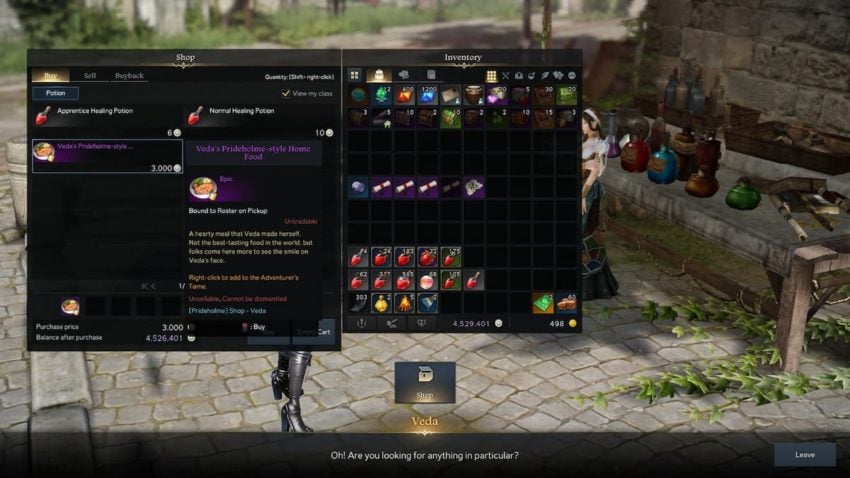
Veda, the potion shop owner doing business out of Prideholme’s north market, also sells servings of her homemade dish as part of her shop inventory. For just 3,000 silver, you can buy a helping of her Home Food, then right click on it from your inventory to add it to your Adventurer’s Tome.
Regria Flower Oil
To the southwest of the monastery in Rethramis Border and behind a guard sits a Regria Flower in some underbrush. Inspecting this flower by pressing G will extract a bottle of its oil. This oil can be consumed through your inventory, adding it to your Adventurer’s Tome.
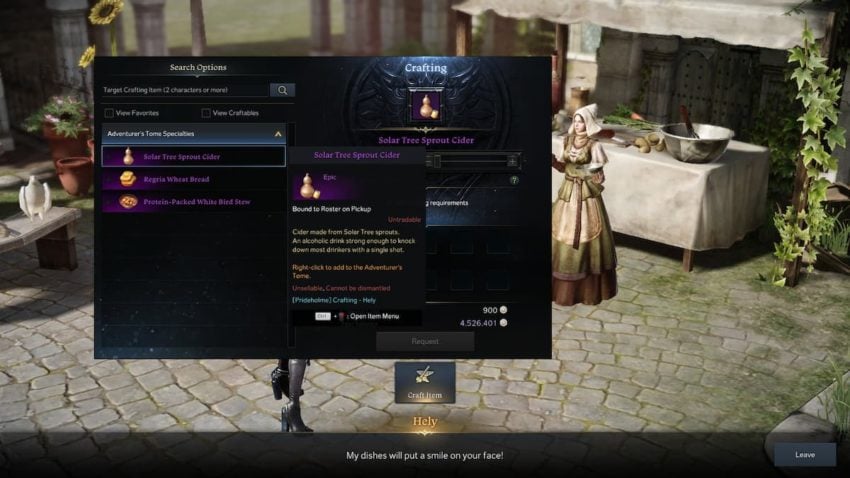
Solar Tree Sprout Cider
The northeast of Rethramis Border features a series of windmills that line a large, east-west path known as Wind Road. Behind one of these windmills is a bush that, when picked, yields a Solar Tree Sprout. You can then take this sprout back to Hely, the chef of Prideholme, who will turn it into cider for a fee of 900 silver.
Regria Wheat Bread
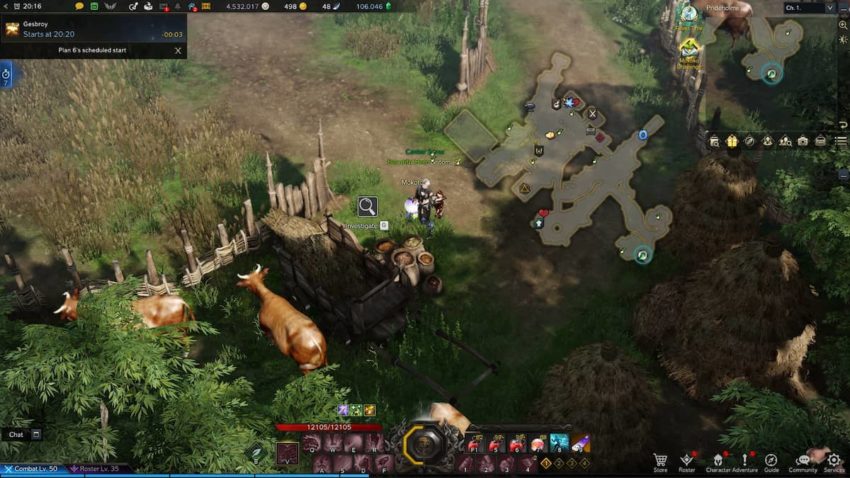
The southern point of Prideholme is home to vast farmland of grain and livestock. To the south of these homesteads is a cart that is strafed by sacks of wheat, where you can take one of these Giant Wheat Sacks for yourself. If you bring this wheat to Hely, she’ll bake you a loaf of Regria Wheat Bread that you can add to your Adventurer’s Tome.
Related: Where to find a wagon full of wheat in Prideholme in Lost Ark
Protein Packed White Bird Stew
The southeastern plains of Loghill are home to violent and territorial avian creatures known as White Birds. If you can fight through to the back corner of their den, you’ll be able to find a Disgorged Lump in a nearby bush. Bringing this lump back to Hely will reward you with a bowl of Protein Packed White Bird Stew.
500-year-old Mera Wine
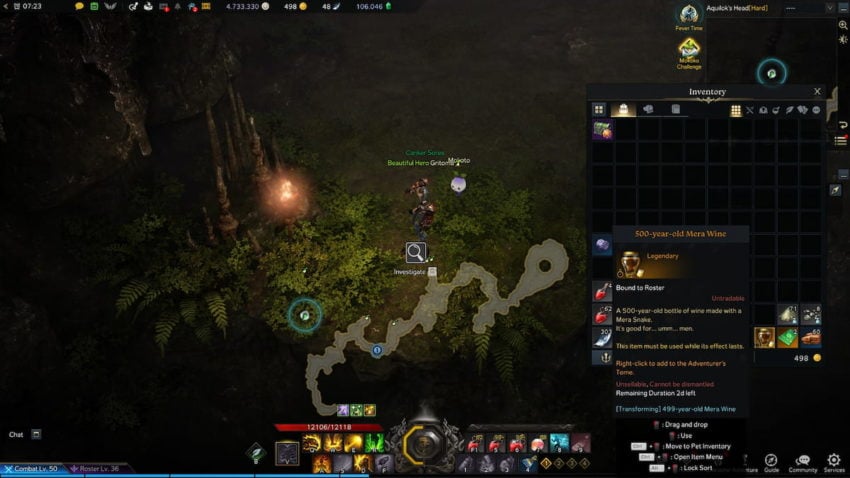
Just past the destructible cart in Aquilok’s Head, you can pull a lever leading to the rocky alcove on your left. Pulling this lever reveals a much broader secret cave to the northwest, revealing, amongst other things, a jug of 499-year-old Mera Wine. If you leave this wine in your inventory untouched for two and a half hours of real time, it will mature into the food item required in your Adventurer’s Tome.
Holy Potato with Teeth Marks
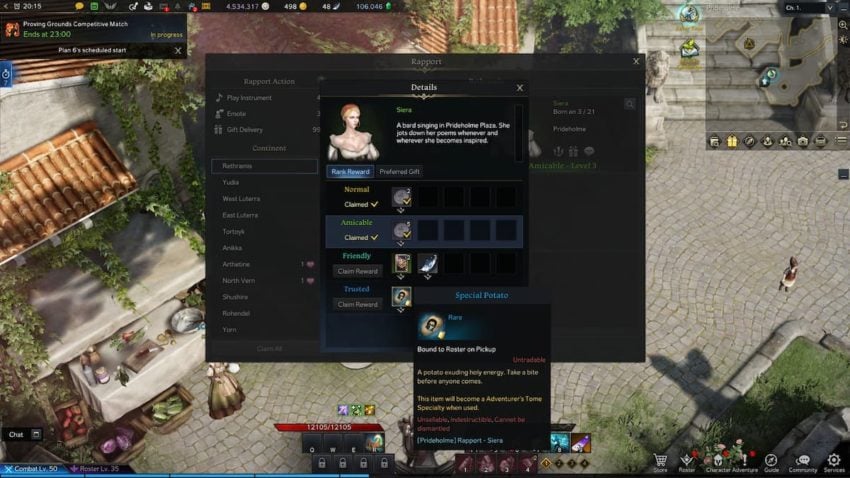
The Holy Potato with Teeth Marks is unlike other foodstuffs in the Cooking category, in that rather than finding it or having it prepared from ingredients, it is instead earned. You can only get the Holy Potato as a reward for reaching Trusted Rapport with Siera. Once the Special Potato is in your inventory, you can attempt to bite it by right-clicking it, only to fail and turn it into a Holy Potato with Teeth Marks.
Rethramis Adventurer’s Tome Vistas
Vistas are scenic locations in Rethramis that can be interacted with to present a panorama of the nearby environment. Appearing in the game world as floating telescopes, all eight of these Vistas need to be found and interacted with to fill out their category of the Adventurer’s Tome.
Chain War Memorial Tree Vista
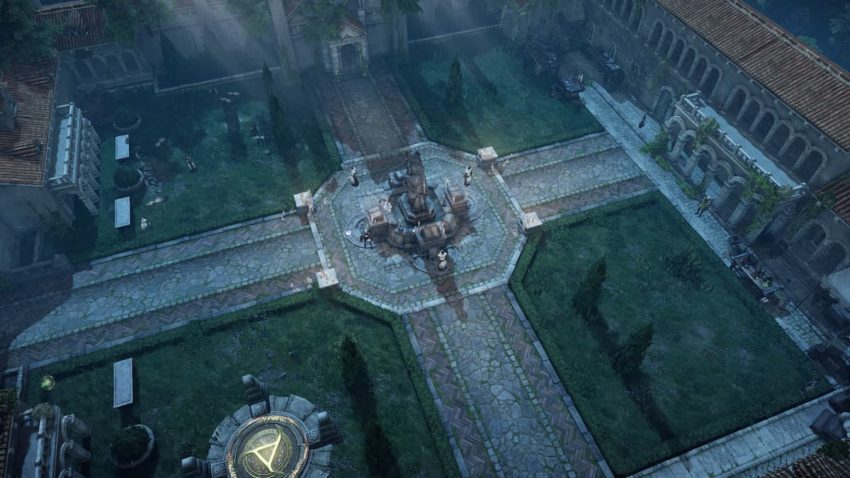
After completing the tutorial and entering Prideholme through its chapel, you’re bound to quickly see the Vista telescope spot next to the tree on your left. Interacting with this point by pressing G will play a short cutscene overlooking the town below. After the cutscene ends, this Vista will immediately be added to your Adventurer’s Tome.
Church Ruins Vista
While exploring Loghill, you’ll be drawn toward an abandoned church on a hill for an instanced quest. The quest itself sees you clearing out the band of bandits who call the church home, and once you do so, you’ll be returned to the overworld while still within the church itself. Once freed from the instance, you can interact with the Vista spot positioned in front of the altar, adding it to your tome’s Vistas category.
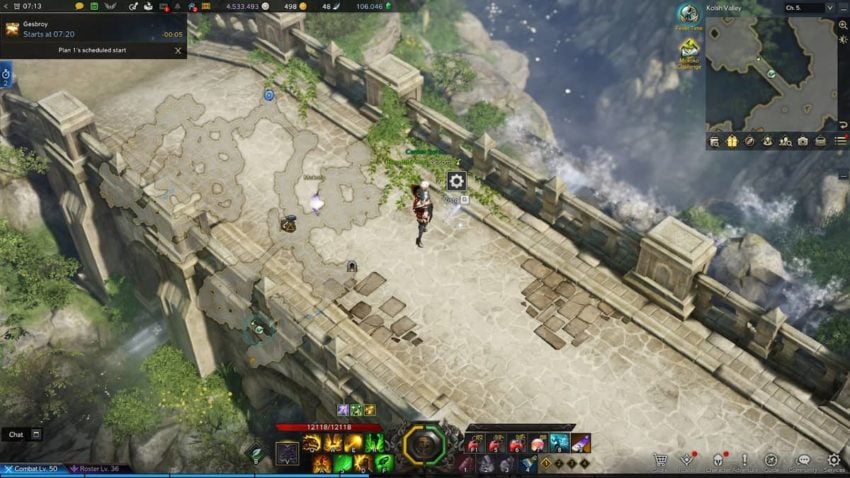
Collapsed Bridge Vista
Just south of Toxiclaw Cavern in Loghill is the damaged bridge that was encountered during the prologue. On the south side of this bridge is another Vista spot, which pans the camera out over both the out-of-commission structure and the ravine below.
Old Fishing Spot Vista
The southwest corner of Loghill features a Vista spot hidden between Moss Wolves and other hostile monsters. After clearing them out, you can interact with this Vista, which overlooks a shady fishing spot in the middle of the forest. This Vista can easily is a short walk south from the nearest Triport.
Rethramis Border Monastery Vista
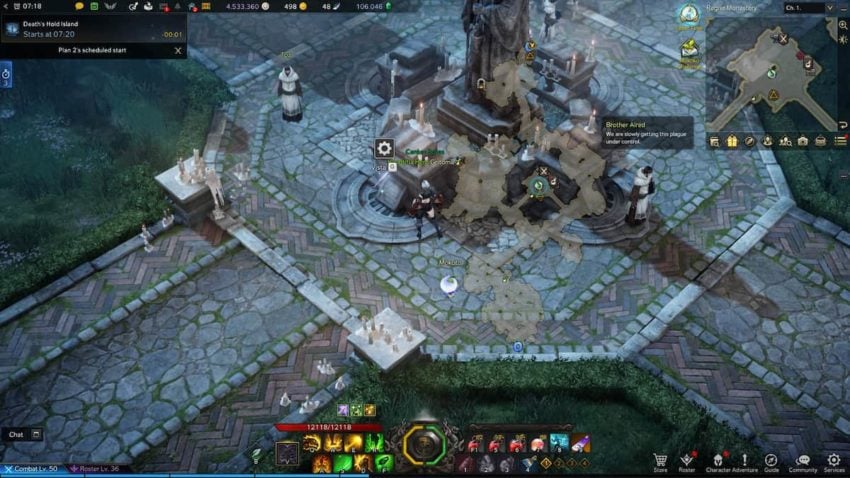
The name of this Vista point should make finding it self-explanatory. After aiding the monastery at the center of Rethramis Border, a telescope spot should appear to the south of its central statue. This spot happens to be very close to the Monastery’s local Triport.
Statue of the Goddess Vista
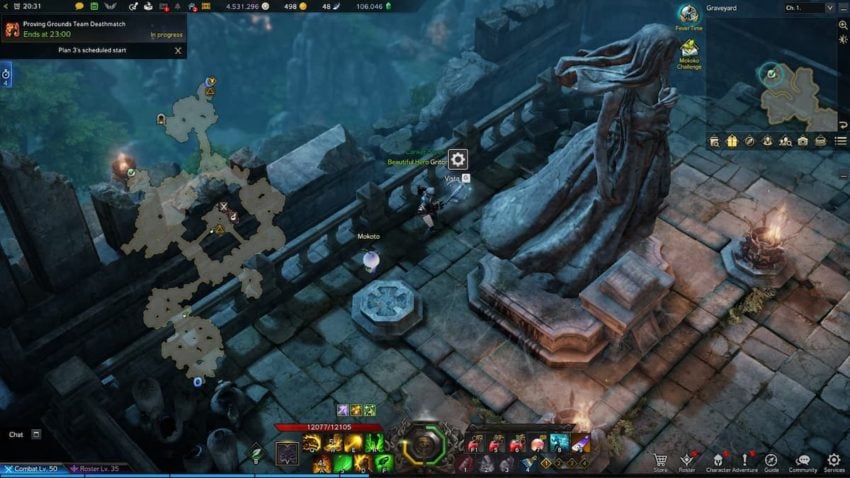
The graveyard to the northwest of Rethramis Border’s monastery features a massive statue dedicated to a goddess in the northernmost clearing. While hostile ghosts roam this area, you can either clear them out or kite around them to reach a Vista spot located behind the statue.
Valley of Falling Water Vista
Just south of Ankumo Mountain’s Border Watch is a clearing that, at its easternmost point, features a Vista spot near a waterfall. Keep in mind that this area is populated with aggressive spiders that will attack you as you attempt to view the Vista, which can interrupt the process. Try clearing out all of the spiders before you log this one in your Adventurer’s Tome.
Waterfall Bridge Vista
This Vista spot can be found halfway across the northwest-leading bridge that connects the Loghill Outpost to the Traveler’s Nook in Loghill. Relatively equidistant between two Triports in the area, the quickest way to find this Vista is by Triporting to the outpost and taking a left at the northern fork.
Rethramis Adventurer’s Tome Monsters
When fighting regular monsters in Rethramis, you may notice that some of them have what appear to be gold masks floating above their heads. When slain, they will provide data to their respective entries within the Adventurer’s Tome, under the Monster category.
These monsters, known as Unique Monsters, spawn randomly in areas that their kind inhabit. Tracking most of them down, while more often than not a game of chance, takes some exploration through the open fields of Rethramis’s different regions, as well as the patience to wait on the correct spawn. A few Unique Monsters in this exhaustive set of 15, however, have only one set spawn each, and thus must be specifically traced down to their respective lairs.
Flesh-Eating Spider Boss
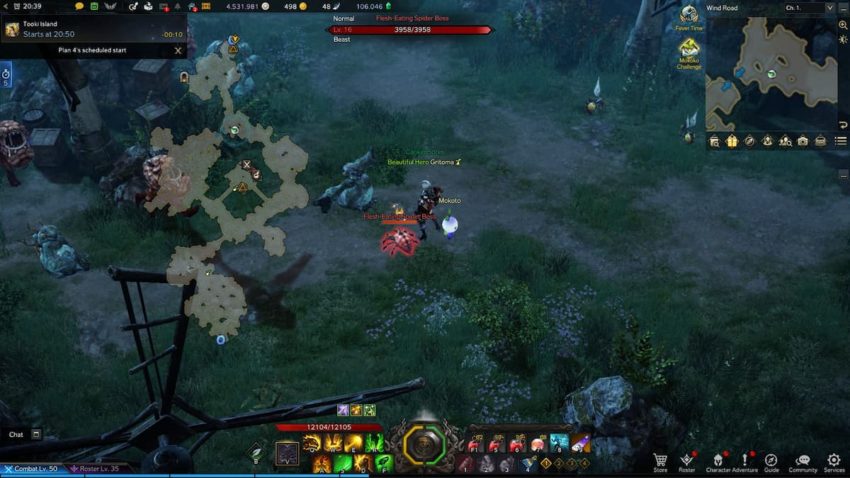
This tiny white spider is the only member of its kind, and as a result, it takes residence among other monster species that are native to Rethramis Border. The Flesh-Eating Spider Boss can be found at the very northern end of Wind Road, due south of Aquilok’s Tail. This single-spawning monster will always spawn as its Unique variant, meaning that you won’t have to grind or get lucky with spawns in order to add it to the Adventurer’s Tome.
Decomposed Infected
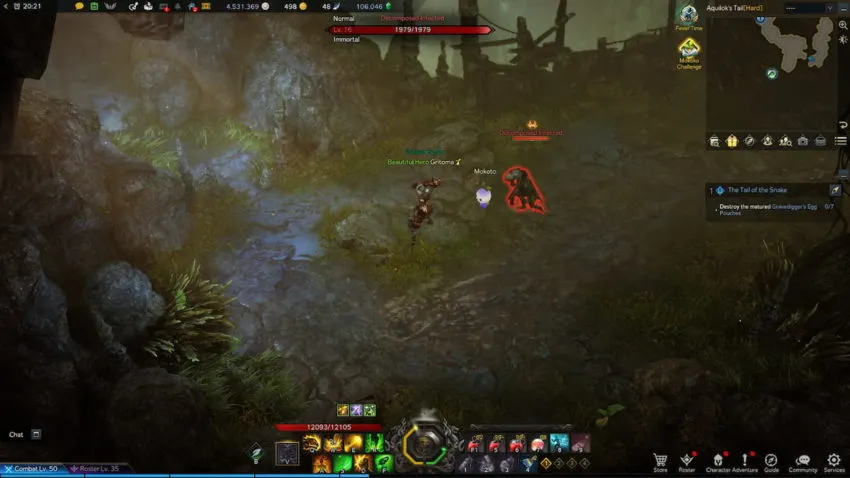
The Decomposed Infected is the only Unique Infected that can spawn in all of Rethramis. None of the other Infected across the continent, including the hordes of Wandering Infected that shamble throughout Ankumo Mountain, have a chance to spawn as Unique in its place.
The Decomposed Infected will only appear in a secret cave outside of the drawn map in Aquilok’s Tail. After jumping over the first gap, if you take a sharp left and continue walking, you’ll notice that the rounded alcove on the mini-map is far deeper than it appears. It’s in this den where you can slay and add the Decomposed Infected to your Adventurer’s Tome.
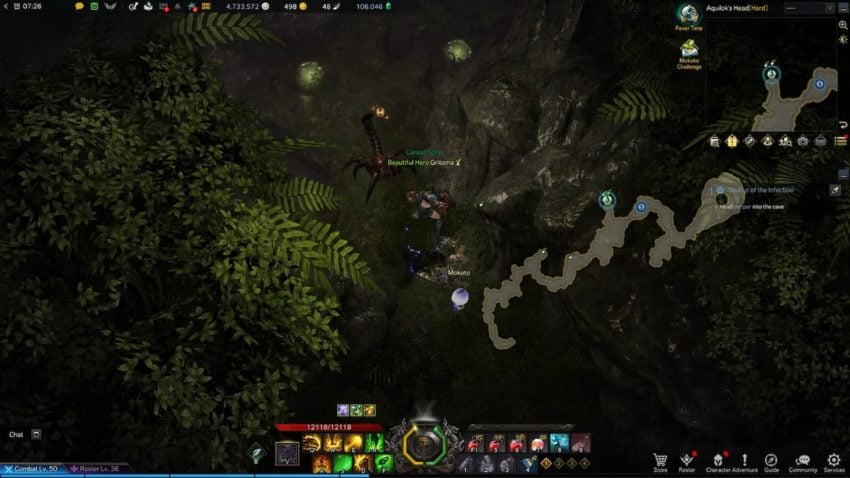
Stinky Gravedigger

As exemplified by the other species of Gravedigger in Rethramis Border, the Stinky Gravedigger is a toxic, flying insect that can only be found in Aquilok’s Head. The last of its specific kind, the Stinky Gravedigger only has one set spawn position, and will always spawn as Unique.
If you happen to be completing all of your Adventurer’s Tome in one go, you can conveniently find the jug of 499-year-old Mera Wine in the Stinky Gravedigger’s lair. Both pieces of completionist content lie behind the fake rock wall that moves after pulling the hidden lever on the floor.
Giant Thornwalker
Much like the Stinky Gravedigger, the Unique variant of the Giant Thornwalker has a guaranteed spawn within a secret component of Aquilok’s head. Unlike the Gravedigger, however, the Unique Thornwalker resides in a separate lair in a different part of the dungeon.
A little bit further to the east, you’ll notice a finger-shaped alcove to the north that seemingly leads to nothing. However, attacking the rock wall to the north will break it down, revealing a small pocket with the Giant Thornwalker inside. This secret area is also notable for hiding two Mokoko Seeds in close proximity to one another.
Rethramis Adventurer’s Tome Hidden Story
The Hidden Story is an unmarked quest-line featured in each continent’s Adventurer’s Tome that revolves around a series of secretly-placed notes in inconspicuous places. The tome will include hints as to where in a certain region each note lies, though these hints are very cryptic spots and directions. The following seven notes are scattered around Rethramis.
The Hidden Past of Varut
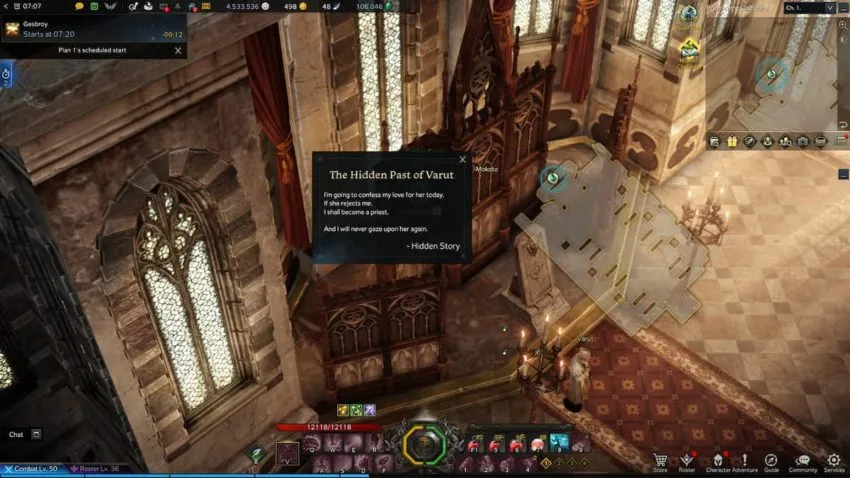
The first note leads you behind the altar of Prideholme Cathedral, past the dividing walls. While you may not be able to see anything behind these screens, there is a note here, hidden from view, that can be examined by pressing G. Reading this note will clear the first stage of Rethramis’s Hidden Story in the Adventurer’s Tome.
The Truth of a Drunk
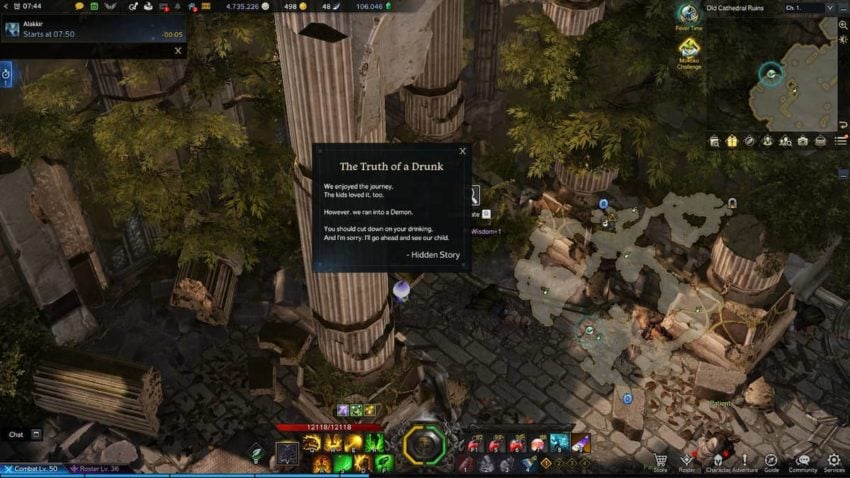
The second note’s hint will lead you out to the ruins that you first encounter when entering Ankumo Mountain from Loghill. To the northwest of these ruins is a small commune of sick adventurers, who are resting in what is left of a former cathedral. At the northeastern wall of this ruined cathedral, you can find a second note lying in a pile of marble rubble.
Burnt with Love
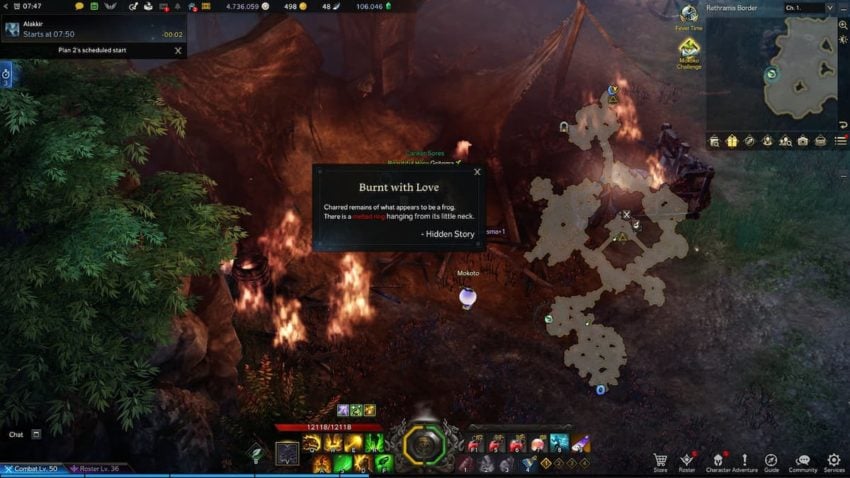
Entering Rethramis Border from the south, you’ll quickly encounter former communes and caravans set ablaze. To the west of the second clearing, you’ll find and recover a note that’s nestled in between two burning tents.
The Cursed Grave Keeper
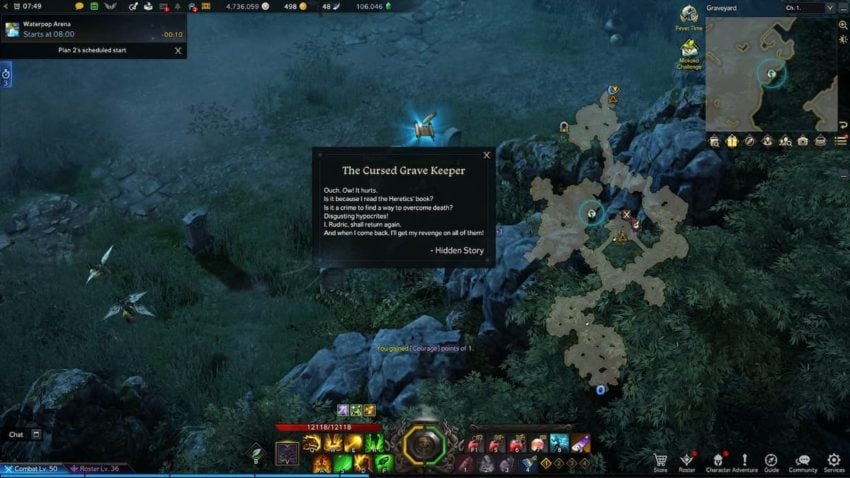
Starting from the central monastery of Rethramis Border, head north toward the graveyard, then east until you encounter a cluster of headstones along the southeastern wall. One of these graves hides the fourth note of Rethramis’s Hidden Story.
Korumba’s Cat

Head back to Prideholme and run down to the farmland at the southern tip of the town. Along the fence of the western homestead is yet another headstone of some sort. Examining this headstone will reveal the Hidden Story’s fifth note.
A Knight in Shining Armor
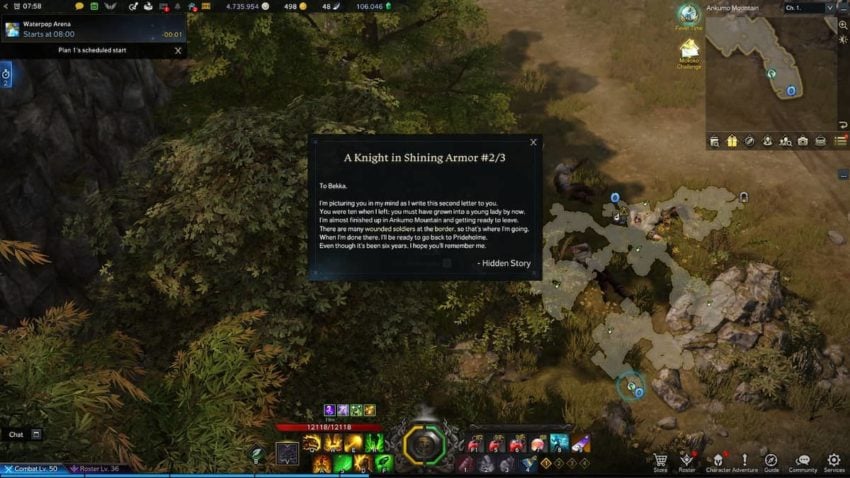
The sixth part of the Hidden Story features one note hidden in three separate locations around Rethramis. The first portion of this note can be found in the rope pile due north of the Triport in Loghill’s Traveler’s Nook.
Next, head due north toward Ankumo Mountain and walk toward the ailing crowd of people on your left. Passing through this crowd to the left, toward the treeline, you should find the second portion of the note.
Now teleport to the monastery Triport in Rethramis Border, then run south toward the plagued masses in the Makeshift Infirmary. Toward the very southeast of this camp, you should find a cart carrying the third and final piece of the sixth note.
Sunflowers for My Love
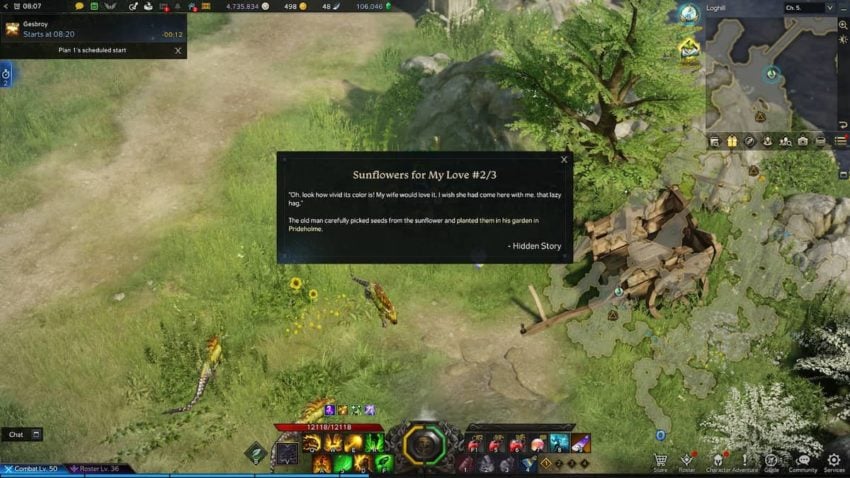
The seventh and final note for this Hidden Story is also broken up into three smaller notes, with each of them scattered across a wide area. To start, head back to Prideholme’s farmland and examine the front door to the northeastern farmhouse. This will send you on a search for a garden in Loghill.
Related: How to find and complete the Knight in Shining Armor Hidden Story in Lost Ark – All letter locations
From the Triport in Fiona Plains, head northeast toward the nearest bridge, then turn to the right and head for the treeline. Next to a broken-down cart is a patch of sunflowers, which bears the second piece of the note.
With sunflowers in mind, head back to the Prideholme farmhouse that you had visited previously. To the right of the door is yet another patch of sunflowers. Searching this patch reveals the third and final note piece, completing Rethramis’s Hidden Story.
Rethramis Adventurer’s Tome Boss
Continental Adventurer’s Tomes often feature local world bosses, or bosses that spawn in the overworld and encourage passing players to all contribute to a large-scale boss fight. Rethramis only features one world boss, Rudric. Scaled to be the easiest world boss in the easiest continent of Lost Ark, the biggest challenge to facing Rudric is actually finding him in the first place.
A former high priest, Rudric is set to spawn in the northern Graveyard of Rethramis Border. However, the rate at which Rudric can spawn is heavily restricted, as he is intended to be fought only occasionally. If a group of players in your server had previously swept through and defeated him, it’s unlikely that he will respawn for another 30 minutes of real time.


Published: Sep 4, 2022 09:25 am