The Ichthyosaurus Offspring, referred to as The Worm or The Itch, is a primary boss for the second level of Gunfire Reborn. After heroes make their way through the desert, this boss will be waiting for them until it has been cleared once, which allows for the engagement against the secondary boss, the Wind God.
The Worm is a relatively straightforward battle once it has been understood, although it requires throwing some common sense out of the window. For the first part of this battle, players will consistently be inches away from death.
Related: How elemental fusion works in Gunfire Reborn
The Ichthyosaurus arena
The arena for The Worm is circular, taking place in an area called the Quicksand Pool. Thankfully, quicksand doesn’t spawn during this boss fight, so players should focus on the primary enemy here: The Worm itself. Some pots litter the edges of the arena, which can be helpful on later Reincarnation difficulties to restock on ammo mid-fight.
The Ichthyosaurus weak spot
The Worm has two weak spots, much like the Golem boss battle: inside of its mouth and the entire end of its tail (which looks like a fan). For the first stage, it will use a laser from its mouth to engage from the center of the arena, and for the second stage, its tail will be the target of choice. Corrosion damage can help mitigate its armor — failure to engage its crit zones can, and will, result in emptied ammo bags, thanks to a flat-damage mitigation percentage on hits outside of weak spots.
The Worm’s laser attack
When players initially enter the arena, The Worm will spawn in the center with its mouth closed. It then points its mouth slightly to the left or right of the player, opens its maw, and begins discharging a massive dust-laden laser while pivoting toward players. Heroes will want to be close enough to the mouth to fire their weapons into the mouth of The Worm while strafing away from the laser moving towards them.
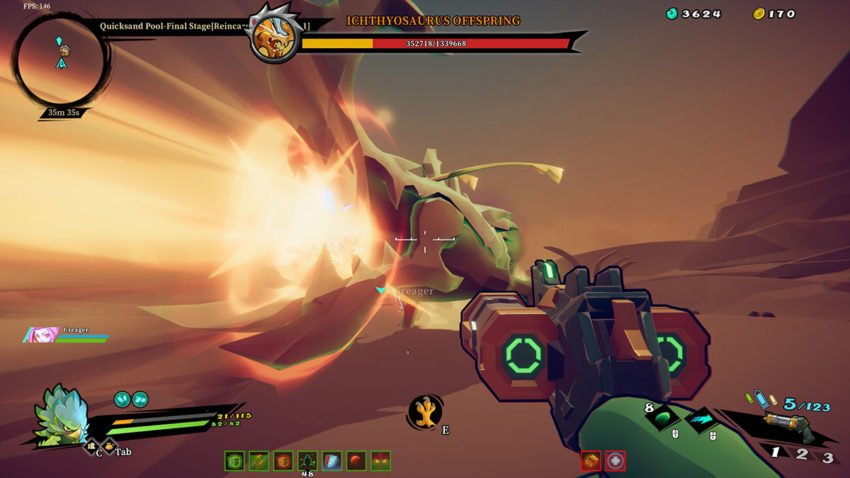
The result is a harrowing dance with death, but the laser will not move quickly. Holding at least a movement speed of three after calculating curses, scrolls, and ascendancies is enough to dodge this laser. Stay close, trust the process, and strafe away from the laser. Once enough damage has been done, the Worm will burrow and leave the arena.
It should be noted that this is one of the very few boss stages in the game where having a cooperative partner doesn’t help. The focus on a single player, the narrow opening for the crit spot, and the damage mitigation all combine to render the other players mostly worthless. The Worm can change targets, however, so pulling out your tertiary weapon and popping the pots on the outside while standing close to the middle is a wise use of time.
The summons of the Worm
In between attack stages, the Worm will summon minor enemies to harass players. Typically no more than four, these enemies grow in strength the longer the Worm lives. Desert Boars are the first summon, followed by Desert Coyotes, then Fire Lizards. Failing to eliminate the Worm within a certain time exponentially increases the threat of these summons.
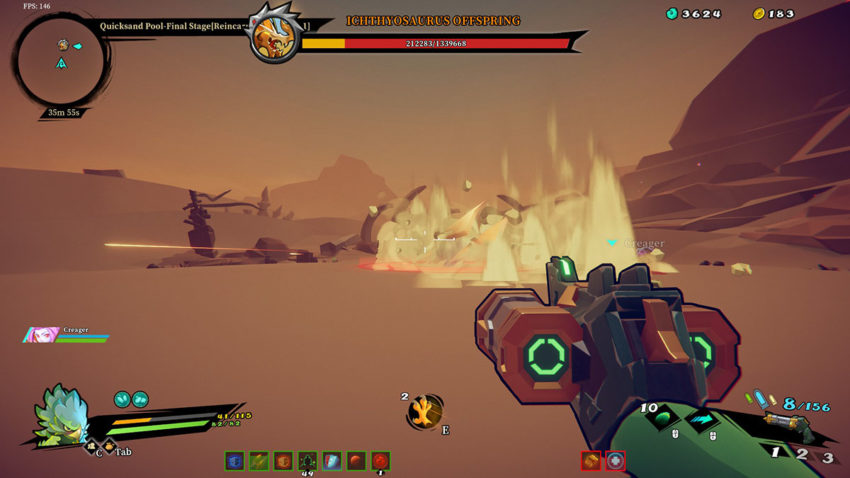
Eliminate most of the foes, using abilities and elemental damage as necessary to regain lost health and armor/shield, then kill the final one to bring the Worm back to the fight.
The Bite of the Worm
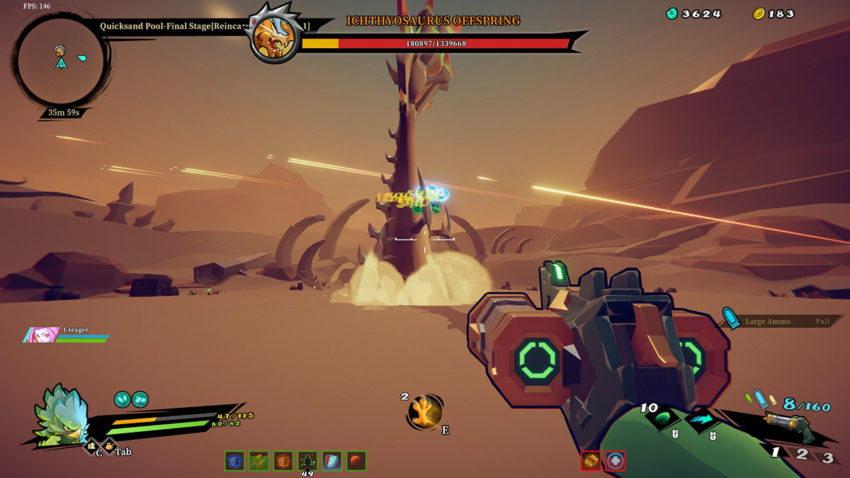
Once the Worm re-enters the arena, a red circle will appear on the ground that it burrows towards. You can safely engage the top of the Worm that is visible above the sand, especially with corrosive damage, but the priority is to leave the red circle.
One of two things will occur when the Worm is burrowing towards a red circle: either it will leap from the sand, head first, in an attempt to bite a hero, or it will raise its tail. Step out of the attack indicator and watch: if the head appears, save your ammo.
The Tail of the Worm
If a tail appears from the sand, it’s time to unleash the DPS. Aim at the end of the tail that looks like a fan, and push as much damage as possible. The tail has two possible attacks: a poison rain, which sends corrosive orbs through the air and creates a damaging (and slowing) pool of acid, and a shockwave attack.
If the tail is poised upright, it will begin raining poison orbs onto the arena. These orbs create pools that can be deadly to players, but the orbs can be shot out of the sky. Which tactic you’ll want to use depends on your current damage output: if the Worm’s health drops quickly, it may be wisest to attempt to end the engagement by focusing fire on the tail rather than bothering with the orbs. If you’re with a party, determine who will keep orbs from fouling up the arena.
If the tail is towards the ground, that’s the tell that it will begin pushing shockwaves by thumping its tail onto the ground. This results in shockwave rings being blasted out from the tail, which players will need to jump over. Standing in a ring of poison can result in the player not successfully clearing the shockwave, which pushes players away from the tail.


Published: Jul 7, 2022 02:55 am