There are multiple quests that you’ll be working to complete as you play through The Legend of Zelda: Tears of the Kingdom, and one of the first ones you’ll find is called The Closed Door. This quest serves as a basic tutorial to go through some of the standard gameplay mechanics you’ll be using throughout your time with the game.
The Closed Door quest will take you all over the Great Sky Island, the starter area where you begin. For those who have already played Breath of the Wild, much of these mechanics will be familiar to you. However, it also introduces a handful of new mechanics, making it a great way to begin your adventure as you return to Hyrule. This guide covers how to complete The Closed Door quest in The Legend of Zelda: Tears of the Kingdom.
All The Closed Door quest steps in Tears of the Kingdom
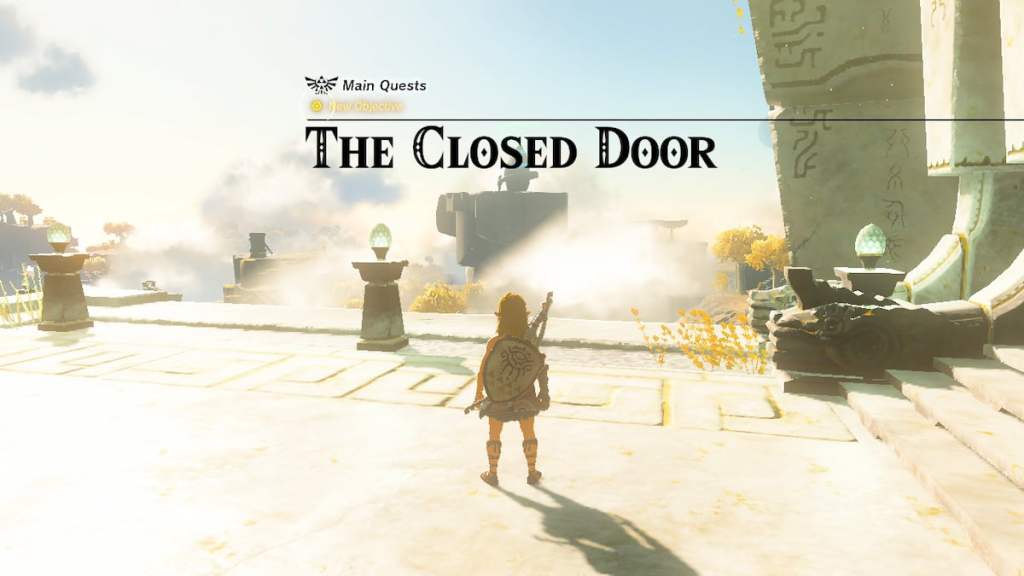
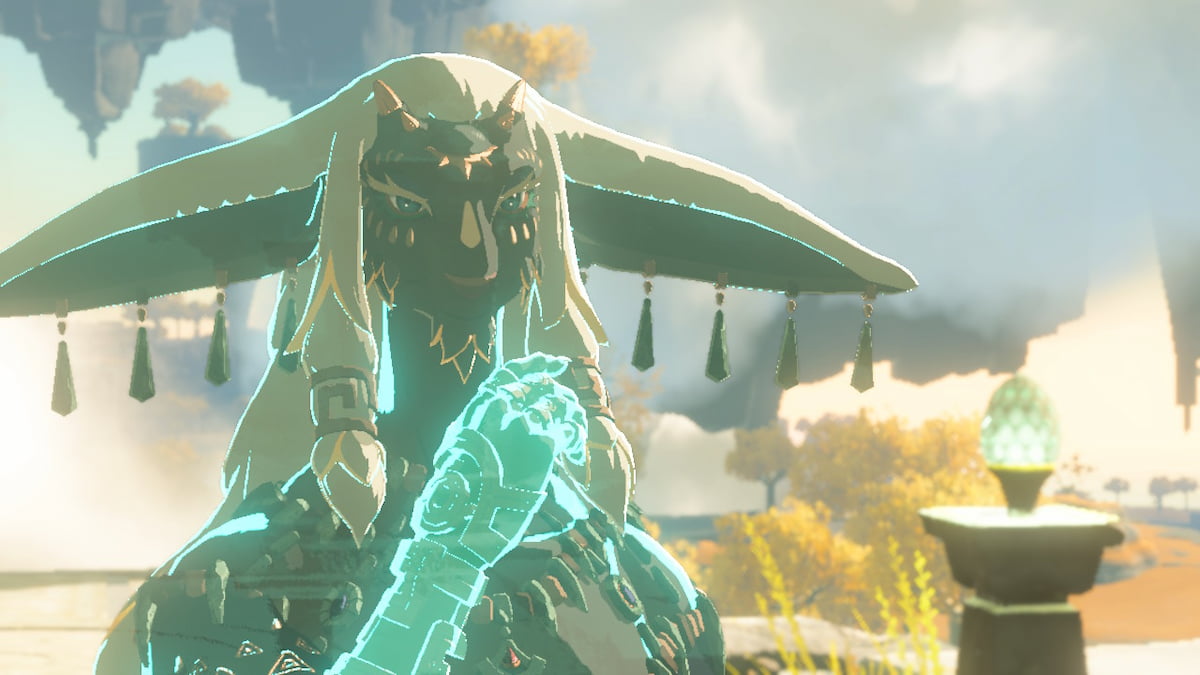
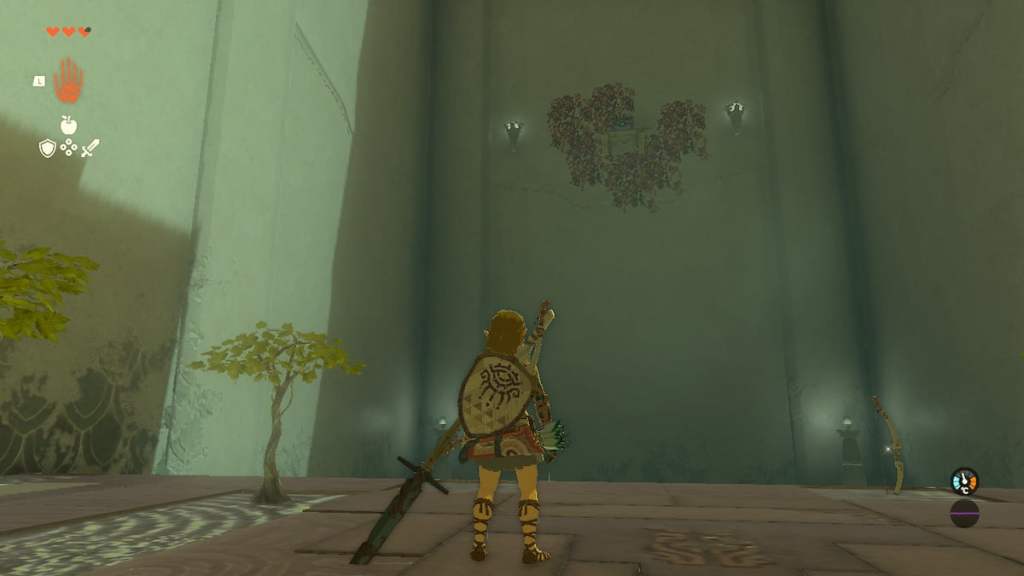
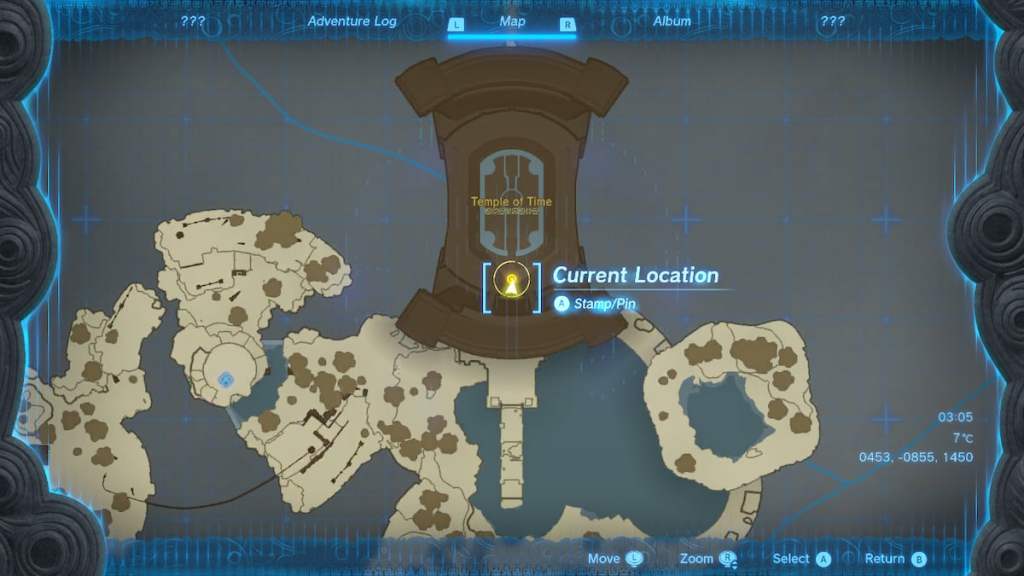
You will receive The Closed Door quest shortly after you attempt to open the front of the Temple of Time, which is associated with the Find Princess Zelda quest you receive when you start Tears of the Kingdom. Shortly after reaching the door, Rauru appears to tell you that your Ultrahand is not fully charged yet, and you need to visit all shrines on the Great Sky Island to reactivate it.
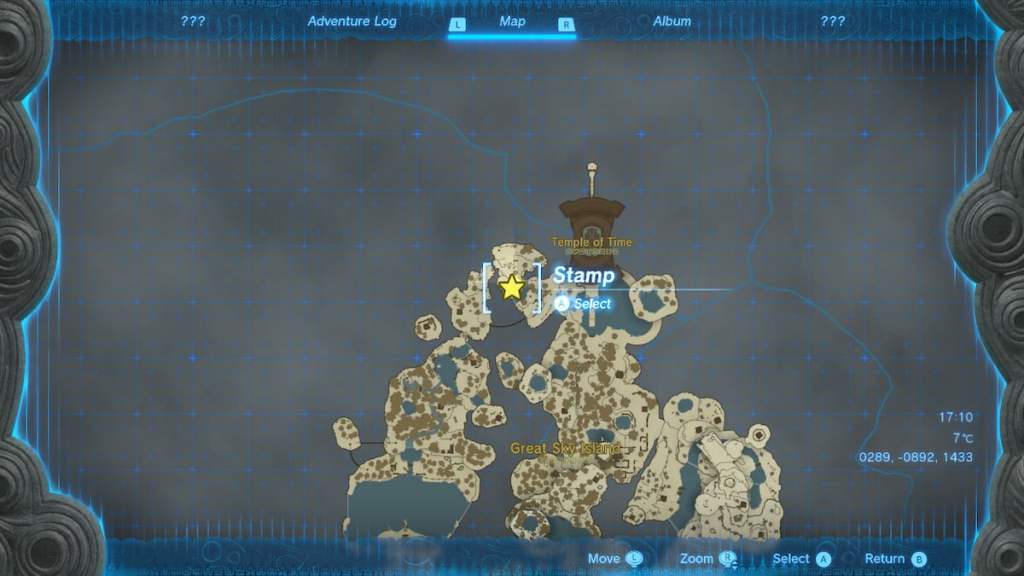
These three Shrines are scattered throughout the island, and Rauru points you in the direction of finding the first one: the Ukouh Shrine. This location is west of the Temple of Time, and you’ll need to climb up the rock to reach it the top.
Once you reach the Ukouh Shrine, the door will open, and you can head inside it to unlock the Ultrahand ability in Tears of the Kingdom.
How to Complete the Ukouh Shrine in Tears of the Kingdom
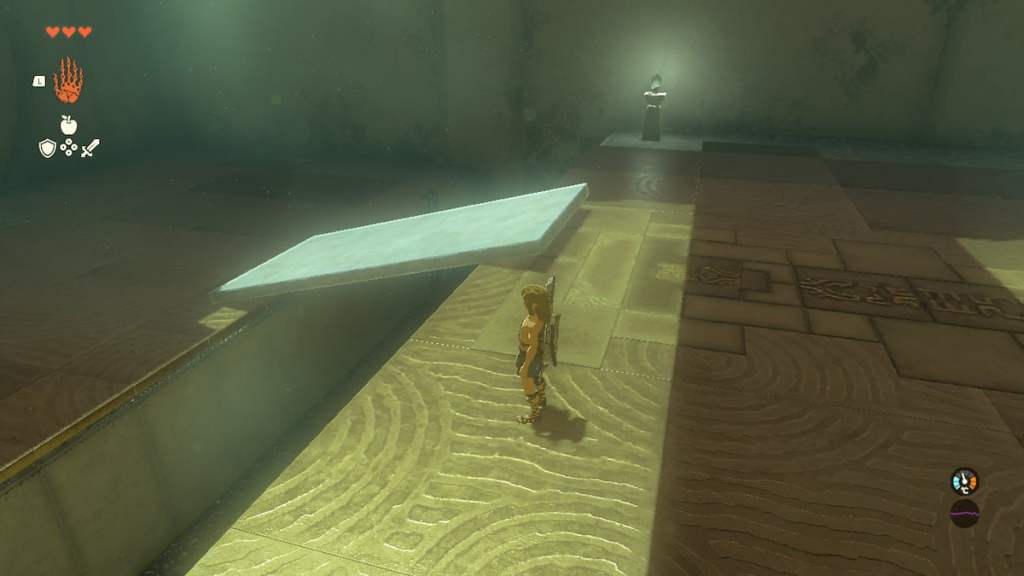
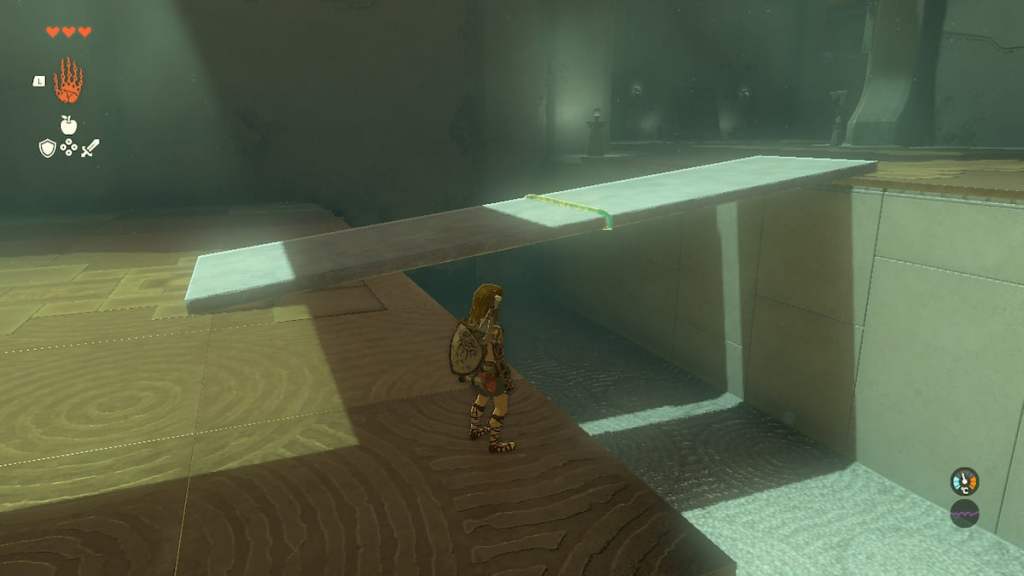
The Ukouh Shrine serves as a tutorial area to share with you how to use the Ultrahand ability. A large gap will prevent you from jumping to the next area. You get across by using the Ultrahand ability on the stone slab near you and create a makeshift bridge so you can cross to the next platform.
When you reach the next platform, you’ll need to repeat the process. However, instead of using one, you’ll need to do it to two stone slabs, and you need to fuse them. You can fuse them in the best method that gets you across, but we’d recommend fusing them at their ends, creating a larger stone slab.
The final Tears of the Kingdom puzzle will be a bit more complicated. Rather than having stone slabs as a bridge, you’ll need to use the wire. The way you do this is to attach the metal hooks you see on the ground, have them pointed up, and fuse them to the wooden pieces you find on the floor.
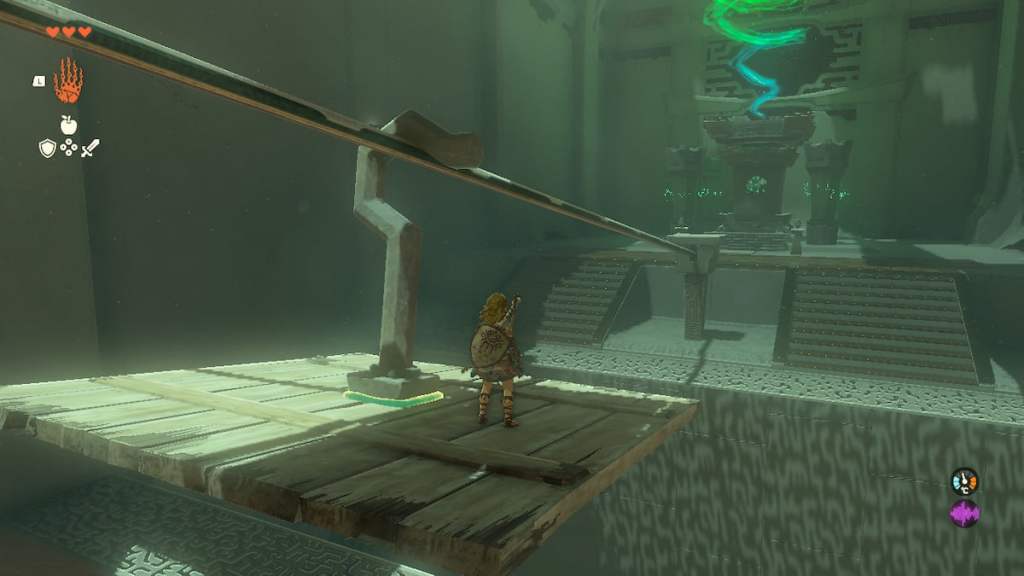
With those attached, move your newly created item to the wire, then jump on. You should fall to the other side, and reach the end of the Ukouh Shrine.
Upon completing the Ukouh Shrine, Rauru will congratulate you on your progress. However, there’s still work to be done. The Ultrahand has not completely powered up, and you need to track down two more shrines on the Great Sky Island to fully empower it. Unfortunately, Rauru does not detail the locations of these shrines.
How to Find The Second Shrine on Great Sky Island in Tears of the Kingdom

The second shrine on the Great Sky Island in Tears of the Kingdom you need to visit will take you west of your current location and then to the south.
The quickest way to make your way over here is by following the path to your south, and you’ll find another wire with multiple metal hooks nearby. These are similar to the last puzzle in the Ukouh Shrine and follow the same logic. You’ll need to attach metal hooks to logs and slide across to the other parts of the island to the west.
When you reach the other side, you’ll need to use the Ultrahand ability once again to attach logs to a small gap and make your way across. We recommend sticking at least two logs together and another two to the front to create a bridge, and walk across. You can also choose to use the Ultrahand on the nearby boat, but there are wooden logs and masts at the next location, so don’t worry about this too much.
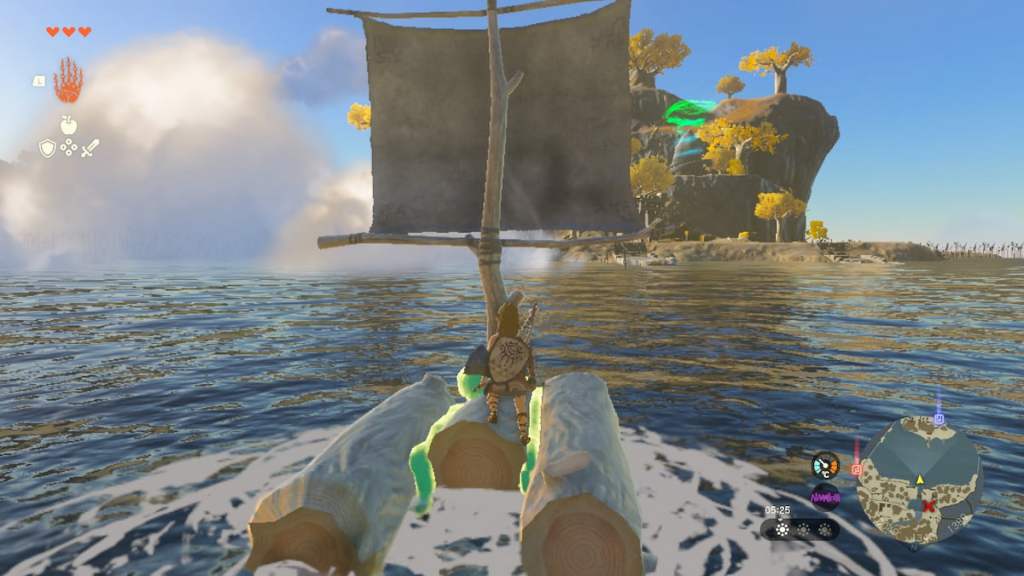
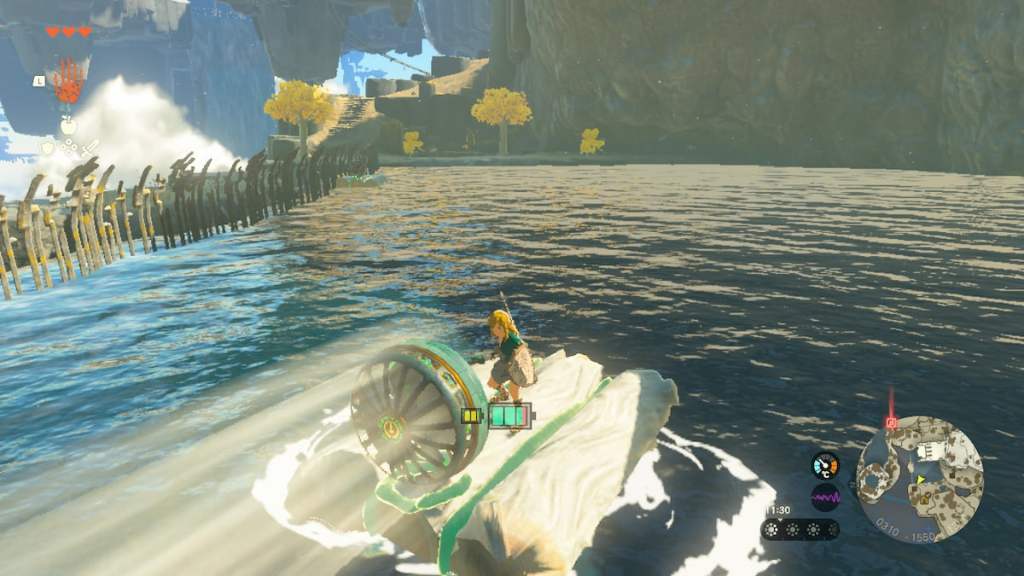
After you make your way further south and reach the large lake, the next step is to create a makeshift boat. You can do this by fusing multiple logs with the Ultrahand and then placing a mast at the top. The winds at this location are strong, so once your boat is in the water, it will sail to the other side, allowing you to reach the second Tears of the Kingdom Shrine: the In-isa Shrine.
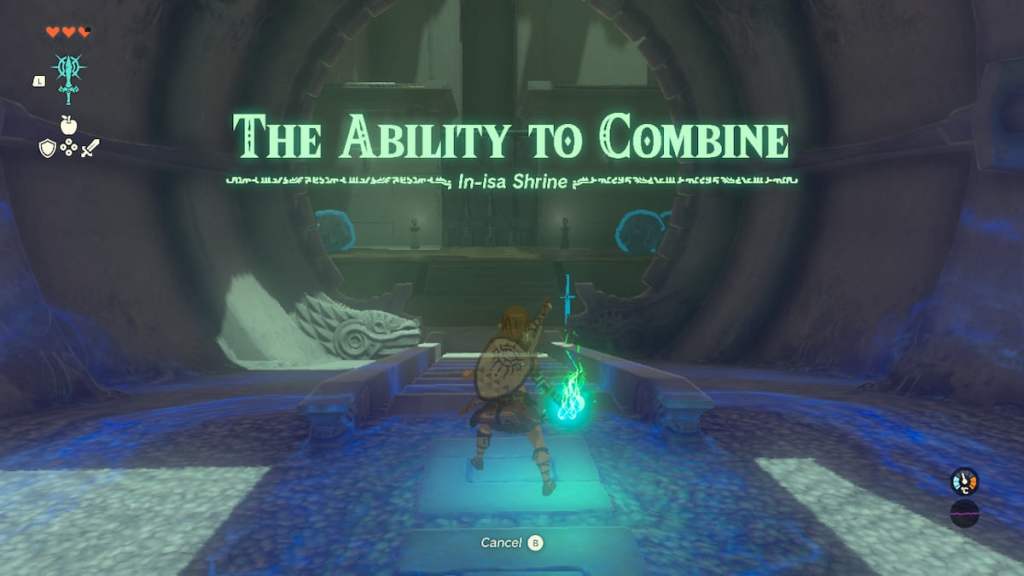
How to Complete The In-isa Shrine in Tears of the Kingdom
The In-isa Shrine is the second one you need to complete for The Closed Door quest. When you enter this location, you unlock the Fuse ability, the second ability that you can use with your Ultrahand. With it, you can fuse materials and objects you find in the world with your shield, weapons, and arrows.
The first puzzle room in the In-isa shrine does not utilize the Fuse Tears of the Kingdom ability. Instead, we used the Ultrahand to stack the three boulders in the room to climb over the wall and reach the other side. When you complete this for yourself, a locked door will stop you in your path, and it requires a key.
You can find this key in the room on the right, which contains multiple Fire Fruits for you to pick up. Grab at least one of the Fire Fruits, proceed into the next room, and use the Fuse ability on your arrows with a Fire Fruit.
Aim your arrow up and across the room at the wall of vines underneath the wooden chest. Your arrow will destroy the vines, and the chest will fall to the contain. It contains a key you can use to unlock the door.
When you reach the room on the other side of a door, there will be a Tears of the Kingdom Zonai that you need to battle against. It’s much stronger than the others you’ve already fought. We recommend going to the platforms to the left or right of the room and grabbing the Fire Fruit from these locations. You can then attach them to your arrows using Fuse, and then light the vines underneath the Zonai, damaging it.
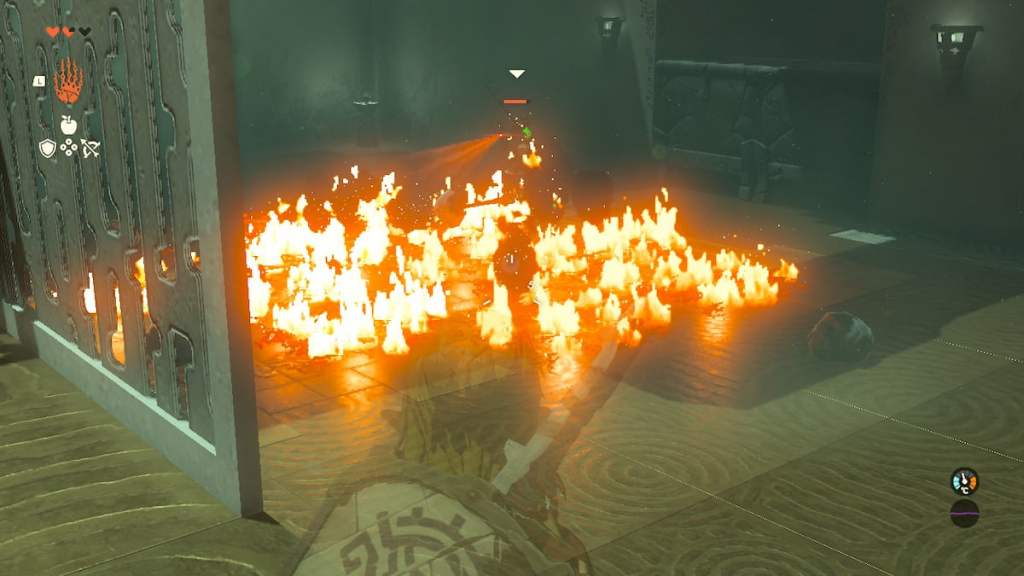
This likely won’t take it out, so make sure to fire another arrow at it from afar. It’s a good way to prevent yourself from taking damage during this portion, and you reach the end of the Shrine after you’ve defeated this Zonai. You can now use the Fuse ability outside of this location. Your next goal is to reach the final Shrine on the Great Sky Island in Tears of the Kingdom.
How to Get to The Third Shrine on the Great Sky Island in Tears of the Kingdom
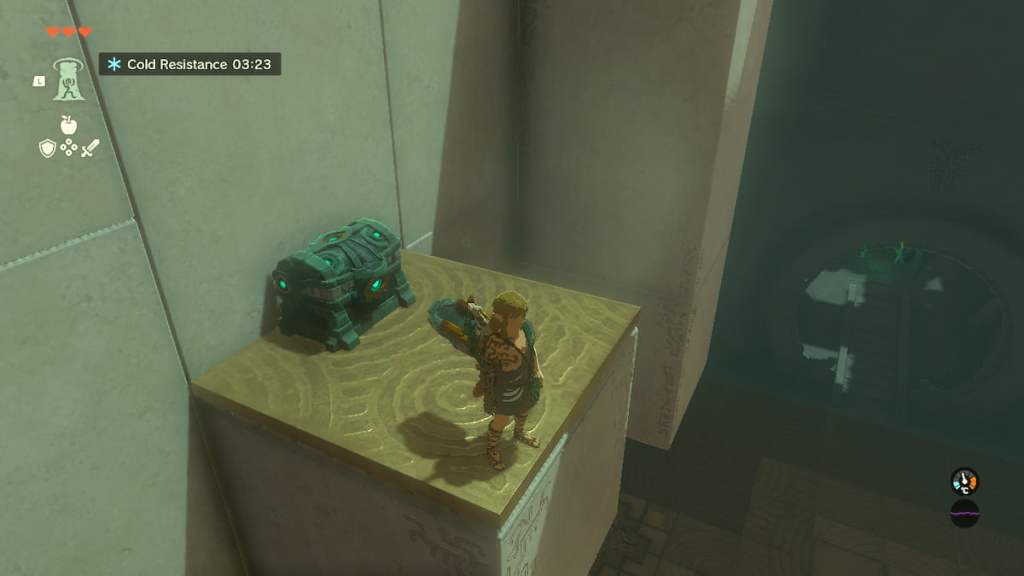
Now, to find the third Shrine on the Great Sky Island in Tears of the Kingdom, proceed to the eastern part of the region. This is where you can find the final Shrine to complete The Closed Door quest. However, this will be the toughest of the three as it requires you to acquire Cold Resistance food to protect against freezing weather.
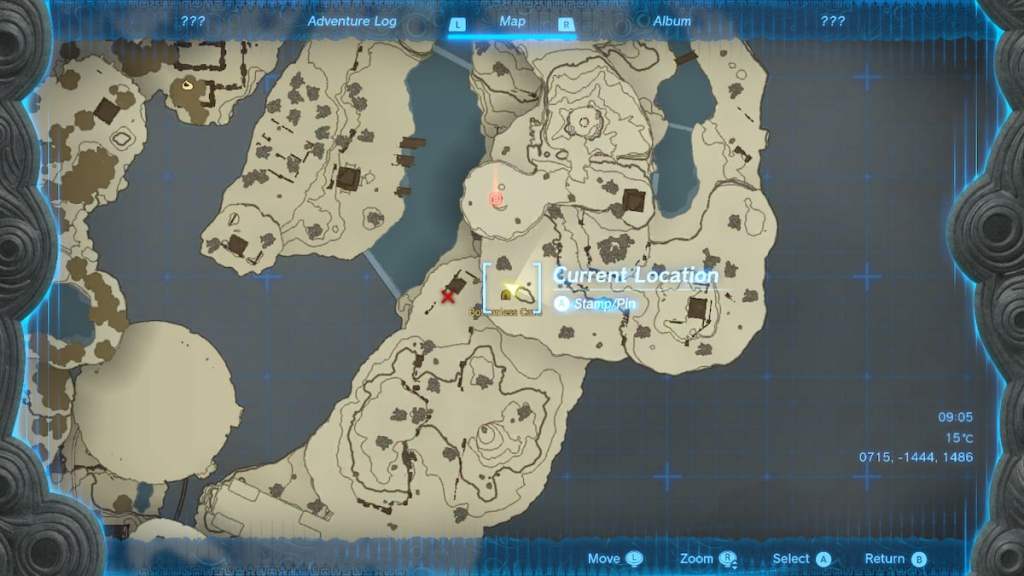
The quickest way to reach this cave is to make your way to the south of the In-isa Shrine and to the Pondside cave. This will be a small cave you can explore, and where you’ll learn about Tears of the Kingdom’s Brightboom Seeds, which allow you to create lights in the dark.
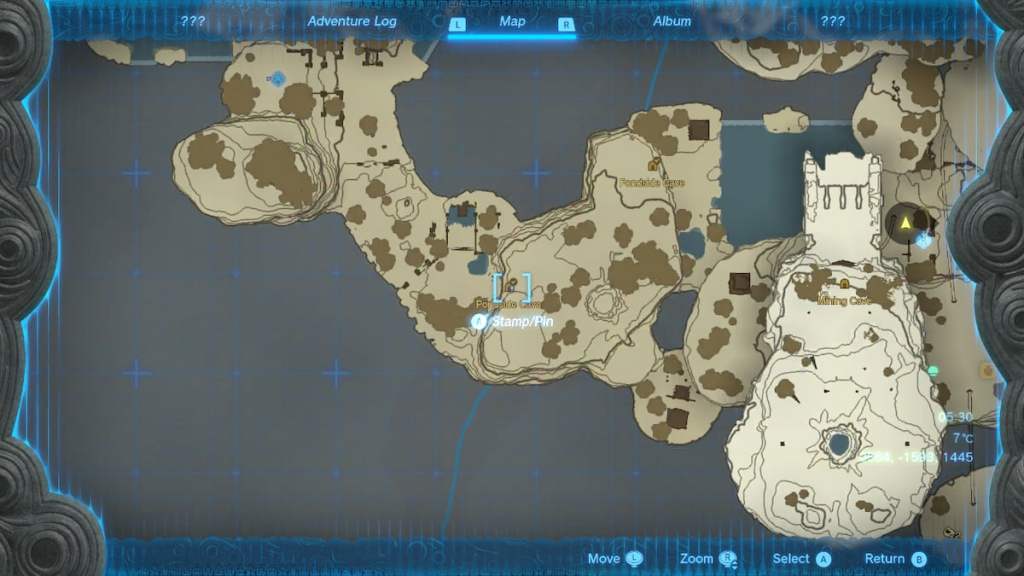
The pathway through the cave is relatively straightforward. When you reach the other side of the cave, you’ll need to cross another water mass, but you won’t have a mast. Instead, you’ll need to use one of the Zonai fans on the ground. Like the other boat you made, you’ll need to attach the fan to the back of three logs and then activate it. You can activate the Zonai fan by smacking it once with any weapon you’re using.
When you reach the other side of the water, you’ll find the Mining Cave. Here is another Tears of the Kingdom location where you’ll be using the Zonai fan and making use of the Zonai battery, which you acquired at the end of the In-isa Shrine.
After completing the Mining Cave, continue going east until you reach the bottom of the mountain. Here, you should find several Spicy Peppers hanging off of several trees. Grab them, and look for the entrance of the Pit Cave, where there should be a pot where you can make Cold Resistance food. You can combine the Spicy Peppers with any food you have in your inventory.
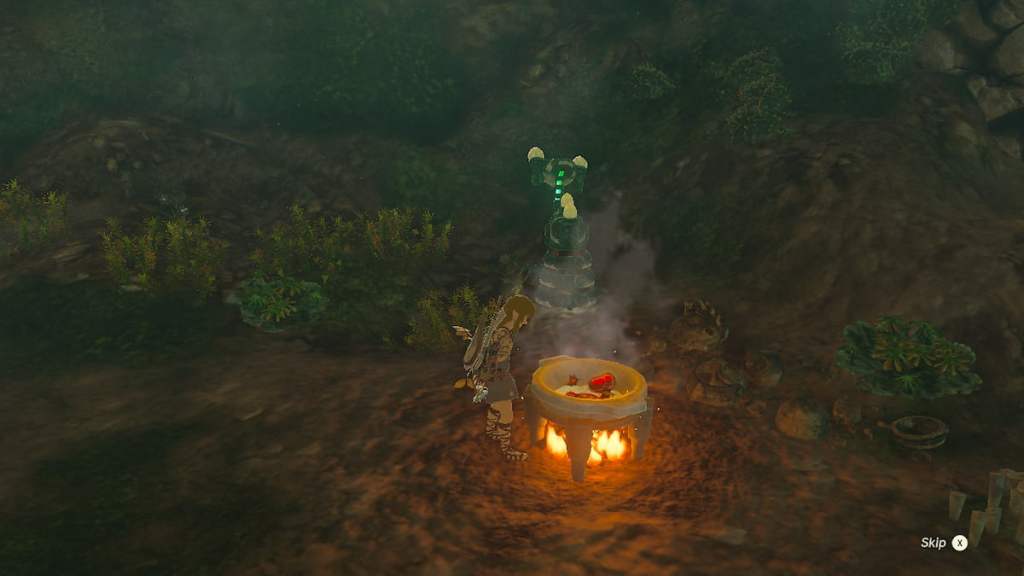
Now, eat the food you made with the Spicy Peppers, and you can now make your way up the mountain. We recommend making multiple batches of this food so you do not run out of Cold Resistance while exploring the mountain and take damage from the cold. You can find a Tears of the Kingdom cooking station at the entrance of the Pit Cave and proceed through it.
Make your way through the Pit Cave, and you’ll reach the first stage of the cold mountain. On the other side of this area is another cave entrance called the Bottomless Cave, which is where you need to go to make your way to the next Shrine.
There are a handful of enemies inside the Bottomless Cave, but you can choose to ignore them and make your way to the top. The last thing you will need to do is reach the base of the rock, where you can find the final Shrine. Unfortunately, you can’t climb the rock wall to reach it. Instead, you’ll need to cut the trees nearby, and make a quick ladder. We recommend using the Ultrahand on two logs and climbing those. You can then climb the white snow to reach the top and discover the Gutanbac Shrine.

How to Complete Gutanbac Shrine in Tears of the Kingdom
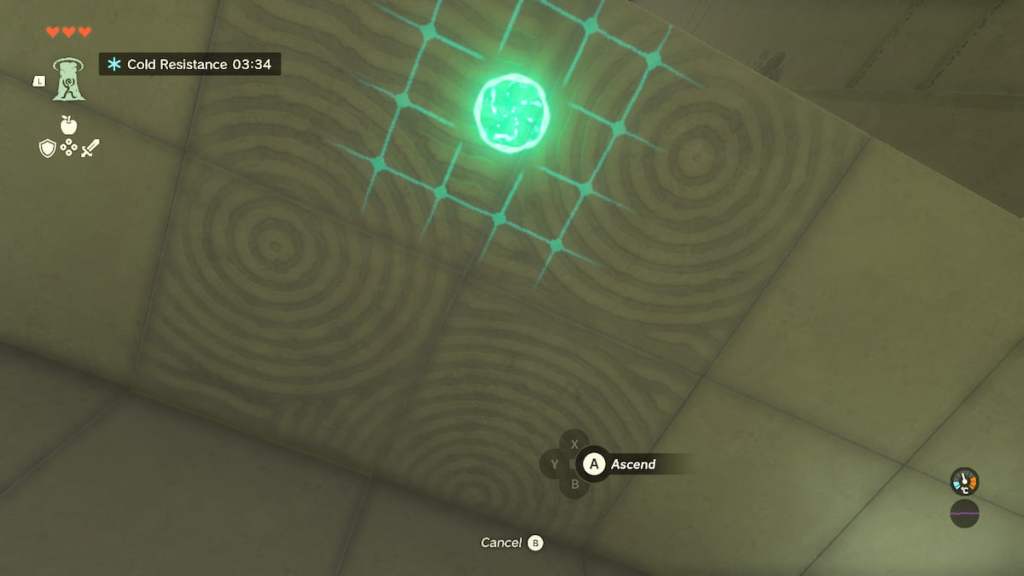
The Gutanbac Shrine is the final Shrine for the Closed Door quest in Tears of the Kingdom. When you enter it, you’ll speak with Rorua again and receive the Ascend ability. This allows you to jump upwards through solid matter, and appear on the other side.
When the Shrine begins, make your way forward and equip the Ascend ability. You can use it to jump through the bottom of the first platform and appear at the top, on the other side.
After reaching this top area, proceed to the following platforms, and repeat the process. There is a shorter platform you can use Ascend on to reach a chest, which contains a Stone Axe. You can then jump down and use Ascend on the taller platform, reaching the next area, where you’ll find a Zonai Solider.
Now, there won’t be a platform for you to use the Tears of the Kingdom Ascend ability. You’ll need to move one. In the back of the room is a bridge being held up by two ropes. Cut the ropes using any sharp weapon, and cause the bridge to fall. You can then use the Ascend ability underneath the bridge and reach the top.
The final test for the Gutanbac Shrine involves another platform. However, the bottom one is moving, and the second one is too tall for you to reach. You need to stand underneath the smaller platform and use the Ascend ability to reach it. Once you get it, prepare the Ascend ability again, wait until you’re under the larger platform, and use it when you’re under it and jump to the top.

This will take you to the top of the Shrine, and you will have completed the Gutanbac Shrine, unlocking the Ascend ability in Tears of the Kingdom.
Now that you’ve completed the three shrines on the Great Sky Island, and unlocked these abilities, the Temple of Time will now open to you. You will need to make your way back over to this starting location and activate the door. How you get over here is up to you, be it using the Zonai Wings, attaching a Fan to the Zonai cubes floating in the sky, or finding somewhere to dive into the water. The choice is yours, but you do need to reach the northern part of the Great Sky Island and activate the door.
And that’s it! Check out our other The Legend of Zelda: Tears of the Kingdom guides below to help with crafting, exploring, and tackling challenges across Hyrule.
Tears of the Kingdom Complete Guide | Every Ability & How To Unlock Them | How to Get The Paraglider | How to Get & Use The Travel Medallion | All Armor Locations & Where to Find Them | All Construct Materials & Where to Find Them | All Shrine Locations & Strategies | How to Get More Heart Containers


Published: May 26, 2023 04:27 pm