The Adamantine Forge is an incredible location that you can visit while exploring Baldur’s Gate 3. You initially learn about it when you’re first exploring the Underdark, and many people have been seeking it, fearing the large Guardian protecting it.
Tracking it down is not easy, but it is a location you can explore and even use with your companions. There are several ways to reach this location, but much of it lies hidden beyond story progression. Here’s what you need to know about how to find and use the Adamantine Forge in Baldur’s Gate.
Where to Find The Adamantine Forge in Baldur’s Gate 3

Although you find clues and hints in the early parts of the Underdark during your Baldur’s Gate 3 campaign, the forge won’t be in this location. It’s in a later area, and you can visit it if you go through the Underdark rather than proceeding over the Mountain Pass. Halsin and other party members prefer going through this location, which is a bonus, especially for anyone wanting to learn more about Shadowheart.
To reach the area where you can find the Adamantine Forge, go to the Decrepit Village in the Underdark. You’ll encounter a handful of Duergar searching for a gnome that ran off with their sergeant’s boots. You can wait for them to hunt down the lost gnome or fight them, which is a large benefit for Sovereign Glut. Upon defeating them, they left their boat in the harbor, and you can choose to interact with it to make your way to the next area in Baldur’s Gate 3: the Grymforge in the Underdark.
Adamantine Forge Location in Baldur’s Gate 3
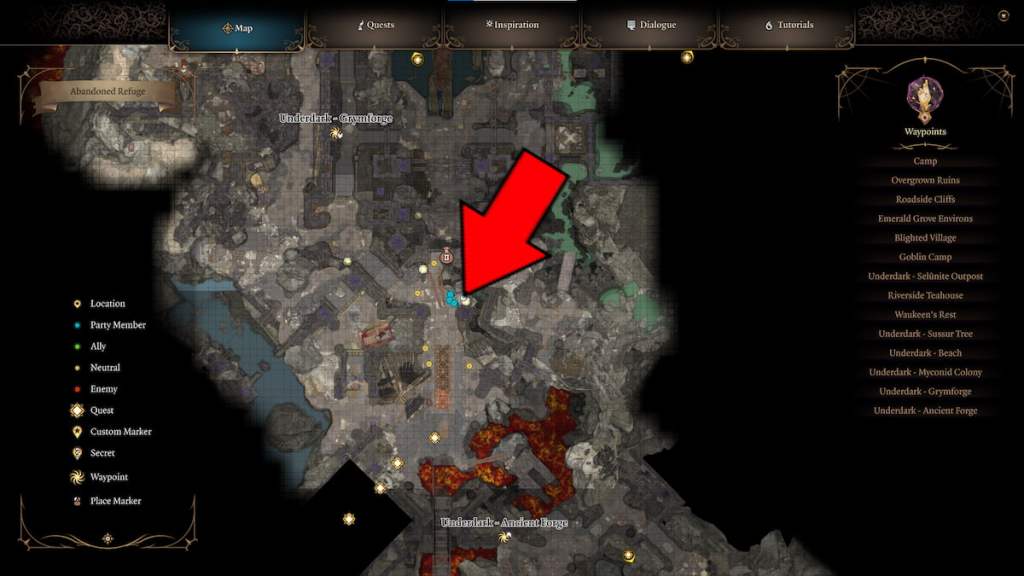
The Grymforge can be dangerous, full of Duergar working for the True Soul, Nere, in Baldur’s Gate 3. How you handle Nere and the Duergar is entirely up to you, but you don’t have to interact with them and finish their quests to reach the Adamantine Forge. Instead, you can work through the platforms and proceed to a platform above the dig site, where the captured gnomes are trying to dig Nere out from behind the rubble.
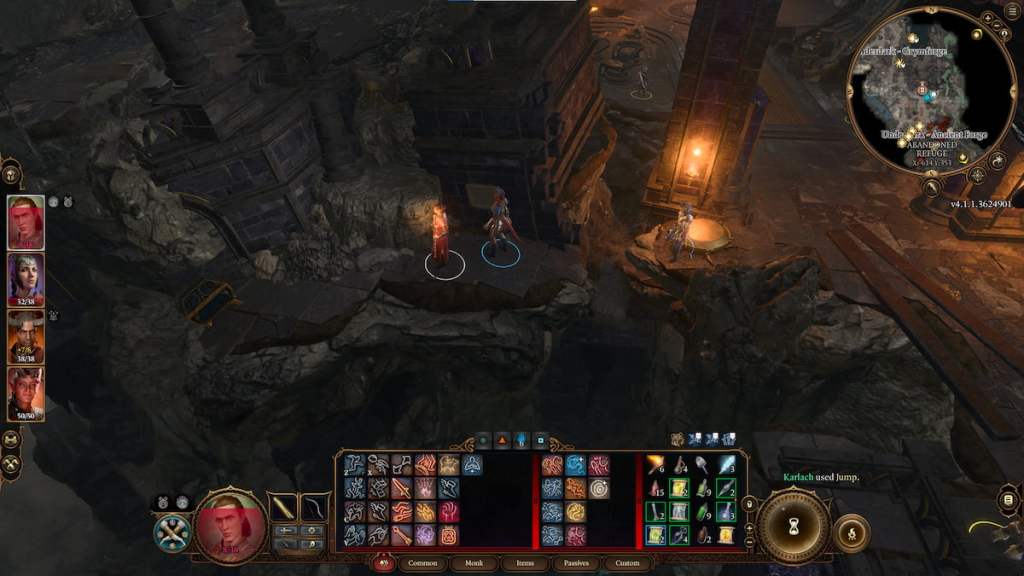
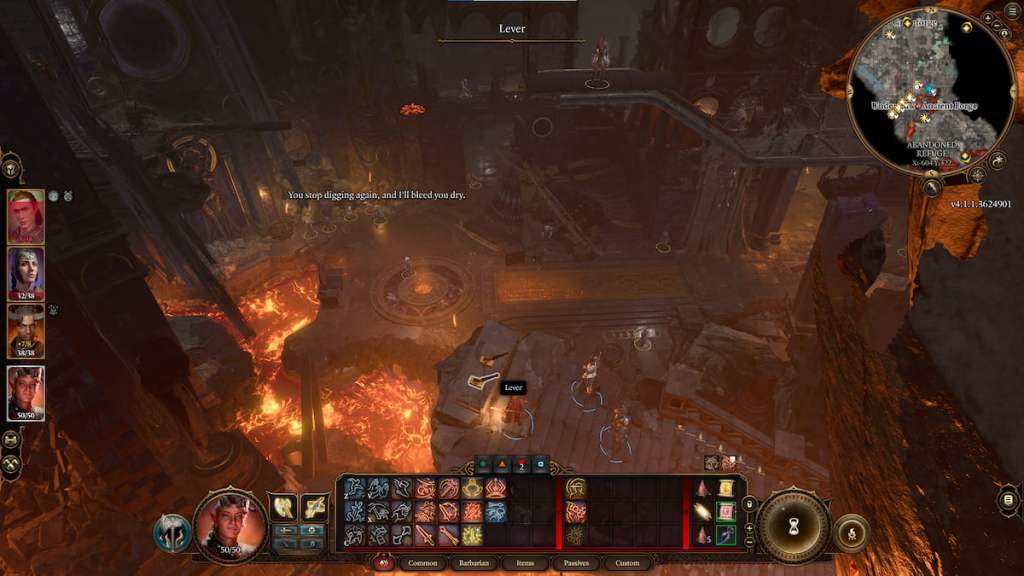
Now, when you reach this point, jump across with your party members and up the stairs. You’ll see a pair of levers you can interact with and move a rotating platform that goes from one part of the ceiling to another. Choose one party member to veer off to the right and jump across the ruined area. I picked Karlach because she has the highest Strength in my party, giving her an advantage in jumping long distances.
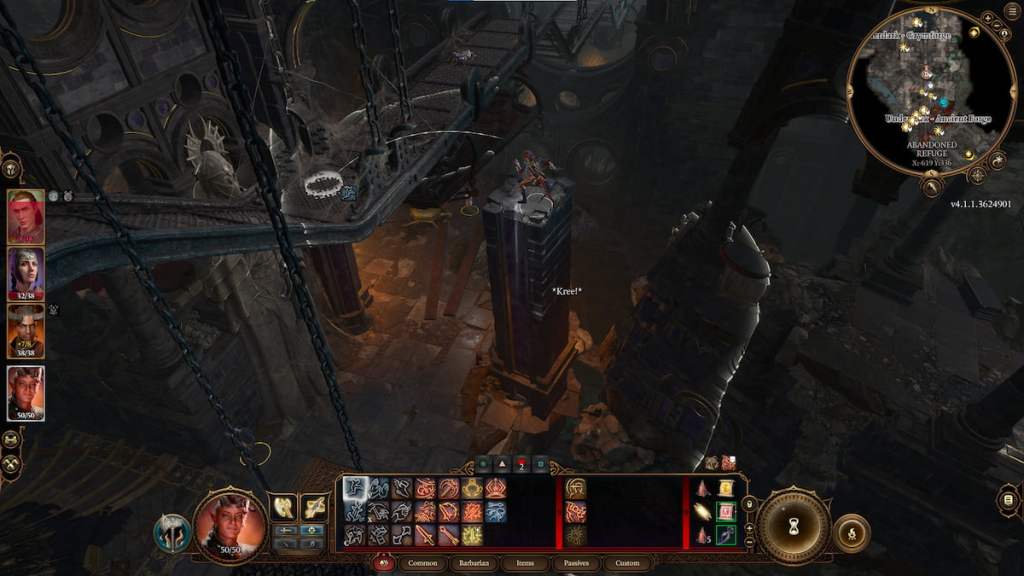
Reach the left side of the platform, and wait for your character to move the platform next to your character. I had Karlach jump onto it when it got there, and then had my main character move the levers so the platform reached the other side. Now, Karlach could move around the wall to reach the other side where there’s a Waystone. You can use that to teleport your entire party across in Baldur’s Gate 3 without repeating the jumping puzzle, which is a huge relief. You could use spells to bypass this point if you have the reach.
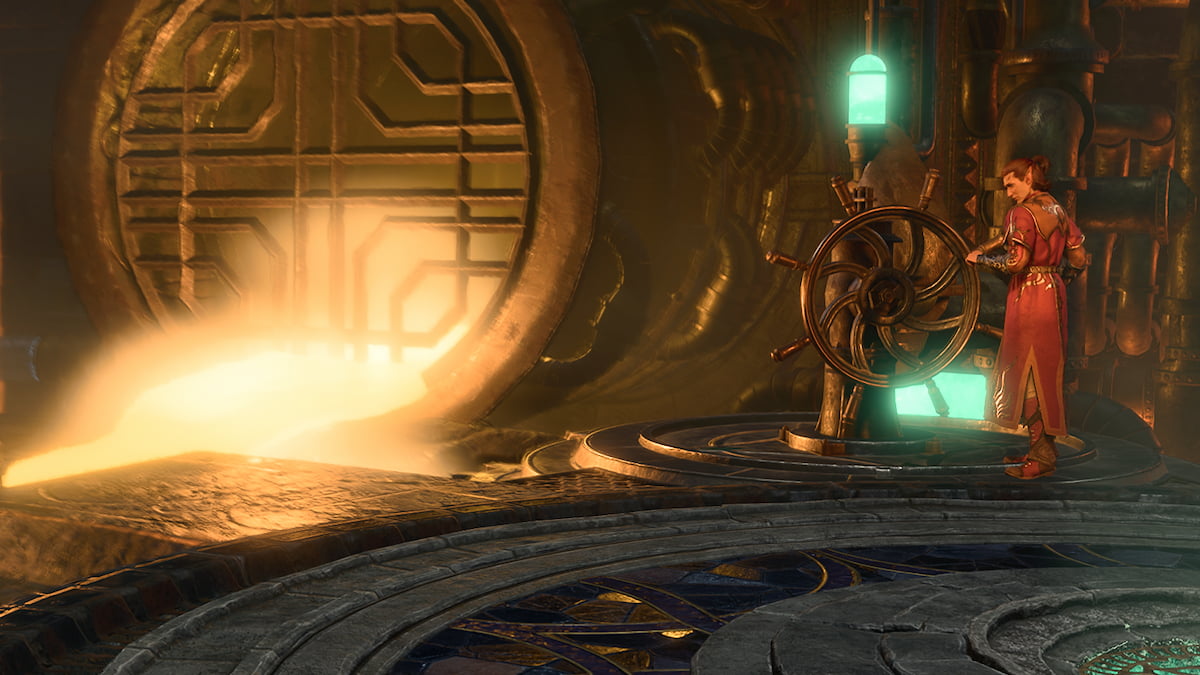
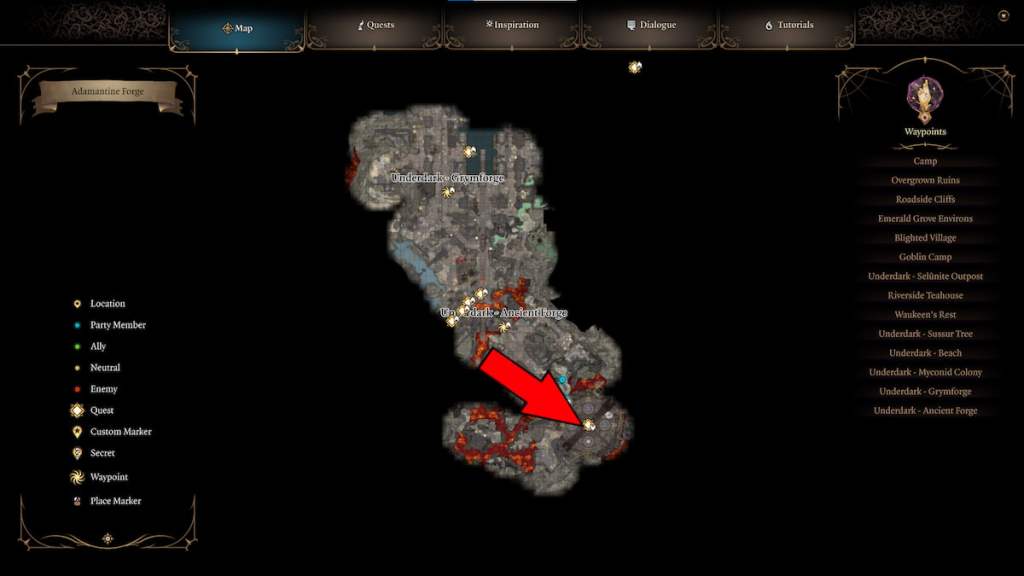
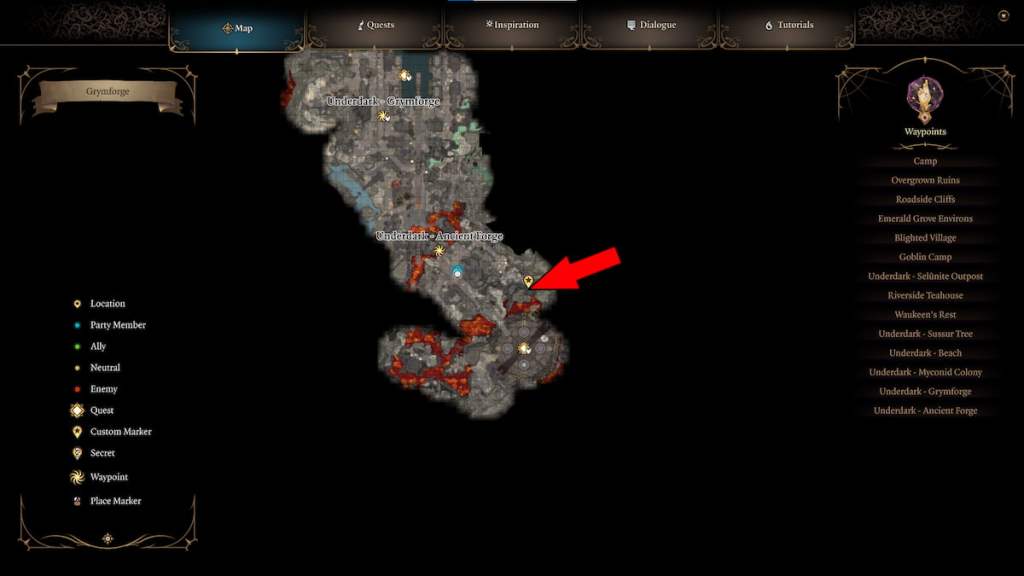
You can now proceed to the southeast, and you’ll discover the Adamantine Forge. This is a key location you’ve been waiting to find throughout your time during the early part of the Baldur’s Gate 3 campaign, especially if you’ve been searching the Underdark.
How to Use The Adamantine Forge in Baldur’s Gate 3
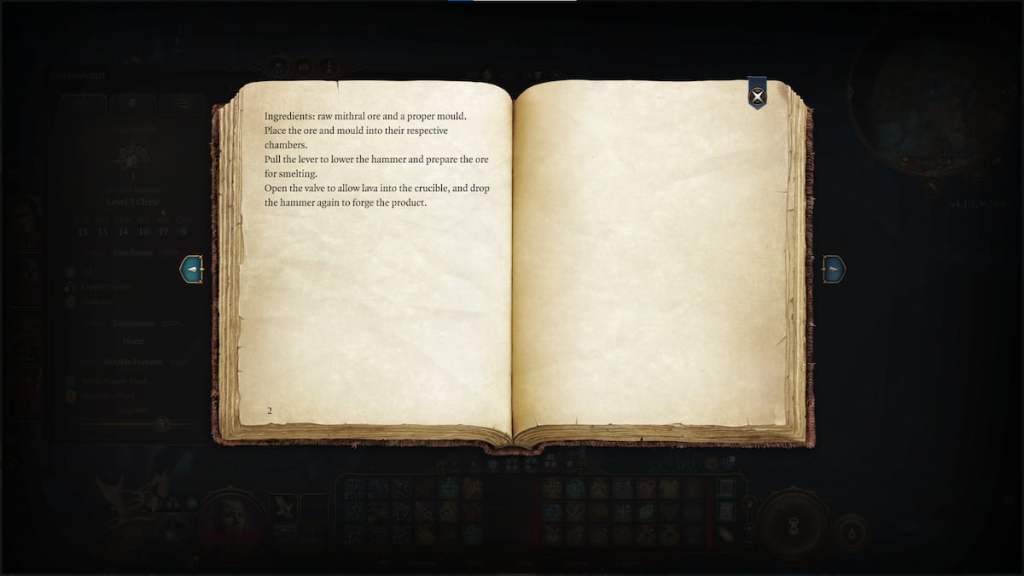
How you use the Adamantine Forge is specific in Baldur’s Gate 3. If you help out the Myconid Sovereign, Spaw, they will unlock their vault for you, and there’s a book inside that will share with you the exact method you use to create an item. It requires a piece of raw mithral ore and a mold of an item you want to make. There’s a mithral ore deposit that you can find next to the Adamantine Forge, protected by several Fire Imps, and there are multiple moulds you can find on the ground in the Ancient Forge area. I decided to grab the Mace Mould and proceed forward to showcase how this forge works.
When you approach the Adamantine Forge, insert the Mould you want to use into the Mould Chamber. The next step will be to interact with the Crucible and place it in the Mithral Ore. Once those are in place, interact with the lever, pull it down to the lava below, and activate the process.
However, upon doing this in Baldur’s Gate 3, the next problem you have to deal with is the Grym, the Guardian protecting the Adamantine Forge in Baldur’s Gate 3. Thankfully, it does have a weakness.
How to Defeat Grym the Golem in Baldur’s Gate 3

The trick behind defeating Grym, the Golem, is his Adamantine Skin. You can open this information by reading it on the examine screen, breaking down Grym’s character sheet in Baldur’s Gate 3. The trick to the Adamantine Skin is that it needs to be superheated, and you can have this effect happen while Grym is in the lava. You need to keep Grym in the lava to do enough damage to do it and successfully defeat it during this rough encounter.
The way you do this is by becoming the Prime Target against Grym. Your characters can do this by hitting it once and luring it into the lava. The primary target for Grym will be its only focus, which means using ranged attacks against it to force it to cross the room and walk through the lava. You’ll see a Superheated status effect on it during this fight, enabling you to do some damage against it.

After defeating Grym, you’ll have free reign to use the Adamantine Forge in your Baldur’s Gate 3 campaign. The encounter can be tricky, especially given this enemy has 300 health, but after you figure out the Superheated status effect, you’re good to go to tackle this encounter.


Published: Aug 6, 2023 02:21 pm