The Serutabomac Shrine is one of many shrines in Tears of the Kingdom, and will reward players with a Light of Blessing to help them grow stronger and survive their adventures in Hyrule. The Serutabomac Shrine is particularly helpful due to its position and is perfect for helping players farm Royal Guard weapons, which can be a significant boon in the early game.
This guide details how to find The Serutabomac Shrine in TotK and complete the puzzles within so that you can have the perfect farming spot.
Where to Find the Serutabomac Shrine in Tears of the Kingdom
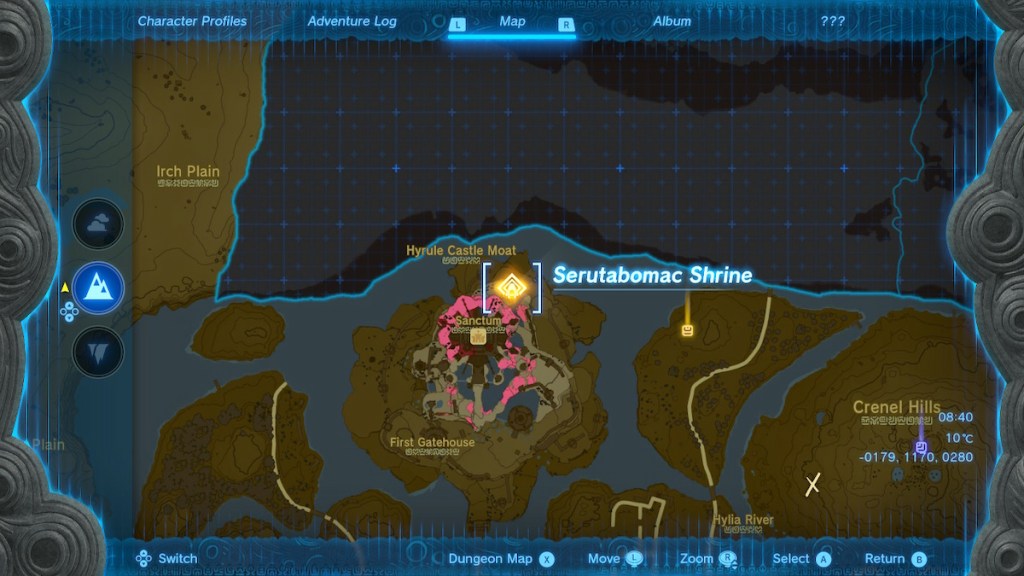
The Serutabomac Shrine in Tears of the Kingdom is located in the northern part of Hyrule Castle, on level B1 towards Hyrule Castle Moat. Getting up to Hyrule Castle can be a bit tricky, but it is possible with some crafty gliding and extra stamina foods. You’ll want to try and land towards the top of Hyrule Castle in the Sanctum. From there, you should be able to work your way through and jump and glide down to the Serutabomac Shrine. Our image will show you the direction you want to be heading. It should be clear against the gloom and ruins, so you should find it relatively easy.
How to Complete The Way Up in Tears of the Kingdom
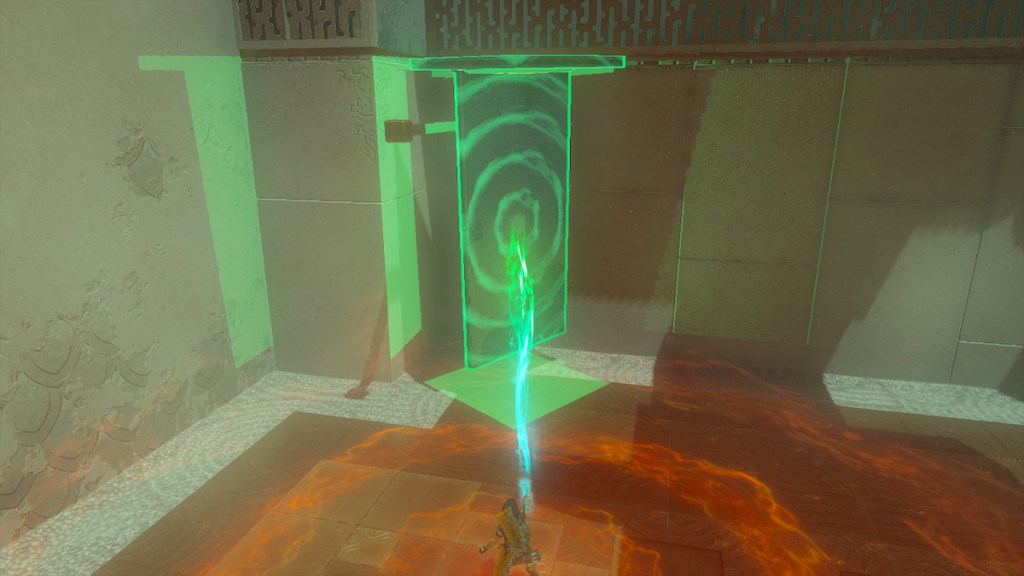
To complete The Way Up in TotK, make your way down to the first area, and you will see a metal plate to the left and a wall with some beams on the right. Use the Ultrahand Ability to pick up the metal plate and place it carefully on the beams. Once it’s there, go underneath, use Ascend to phase through the metal plate, and jump up the ledge.
Next, you’ll find a similar setup as before, only with a second, more extended metal plate and a smaller one like before. You will see a beam on the right wall, but you won’t be able to place one of the plates there and be done with it. Instead, you’ll need to fuse the smaller plate to the top of the long plate, making sure to have the long plate standing upright longways. It should look a little like a capital T. Bring the fused plates over to the beam and use it as support. Once it’s secure, head under the protruded plate, use Acsend, jump on up, and head to the final room.
In the final room, you’ll find three plates, Two short ones and a long one, and you’ll need all three to clear Serutabomac Shrine and get the treasure chest. The chest can be found on the left side of the room atop a ledge, with some spikes beneath it. To get the chest, Ultrahand the long plate and stand it upright against the ledge wall, ensuring that the plate isn’t flat but protruding out of the wall. Next, Ultrahand the two smaller plates and fuse them to the top of the long plate, one right in the middle and the other hanging over to not be over the spikes. From there, you should be able to Ascend onto the top of the plate and walk across to grab the chest, which will reward you with a Magic Rod for your efforts.
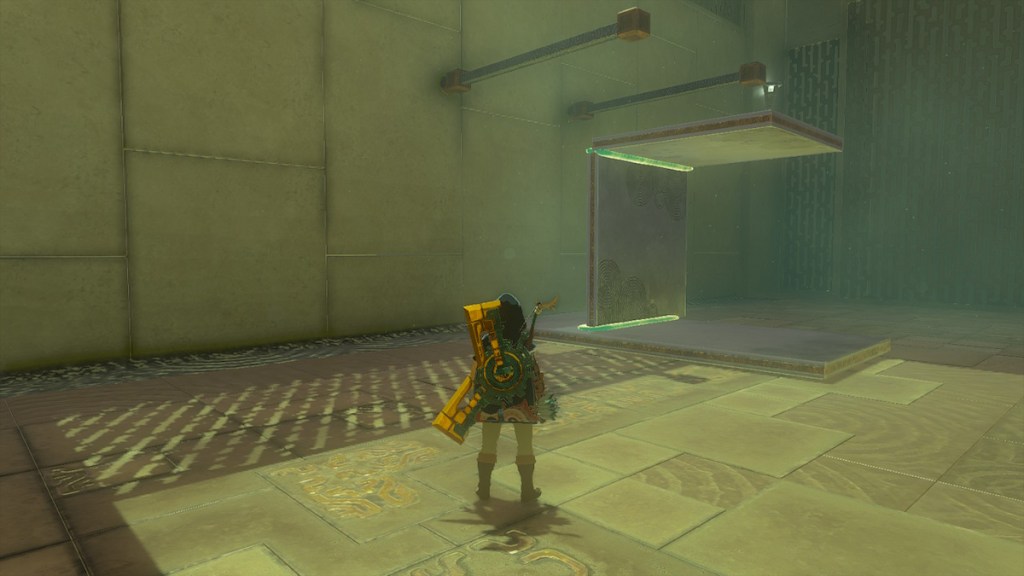
Lastly, jump back down and unfuse your plates. From there, you’ll want to fuse them to make a shape like the number 4. Put the long plate on the ground, a small plate just off the center facing upright, and the final small plate fused to the other small plate lengthwise. If that sounds odd, our image here should give you an idea of what we mean.
From there, place the fused plates atop the beams, and Ascend through both platforms you have made by combining the plates. Once you have Ascended, you’ll be at the exit and can grab your Light of Blessing.
And that’s it! Check out our other The Legend of Zelda: Tears of the Kingdom guides below to help craft, explore, and tackle challenges across Hyrule.
Tears of the Kingdom Complete Guide | Every Ability & How To Unlock Them | How to Get The Paraglider | How to Get & Use The Travel Medallion | All Armor Locations & Where to Find Them | All Construct Materials & Where to Find Them | All Shrine Locations & Strategies | How to Get More Heart Containers









Published: May 17, 2023 05:46 pm