
Samus Aran’s journey across Planet ZDR begins in Artaria. You’ll start without any special weapons or items, but as you recollect your powers, you’ll find all sorts of upgrades to your health and ammo count.
Every zone in Metroid Dread (minus the final one) has secrets like this to find. Here’s where to find all the hidden and hard-to-reach goodies in Artaria.
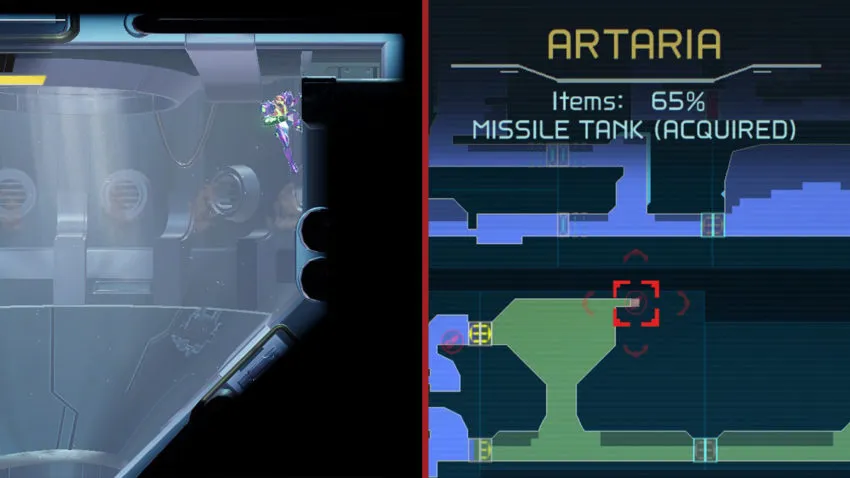
Missile Tank #1 [+2] | Requirements: None
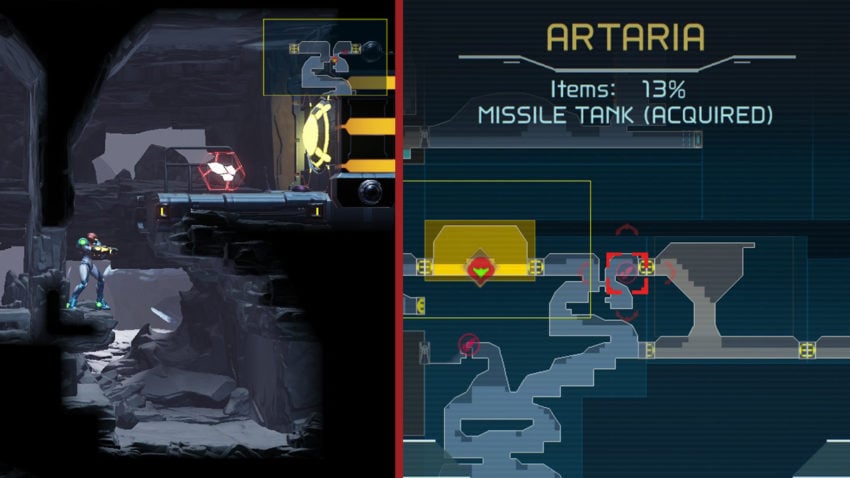
Artaria’s first Missile Tank is unmissable. During the opening moments, the game will pause to give you some crucial information: when you see a white blinking room on your map, there’s a hidden item you’ve yet to find. When the game tells you this, look for a cracked part of the rock wall and shoot it, then shoot the explosive sac hidden behind it. That’ll blow open the path to your first expansion.
Missile Tank #2 [+2] | Requirements: None

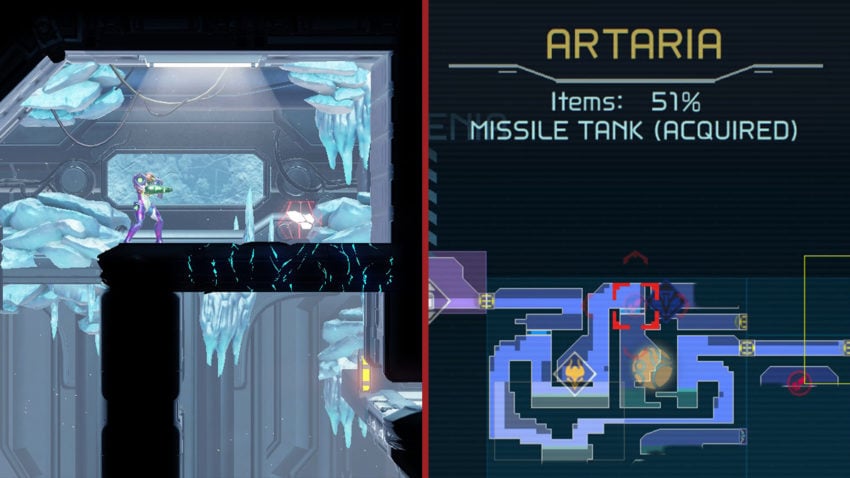
You can find the second Tank just after you escape the first EMMI Zone. Run through the cavern to the right to find a series of platforms near a yellow-striped wall. Climb them to find the Tank on a ledge to the right.
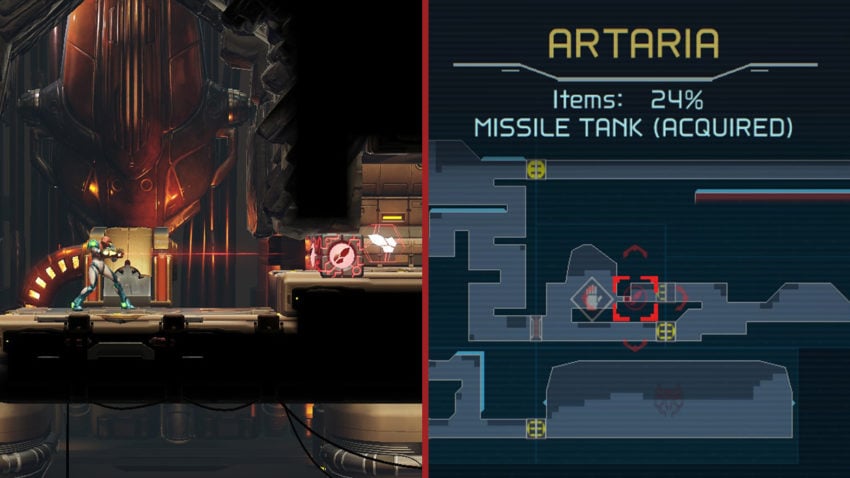
Missile Tank #3 [+2] | Requirements: None
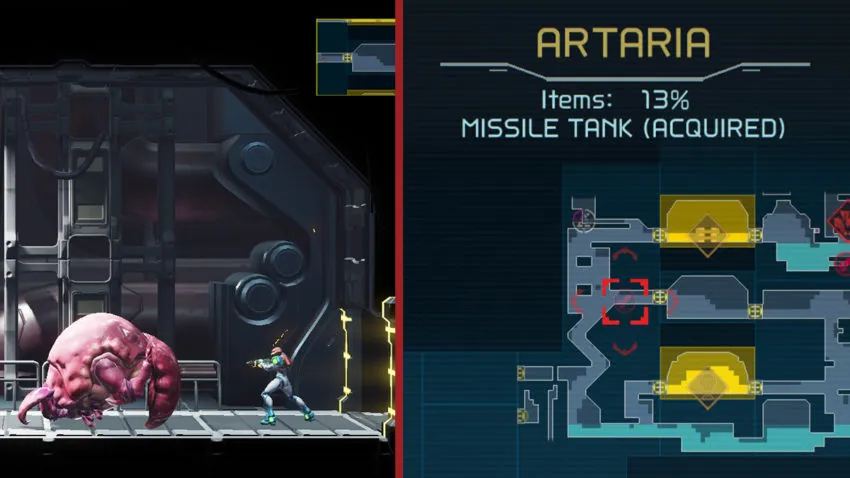
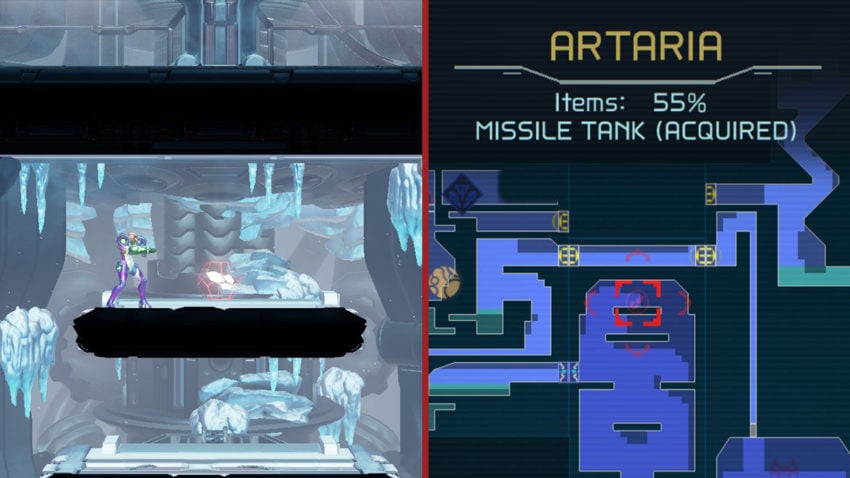
The third Missile Tank is right above the Artaria Map Station – you’ll pass by it as you slide down some sloped floors. From the Map Station, head right, climb the platforms, then take the door on the left. Defeat (or dodge) the large Muzby in the next room and proceed through the other door. You’ll find yourself on the ledge near those sloped floors from earlier, where you can grab the Missile Tank.
Energy Tank | Requirements: Charge Beam
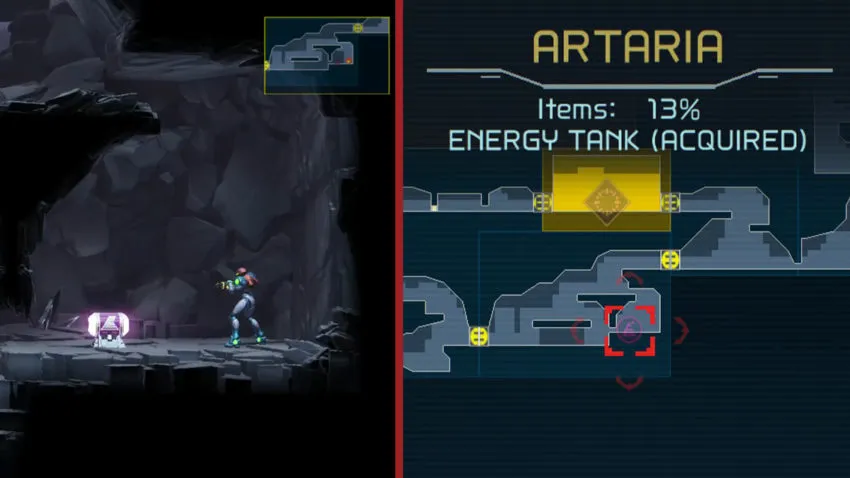
Step one, you’ll need the Charge Beam – here’s how to get it. Once you’re armed with that, return to the very beginning chambers of the game. Head through the caverns, all the way to the right, to find a Charge Beam door. Go through it, jump atop the next platform, then slide through the narrow opening to find the tank inside the small alcove.
Missile Tank #4 [+2] | Requirements: Charge Beam
This is found in the room directly adjacent to the Network Station at the top-right of the EMMI Zone. With your new Charge Beam, you can open the door on the top right in the station. Slide through the narrow gap in the next room to grab the Tank.
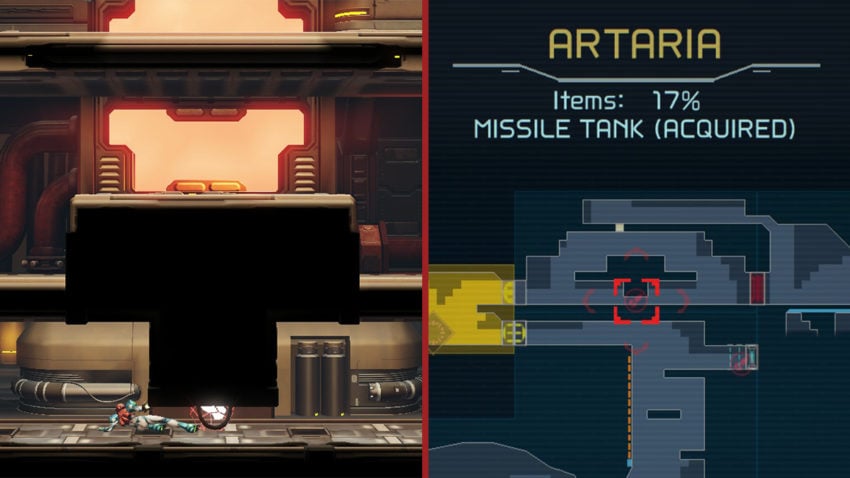
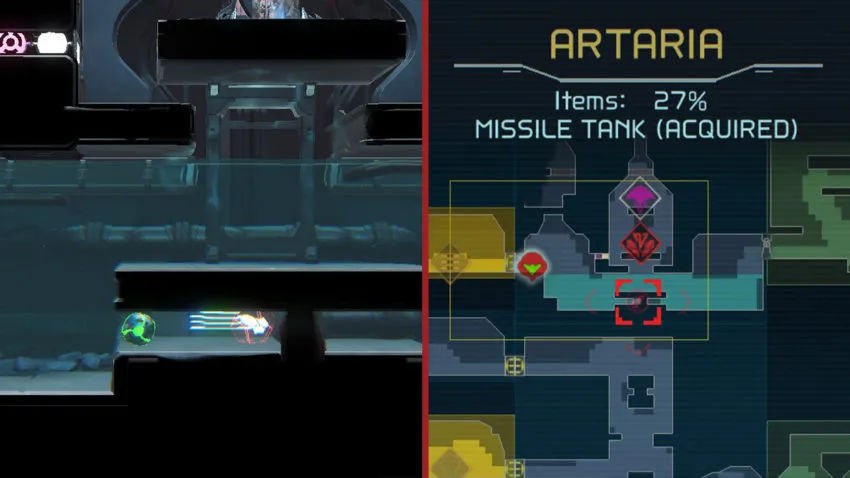
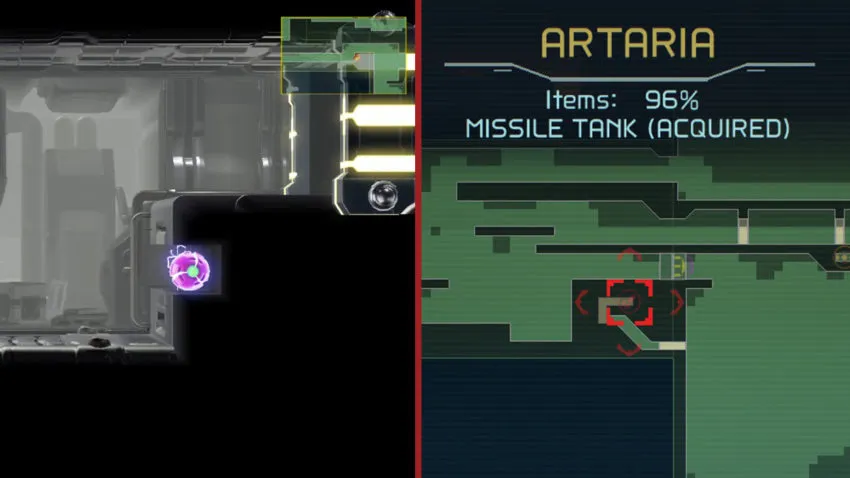
Missile Tank #5 [+2] | Requirements: None
You can find this when opening the thermal doors in the region. Directly next to the device that opens said doors is a hidden missile block. Blow it away then aim through the hole to shoot the door from this side (it can’t be opened from the other). Exit the room to the east and loop around to the now-open door to grab the Missile Tank.
Missile Tank #6 [+2] | Requirements: Spider Magnet
There’s a collection of blue platforms in the center-east part of the EMMI Zone. Once you have the Spider Magnet ability, you can climb up the top left side of the passage. Shoot the Beam Blocks out of your way, then hop over to the ledge to grab the upgrade.
Missile Tank #7 [+2] | Requirements: Spider Magnet
Immediately south of the EMMI Zone is an Energy Recharge Station. Head there and use your new Spider Magnet to latch onto the left-hand wall. Climb up to the ledge, dip into the water, then jump to hoist yourself back to the surface where a Missile Tank awaits.
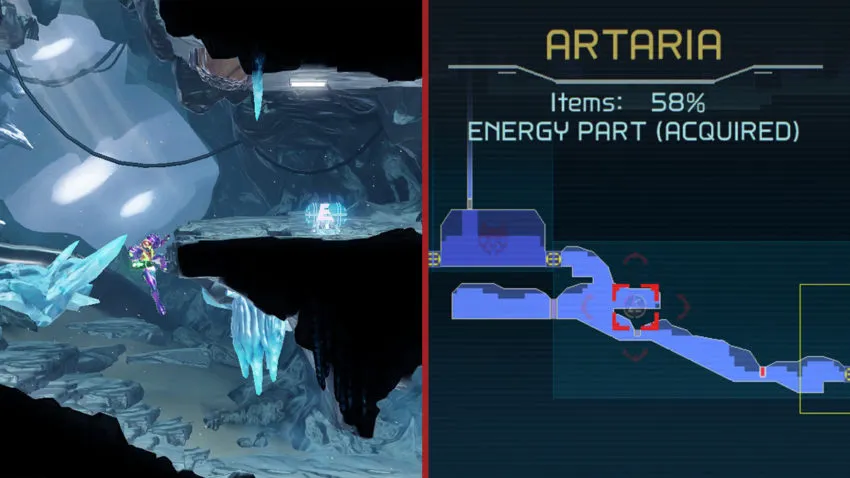
Energy Part #1 | Requirements: Morph Ball
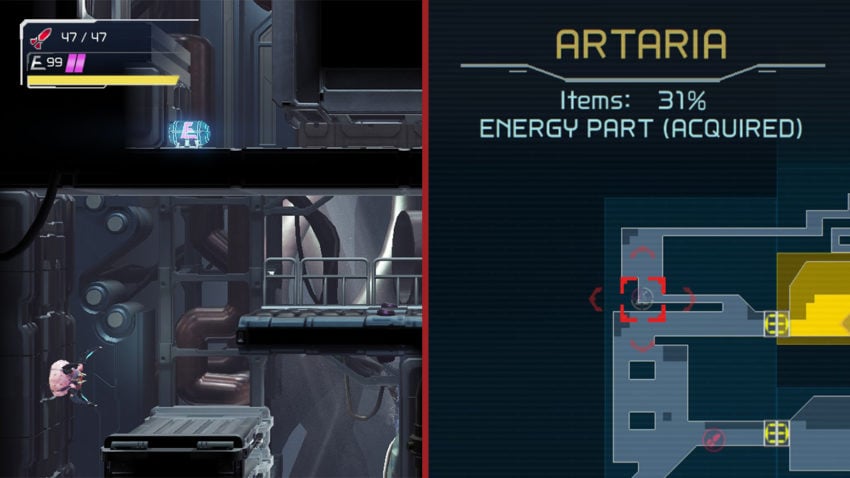
This Energy Part is found in the room adjacent to the northwest Save Station – you’ll see it in the ceiling. Once you have the Morph Ball, hop up to the ledge and roll over to get it.
Missile Tank #8 [+2] | Requirements: Morph Ball
This Missile Tank is found directly below the Red Teleportal from Cataris. Drop into the water and use your Morph Ball ability to tuck into the compartment where it’s hiding.
Missile Tank #9 [+2] | Requirements: Morph Ball
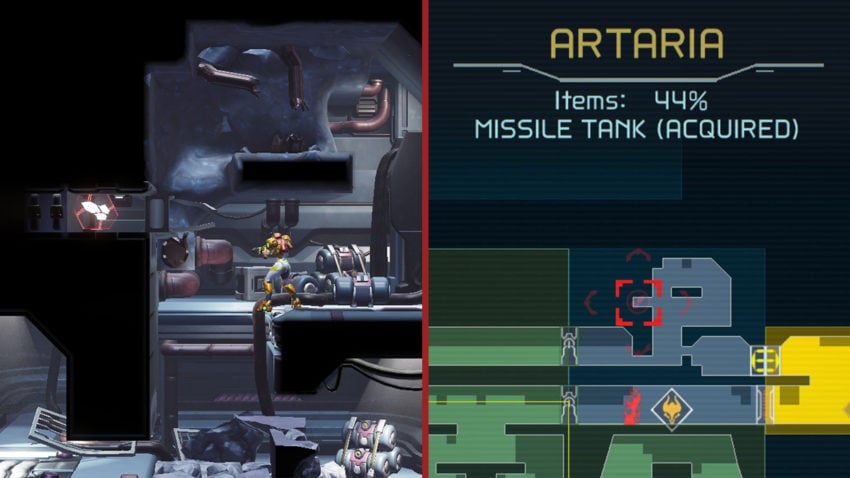
There’s a small room bookended by the top-right of the EMMI Zone and the higher of the two Network Stations. Head through the top-left door of the Station to get there. Use your Morph Ball to slip through the rubble, jump up to the ledge, then jump across the gap to squeeze through the opening in Morph Ball form to grab another Missile Tank.
Power Bomb Tank | Requirements: Morph Ball, Spider Magnet, Grapple Beam
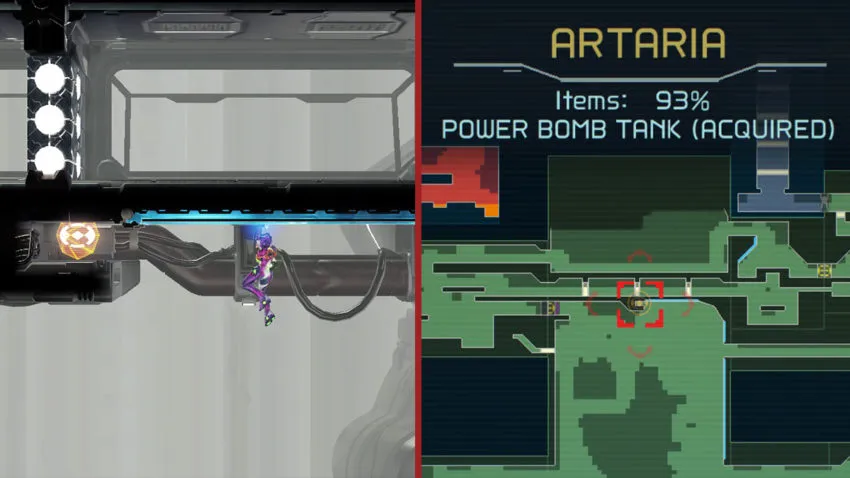
This is found in the rafters high above the big room in the middle of the EMMI Zone. While it’s a breeze to reach it with the Space Jump, you can get it earlier in the game if you wish. Using the Spider Magnet on the blue wall on the right side of the room, you can shimmy up and over, swinging to the ceiling with the Grapple Beam. From there, you can tuck into the small opening in Morph Ball form to grab the Power Bomb Tank.
Missile Tank #10 [+2] | Requirements: Morph Ball, Bombs
There’s small lip in the large cave near the beginning of the game. From the left side, you can drop a Bomb to destroy a block, then roll on the through to grab the Missile Tank on the other side. (You can also just leap up to the ledge later once you have the Space Jump.)
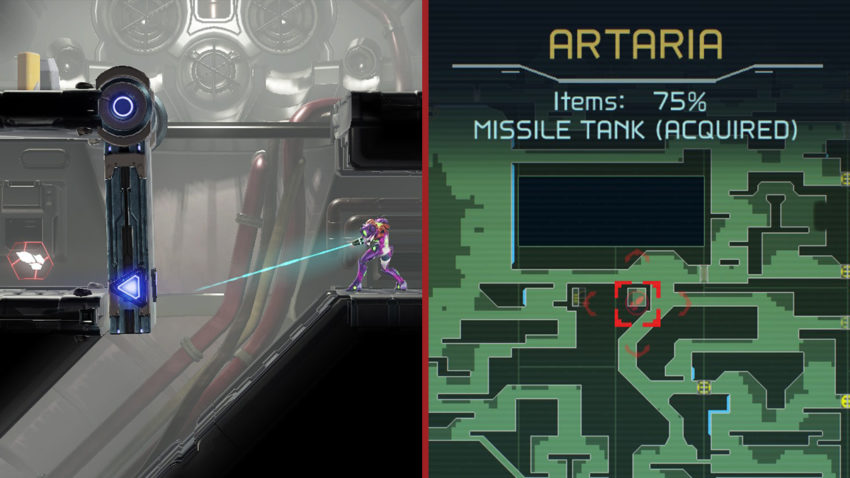
Missile Tank #11 [+2] | Requirements: Morph Ball, Bombs, Flash Shift
Once you have the Flash Shift ability, return to the area where you encountered the first EMMI, the broken one. There’s a small pocket in the top-right corner of the upper room which you can reach with a jump and a double Flash Shift in midair. Tuck into the opening and Bomb the wall to find a Missile Tank inside. (Like the previous Tank, you can also Space Jump your way up here.)
Missile Tank #12 [+2] | Requirements: Charge Beam, Spider Magnet, Varia Suit
Head to the volcanic room connected to the elevator to Cataris – this Tank is easier to reach from that eastern side. Open the door with a Charge Beam, then hop up to the Spider Magnet track on the ceiling. Drop at the right time to grab the Missile Expansion atop a small sloped platform.
Missile Tank #13 [+2] | Requirements: Charge Beam, Spider Magnet, Varia Suit
There’s another volcanic room just west of where the previous Missile Tank is found. Once again, open the door with a Charge Beam and jump to the magnetic ceiling. As you monkey-bar to the left, be sure to shoot the flying enemies, as they can knock you into the lava below. Time your movements to pass the intermittent fire jets, and you’ll eventually reach the Expansion on a ledge at the far end of the room.
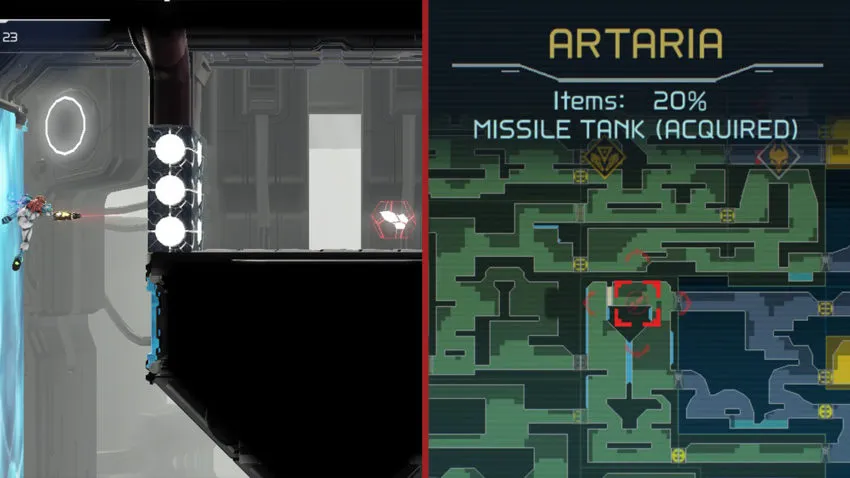
Missile Tank #14 [+2] | Requirements: Speed Booster
At the top of the EMMI Zone are a pair of Speed Booster Blocks. Blow through those but stop before the exit door. Shoot down to drop through some Beam Blocks, then you can grab the Missile Tanked tucked hidden under the walkway.
Missile Tank #15 [+2] | Requirements: Morph Ball, Speed Booster
There’s another Speed Booster puzzle in the large room in the middle of the EMMI Zone, and it has one of the niftiest solutions. There’s a set of Beam Blocks high up on the wall, but you’re going to want to start in the long hallway across the gap – there’s a Beam Block at the far right side too. Run toward that block and charge up, then when you’re ready to Shinespark, store it, shoot out the block, and tuck into your Morph Ball in the small gap. From here, you can launch yourself straight to the left, through the door, through the Beam Blocks across the big chamber, and around the bend to the Missile Tank.
Missile Tank #16 [+2] | Requirements: Grapple Beam
This one’s also found inside the EMMI Zone. Once you have the Grapple Beam, head to the center where you dropped through the rotating plank. You can use the Grapple Beam to pull it back into place, then jump on over to the Missile Expansion.
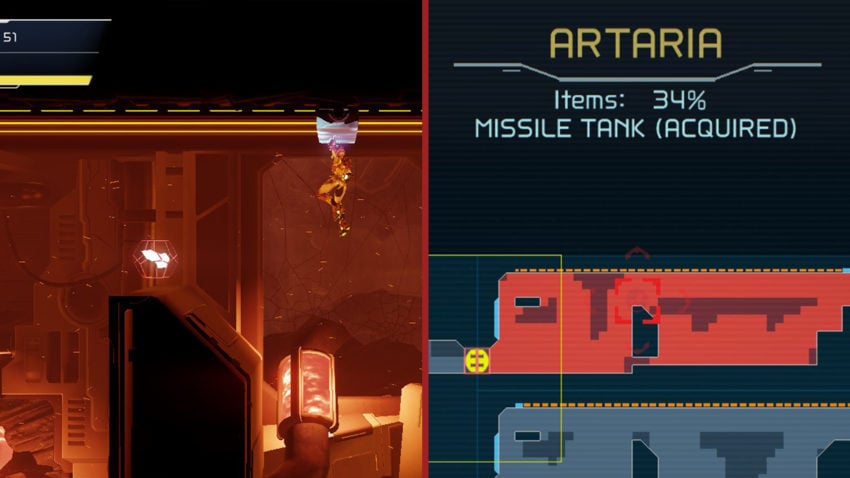
Missile Tank #17 [+2] | Requirements: Charge Beam, Morph Ball, Bombs, Super Missile
Once you have the Super Missile ability, head to the volcanic sector in the northwest part of Artaria. Use it in conjunction with the Charge Beam to open the door under the cut-off lava room. Inside, use your Morph Ball to jump up and Bomb through some blocks, then you can grab the Missile Tank above.
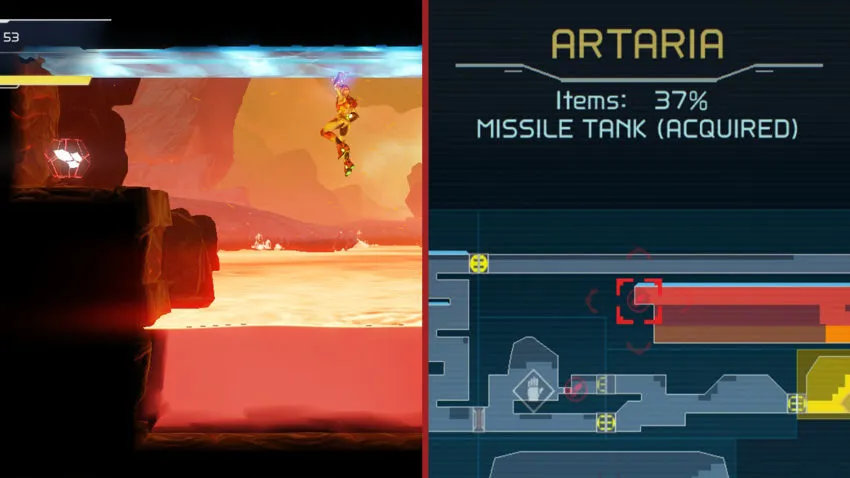
Missile Tank #18 [+2] | Requirements: Morph Ball, Gravity Suit
This is in the same volcanic area, in the main section. Once you have the Gravity Suit, you can safely roll through the lava tunnel and grab the Expansion.
Missile Tank #19 [+2] | Requirements: None
Upon acquiring the Gravity Suit and riding the elevator from Burenia to Artaria, you’ll find yourself in a frozen section of the region. This Missile Tank simply sits on a ledge past the spinning plank – just Space Jump back up if you fall through.
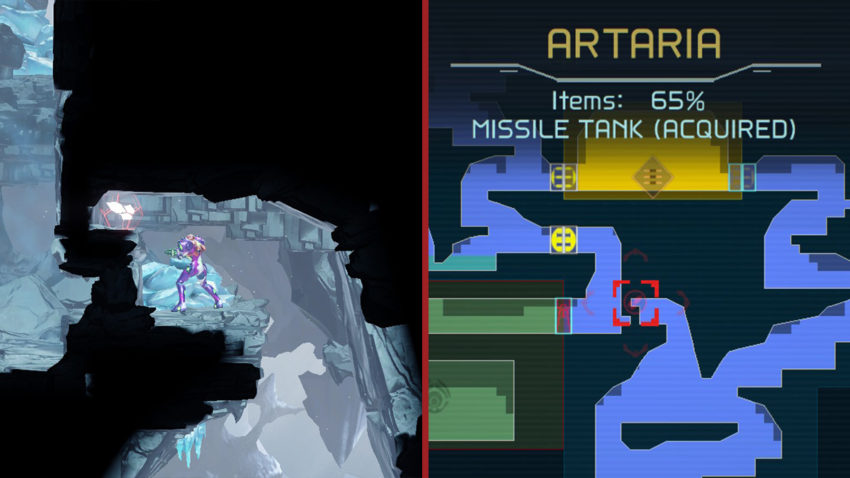
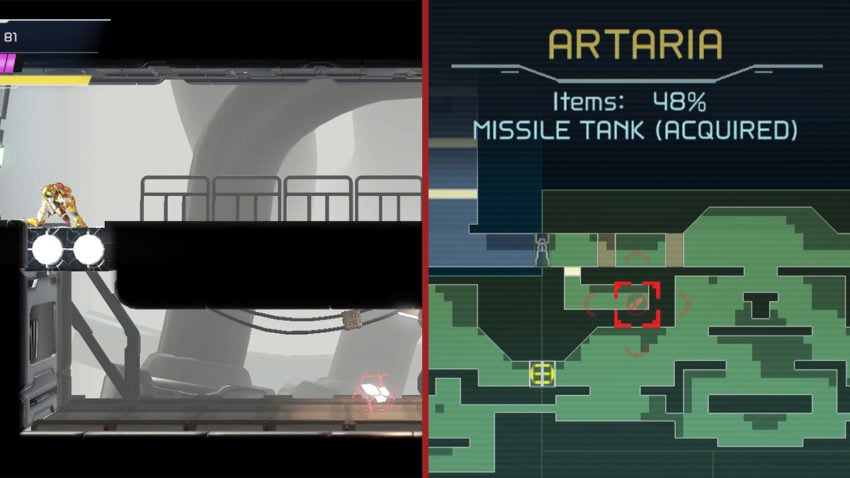
Missile Tank #20 [+2] | Requirements: Space Jump
Proceed through the same frozen area until you fall down a long shaft into a Red Chozo Soldier mini-boss room. After the fight, take the left door and Space Jump all the way to the top of the tall room to find this Missile Tank resting on a platform.
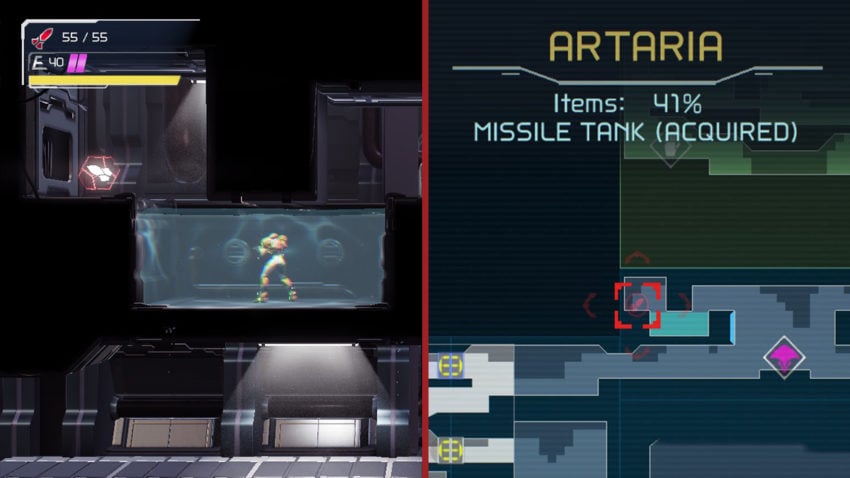
Missile Tank #21 [+10] | Requirements: Morph Ball, Speed Booster

Now take the right-hand door out of the Red Chozo Soldier room. Up in the ledge here is a collection of Speed Booster Blocks. Run up from the sloping part of the cave to ready a Shinespark, then hop up to the ledge and release it to break through. Note the single, low block at the end – you’ll need to Shinespark in Morph Ball form to pass it. Once you do, you can grab the Missile+ Tank up on the ledge.
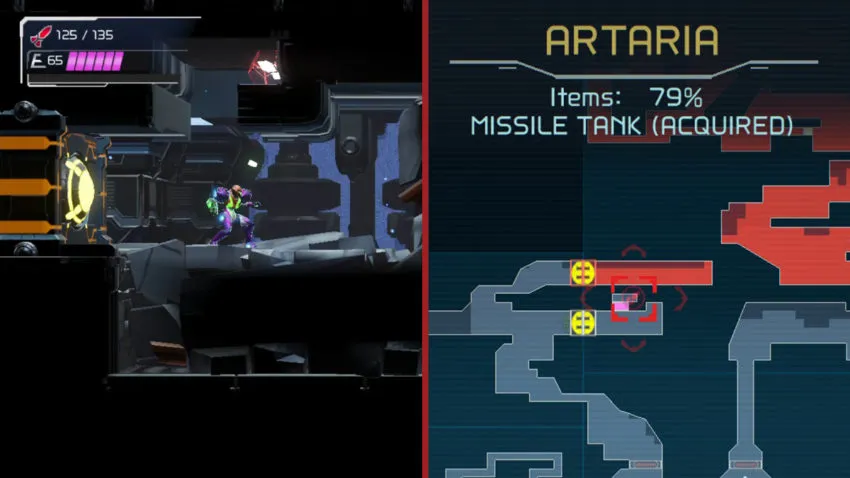
Missile Tank #22 [+2] | Requirements: Morph Ball, Speed Booster

There’s another Speed Booster puzzle in the same cave system. This time, run down the sloping cave to the right. You want to Shinespark to the right while in Morph Ball form below the ledge by the exit door. This will send you rocketing through a tunnel to the Missile Tank. Alternatively, you can approach from the other end of the tunnel with a Power Bomb, as shown in the screenshot above.
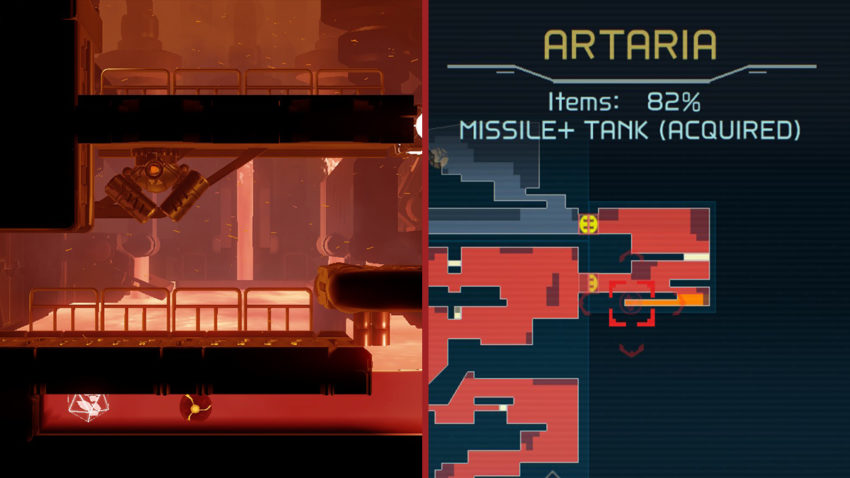
Missile Tank #23 [+2] | Requirements: Diffusion Beam, Bombs
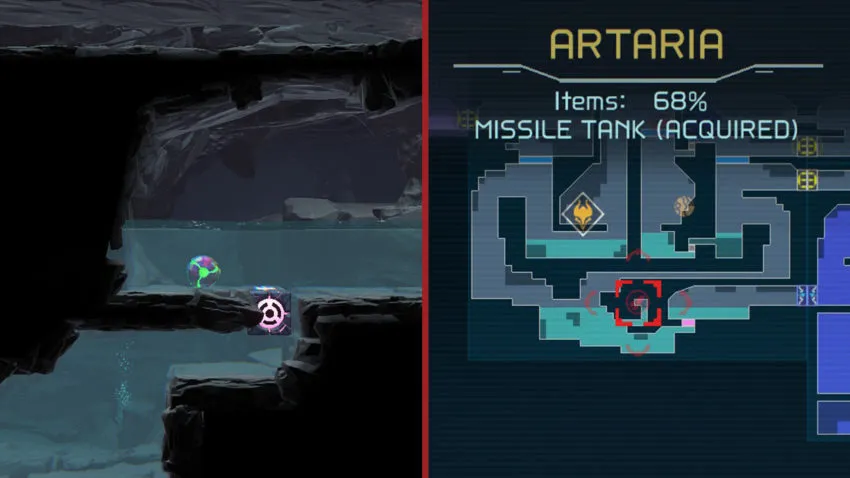
Once you defeat Experiment Z-57 and thaw out Artaria, return to the southwestern section of the map. The ice here will have melted, so drop into the water and look for some Bomb Blocks you can blow through. Use your Diffusion Beam on the cracked rock and explosive sac just beyond to open up a small tunnel. Follow that to grab the Expansion.
Energy Part #2 | Requirements: Morph Ball, Bombs, Flash Shift, Grapple Beam, Speed Booster, Varia Suit
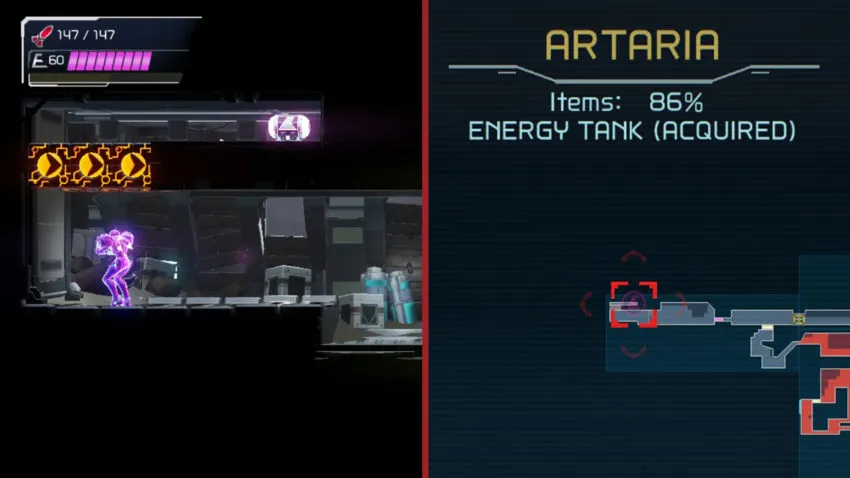
There’s a Speed Booster puzzle in the northwest corner of the map. Once you have the Varia Suit, you can safely move through the heat there. Use Morph Ball Bombs to reach the puzzle area, which is marked by a pressure plate that you can only pass with the Flash Shift. Start on the left side of that plate, up against the ledge. Turn right and immediately activate your Speed Booster – don’t worry about closing the pressure plate door; it’ll be open by the time you need to move back. If you time it right, you’ll be able to store a Shinespark just as you hit the right-side wall. Now Flash Shift back across the pressure plate and launch up into the Speed Booster Blocks to grab the Energy Tank they were guarding.
Missile Tank #24 [+2] | Requirements: Screw Attack

This one’s easy to get once you have the Screw Attack. Next to the elevator from Burenia are three columns. Shoot the first, Screw Attack through the other two, and Artaria’s final Missile Tank will be yours.
Energy Part #3 | Requirements: None
While there are technically no requirements to grab this Energy Part, you do have to wait until you return to Artaria from the Burenia elevator. Proceed through the now-frozen zone until you drop down a long shaft into a mini-boss chamber. Take out the Red Chozo Soldier and exit via the right-hand door. The Part is just sitting on a ledge in the next cave, waiting for you to pick it up.


Published: Oct 16, 2021 04:06 pm